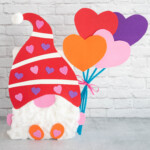
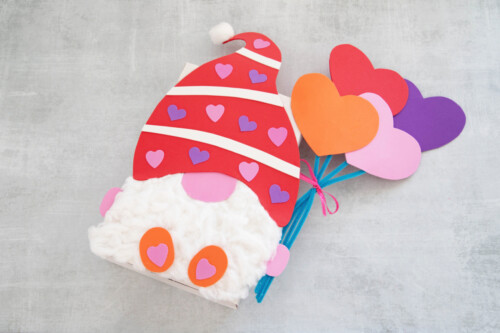
Gnome Valentine Box
This whimsical Gnome Valentine Box, complete with free printable templates, is the perfect way for little ones to collect all their sweet classroom valentines!
Servings 1
Ingredients
Instructions
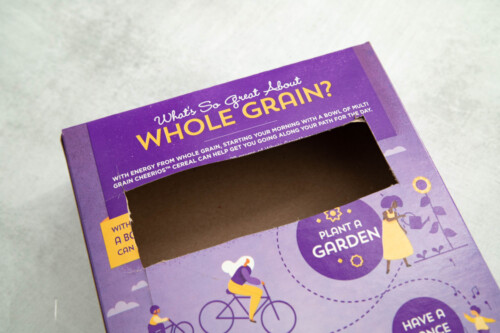
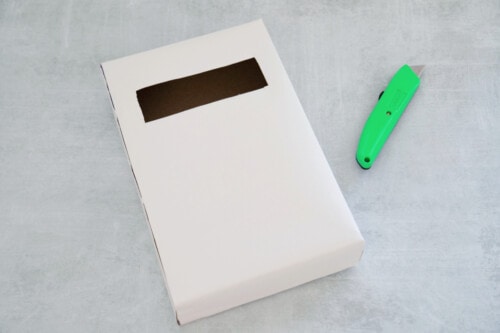
- Start by cutting a hole in the back of the box with box cutters (parents may want to do this part themselves). This is where the valentine cards will go.
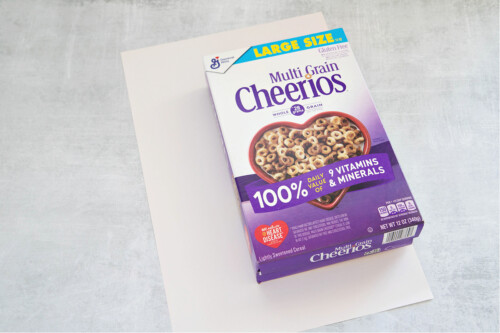
- Lay the cereal box on one of the pieces of white construction paper where the right side of the box is flush with the edge of the paper. Leave enough on the top and bottom to fold down and cover the top and bottom of the box.
- Fold the paper over the box, covering the back, one side and the top and bottom of the box, gluing into place with the hot glue gun.
- Use the second piece of white construction paper to cover the remaining sections of the box. Use the box cutter to cut the construction paper that's covering the hole.
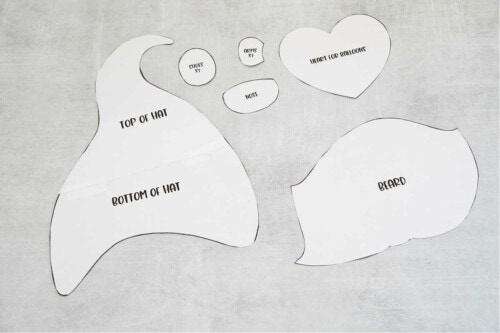
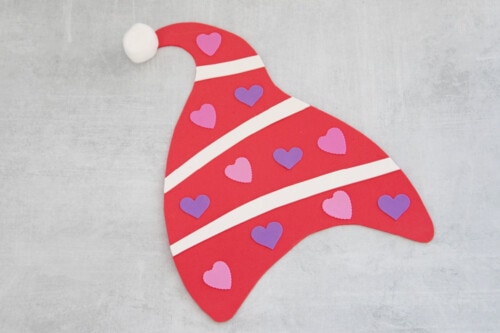
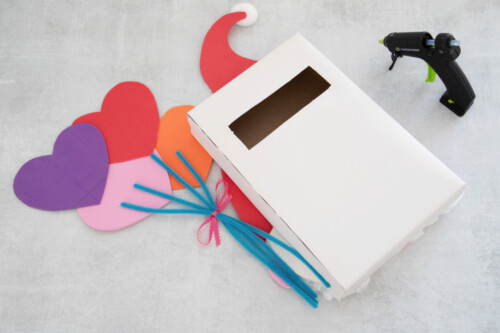
- Print the template and cut out each of the pieces.
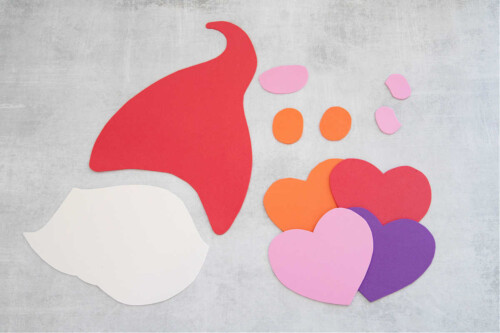
- Trace each one on to the craft foam. You can use the colors I used or change the color scheme completely...totally up to you.
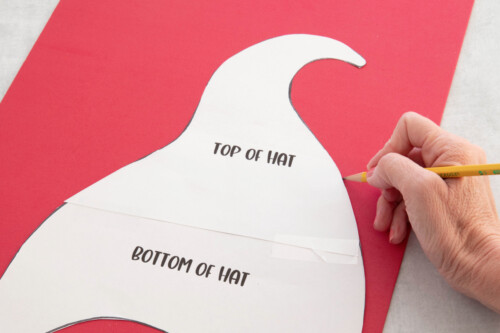
- Once you've traced each piece of the template, cut out your pieces.
- Decorate your gnome hat. I used heart shaped stickers and scraps from the white foam to make stripes.
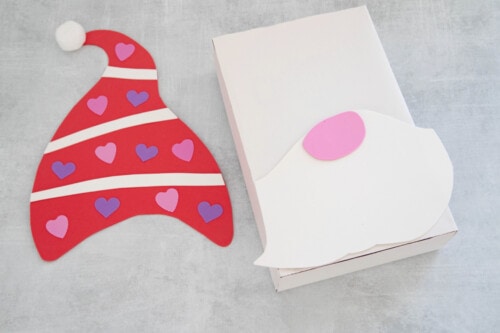
- Glue the gnome beard and nose to the bottom section of the cereal box. Be sure to glue the bottom of the beard flush with the bottom of the cereal box. Otherwise the box will fall over when you try to stand it upright.
- Take 5-6 cotton balls and stretch them out to cover the beard.
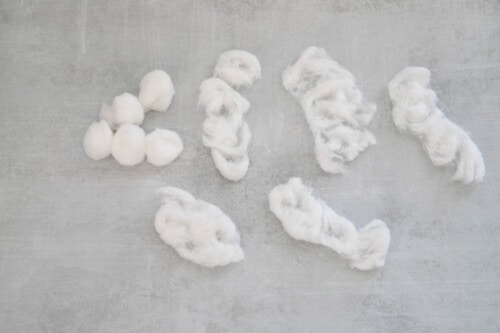
- Glue the cotton on the beard, covering it completely. Add the hat.

- Glue the shoes to the bottom part of the beard. My craft consultant (a.k.a. my 9 year old daughter) suggested we add hearts to the bottom...so cute!

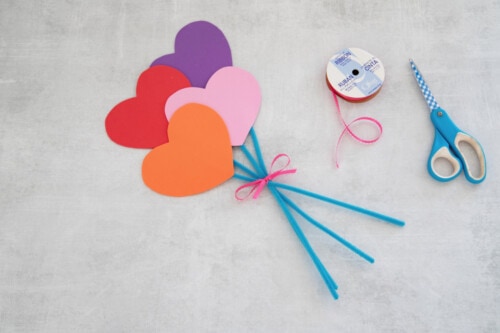
- Glue the balloons together to form a balloon bouquet. Turn them over and glue the chenille stems on the back.
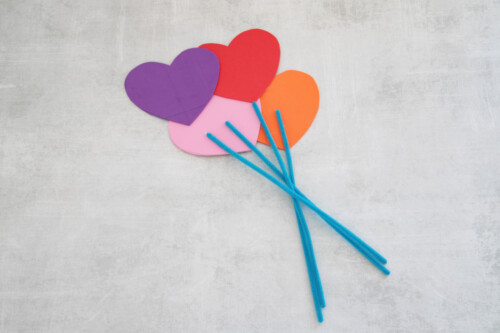
- Let the glue dry, then tie a ribbon around the chenille.
- Finally, glue the hands on and attach balloons to the valentine box. I glued two to the back of the hand, one to the back of the beard and one directly to the box. This keeps the balloons from flopping around too much.
- Once all your glue has dried, you've got the cutest gnome valentine box ever!
Notes
Don't have craft foam? You can use construction paper instead.
You can use any color scheme you like for the balloons, hat and shoes.