SpongeBob Valentine Box
This SpongeBob Valentine Box is the perfect way for little cartoon fans to collect their valentine cards at school!
Servings 1
Equipment
- X-Acto knife
- Pink markers
- Black markers
Ingredients
- Printable template page 1
- Printable template page 2
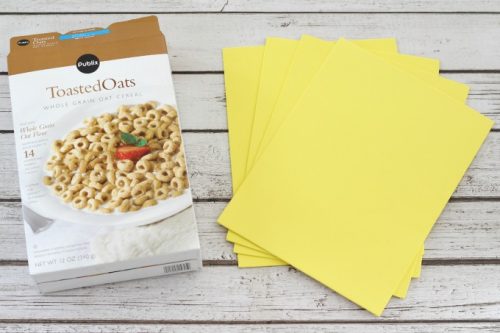
- 12 oz regular size cereal box if you use a bigger box, you’ll need bigger yellow craft foam sheets
- 3 sheets yellow craft foam 9"x12" or larger
- 1 sheet white craft foam
- 1 sheet pink craft foam
- 1 sheet brown craft foam
- 1 sheet light blue craft foam
- 1 sheet light green craft foam
- 1 sheet black craft foam
- 1 sheet red craft foam
- Bead button or marble – a spare button will work just fine)
- String or yarn approx 4-6 inches
Instructions
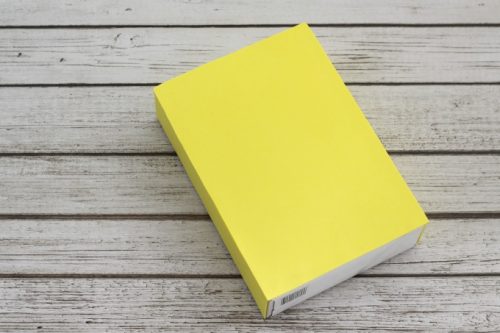
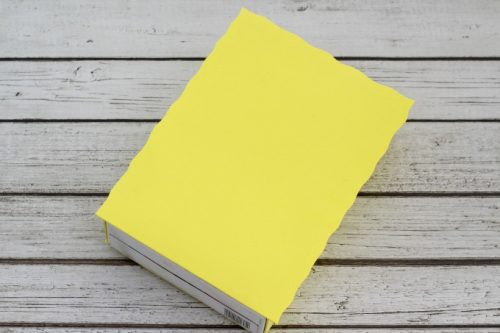
- Start by wrapping your cereal box in yellow craft foam. We used a regular sized cereal box but it you use a family sized one, you'll need more foam.3 sheets yellow craft foam, 12 oz regular size cereal box
- Trace around the box to make pieces to cover the back, the two sides and the top of the box. Don't cover the front yet.
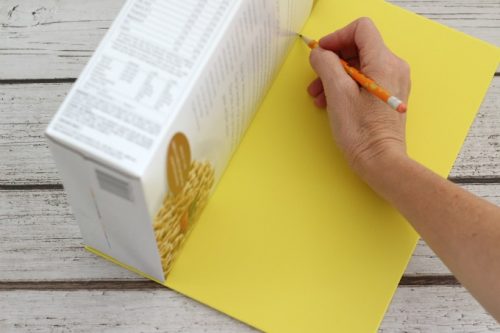
- Glue the foam pieces to the sides and back of the box.
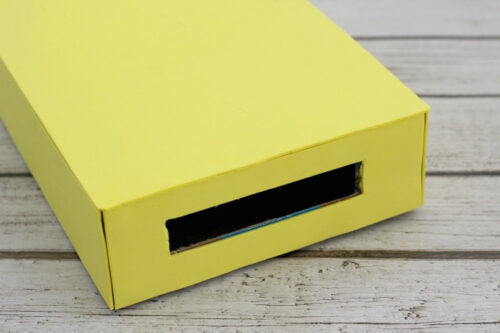
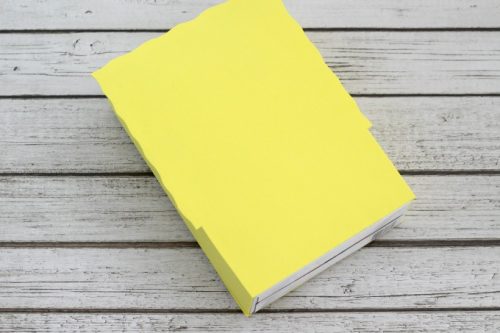
- Use a craft or X-acto knife to cut a hole in the top of the box. (Younger children will need their parents to do this part)
- Take your last piece of foam and use the scissors to scallop the edges. Glue that piece to the front of the box, making the bottom edge flush with the bottom of the box. The other three edges will extend slightly over the sides.
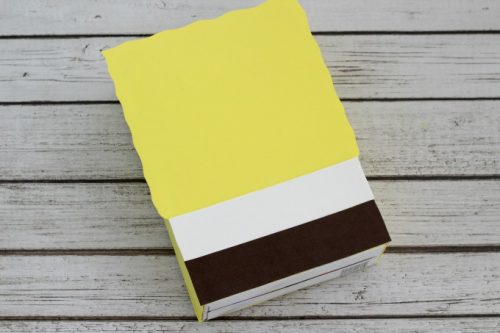
- Measure about 1/3 up the side of the box and cut the yellow foam so that it’s even with the sides. Leave the top 2/3rds extending out. This will give the SpongeBob valentine box a defined head.
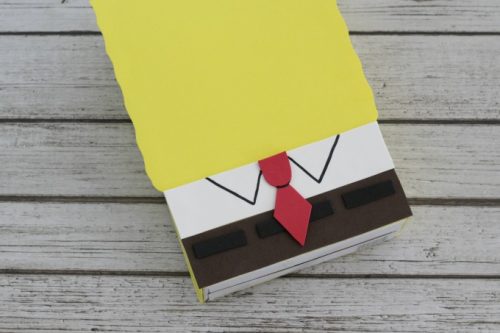
- Cut equal size strips of white and brown foam to make the shirt and the pants. Glue them on, with the white above the brown.1 sheet white craft foam, 1 sheet brown craft foam
- Glue the belt pieces, then the tie. Finally, use a black marker to make the collar. You can draw it with pencil first to make sure it's even.
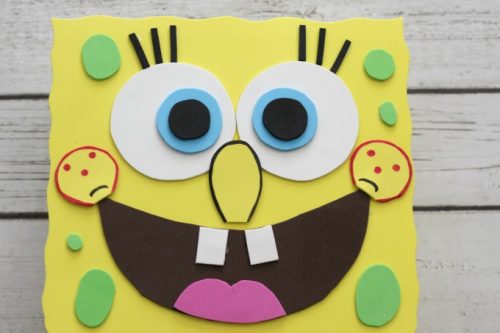
- To make the face, print and cut out the template pieces and use them to trace onto the corresponding colored craft foam. Make small black strips for the eyelashes.Printable template page 1, 1 sheet pink craft foam, 1 sheet light blue craft foam, 1 sheet light green craft foam, 1 sheet black craft foam, 1 sheet red craft foam, Printable template page 2
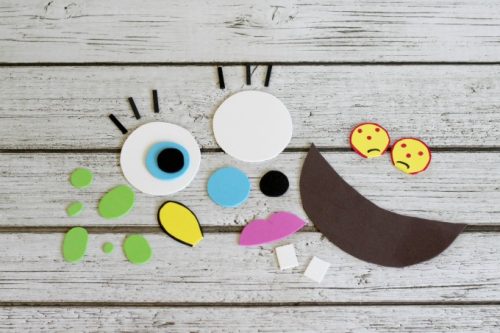
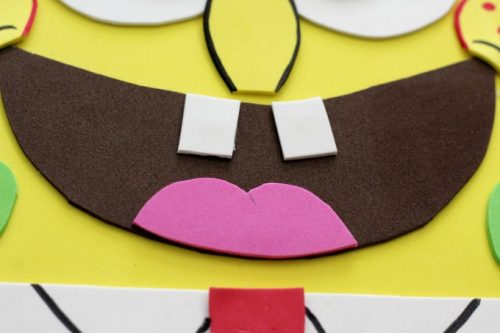
- Place all the pieces on the yellow foam without gluing, to get a feel for how they will all fit. Then you can start by gluing the mouth, the teeth and the tongue.
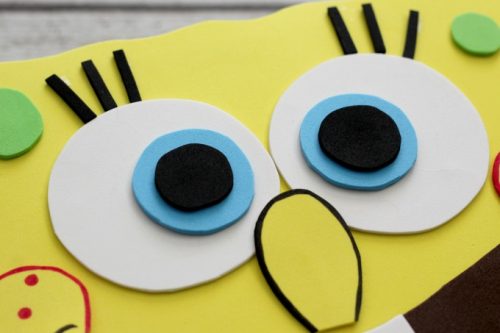
- To make the eyes, glue the blue circles inside the large white ones, slightly off-center. Next, glue the black circles inside the blue ones. Glue the eyes to the yellow foam, then add the nose so that it just overlaps the bottom of the eyes .If you want it to stand out more, trace around it with black marker first. Finally, cut out strips for eyelashes and glue at the top of the eye.
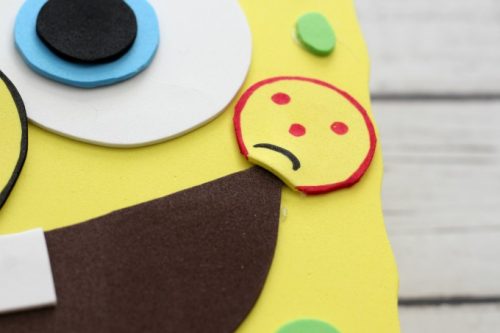
- Before adding the cheeks, use a pink marker (red works too) to outline it and draw the dots. Use black marker to make a smile line. Glue cheeks to the outer corner of the mouth.
- Finally glue the green circles and ovals around the face.
Notes
- You won’t use the entire foam sheet for most of these shapes so if you have scraps from a previous project, you may be able to use those instead.
- We typically don't cover the bottom with craft foam because it can make the box a little wobbly.