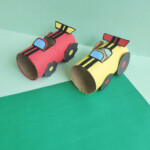
Toilet Paper Roll Race Car
Your kids will have so much fun making this adorable Toilet Paper Roll Race Car craft. Even better, this cute craft becomes a toy that they can play with afterwards!
Servings 1
Equipment
- Liquid glue
Instructions
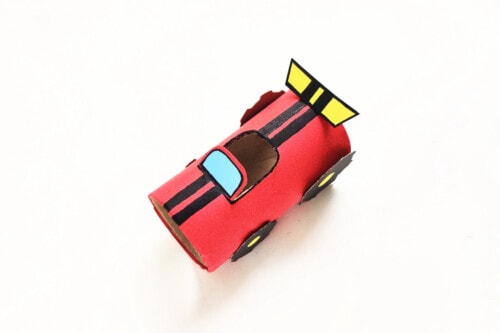
- Print and cut out the template. Traces the pieces onto construction paper, using gray or black paper for the wheels, blue paper for the windshield and whatever colors you like for the body of the race car. Cut out the pieces.
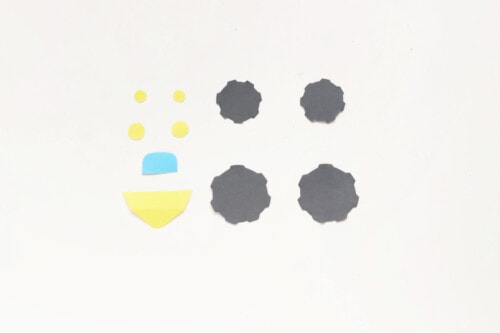
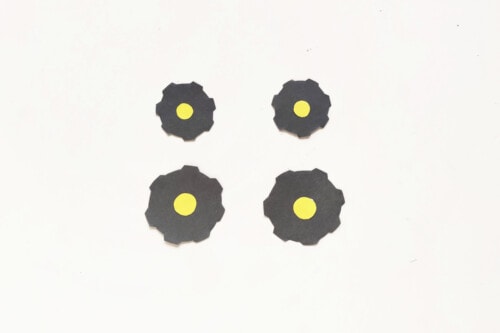
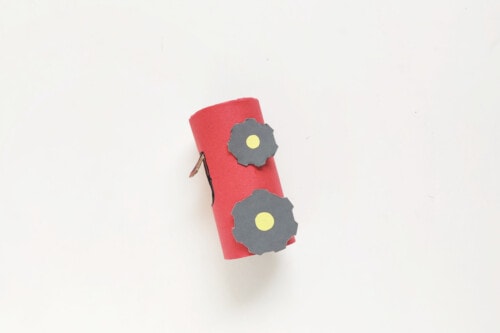
- Glue the small circle pieces to the center of the wheels.
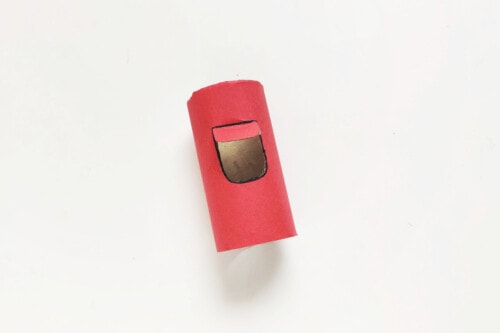
- Use red construction paper, or your color of choice, to wrap the cardboard tubes. Then, use a pencil to draw what almost looks like a pocket shape (see image)
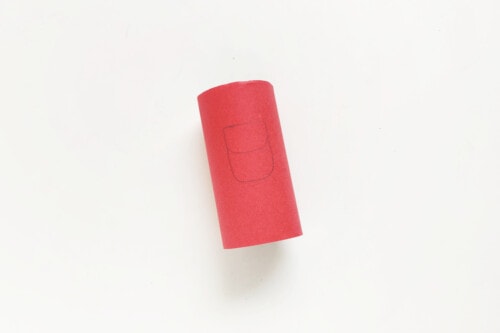
- Use scissors to cut around the curved outside area of the shape. Do not cut the line at the front. Once cut, pull the piece straight up. This will be your windshield.
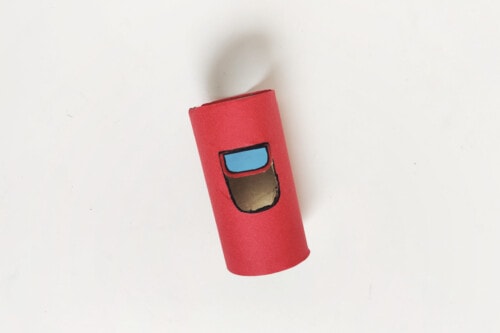
- Take the blue construction paper shape and glue it to the front of the windshield.
- Glue the wheels to the sides of the toilet paper roll. The large wheels are for the back and the smaller wheels go up front. Give the glue time to dry.
- Use a permanent marker to add two vertical strips to the top side of the car. These are your racing stripes.
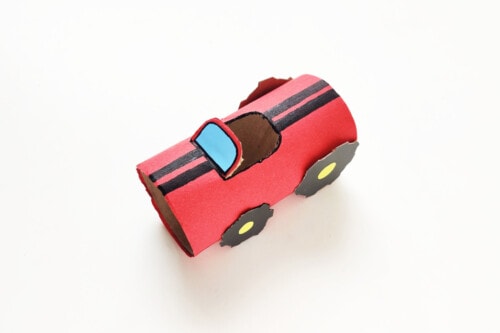
- Glue the bumper to the back and you're ready to race!
- Now that they've made one, kids can make as many cars in as many colors as they want...then it's off to the races!

Notes
- I use hot glue when doing this craft with older children but if making it with younger children, l recommend liquid craft glue (or even a glue stick).
- We didn't add a steering wheel but if you'd like one, just cut out a circle and glue it to the inside of the windshield.
- If you want the wheels to spin, poke a small hole in the roll where the wheels will go, then punch holes in the center of the wheels. Then use a brad/metal fastener to attach the wheels to the roll.
- Forgot to save those toilet paper rolls? Take some paper towel tubes and cut them in half instead.