
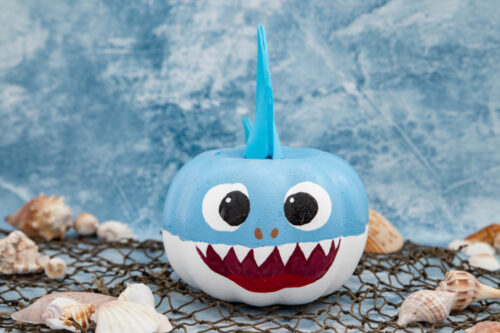
Baby Shark Pumpkin
This fin-tastic Baby Shark Pumpkin is the perfect mess-free pumpkin craft for Halloween!
Servings 1
Equipment
Ingredients
Instructions
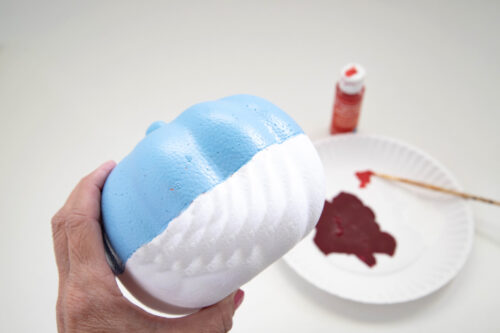
- Use a pencil to draw a line around the center of the pumpkin. Paint the top half blue and the bottom half white. Add a second coat if needed and let dry completely (about 30 minutes, depending on the paint).
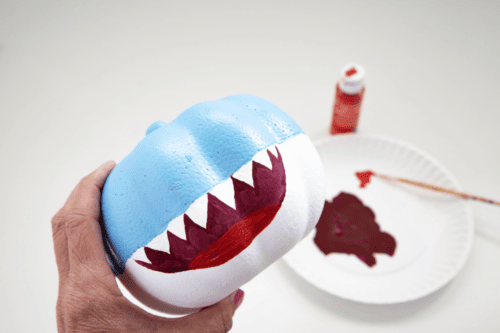
- Combine a few drops of black paint with some of your red paint to make a maroon color. This way the red tongue won't blend in. Draw an outline of the mouth with pencil, then fill it in with the maroon paint.

- Use red paint to add a tongue.
- To make the eyes, start by dipping a large round sponge brush into white paint, then add two large white dots above the mouth.

- Take a medium size sponge brush and dip it into black paint. Make two slightly smaller black dots inside the white ones.
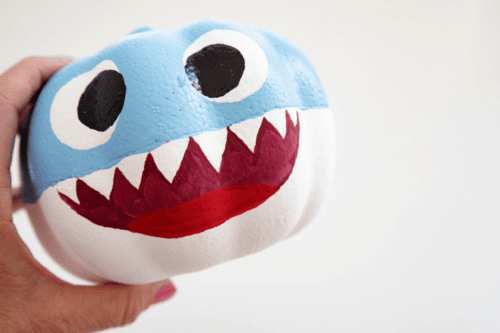
- Use a small paintbrush dipped in white paint to make a small dot on each of the eyes (on the pupil), giving your shark a little sparkle in his eyes. Add two nostrils with either brown paint or the maroon paint. Set aside until paint is completely dry.

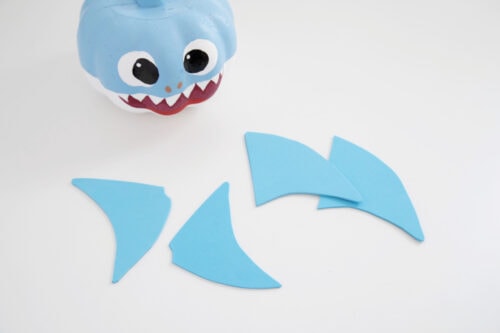
- Print the template for the fins and tail.
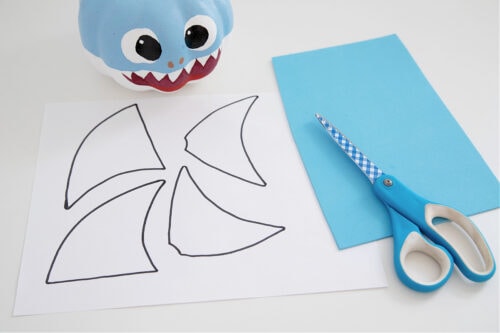
- Cut out the template and trace the pattern pieces onto the craft foam. Cut out the craft foam pieces.
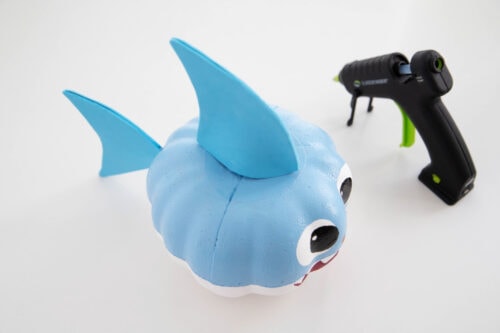
- Glue the long edges of the fin together, leaving the bottom so that it opens up to fit over the pumpkin stem. Glue into place. Glue the two tail pieces together (you can use just one but two makes it sturdier), then glue them onto the back of the pumpkin.
- Let the glue dry and your shark pumpkin is good to go!
Notes
Be sure to let the white paint dry completely before painting the mouth. Otherwise you could end up with an uneven pink color.