Baby Shark Pumpkin Painting Craft
This post may contain affiliate links. As an Amazon Associate, I earn from qualifying purchases.

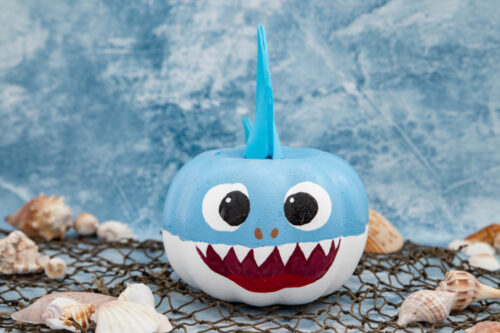
This adorable Baby Shark Pumpkin is the perfect no carve pumpkin craft for Halloween. Easy enough for kids of all ages, this fin-tastic Halloween activity will be a family favorite!
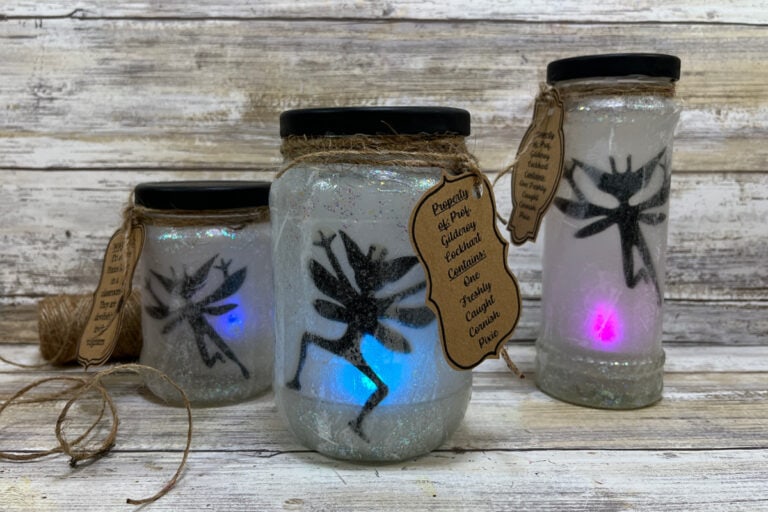
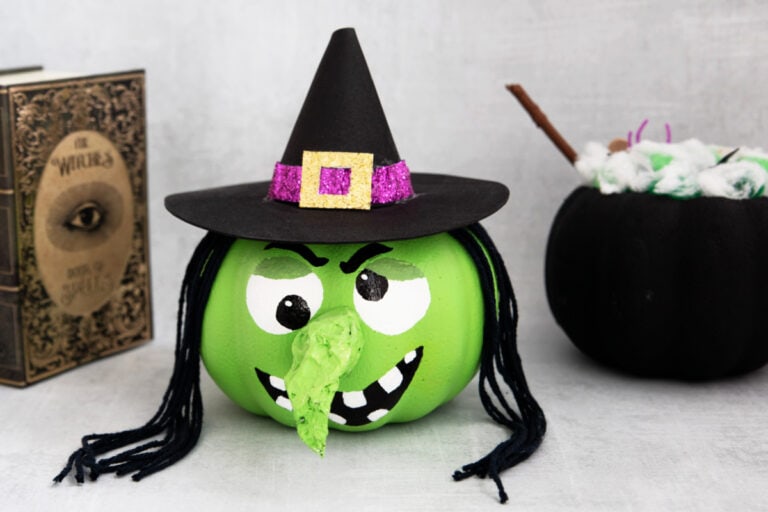
We love making painted pumpkins for Halloween, whether it’s a fun character like a Harry Potter pumpkin or a classic like this painted witch pumpkin.
This one is a little of both! Originally I was going to make a regular shark but it started looking more and more like a baby shark pumpkin instead…so we’ve got the best of both worlds.
So whether your little one is a fan of shark week or baby shark, they’ll love making this fun Halloween craft! It’s the perfect family friendly activity for Halloween!
Why We Love This Baby Shark Activity
Easy – Older kids can do this craft completely on their own. If you have little ones, you may just want to take a pencil and draw the line around the center of the pumpkin and one in the shape of the mouth. Then kids can fill it in with paint.
Mess-free – Carve pumpkins with kids? No thank you! Not only is it super messy but it makes me a little nervous to see my kids carving with knives. Aside from maybe a few paint splatters, the cleanup for this is so much easier!
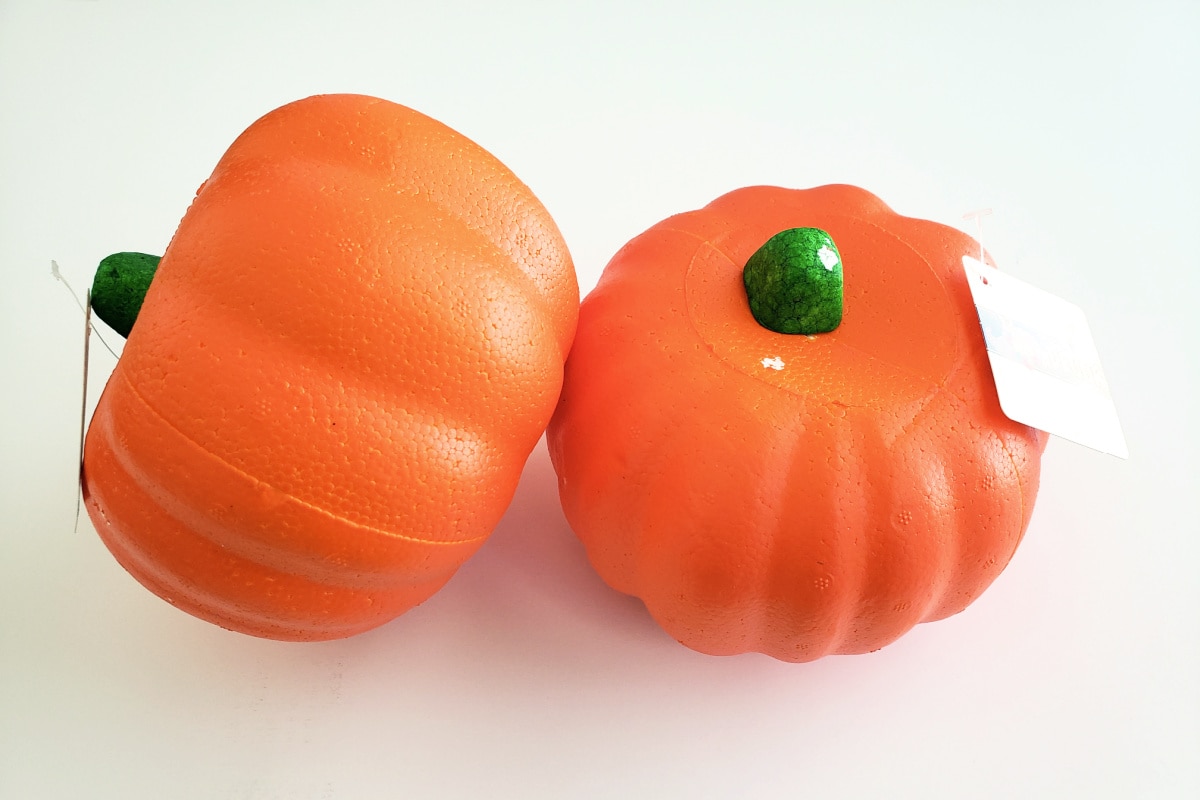
Budget Friendly – I made this shark pumpkin with foam pumpkins that I found at Dollar Tree. The paint and craft foam are easy on the wallet too.
Materials Needed
- Tracing template – download this free printable for tracing the tail and fin onto craft foam
- Craft pumpkin – I use the foam ones from Dollar Tree but you can use any kind you like.
- Craft paint – blue, white, red, black, brown (brown is optional)
Tools Needed
- Pencil
- Paintbrush
- Large round foam sponge brush
- Medium round foam sponge brush
- Small paintbrush
- Scissors
- Hot glue gun & glue sticks
Tips & Tricks
- Be sure to protect your table or work surface. While I’m at the dollar store, I pick up a couple of the $1 plastic tablecloths in the party section. When the kids are done painting, you can just toss the tablecloths in the trash.
- I found it helpful to outline the mouth in pencil first. That way if it doesn’t look quite right, you can just paint over it and try again.
- Don’t make the paint too thick or it’ll take a long time to dry. I find it easier to do a thin coat, then add another if necessary.
- Don’t rush the dry time. If you try to paint the red mouth over the white paint if it’s still wet. You may end up with an unwanted pink color.
- Get creative and make your sharks in a variety of colors.
Now, are you ready to get crafty?

Baby Shark Pumpkin
Equipment
Materials
Instructions
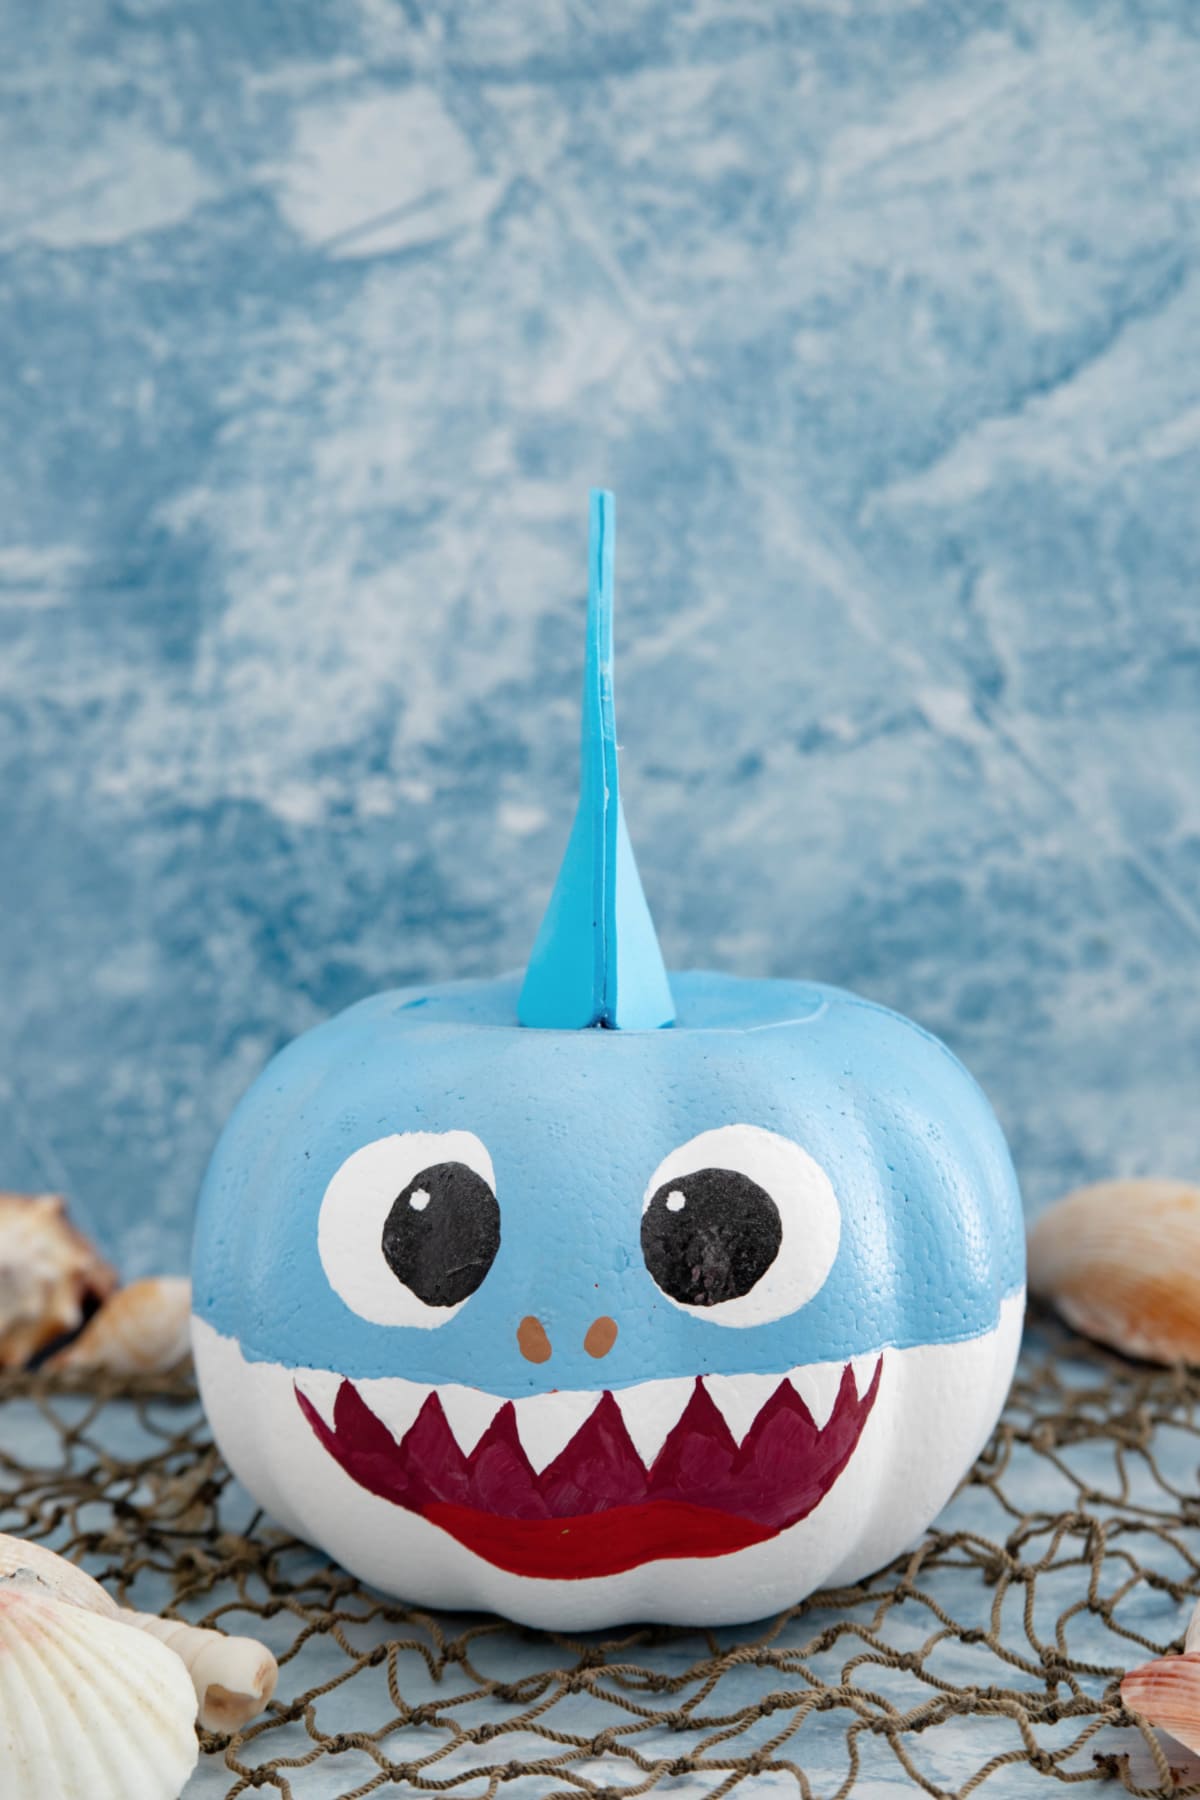
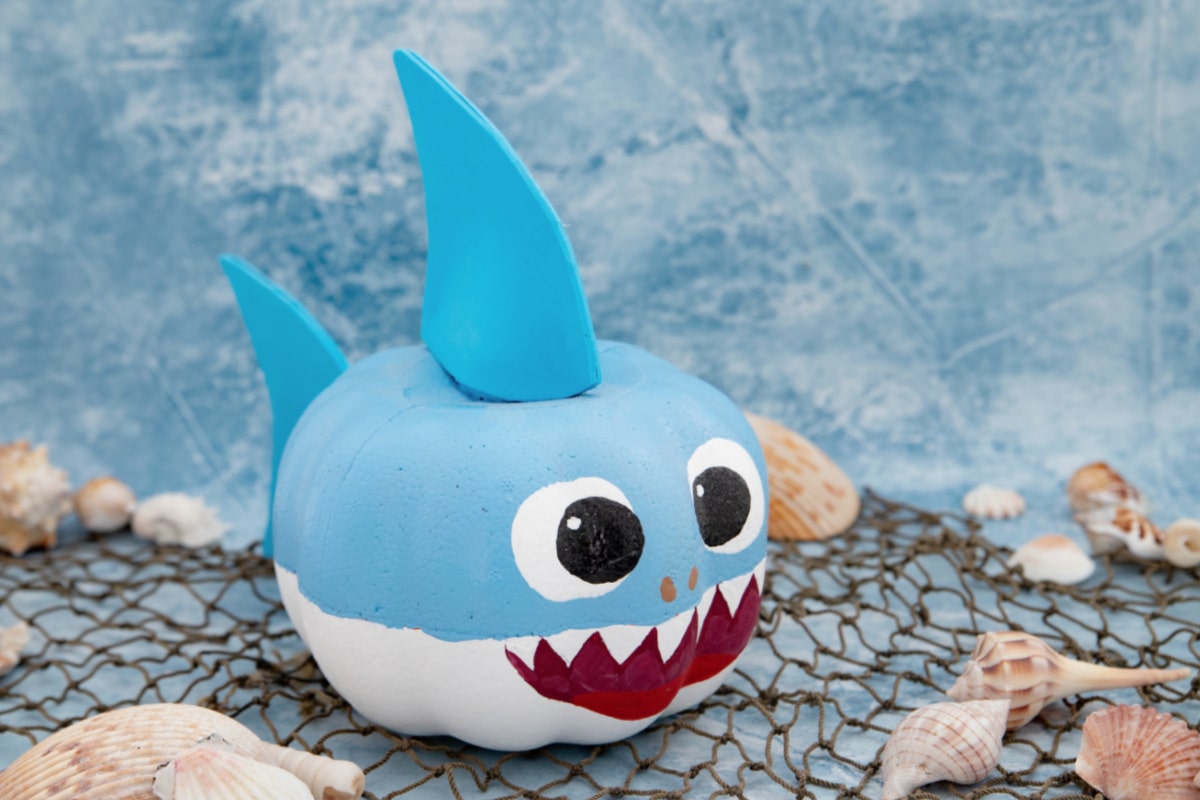
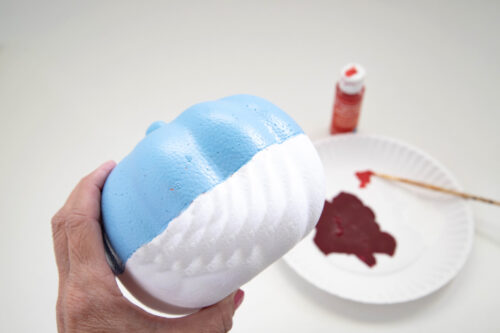
- Use a pencil to draw a line around the center of the pumpkin. Paint the top half blue and the bottom half white. Add a second coat if needed and let dry completely (about 30 minutes, depending on the paint).

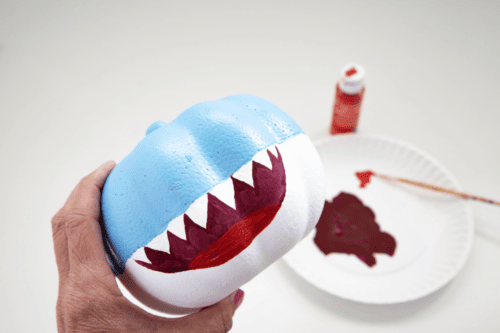
- Combine a few drops of black paint with some of your red paint to make a maroon color. This way the red tongue won't blend in. Draw an outline of the mouth with pencil, then fill it in with the maroon paint.
- Use red paint to add a tongue.
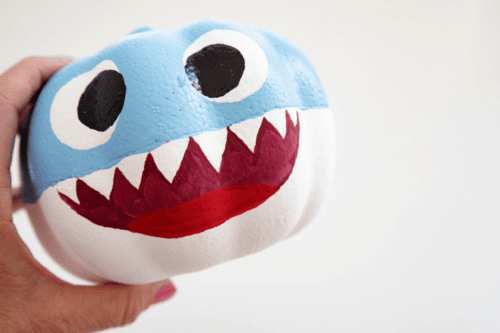
- To make the eyes, start by dipping a large round sponge brush into white paint, then add two large white dots above the mouth.
- Take a medium size sponge brush and dip it into black paint. Make two slightly smaller black dots inside the white ones.
- Use a small paintbrush dipped in white paint to make a small dot on each of the eyes (on the pupil), giving your shark a little sparkle in his eyes. Add two nostrils with either brown paint or the maroon paint. Set aside until paint is completely dry.
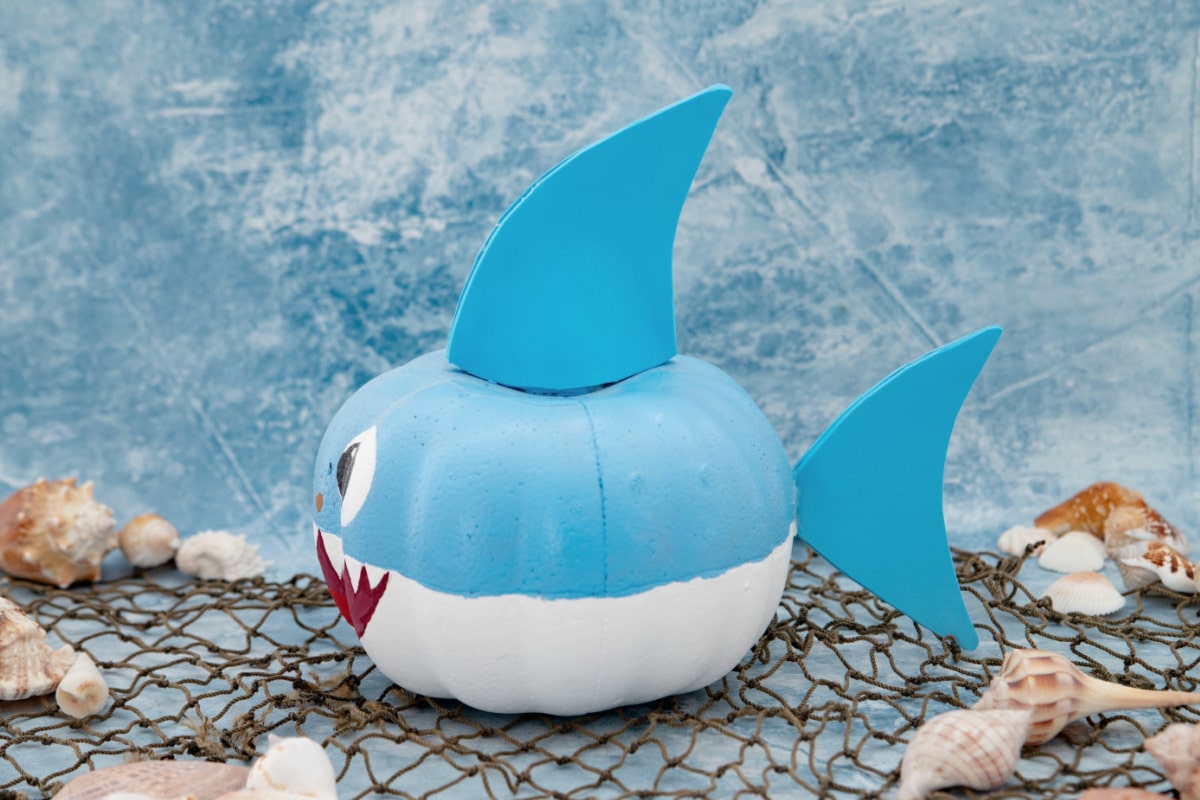
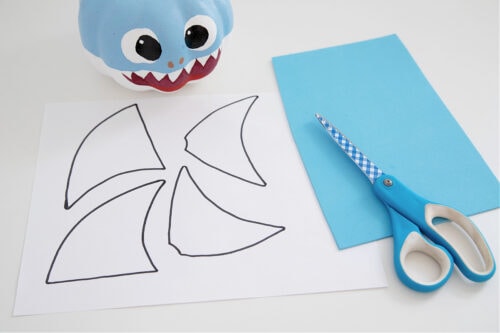
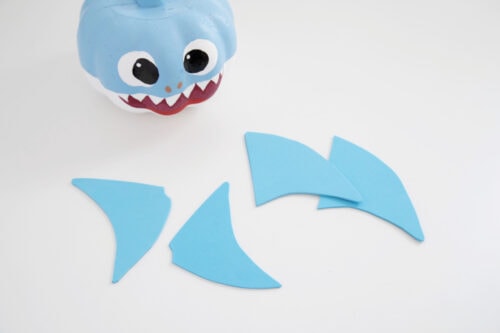
- Print the template for the fins and tail.
- Cut out the template and trace the pattern pieces onto the craft foam. Cut out the craft foam pieces.
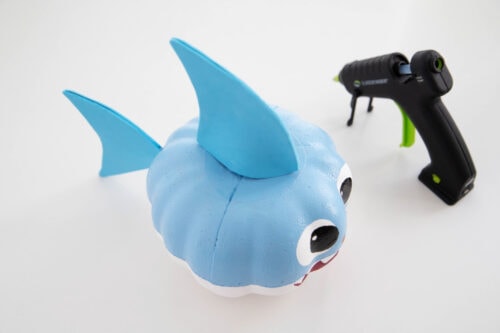
- Glue the long edges of the fin together, leaving the bottom so that it opens up to fit over the pumpkin stem. Glue into place. Glue the two tail pieces together (you can use just one but two makes it sturdier), then glue them onto the back of the pumpkin.
- Let the glue dry and your shark pumpkin is good to go!


Notes
Did You Make This Project?
Share it with me on Instagram @funmoneymom and follow on Pinterest @funmoneymom for more!
More Cute Halloween Pumpkin Ideas
Let’s be friends!
Did you love this post? Make sure to comment below and let me know your thoughts! And don’t forget to follow on your favorite social network below!

About Lisa O’Driscoll
Lisa O’Driscoll is a lifestyle and parenting expert, cookbook author, and the creative force behind Fun Money Mom, a popular blog she’s run since 2014. She’s the author of the children’s cookbook Roll It, Slice It, Mash It, Dice It, designed to get kids excited about cooking. With multiple TV appearances under her belt, she loves sharing her expertise on family-friendly recipes, creative DIYs, and party planning and is always on a mission to inspire and entertain!