
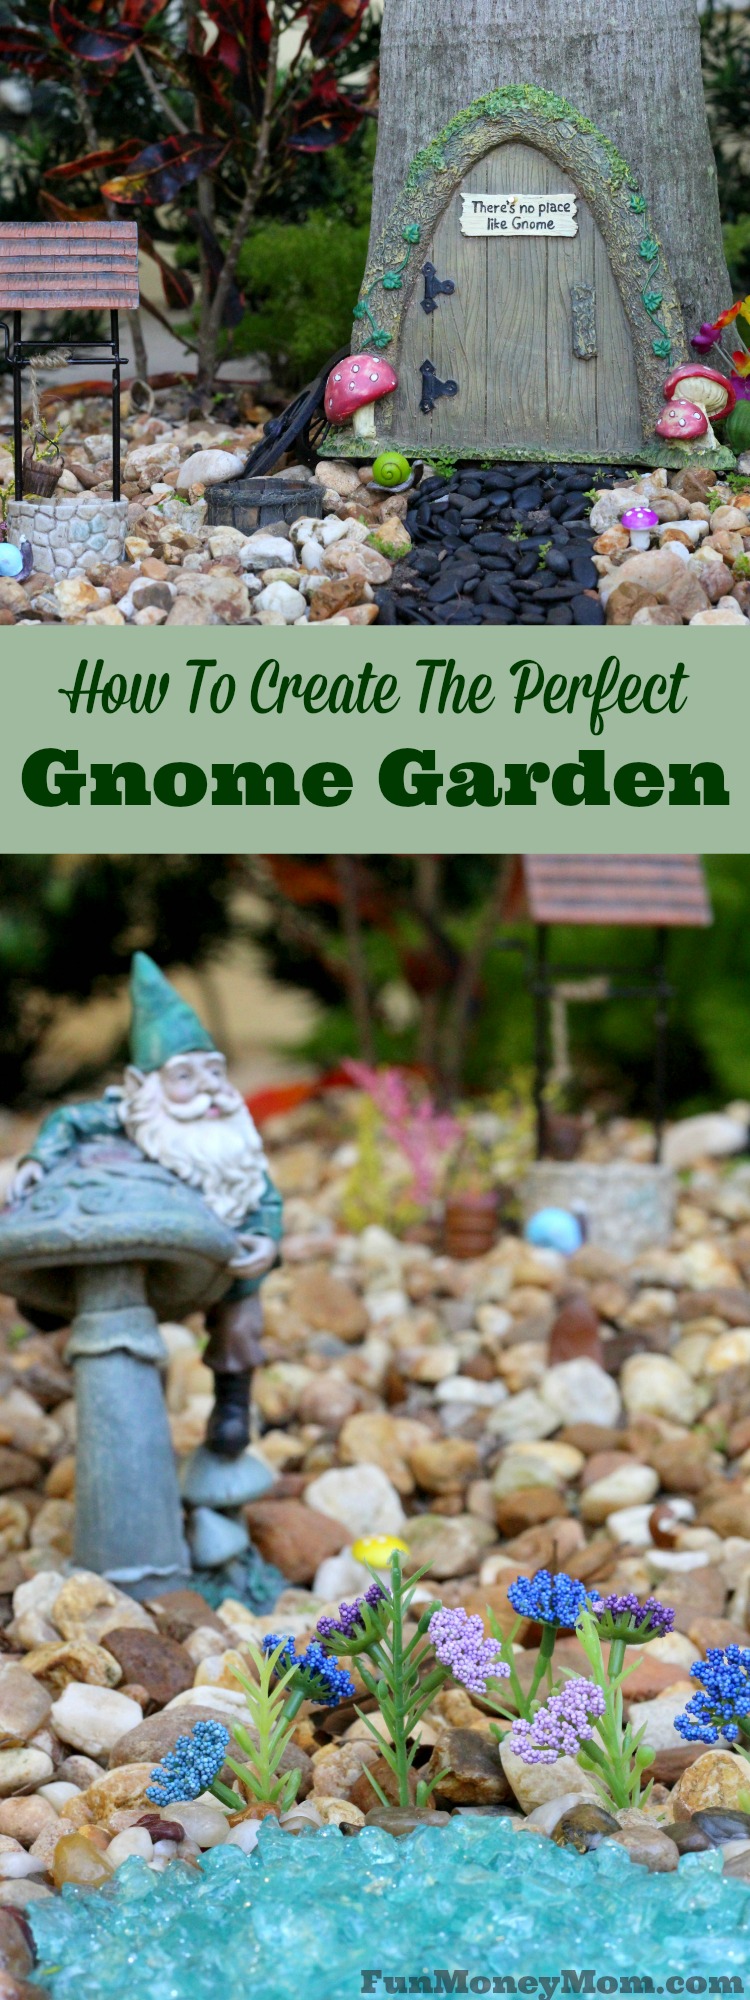
How To Create The Perfect Gnome Garden
This post may contain affiliate links. As an Amazon Associate, I earn from qualifying purchases.
This shop has been compensated by Collective Bias, Inc. and its advertiser. All opinions are mine alone. #FreeOfSulfates #CollectiveBias
Looking for new ways to spend some outdoor time with the kids? Why not have fun creating your own gnome garden together?
Years ago, we had a problem to solve. We couldn’t figure out where to keep the collection of gnomes that we had bought my husband for Father’s Day. After moving them several times, I finally decided that we should have a gnome garden. We actually called it a gnome village at the time but later decided that since there was only one building, it’s actually more of a garden than a village.
Fast forward a couple of years. We have since moved to Florida and our gnomes have been living in a cardboard box ever since. Since they probably weren’t very happy living in a box, it was time to create a new home for them. We pulled out the gnomes and all their supplies, then picked the perfect spot. We were almost ready but needed to pick up a few more supplies before we could get started.
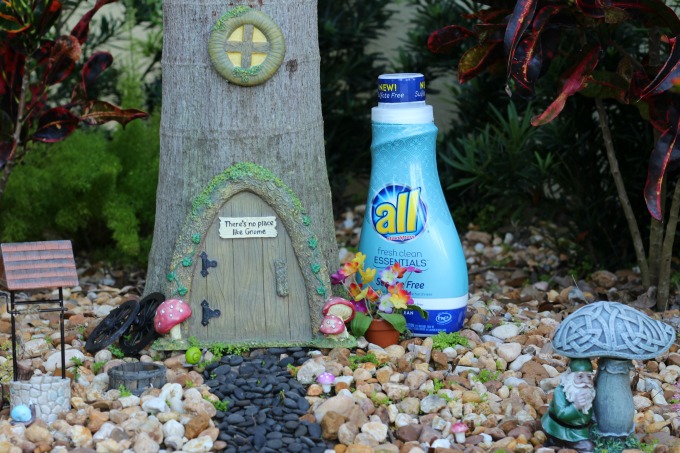
It’s a given that if you’re working in the garden, things are going to get messy. Since I was planning to stop by Walmart anyway, I thought I’d better pick up some laundry detergent while I was there. I use all® products regularly and I’d heard that the new sulfate free all® fresh clean ESSENTIALS® delivers a powerful clean without harshness so I wanted to try it out for myself. I found it with the other detergents, near the top shelf.

The sulfate free formula deep cleans and lifts difficult stains with ingredients that have been proven effective. It’s actually one of the first laundry products to put the ingredients right on the bottle so that you know exactly what you’re using on your family’s laundry. I wasn’t sure how bad my kids clothes would get but they do tend to get pretty messy. It’s better to be safe than sorry, right?
How To Create The Perfect Gnome Garden
Any good gnome garden needs water features but since they’re kind of pricey, I like to make my own. I had to get started on them right away though, since they take so long to dry. I found river rocks, blue glass chunks and some outdoor Modge Podge at the craft store. I’ll post a tutorial soon on just how to make these.

Another thing that I did before we began was to drill holes in a few of the accessories so rainwater could drain out the bottom. I didn’t do that the first time around and had to dump everything out every time we had a shower.

Now it was time for the real fun! My girls had been dying to help and it was finally time for them to play in the dirt. First, I had them clear the river rock to make room for a path.

The girls and I lined the path with small black pebbles, then I added the gnome door and window to our tree.

Next, the girls cleared away more river rock and used a regular sized tile (all of 78¢) to create a gnome “patio”.

Then we added some cute stepping stones to connect the path to our new patio.

Next we added the furniture. I found this cute set on ebay when I made the first gnome garden. It came with a couple chairs, a table, a fire pit, bird bath and a blue orb for decoration.

The glue on our water features had dried so I added the river. We also gave the gnomes a bridge so they could cross.

We placed lots of flowers and mushrooms around the riverbed. The flowers were inexpensive, artificial flowers that I’d picked up at the craft store. I bought several stems and cut the tops off. I’ve found that these actually hold up much better than you’d expect. The ones in my last gnome garden seemed to last forever, though I imagine these might start to fade after a while since they’ll be directly in the sunlight. I ordered a bag of colorful mushrooms online, getting 18 for just under $5. I sprayed everything with polyurethane, including the water features, to make them last longer.

Finally we started placing the gnomes in their new home. This guy was so comfy that he immediately took a nap.

My girls loved this bird bath. It had come with the furniture, though I added the stones and the butterfly. Originally I was just planning to make the river but I had extra supplies so I made a small lake as well.

We picked special spots for the rest of the gnomes.


There were just a few more things we needed to make our gnome garden complete.


We were so happy with how our gnome garden turned out but we were a mess by the time we finished. Sweaty and dirty, I was pretty happy that I had all® sulfate free so I could be sure I’d get my family’s laundry clean again.
Let’s be friends!
Did you love this post? Make sure to comment below and let me know your thoughts! And don’t forget to follow on your favorite social network below!

About Lisa O’Driscoll
Lisa O’Driscoll is a lifestyle and parenting expert, cookbook author, and the creative force behind Fun Money Mom, a popular blog she’s run since 2014. She’s the author of the children’s cookbook Roll It, Slice It, Mash It, Dice It, designed to get kids excited about cooking. With multiple TV appearances under her belt, she loves sharing her expertise on family-friendly recipes, creative DIYs, and party planning and is always on a mission to inspire and entertain!


This looks like a fun project to do with the kids. Now that school is out, I’m always looking for new ways to keep them entertained and away from the TV.
It was so much fun and I know your kids will love it! I have the same problem and this is such a great way to get them outside!