Easy Oreo Bats
This post may contain affiliate links. As an Amazon Associate, I earn from qualifying purchases.

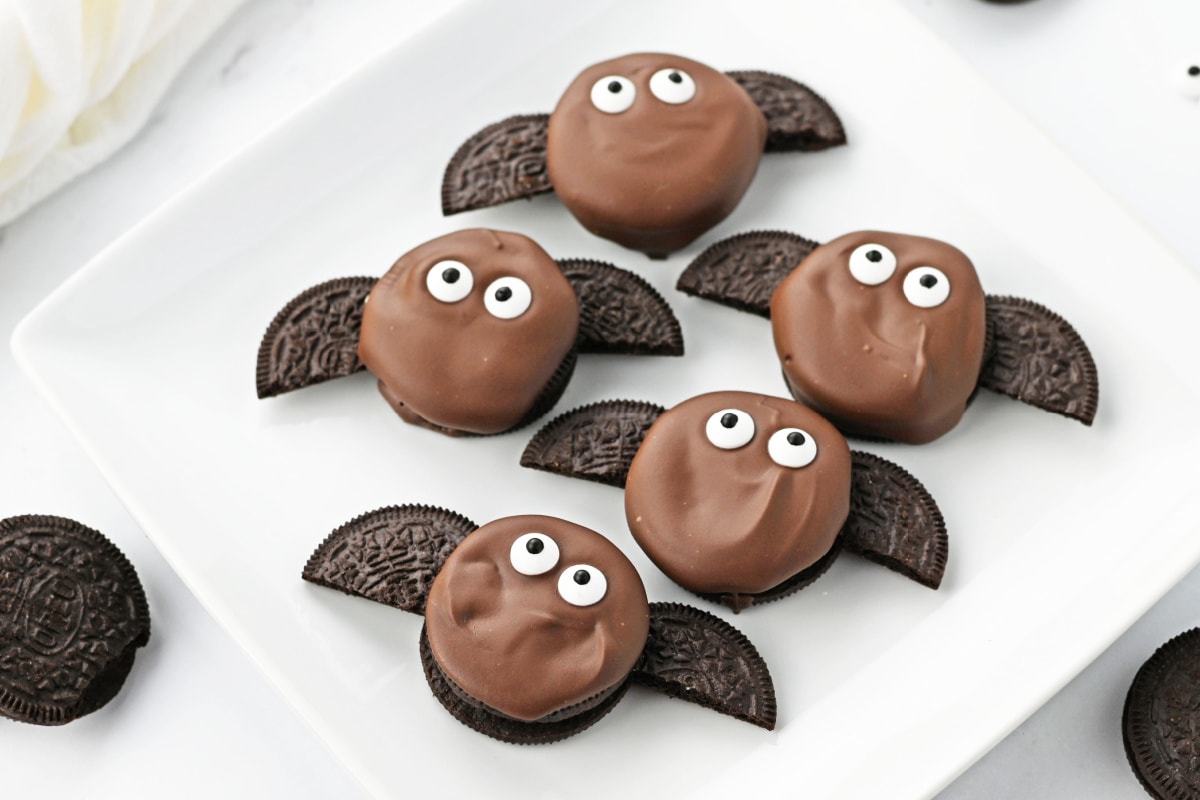
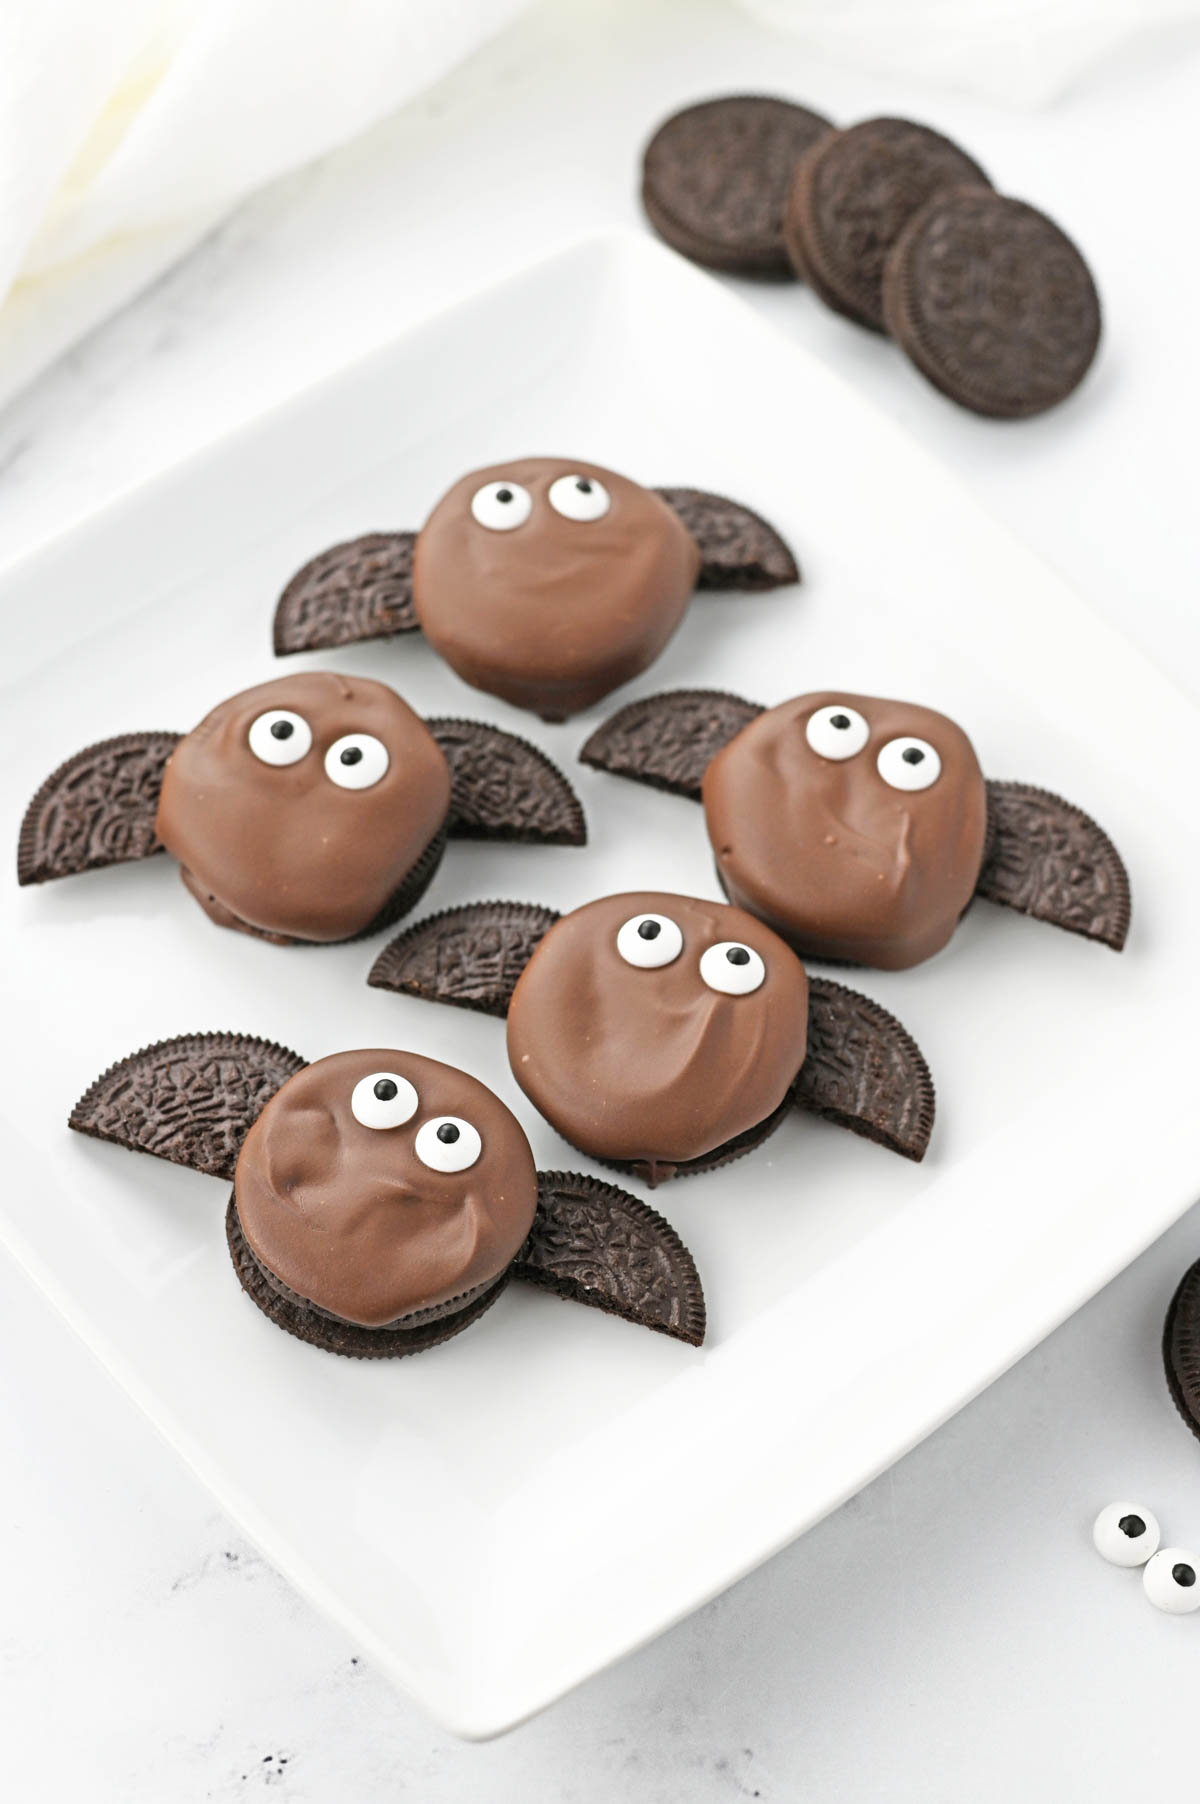
These easy Oreo Bats are a cute treat that’ll look festive and fun on your Halloween party table. Part recipe and part craft project, these adorable bats are as much fun to make as they are to eat!
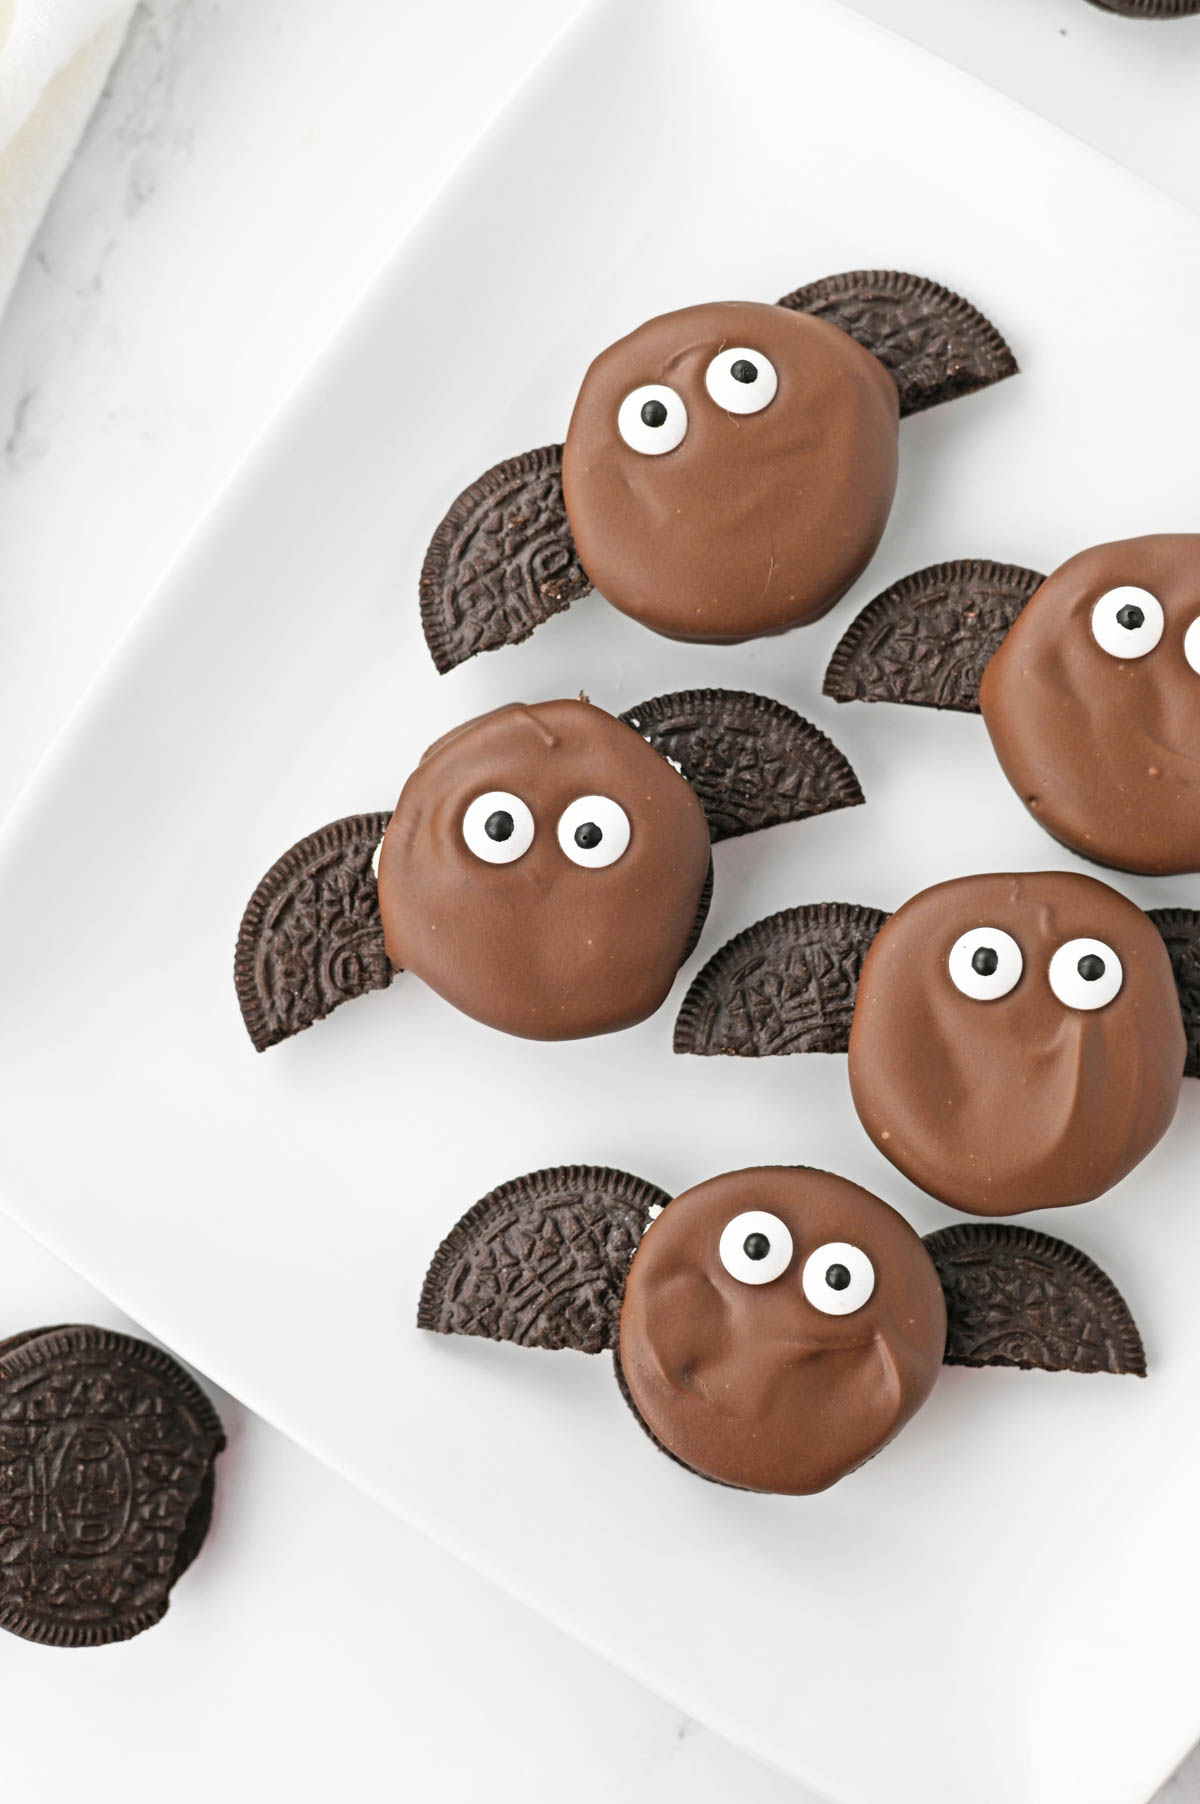
If you’re looking for a fun Halloween dessert that’s sure to impress, you’ll love this cute Oreo Cookie Bats recipe. This 3 ingredient treat is not only adorable and delicious, but also super quick and easy to make.
You’ll start by coating Oreos in melted chocolate to make the bat body. Then additional cookie pieces are attached to each side to form the bat wings, with candy eyes added to complete the Halloween look.
Perfect for parties, a class Halloween activity, or just a fun family activity, these Oreo bats are a spooky Halloween treat that you can have ready in no time. This easy recipe will add lots of cute and spooky fun to all your fall celebrations!
Why We Love This Recipe
Perfect for Halloween – These no bake treats are always a hit and so much fun to make with the kids. They love making their very own little bats to snack on!
Easy – All it takes is a store-bought cookie and a little decorating to create these super easy Oreo bat treats. Plus, it doubles as an edible craft that makes a great Halloween activity for the kids.
Budget-Friendly – There are just 3 ingredients to buy, so it’s a simple way to make something special for Halloween without spending a lot of money.
Versatile – You can enjoy these bat Oreos on their own or use these as a cute cupcake topper for Halloween cupcakes.
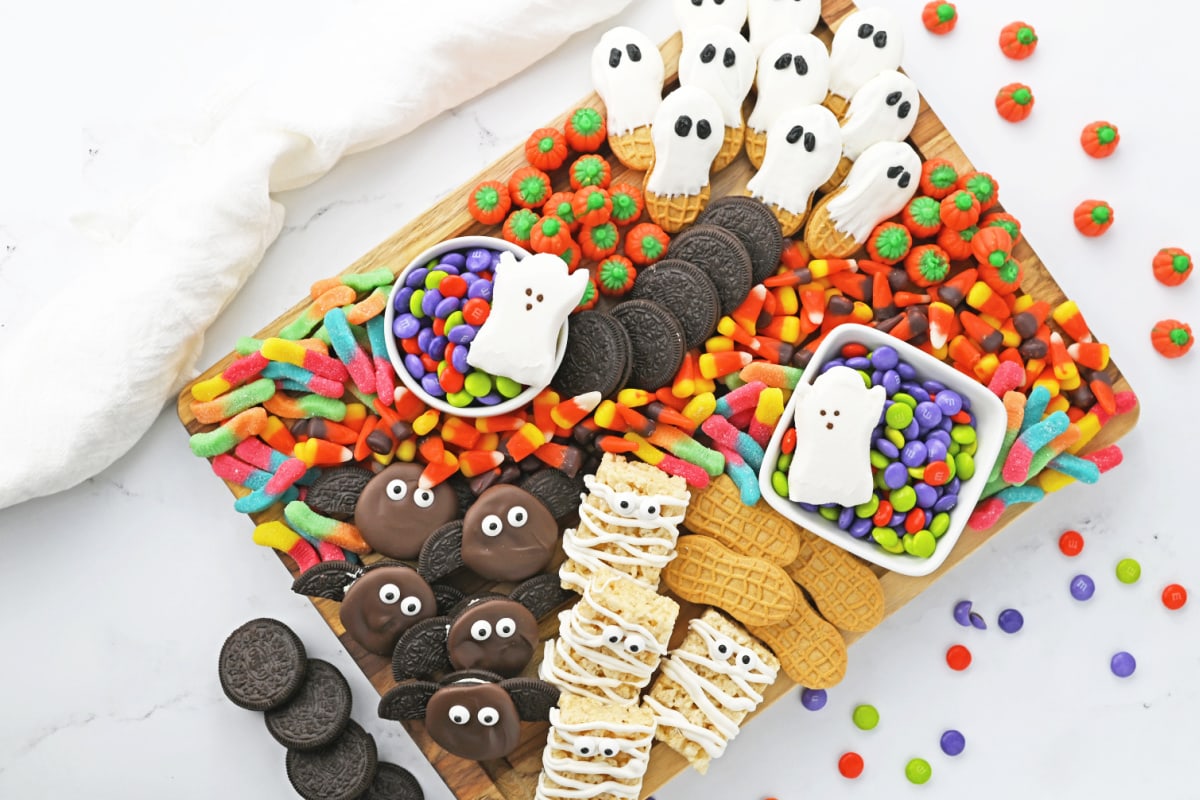
Make A Fun Halloween Treat Board
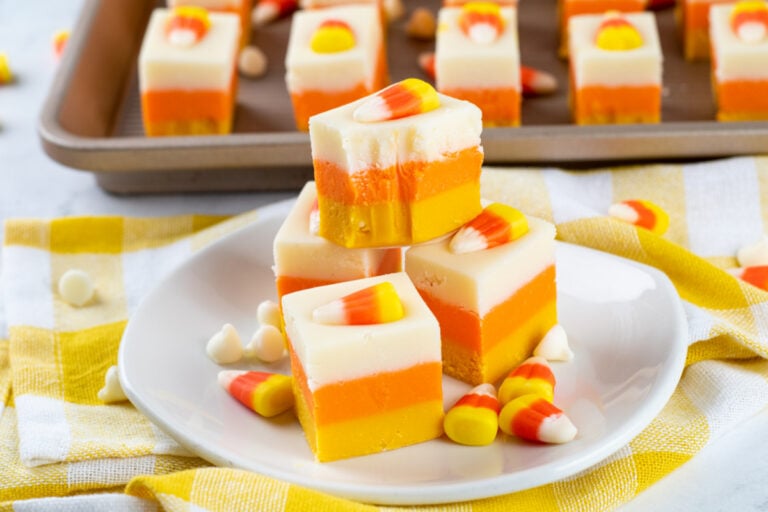
If you really want to get into the spooky spirit, use these to make your own Halloween Snack Board. Combine them with these cute Nutter Butter Ghosts, Mummy Rice Krispie Treats and a few other tasty snacks to make the ultimate Halloween party platter!
Ingredients

- Oreos
- Dark chocolate melting wafers
- Candy eyes
How to Make Easy Oreo Bats
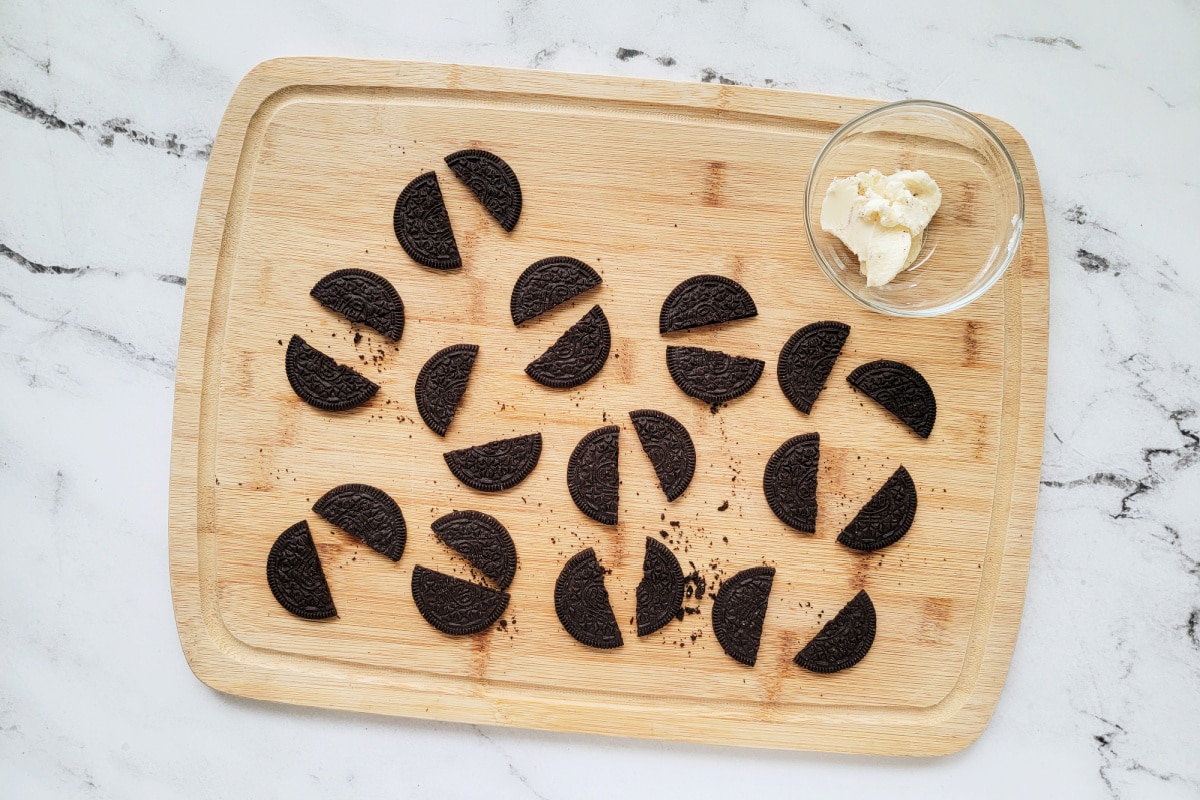
Step 1: Remove the tops from 6 of the Oreos. Use a butter knife to scrape off the filling and reserve it for later. (You’ll need it to re-assemble the bats.)
Step 2: Using a sharp knife (I used a serrated one), cut the cookie tops in half. You should have 24 cookie pieces to make the wings.
Step 3: Twist the cookie tops off of the remaining 12 Oreo cookies and separate them from the cookie sides with the filling. Lay the cookies with filling on a cutting board
or parchment paper.
Step 4: Slide 2 “wings” (the cut cookie pieces from earlier) on each side of an Oreo cookie half that has filling still on it. Gently press into the cream.
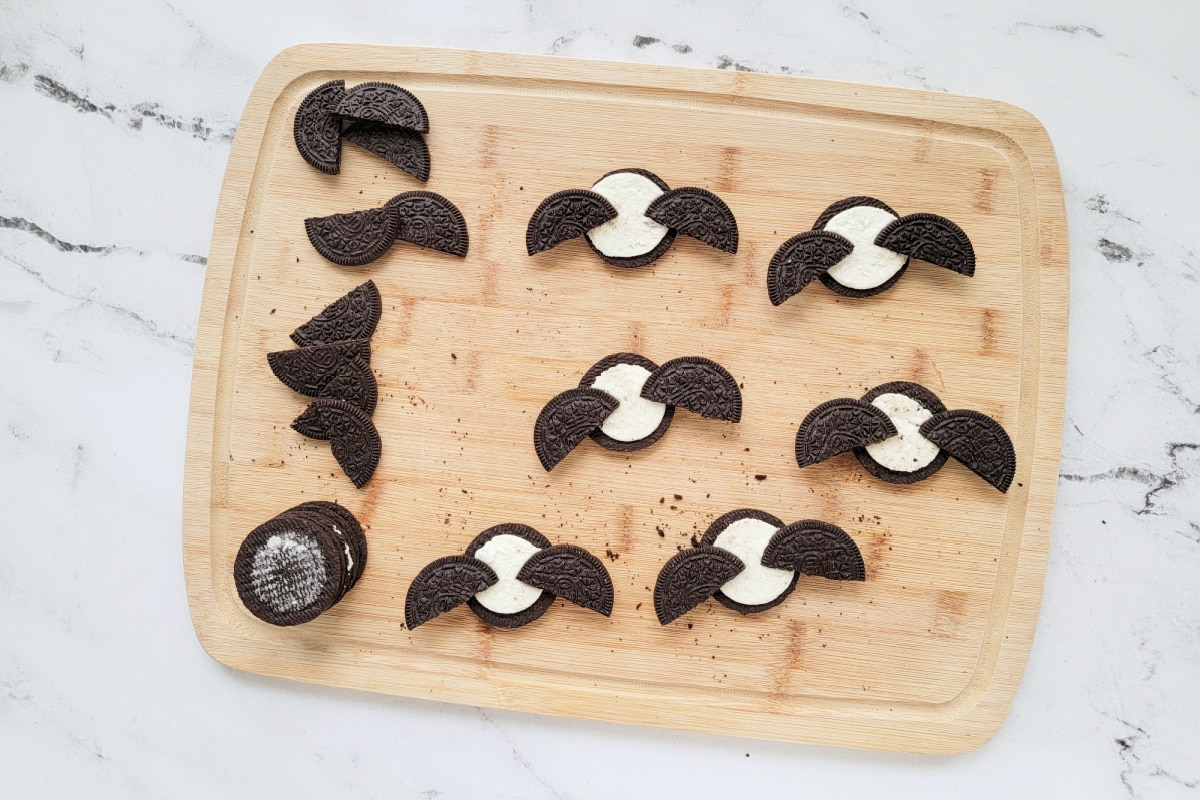
Step 5: Place a bit of the reserved filling on top.
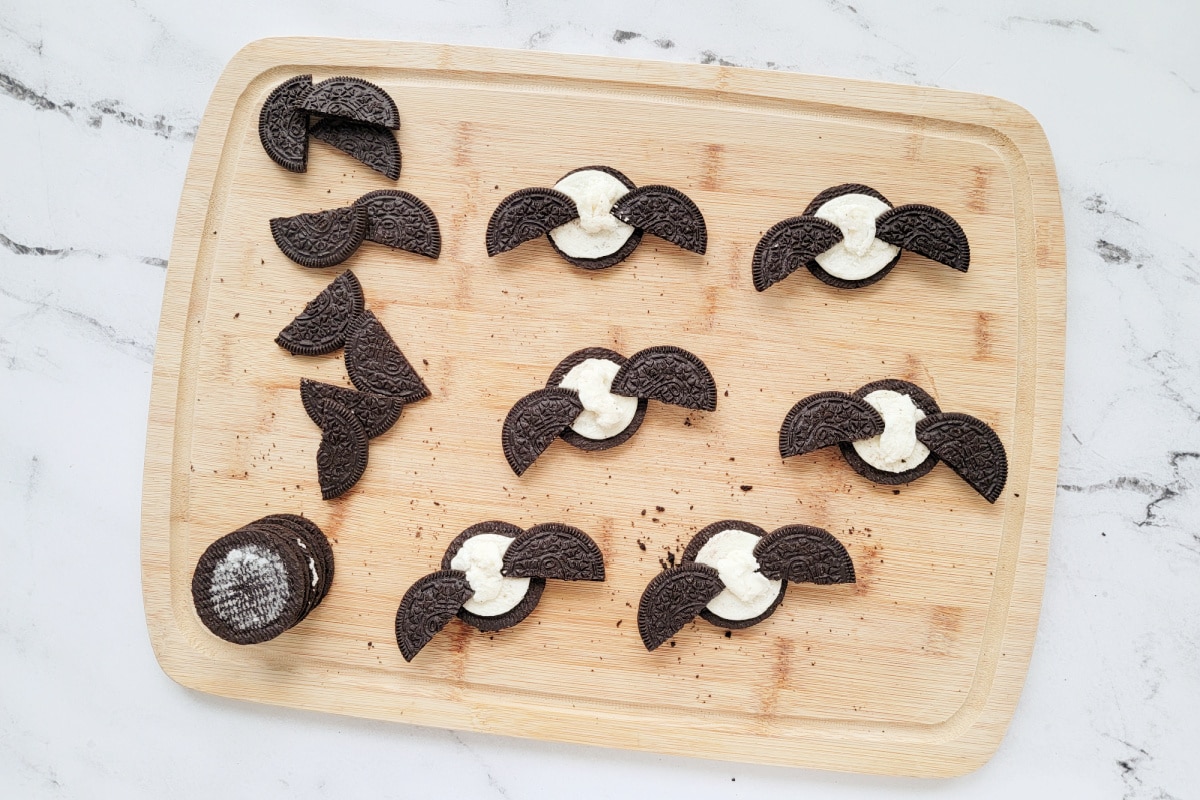
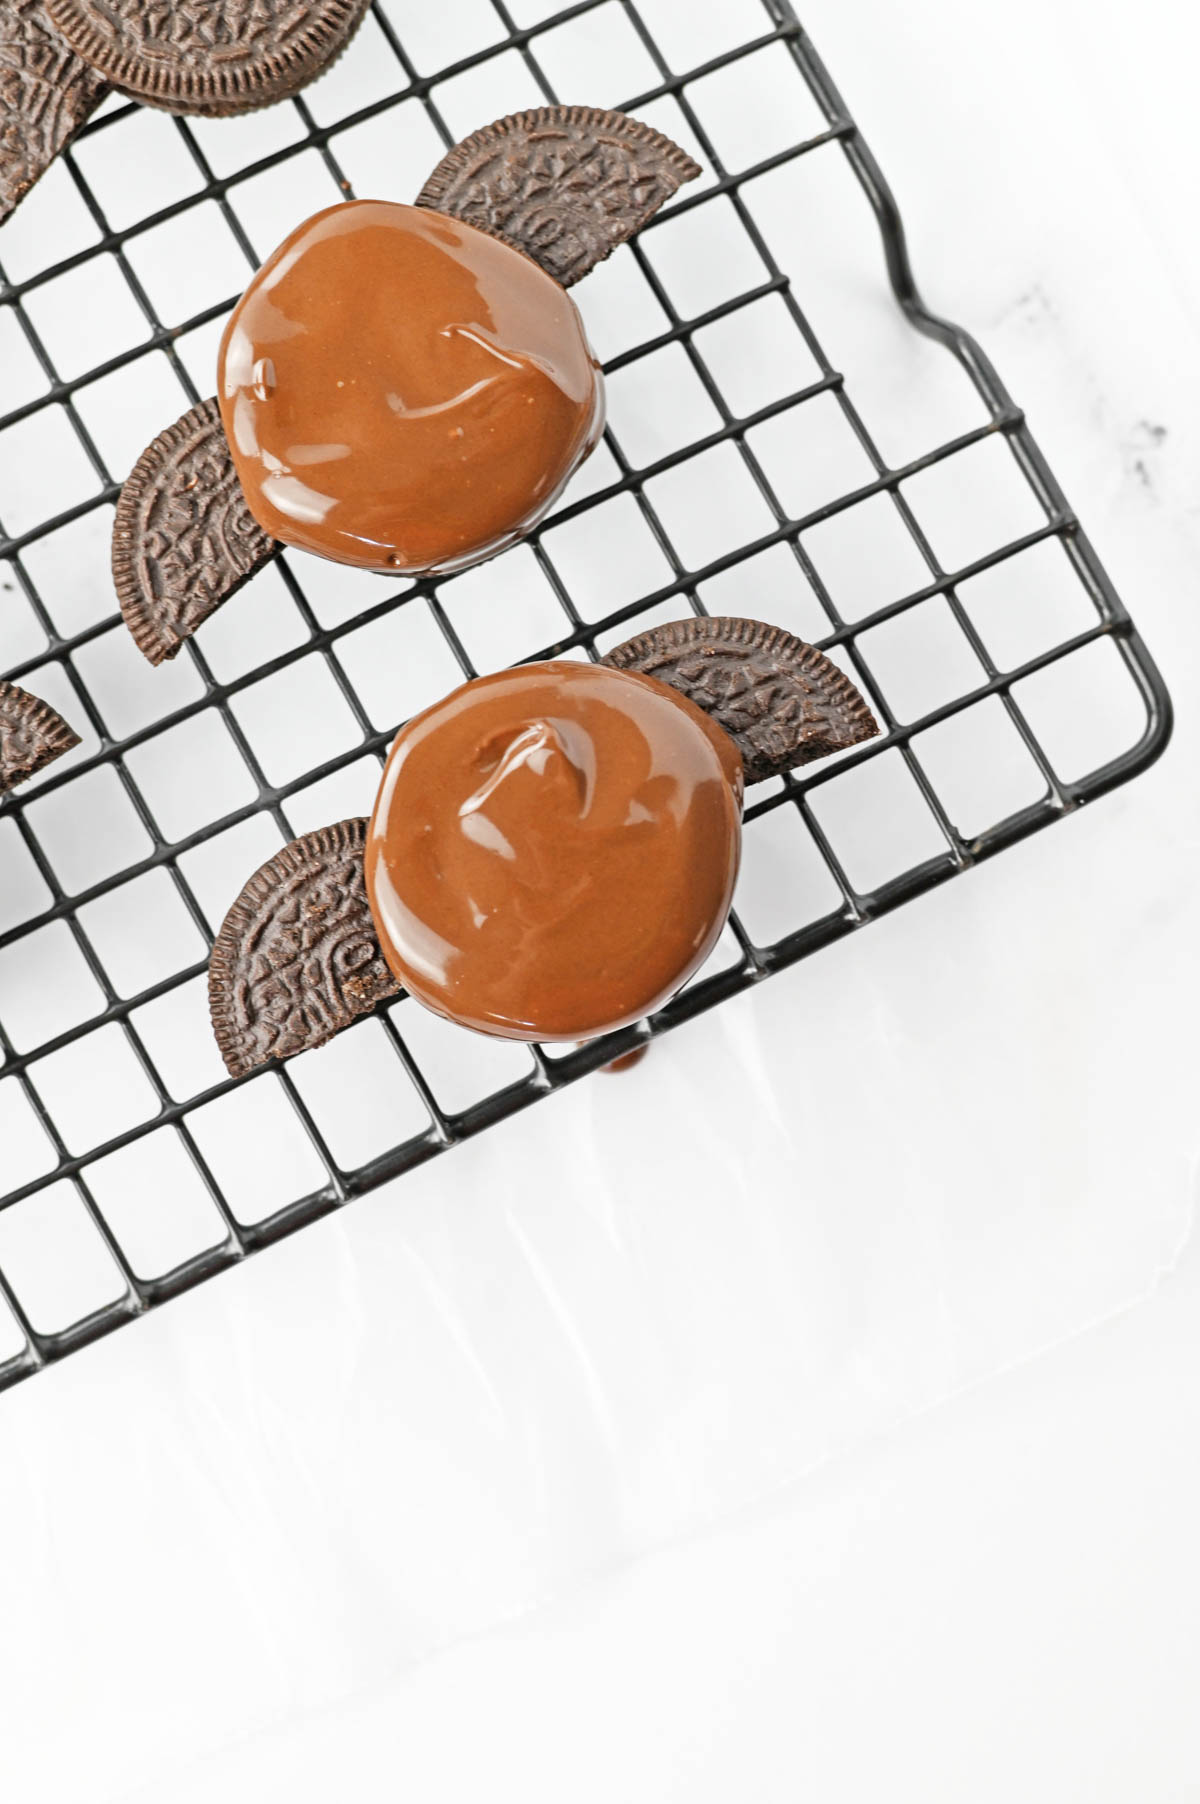
Step 6: Press one of the Oreo cookies without the filling on top to reassemble the cookie and seal on the wings. Place the cookies on a cooling rack.
Step 7: Place the chocolate melting wafers in a microwave safe bowl. Melt the chocolate in 30 second increments, stirring between, until melted and smooth.
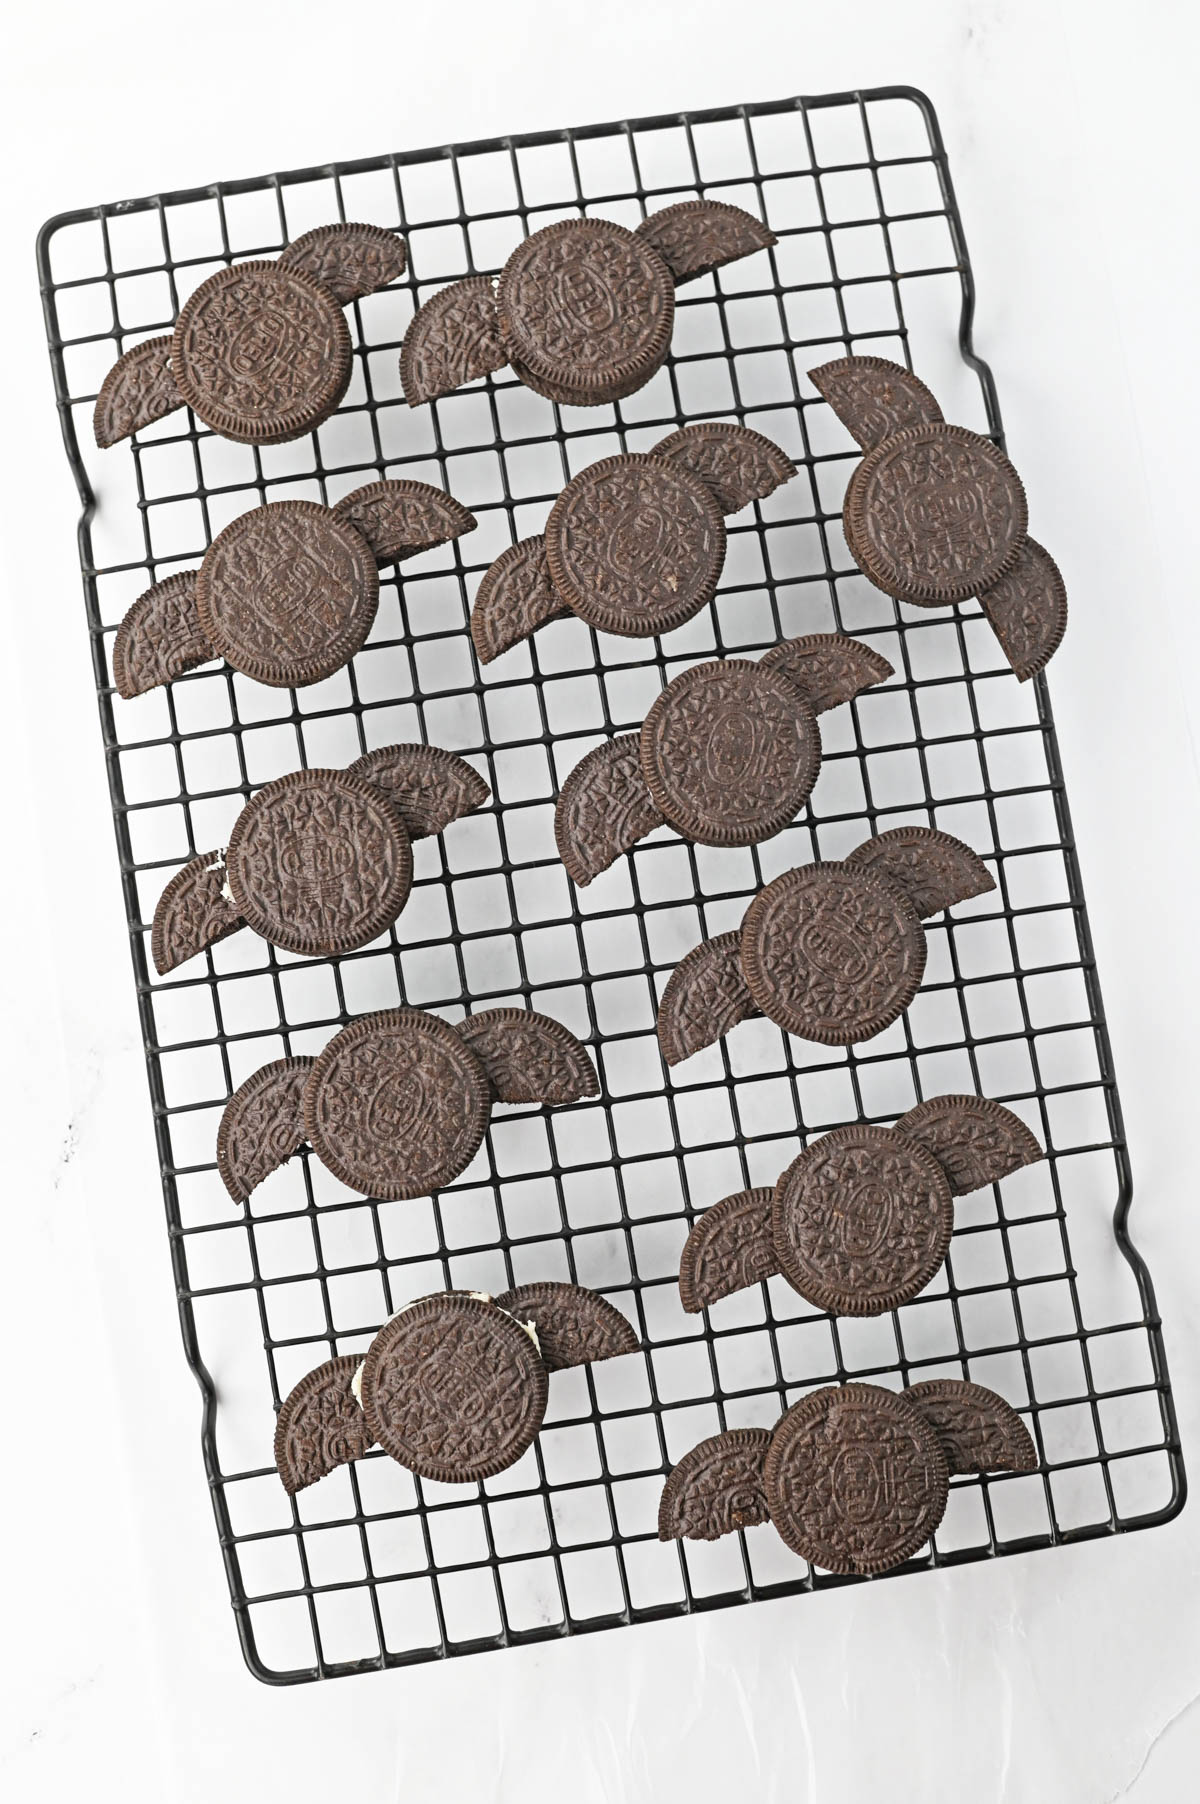
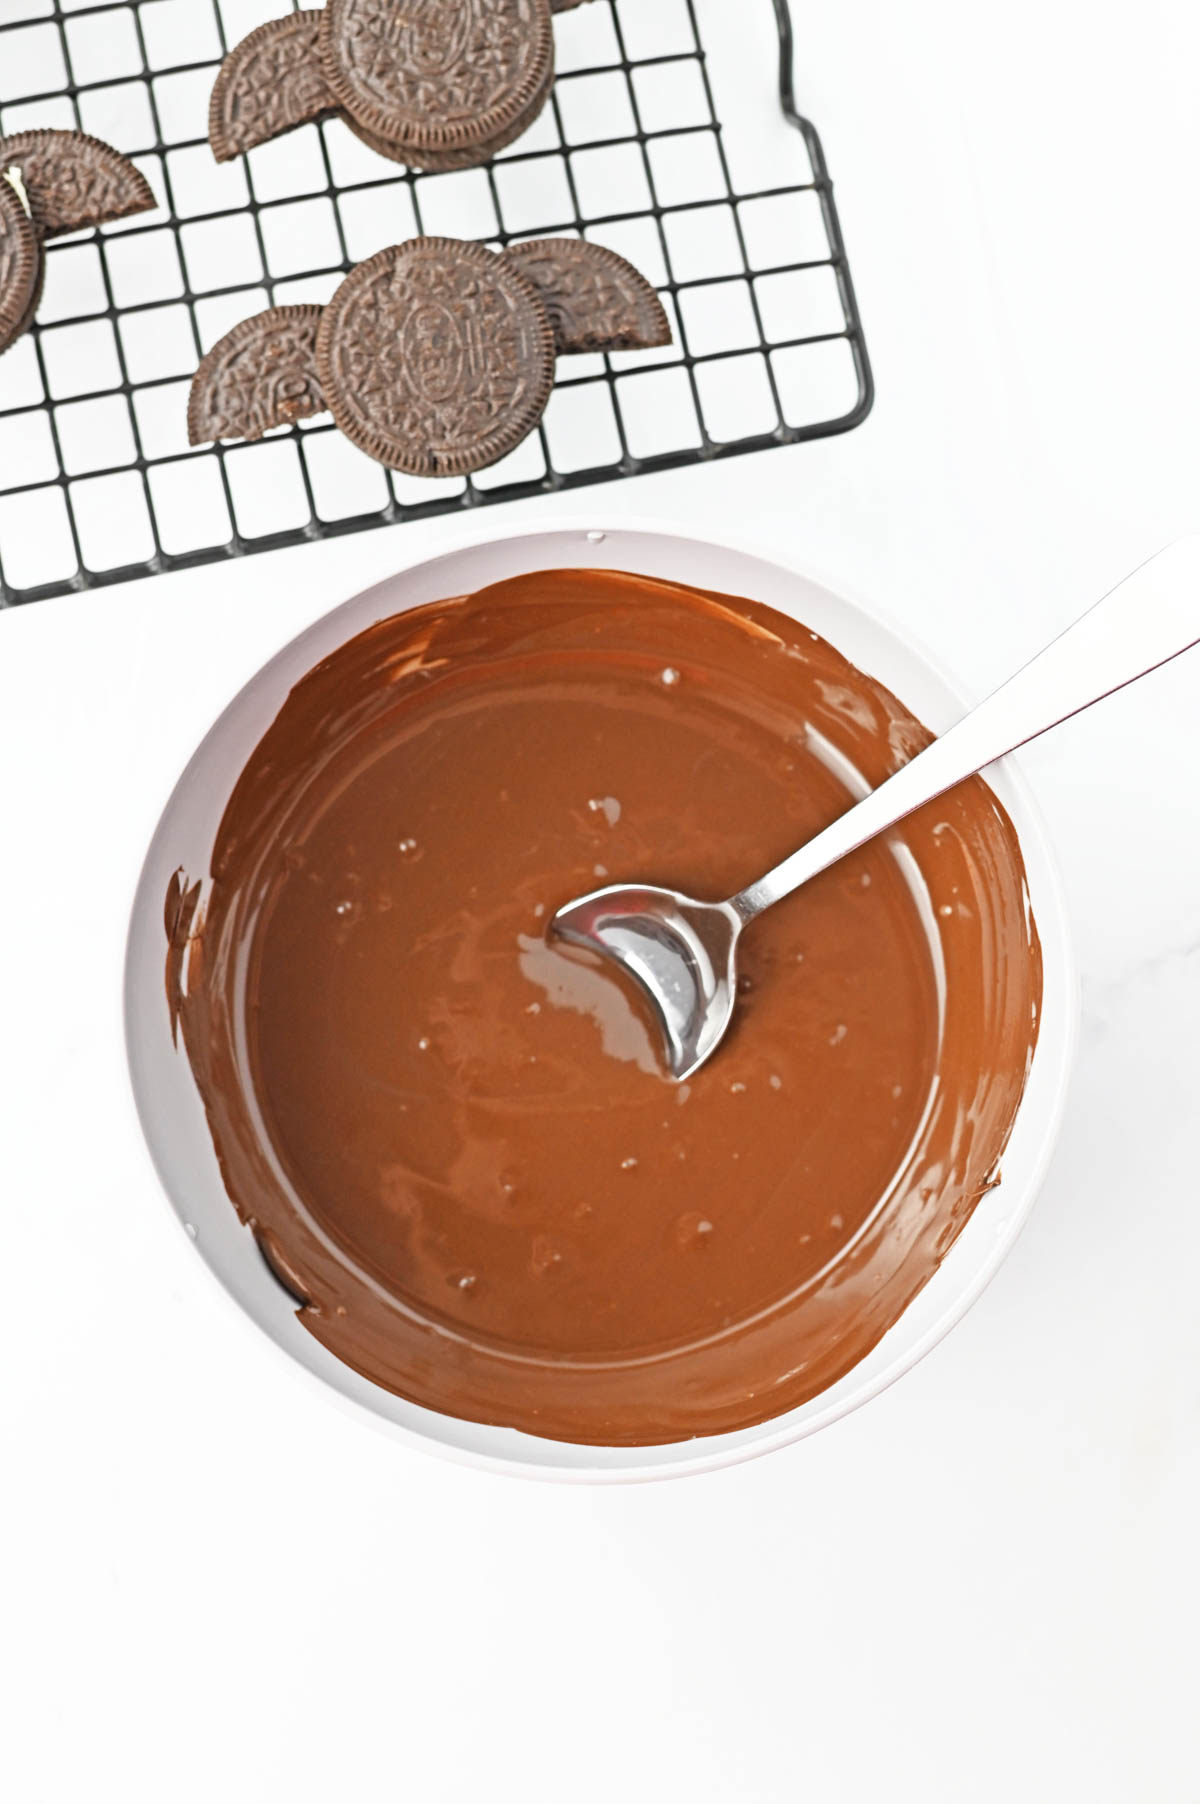
Step 8: Use a small spoon to drizzle the melted chocolate over the bat body, smoothing it out to cover the middle Oreo.
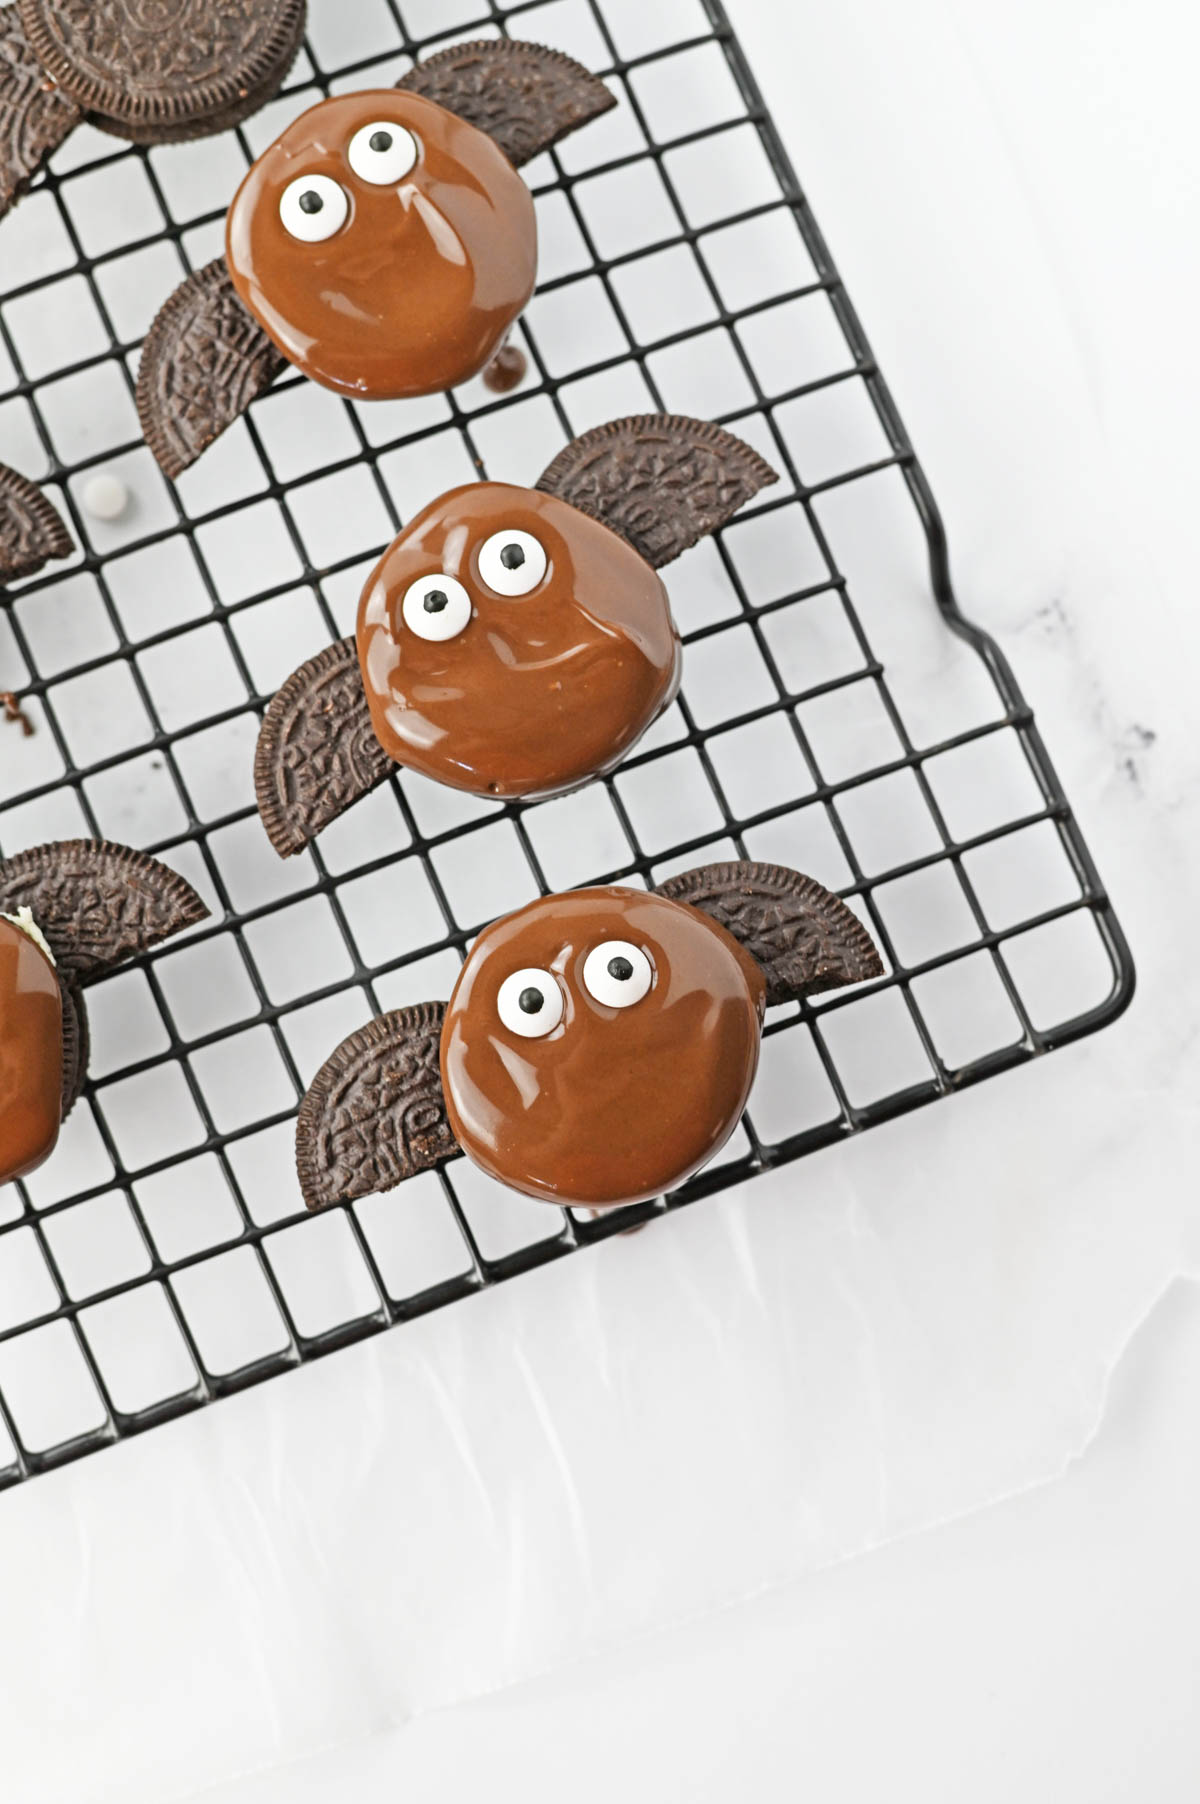
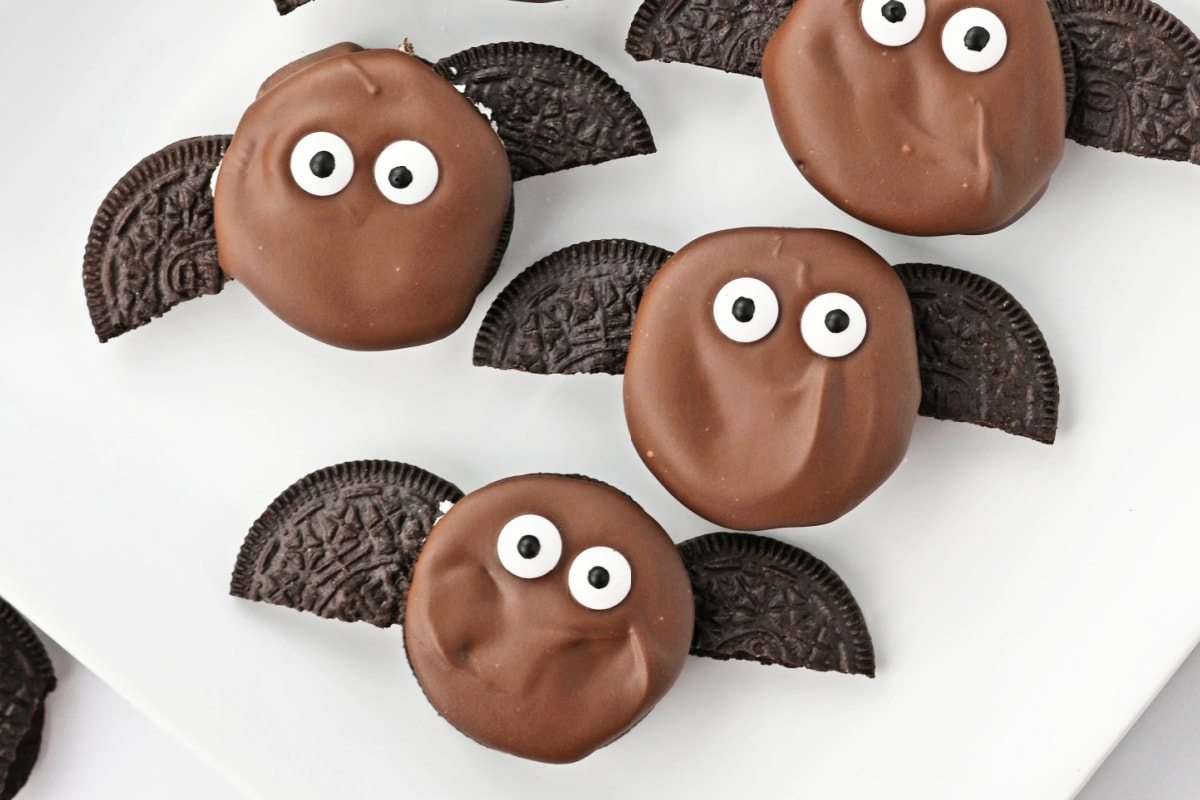
Step 9: Place two candy eyeballs into the melted chocolate. Repeat for all the bats and chill for 30 minutes to allow the chocolate to set. Serve and enjoy!
Tips & Tricks
- Make purple bats for a fun variation on this treat! You can use purple candy melts to get this color or color white chocolate with purple food coloring.
- When dividing the cookies in half, be sure to use a sharp knife, and use a back-and-forth sawing motion to cut. This will help ensure that they slice cleanly and don’t break into pieces.
- If you don’t have edible eyes, you can make the eyeballs yourself. Just use a tiny bit of Oreo cream filling and roll it into two small balls. Flatten it into a circle and place on the chocolate. Then place a mini chocolate chip in the center of the circle.
How Do I Store Oreo Bats?
Store these in an airtight container in the fridge for up to 5 days. If you’re going to have multiple layers, place a piece of parchment paper or wax paper in between each layer so they don’t stick.
Can I Use a Different Cookie?
Sure! Just about any type of round sandwich cookie will work.
More Halloween Recipe Ideas
- Halloween Puppy Chow
- Easy Halloween Donuts
- Mummy Rice Krispie Treats
- Halloween Poison Apples
- Candy Corn Cupcakes


Oreo Bats
Equipment
- mixing bowl
Ingredients
- 18 Oreo cookies
- 12 ounces dark chocolate candy melts
- 24 candy eyes
Instructions
- Remove the tops from 6 of the Oreos. Use a butter knife to scrape off the filling and reserve it for later. (You’ll need it to re-assemble the bats.)18 Oreo cookies
- Using a sharp knife, divide the cookie halves in half. You should have 24 cookie pieces to make the wings.
- Remove the tops from the remaining 12 Oreo cookies and separate them from the cookie sides with the filling. Lay the cookie halves with filling on a cutting board or parchment paper.
- Slide 2 “wings” (the cut cookie pieces from earlier) on each side of an Oreo cookie half that has filling still on it.
- Place a bit of the reserved filling on top.
- Press one of the Oreo halves without the filling on top to reassemble the cookie and seal on the wings. Place the cookies on a cooling rack.
- Place the chocolate melting wafers in a microwave safe bowl and heat in 30 second increments, stirring between, until melted and smooth.12 ounces dark chocolate candy melts
- Use a small spoon to drizzle the melted chocolate over the bat body, smoothing it out to cover the middle Oreo.
- Place two candy eyes into the melted chocolate. Repeat for all the bats and refrigerate for 30 minutes to allow the chocolate to set. Serve and enjoy!24 candy eyes
Notes
Nutrition
Did You Make This Recipe?
Share it with me on Instagram @funmoneymom and follow on Pinterest @funmoneymom for more!
Let’s be friends!
Did you love this post? Make sure to comment below and let me know your thoughts! And don’t forget to follow on your favorite social network below!

About Lisa O’Driscoll
Lisa O’Driscoll is a lifestyle and parenting expert, cookbook author, and the creative force behind Fun Money Mom, a popular blog she’s run since 2014. She’s the author of the children’s cookbook Roll It, Slice It, Mash It, Dice It, designed to get kids excited about cooking. With multiple TV appearances under her belt, she loves sharing her expertise on family-friendly recipes, creative DIYs, and party planning and is always on a mission to inspire and entertain!