
How To Create An Amazing Gnome Village
This post may contain affiliate links. As an Amazon Associate, I earn from qualifying purchases.
Want to create the best gnome village ever? With a few craft materials and a little creativity, you can have a fun little gnome home in your own back yard.

A few years ago, my girls and I bought my husband a couple of garden gnomes for Father’s Day (a little more original than a tie, right?). My oldest daughter had seen them online and decided that was what daddy needed most! He loved them, of course, and we set our new friends by the back door. The problem was that they kept getting moved around and we just couldn’t seem to find the perfect home for them.
Fast forward to the following year and my daughter wanted to buy another gnome for Father’s Day. I decided that if we were going to have an entire clan of them, our gnomes needed a permanent home and so the idea for our “Gnome Village” was born. I went online to see what I could find and was amazed at all the choices. This project was going to be fun!
[bctt tweet=”Want to make an adorable #gnome village for your #garden? All you need are a few craft materials and a little creativity! ” username=”FunMoneyMom”]
How To Create an Amazing Gnome Village
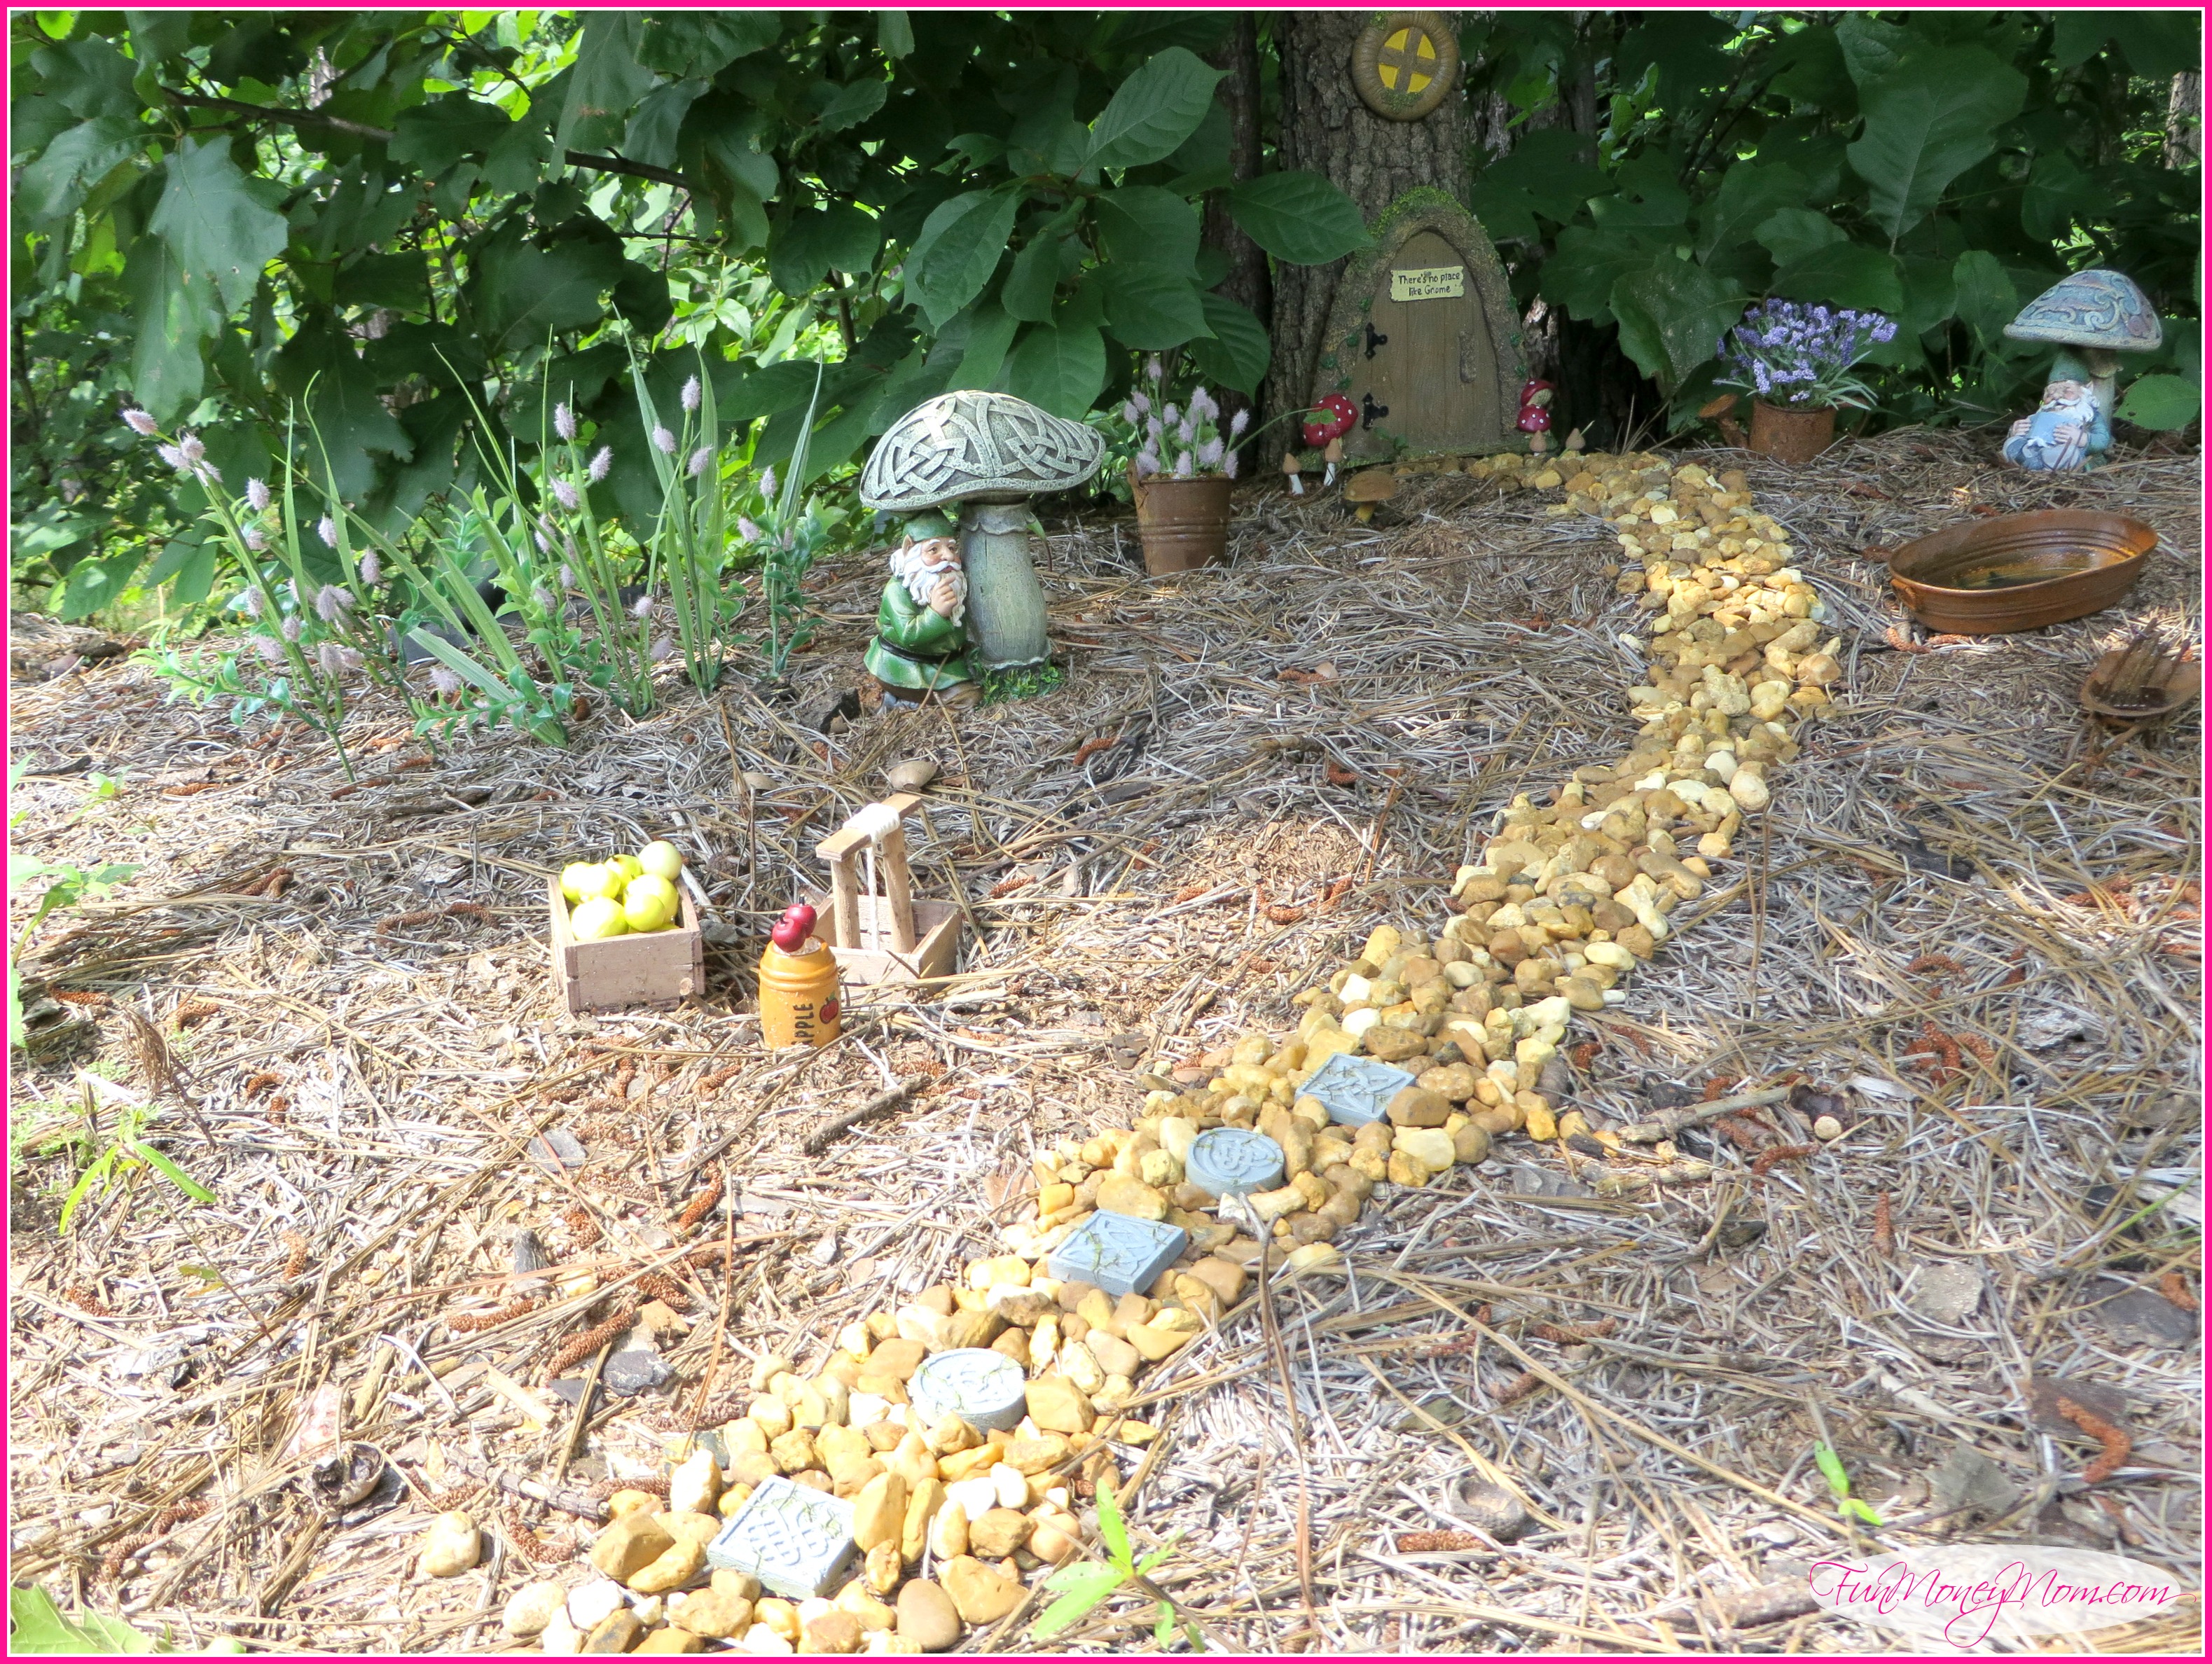
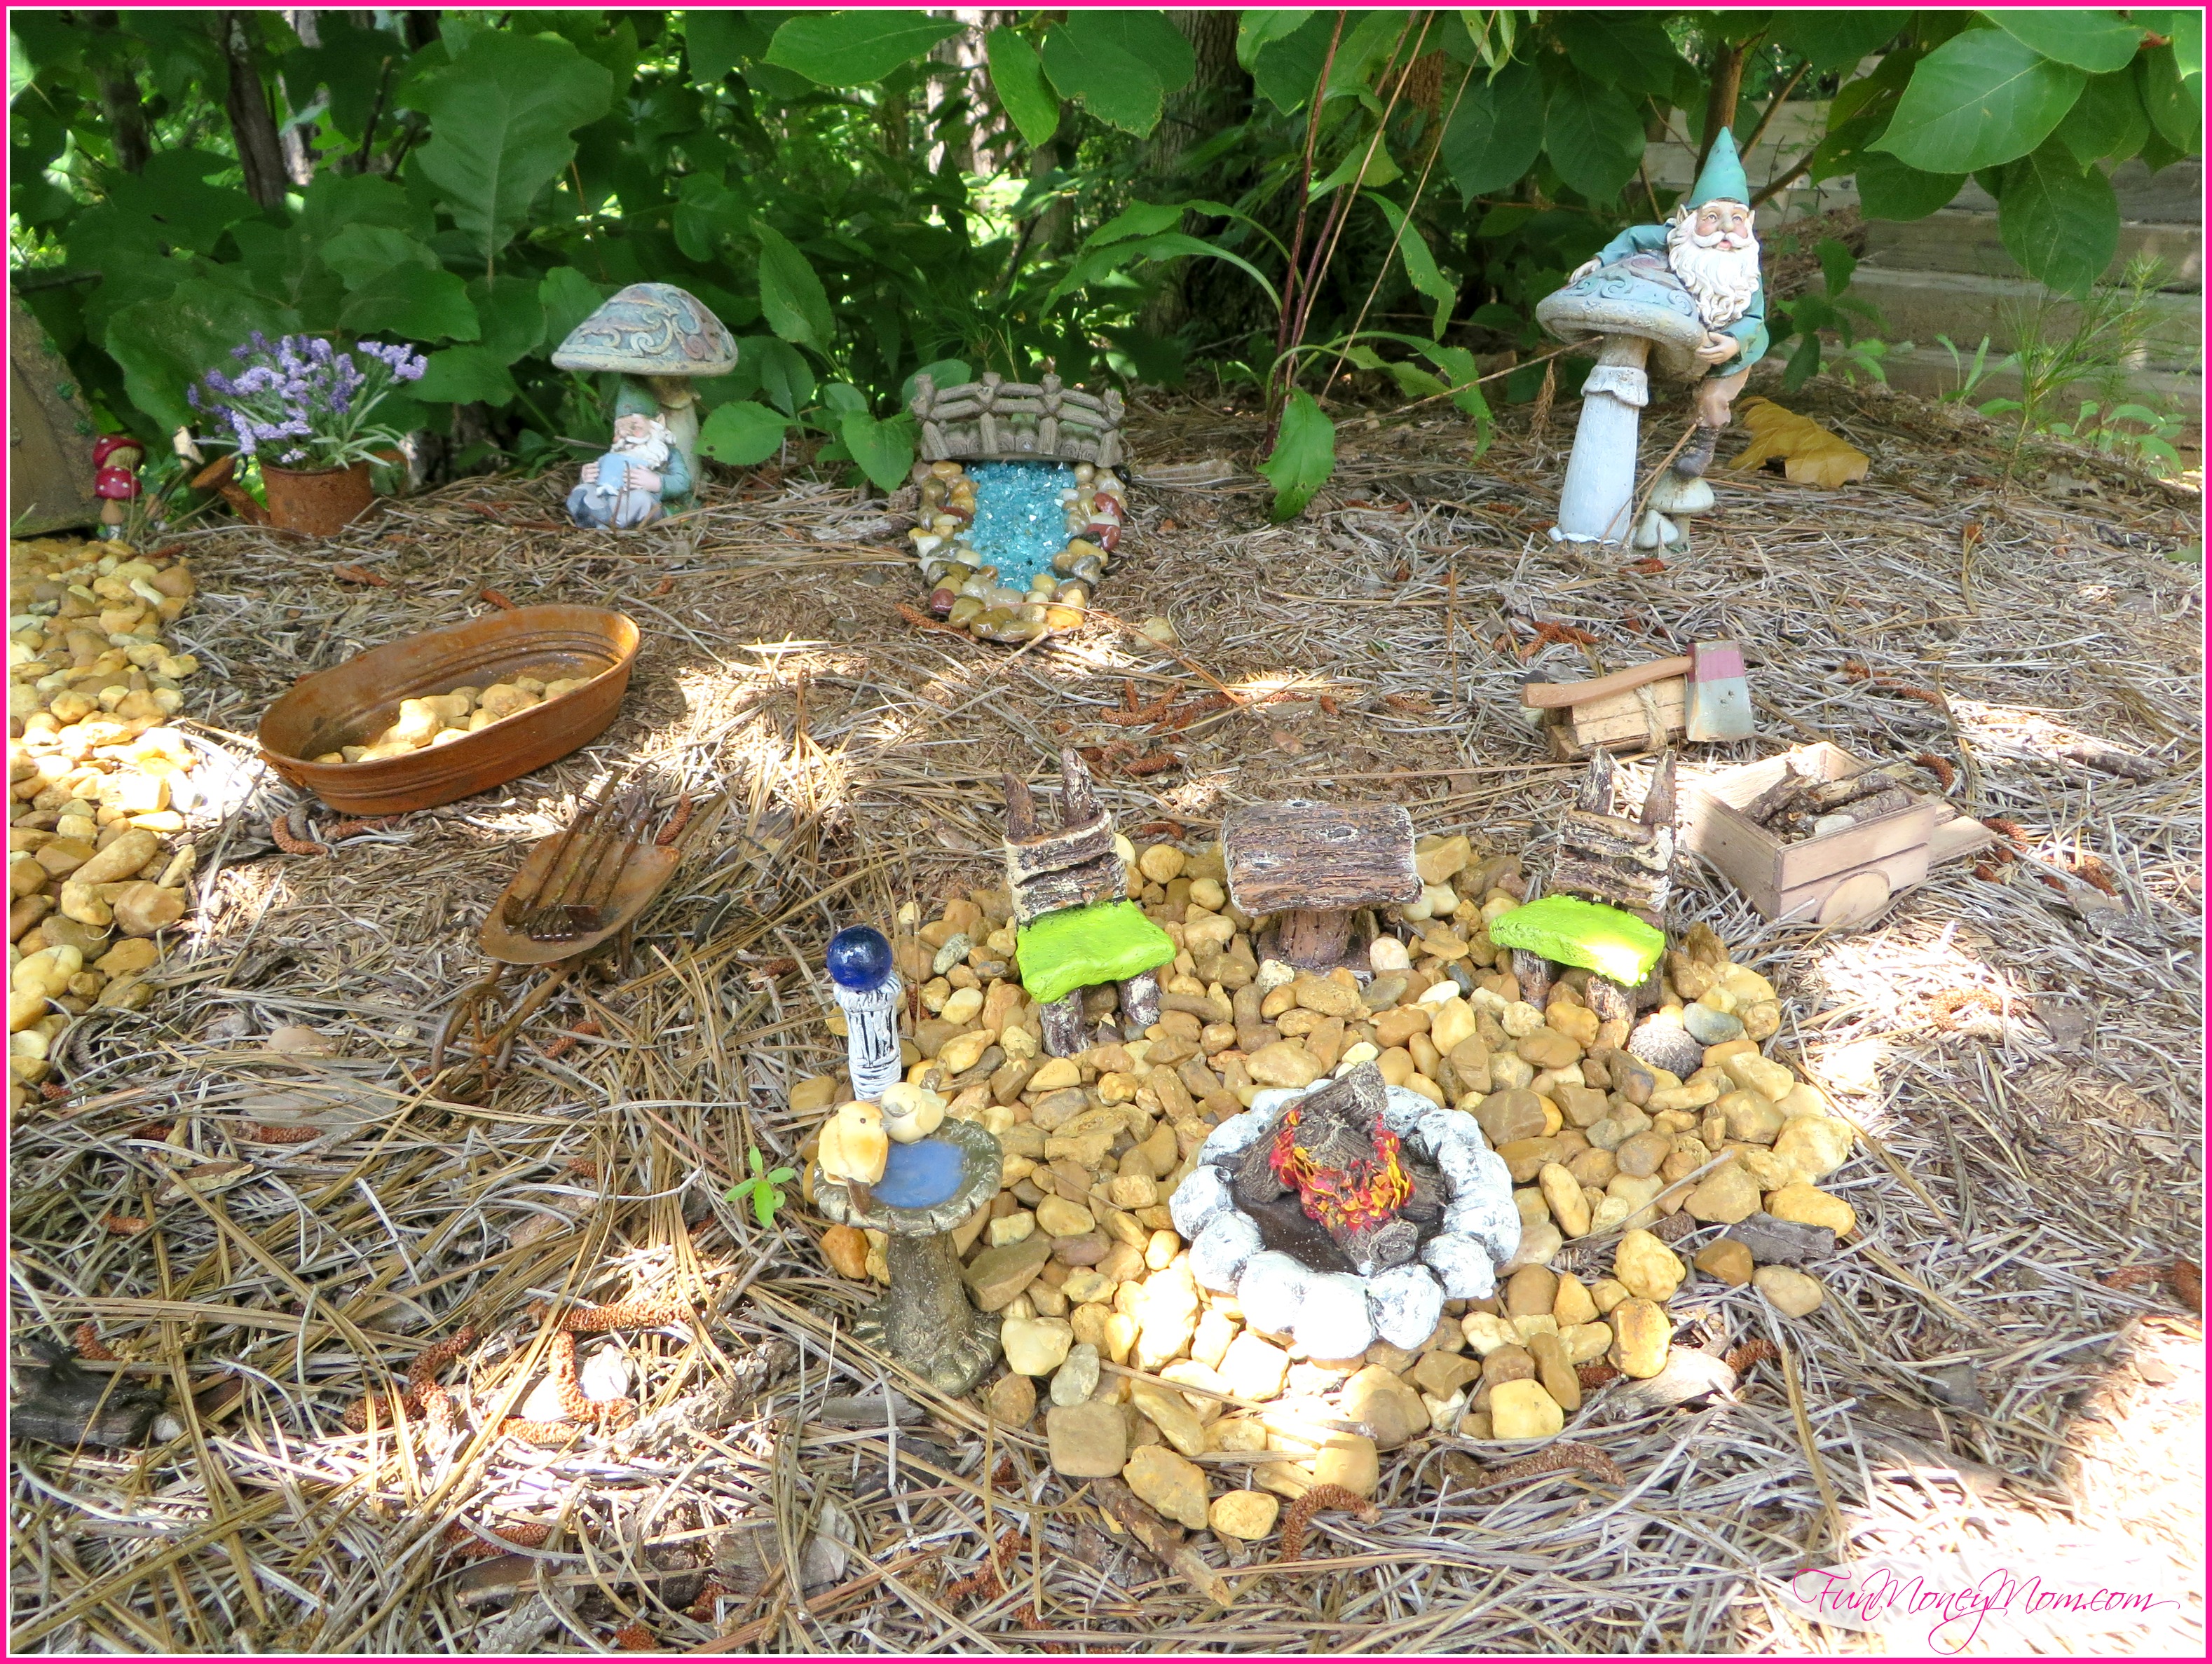
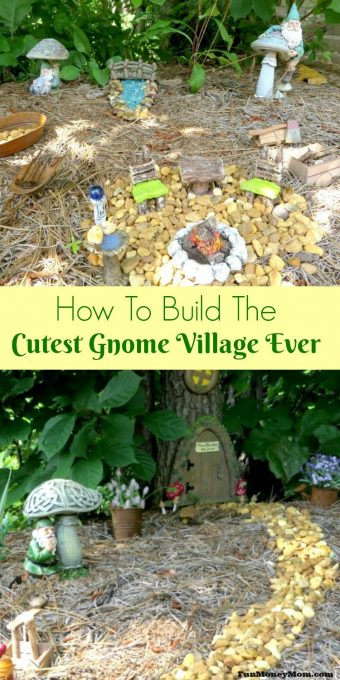
First we needed to pick the perfect location…we found a little spot in a wooded area of our backyard and got to work! Our gnomes were excited to finally have a permanent place to live! We even created an entire Gnome Garden for them.
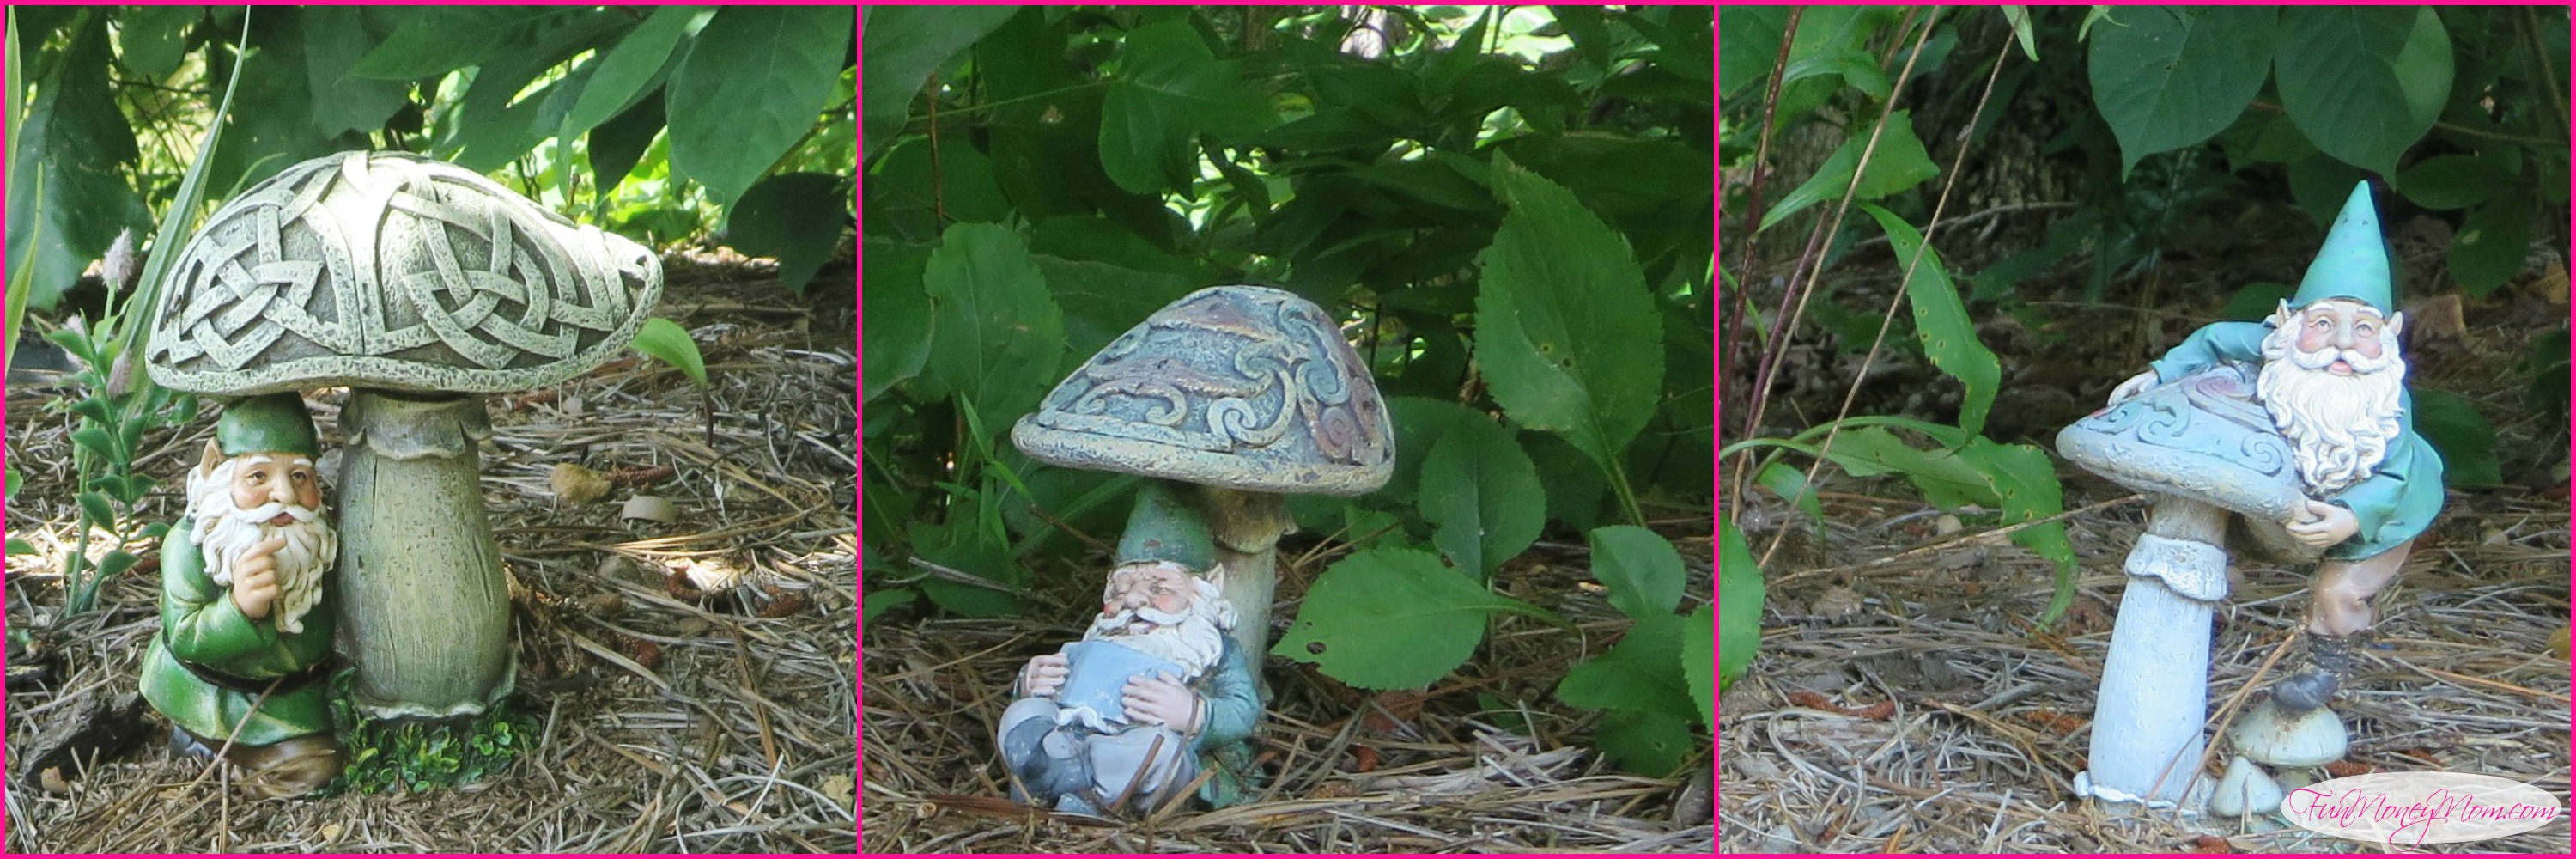
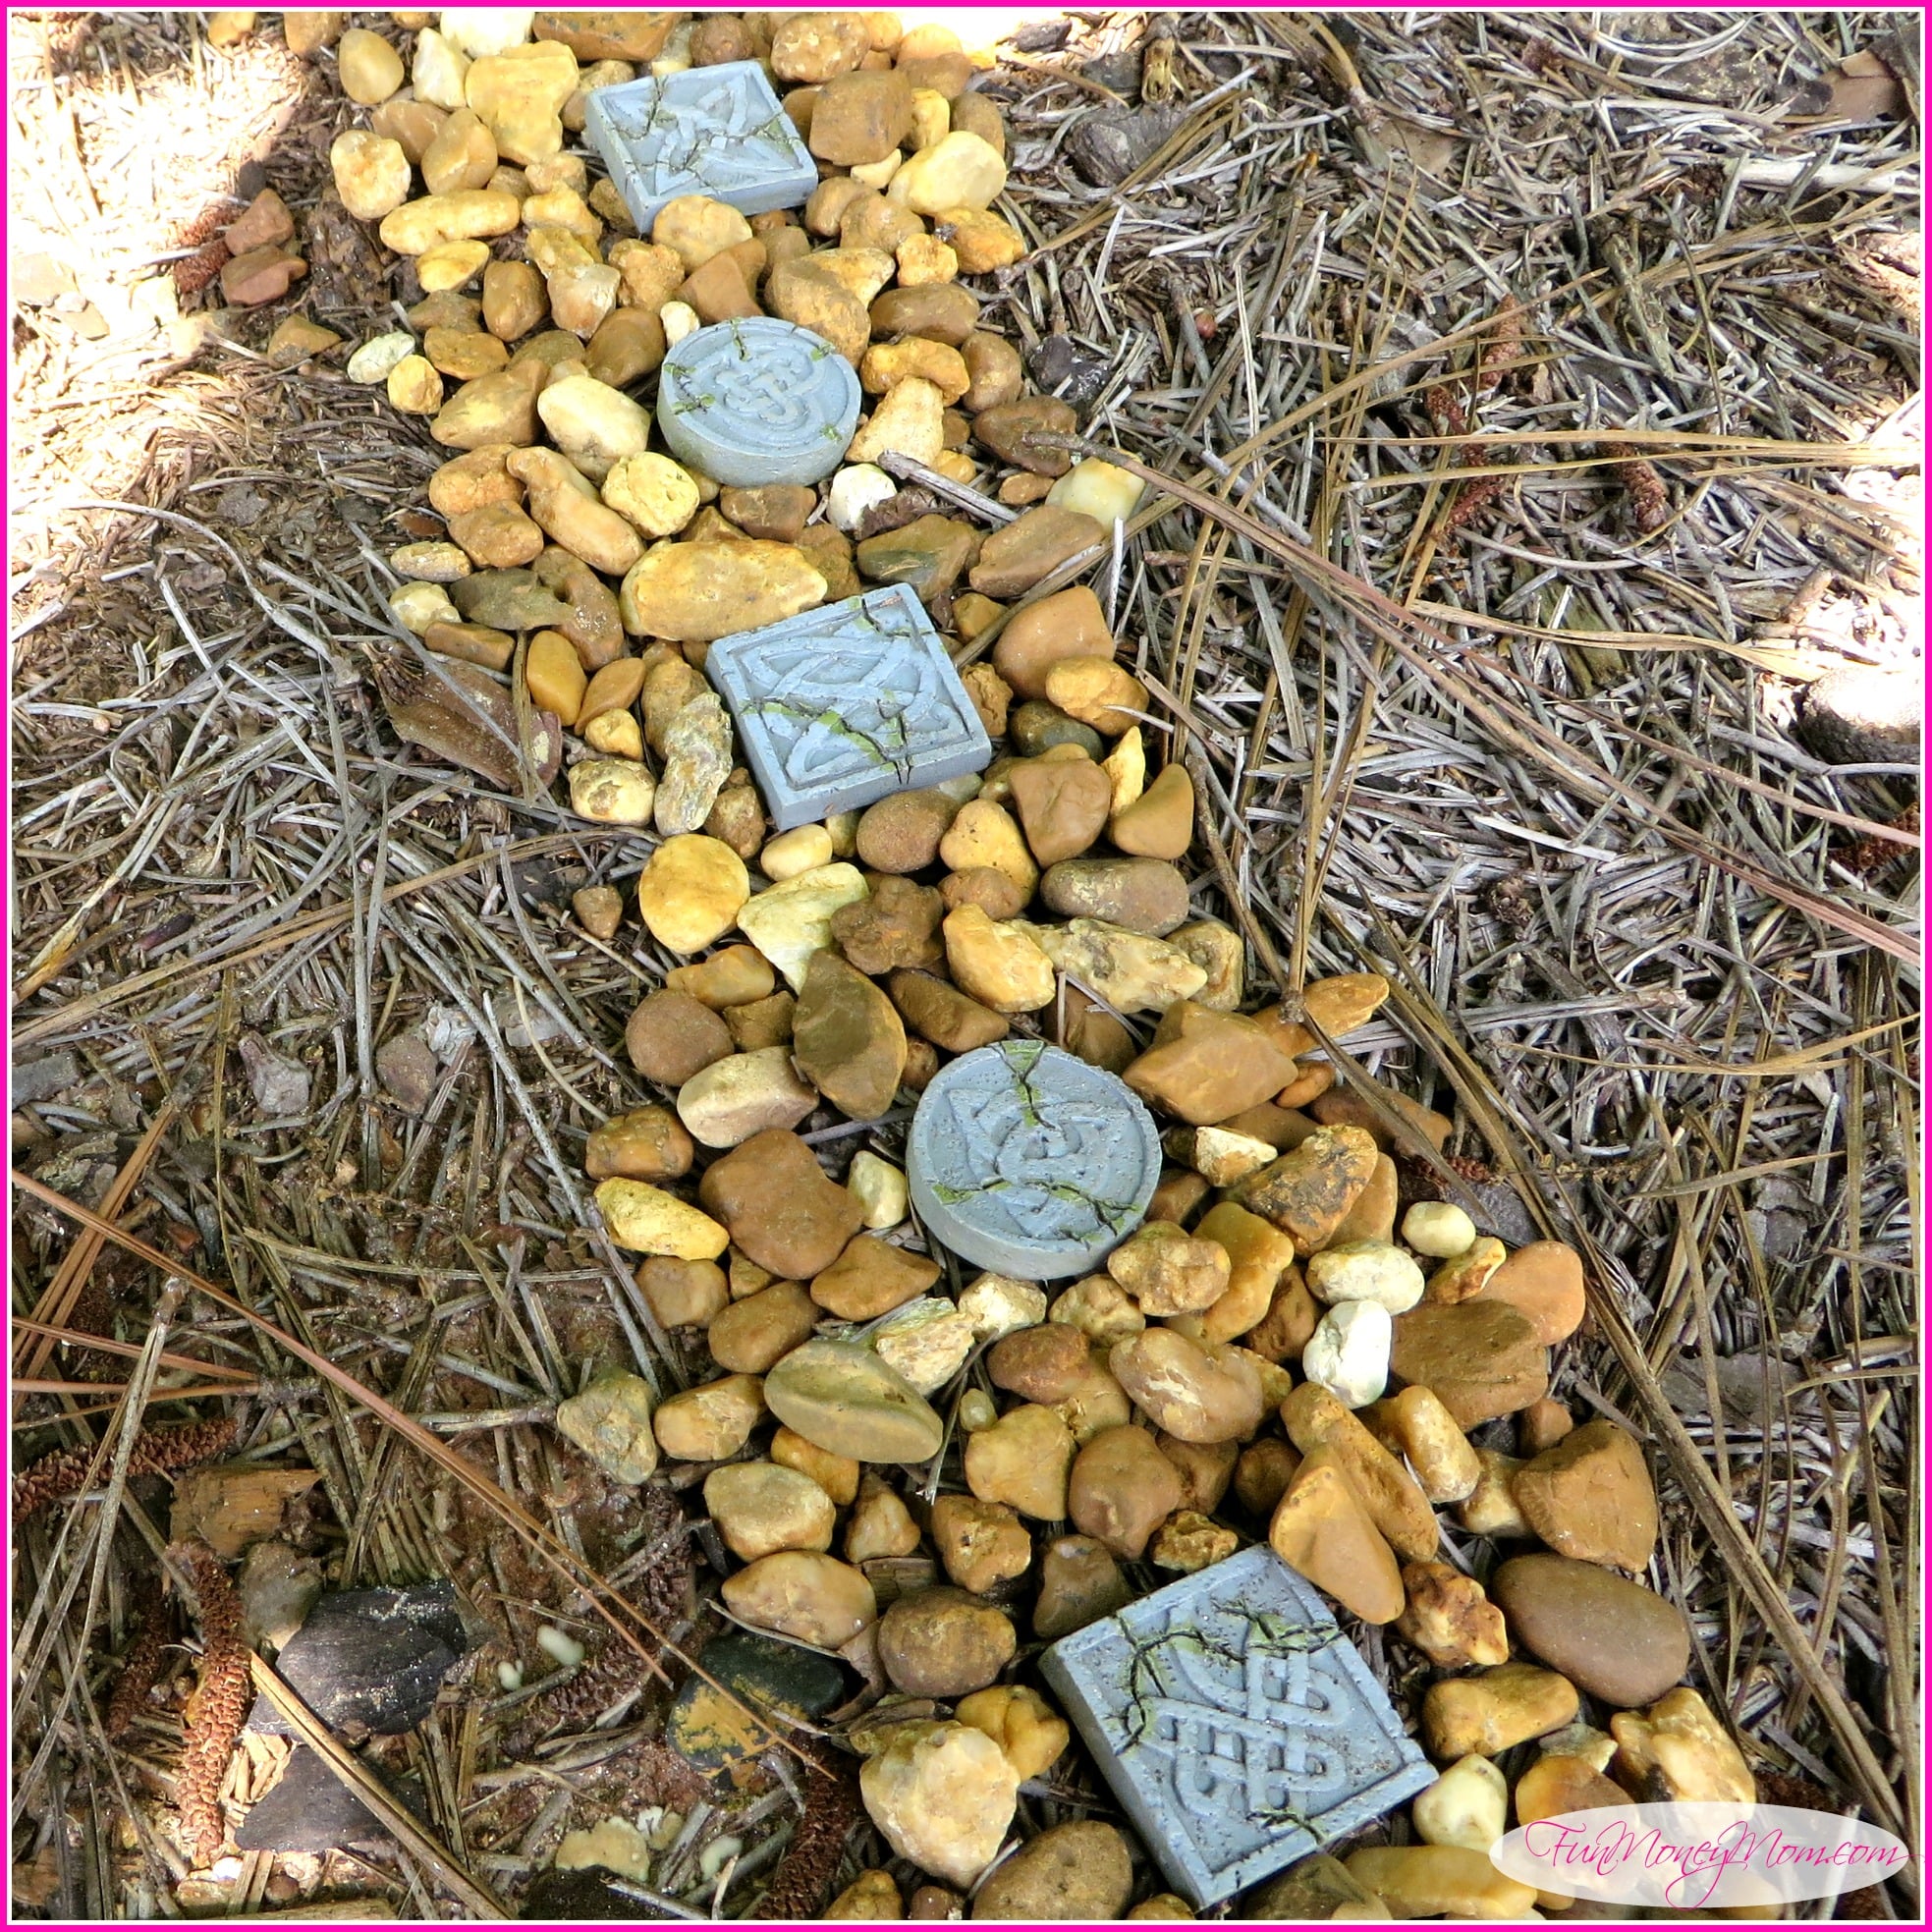
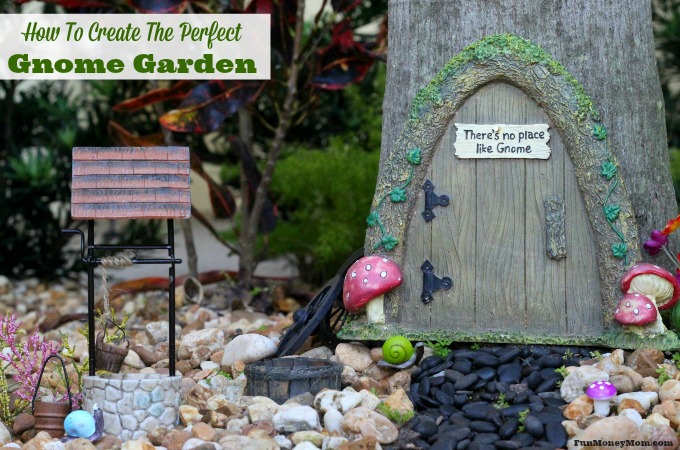
I wanted to buy everything I found online! There were so many cute things that I could have easily gone way over budget (and in a way I did, because then I decided we needed a fairy garden too). Somehow I managed to narrow down my selections and also planned to test out my crafty side and make a couple myself. First, I had to have this door/window set and the Irish stepping stones. The door and window attach right to the tree, though I had a little trouble getting the window straight. I was going to go back and fix it but then I figured that gnomes are pretty laid back creatures so they wouldn’t care!

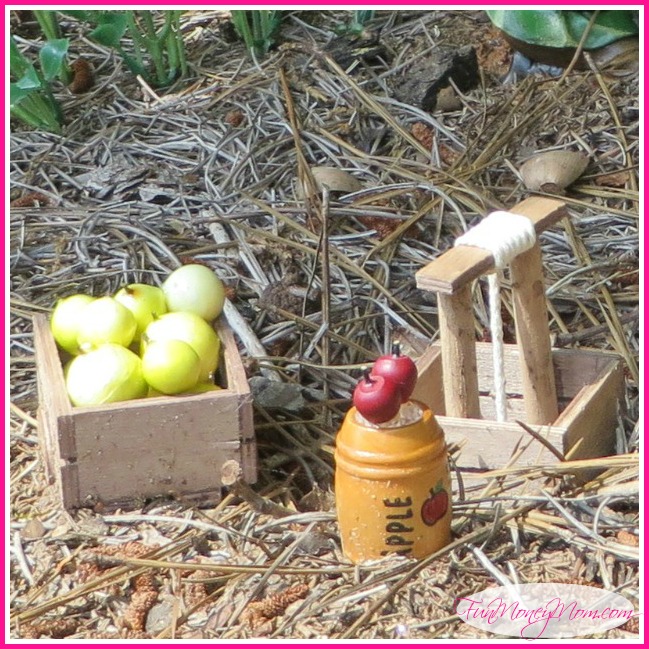
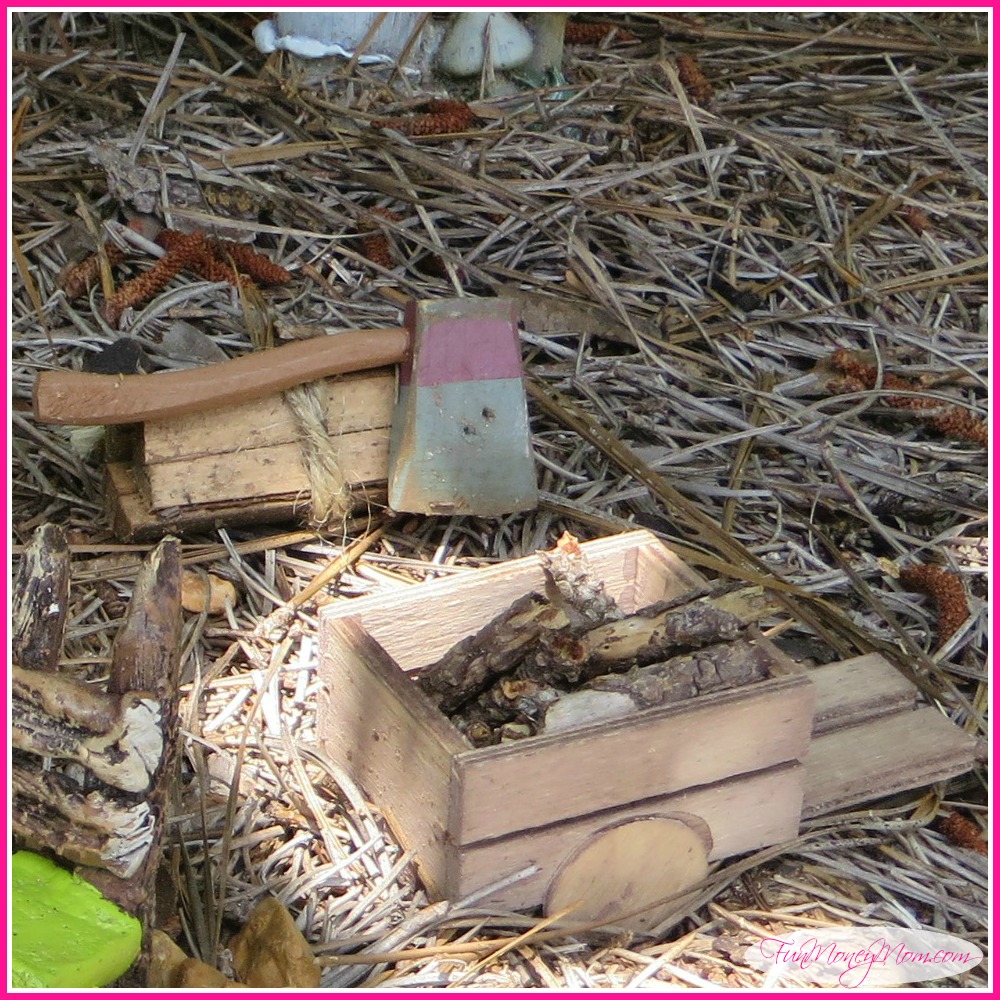
I thought these accessories were fun too. I found a sprig of yellow-green berries at Michaels and added some “apples” to the wooden box. I also love the little wheelbarrow. What I didn’t realize is that these wooden pieces weren’t really meant for outdoors and were falling apart by the end of the summer. It actually added a little charm so I left them but I would probably buy something more weather resistant next time (live and learn).
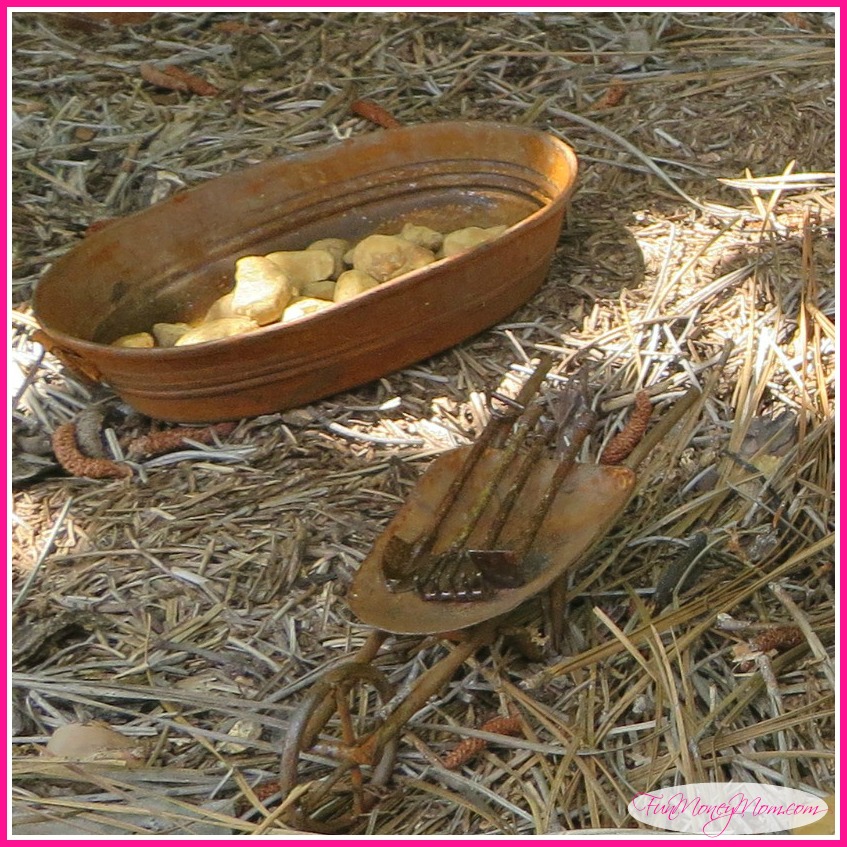
I had seen flowerpots online but wanted to try to make my own. I found these “rusted” containers and also bought modge podge for outdoors, fake flowers and a bag of small stones. I put the stones in a bowl and mixed them with a generous amount of the modge podge. Then I filled the containers and pushed the flowers in as far as I could. They turned out great and though I was worried about the fake flowers surviving the elements, they’ve held up well. They were fairly well shaded so I think that helped to keep the color from fading.

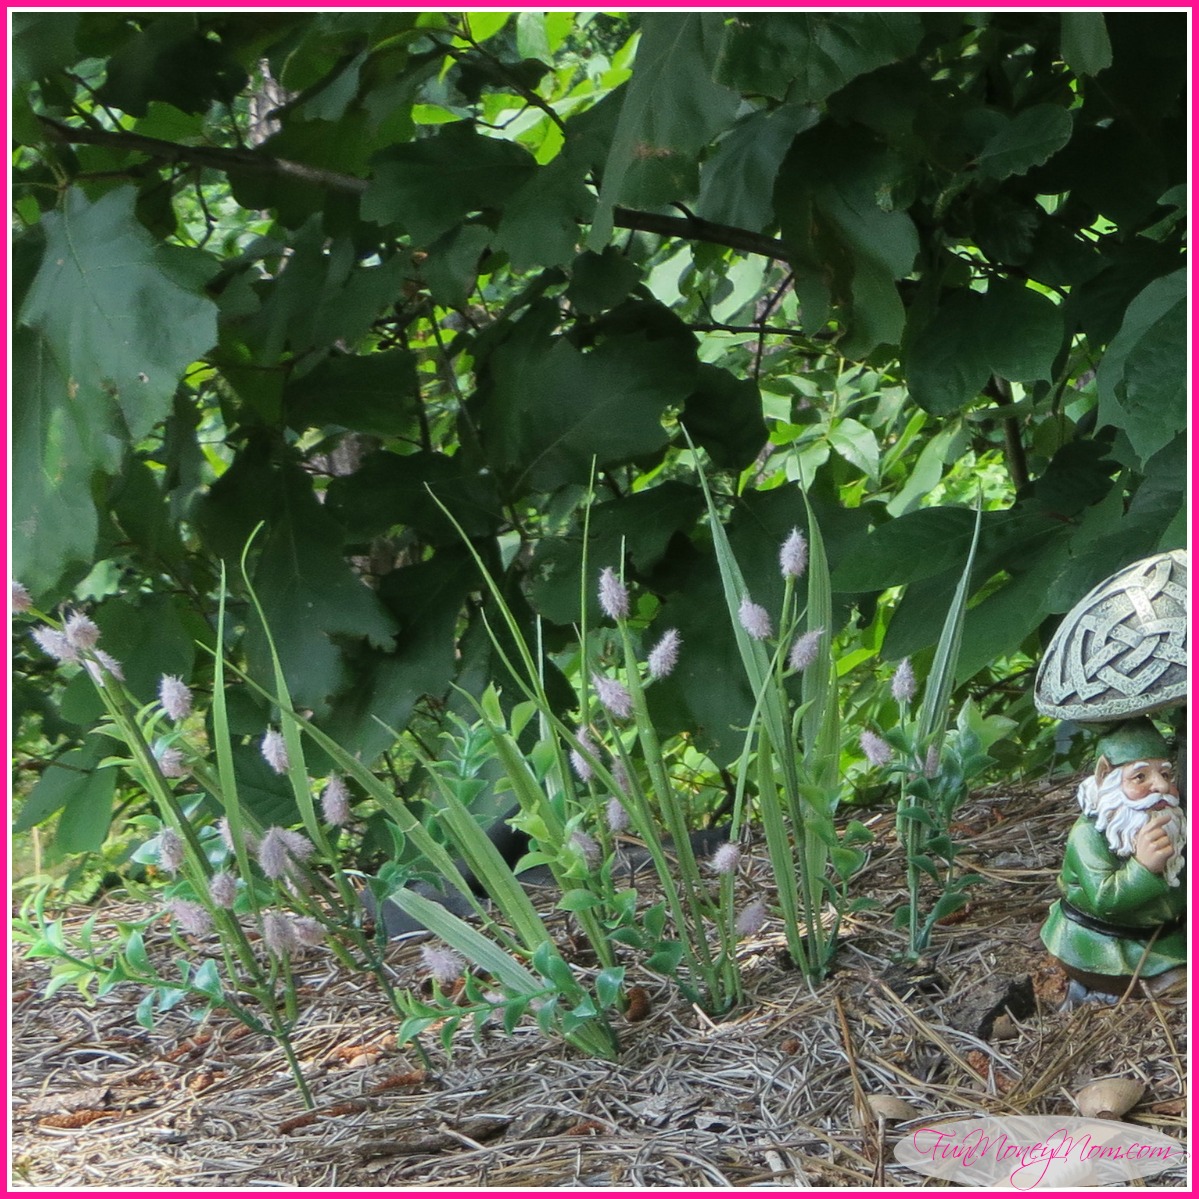
I had a few little sprigs left over so I just stuck them in the ground behind one of the gnomes…
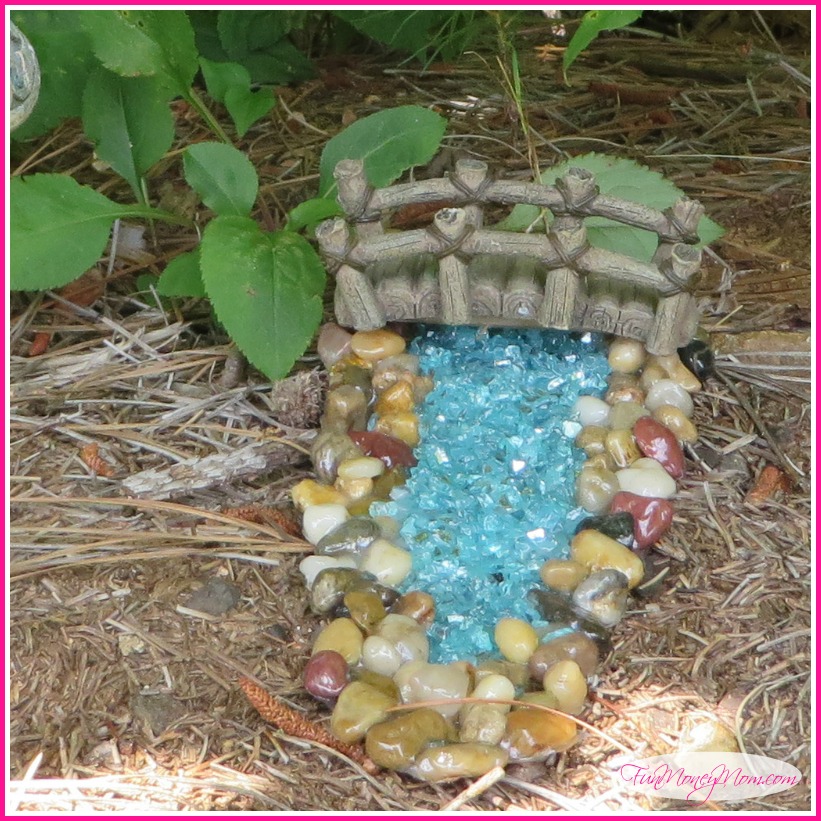
I had seen some pretty ponds and rivers online but they were all too pricey for my so I decided to try making my own. I’m so glad I did because it was fun and I think they turned out pretty cool! Again, modge podge outdoors was my main ingredient. I bought some medium sized stones and mixed them with the modge podge. I put a piece of wax paper down and laid the stones over it in the shape that I wanted. I let it dry overnight, then mixed the glass pieces with more modge podge and poured them inside the stone setting. I pushed the glass pieces firmly against the stone so it would all stick together nicely. It took a few days to dry completely, then I added it to the village and added a bridge.
After a few more finishing touches, it was ready! All we had to do was wait for daddy to come home from work and surprise him. I don’t know who was more excited…me or the girls! He definitely thought it was cooler than a tie!


However, the story doesn’t end here! When I was looking up all the things that I needed for my Gnome Village, I found even more sites devoted to Fairy Gardens. I think you can guess what happened next. Our gnomes needed some friends, right?
Where to find everything you need for your gnome village
If you’d like to create your own gnome garden, you can follow these links to find some of the things pictured. A couple of these items are slightly cheaper elsewhere but since I ordered everything at once, I just used Amazon for almost everything. It’s easier and the shipping costs won’t add up. There were a couple items that are no longer available so I found some that were similar. I also found items similar to the wooden ones that fell apart. I haven’t tested these but they seem to be more weatherproof.
Garden gnomes (While the gnomes we bought are no longer available, there are plenty to choose from online)
Stepping Stones
Wheelbarrows & Gardening Tools
More fun gnome village accessories
You can also find some good stuff in the Fairy Garden Accessories
If you can’t find what you’re looking for, you can always just google Gnome Garden or Fairy Garden. There are a lot of fun things you can add to make your village your own (I’m still planning to buy the mini mugs of beer…I know my gnomes are getting thirsty)!
*Note: As you check out all the cute accessories for your gnomes, remember to look at the sizes. Some items can be teeny tiny and you don’t want to get a tiny chair that looks funny next to your “normal” sized gnome.
Let’s be friends!
Did you love this post? Make sure to comment below and let me know your thoughts! And don’t forget to follow on your favorite social network below!

About Lisa O’Driscoll
Lisa O’Driscoll is a lifestyle and parenting expert, cookbook author, and the creative force behind Fun Money Mom, a popular blog she’s run since 2014. She’s the author of the children’s cookbook Roll It, Slice It, Mash It, Dice It, designed to get kids excited about cooking. With multiple TV appearances under her belt, she loves sharing her expertise on family-friendly recipes, creative DIYs, and party planning and is always on a mission to inspire and entertain!


I love your gnome village! I’ve always wanted to do something like that bit haven’t yet.
You should do it…it’s so much fun 🙂
Thanks for checking it out!
xoxo
Lisa
This is one of the cutest things that I have ever seen! 🙂 So So creative!!
Cathy
Thanks so much…it was really fun to work on!
I’m so glad you stopped by!
xoxo
Lisa
This looks like such a fun place just to sit, but I love that it means so much to your family. Thank you for linking up with us at the Thank Goodness It’s Thursday party!
Thank you! We really did love it but we’ve since moved into a new house so I have to find a new home for our little guys 🙂
xoxo
Lisa
So pretty!
Thank you so much 🙂
I have these little guys all over my front yard! Now I just might have to make them a home. I loved this, just loved it. Thanks so much for sharing. Can’t wait to see their new home.
Thank you so much! If you make a home for yours, you’ll definitely have to share 🙂
I’m so glad you stopped by today!
xoxo
Lisa
LOVE this! So adorable and inspiring! Thanks for sharing!
Thank you so much! It was fun to do!
xoxo
Lisa
I love gnome villages. My favorite is your bridge. I have a gnome Pinterest board that’s getting a couple more pins!!
Saw your post at Sunday’s Best.
Kristine 🙂
I’ll have to head over and check out your board. I love seeing how other people do their gnome villages and fairy gardens! Thanks so much for visiting!
xoxo
Lisa
I love this! You included tons of great detail pieces. I recently made a fairy garden in a an old bird bath and used a few similar pieces and had a lot of fun putting it together. Thanks for sharing your gnome village on Snickerdoodle Sunday.
Thanks…it really was a lot of fun to create! I’ll bet your bird bath fairy garden was adorable!
xoxo
Lisa
I love seeing these gnome villages! You are so creative! Thank you for sharing with us at the Brag About It Link Party!
~Laurie
Thanks so much…it was really fun to create! Thanks for hosting a great party!
xoxo
Lisa
What an adorable village. I love it! Thanks for sharing with Small Victories Sunday linkup and hope you join us again this weekend. Pinned to our linkup board.
What a cute idea, Lisa! I never thought of make a gnome village. Looks like it was much fun to create, and it turned out great~
I came over on Shine today, and I’m glad to find your blog. I also followed you on Pinterest and pinned your photo here: https://www.pinterest.com/melredd/blog-link-parties-and-blog-link-ups/
Hope you have a blessed day today~
Melanie
Thanks so much…it really was a lot of fun to create! I’m so glad you stopped by today!
xoxo
Lisa
How adorable!
Thank you so much 🙂
Oh my goodness, is this ever fun and whimsical! I love it! So many neat ideas and I love the teeny, tiny door!
Thanks for sharing (and for linking up to the #SHINEbloghop).
Wishing you a lovely weekend.
xoxo
Thank you so much…I always love linking up with your blog hop! I hope you have a wonderful weekend as well!
xoxo
Lisa
so totally cool!! I love the little gnomes out there having a party under the trees 🙂 You see fairy gardens everywhere but I think this is the first gnome one ever! Love all the details, hints and tips. What an awesome surprise for dad too. I can’t wait to see the fairy garden! Thanks for linking to Snickerdoodle!
Thanks so much! It was a lot of fun to create and I can’t wait to pull them out again now that we’re in our new house. Thanks for hosting such a fun link party!
xoxo
Lisa
I’m loving this! Pinned and tweeted! I always love your creations, thanks for sharing this with us! I hope to see you tonight at 7 pm. Lou Lou Girls
Ok wow that is the cutest thing I have seen all week! Stopping in from Turn It Up Tues!
Such a fun corner of the yard. It is indeed a nice change from the traditional tie gift. Love it! Thanks for sharing at the Summer Family Fun party.
Thanks! It’s always hard to think of something but we all really loved this gift!
xoxo
Lisa
This is precious! I know my girls would love to have one of these little villages! I’ll have to work on that! 🙂 Thanks for sharing at Waiting on…Wednesday! I hope you’ll link up with us again!
Holly @ http://www.iwillservewhileiwait.blogspot.com
This is so adorable! I love making fairy gardens with my kids too. I pinned this to refer to for more great ideas. Love it!
Glad i saw your post on the Turn it Up Tuesday blog hop! Congrats on the Feature!
Cheers!
Shana from Technotini.com
Thank you so much! I’m sure your kids really love the fairy gardens…it’s such a fun project to do together!
Thanks so much for visiting!
xoxo
Lisa
Love this! I saw these fairy gardens on a taping on a Toronto TV show a couple of months ago. I’ve been dying to try one in my own backyard…I just need to do it without my husband’s knowledge 😉