
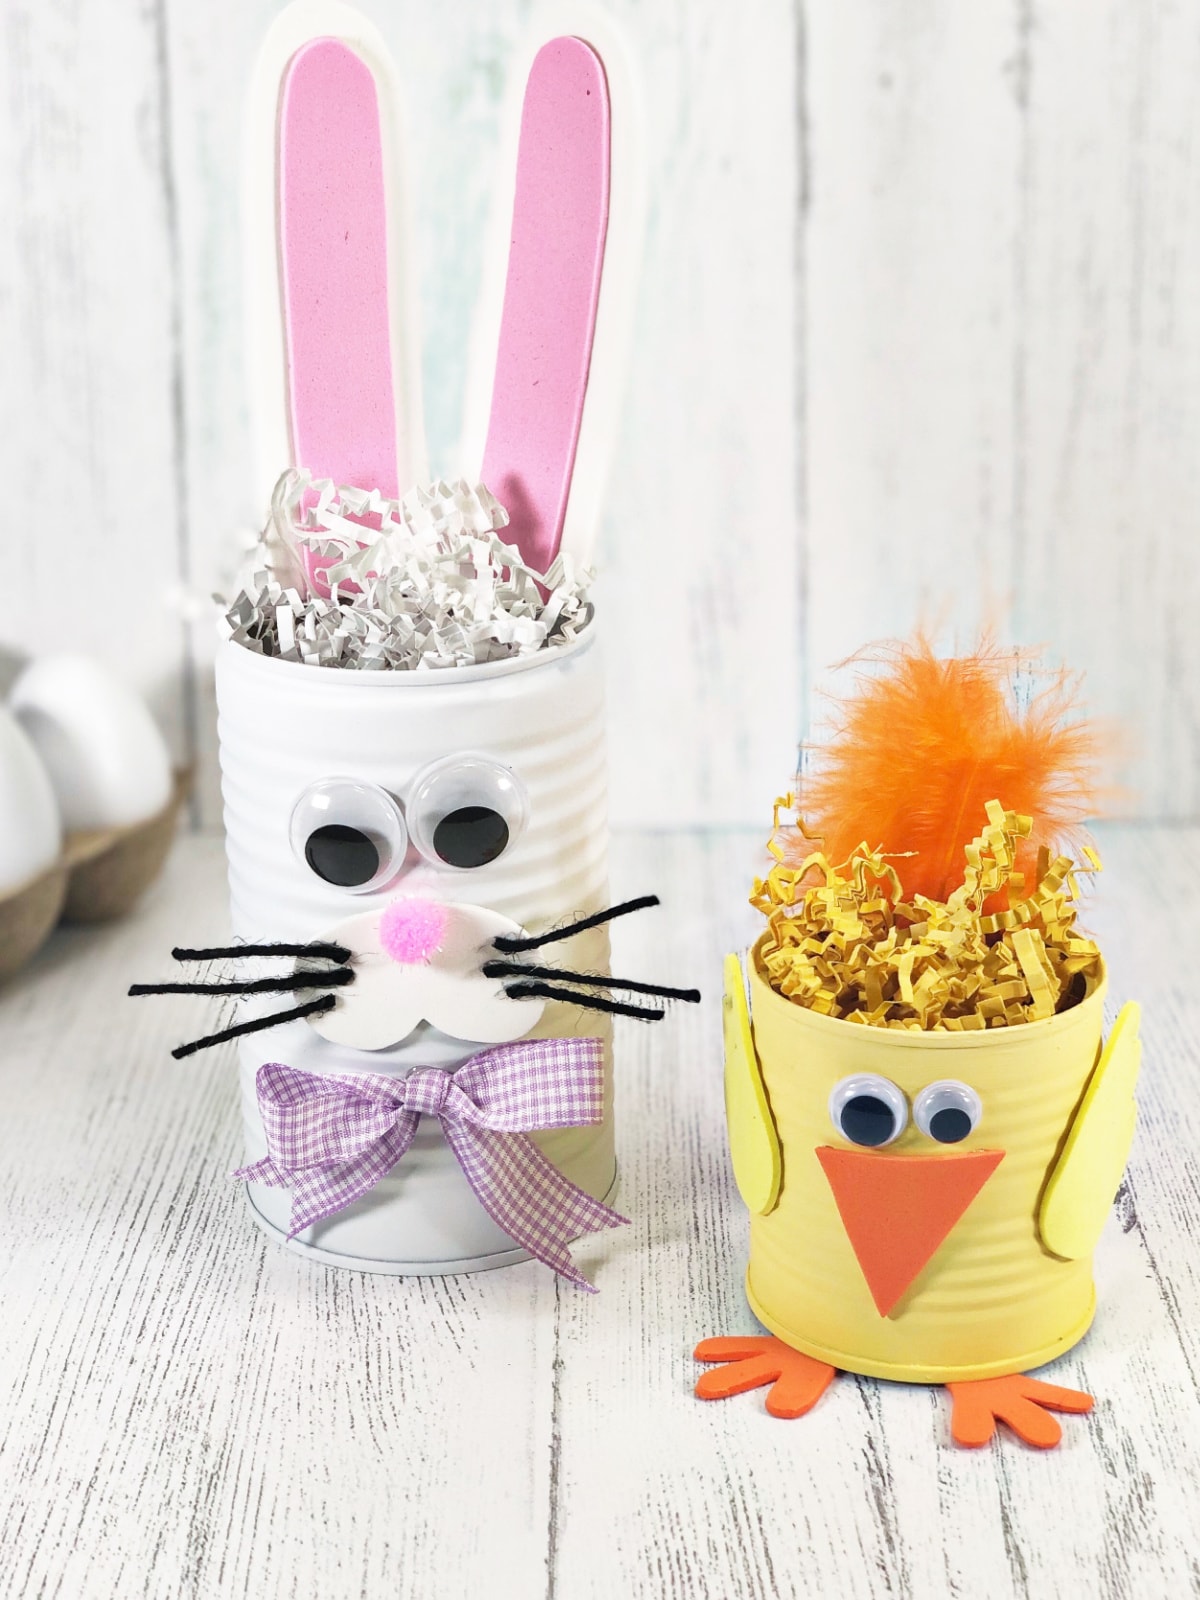
Bunny And Chick Tin Can Easter Crafts
This post may contain affiliate links. As an Amazon Associate, I earn from qualifying purchases.
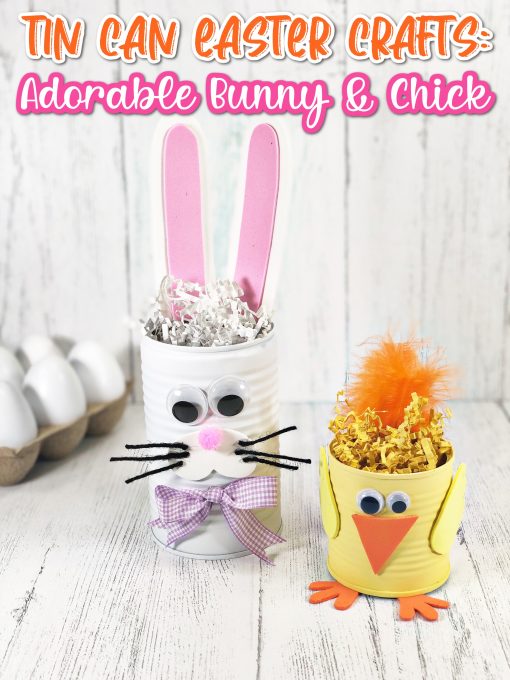
These tin can Easter crafts make an awesome craft for kids of all ages. Just grab some cans out of recycling and they can make their very own bunny and chick crafts for the holidays!
I love getting crafty for the holidays but for Easter, we’re usually pretty focused on the Easter egg decorating! We made everything from unicorn Easter eggs to marbled eggs with nail polish.
Tin Can Easter Crafts
This year we’re going rogue! Instead of more eggs, I’ve got these super cute tin can Easter crafts. They’re very easy to make so kids of all ages will love them. Plus, the materials are budget friendly and easy to find at dollar stores or craft stores (though I did link to Amazon if you prefer shopping the easy way).
So grab the kids and a couple of tin cans and get a little crafty for Easter!
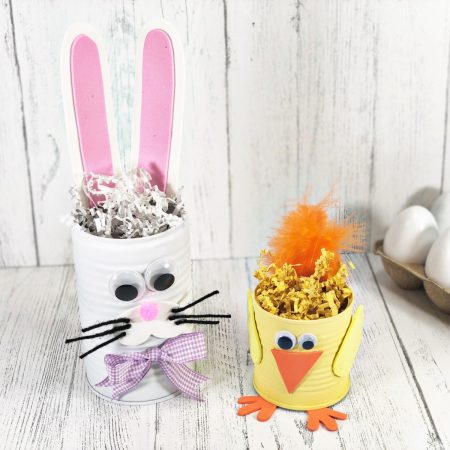
Bunny And Chick Tin Can Easter Crafts
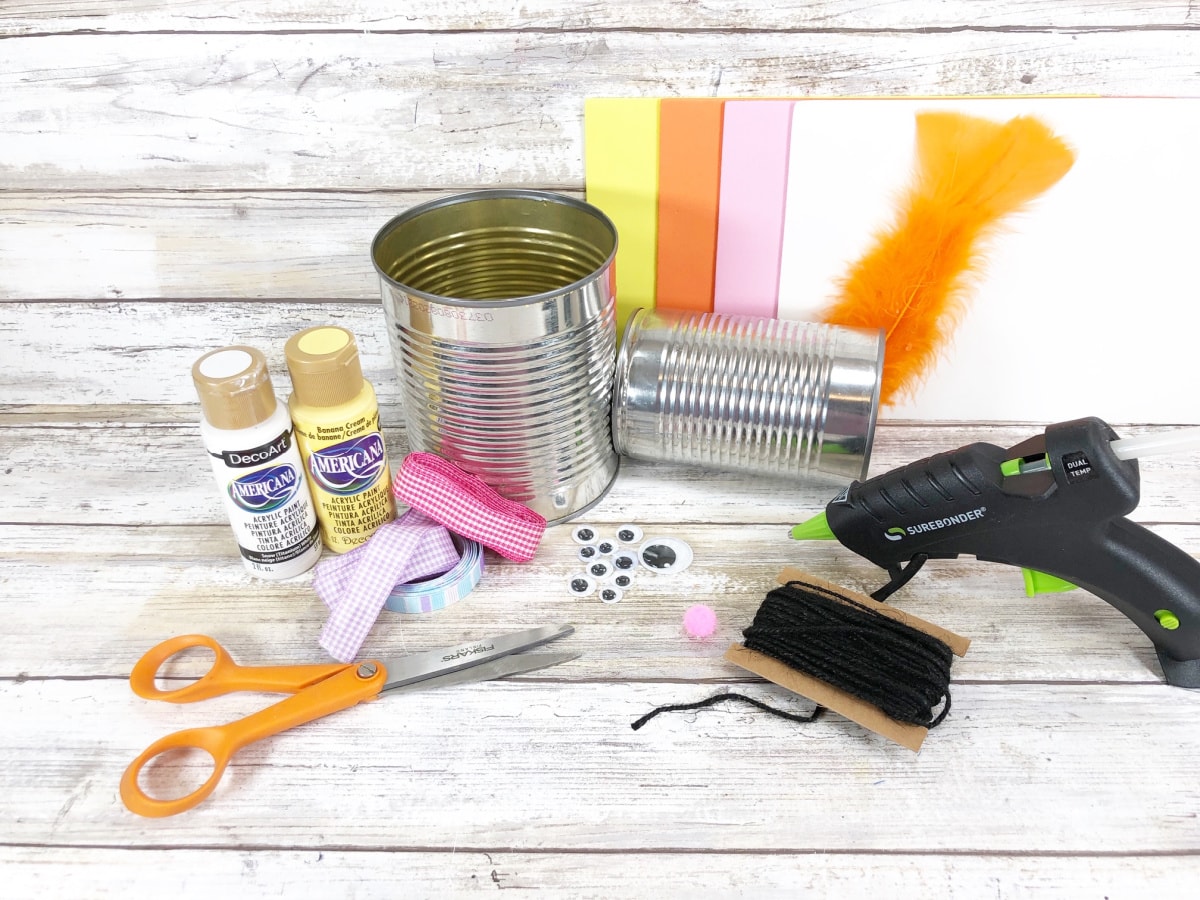
Materials
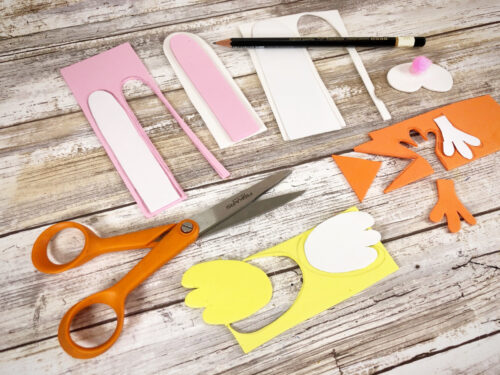
- Bunny and chick template for tracing
- One large soup can and a smaller veggie can
- Yellow acrylic craft paint
- White acrylic craft paint
- Craft foam: pink yellow, orange, white
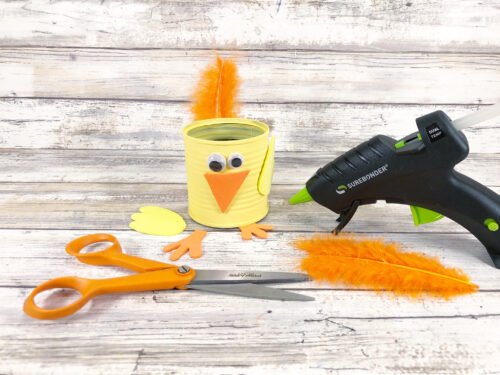
- 2 orange craft feathers
- Four wiggly eyes
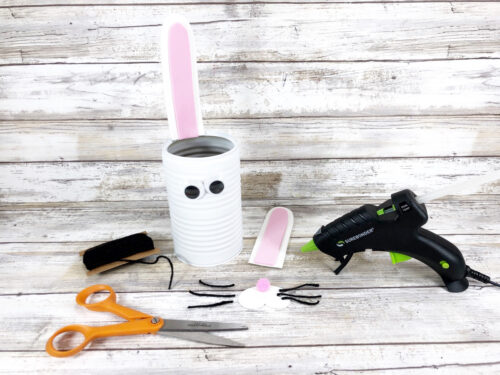
- Black twine you can also substitute black craft foam
- 3/8 ” ribbon any color you prefer…ours is gingham
- 1 pink pom pom
- White shredded paper
- Yellow shredded paper
Instructions
- Wash and dry your metal cans and add a basecoat of white acrylic paint to the bottom, outside and inside edge of both cans. Let dry (if necessary, apply a second coat).

- Add a coat of yellow acrylic paint to the smaller can. Set aside to dry.
- Print the bunny and chick template. Trace chick feet and beak patterns onto orange craft foam and the wings onto yellow craft foam. Next, trace the bunny ears and muzzle onto white craft foam. Finally, trace the inside of the bunny years onto pink craft foam. Cut out all of the pieces.
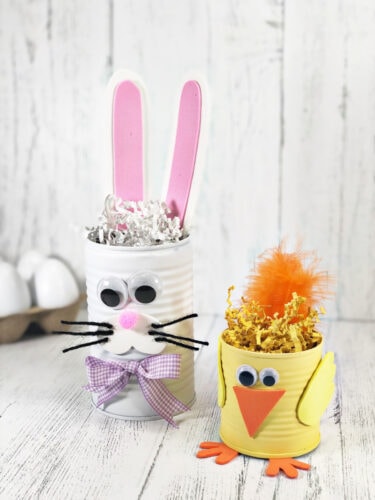
- Measure and cut six pieces of the black twine into one inch long whiskers (you can also use black craft foam for this step)3/. Using a glue gun to attach the whiskers and pom pom nose to the bunny muzzle. Add the muzzle and wiggly eyes to the white can. Attach the pink part of the bunny ears to the white and glue to the top edge of the can.
- Now take your glue gun and glue the wiggly eyes and beak to the can. Attach an orange feather to the back of the can. Glue the wings to the sides of the chick and the feet on the bottom. Finally add an orange feather to the back of the can. (You’ll also add another feather directly in front of it, as seen in the image following this one).
- Tie your ribbon into a bow, using scissors to cut triangular notches into the ends. Attach the bow under the bunny’s muzzle with your glue gun.
- For your finishing touch, fill the bunny can with shredded white paper and the chick can with shredded yellow paper. You can also add candy, small Easter toys or anything else you like.


Notes
Did You Make This Project?
Share it with me on Instagram @funmoneymom and follow on Pinterest @funmoneymom for more!
More Easter Fun
Want more fun Easter ideas? Check these out…
Rice Krispie Treat Easter Eggs
Let’s be friends!
Did you love this post? Make sure to comment below and let me know your thoughts! And don’t forget to follow on your favorite social network below!

About Lisa O’Driscoll
Lisa O’Driscoll is a lifestyle and parenting expert, cookbook author, and the creative force behind Fun Money Mom, a popular blog she’s run since 2014. She’s the author of the children’s cookbook Roll It, Slice It, Mash It, Dice It, designed to get kids excited about cooking. With multiple TV appearances under her belt, she loves sharing her expertise on family-friendly recipes, creative DIYs, and party planning and is always on a mission to inspire and entertain!


I think my special education students will love these.
I hope they had so much fun with them!