
Easy DIY Photo Coasters
This post may contain affiliate links. As an Amazon Associate, I earn from qualifying purchases.
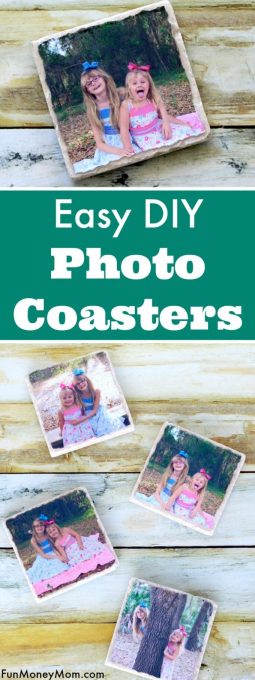
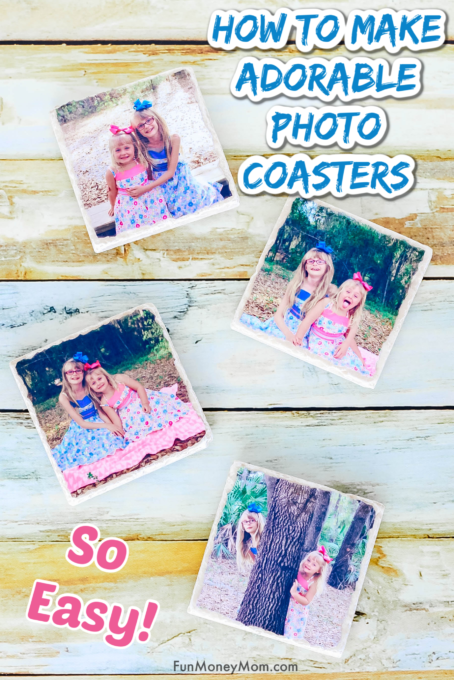
Looking for a great gift or just a fun way to display your photos? These DIY Tile Photo Coasters are both pretty and practical!
This post contains affiliate links
When I taught Kindergarten, we loved to make photo gifts for the parents. They were perfect for Christmas, Valentine’s Day, Mother’s Day and any other occasion when we needed a gift. One of my favorites were these photo coasters because not only were they cute, they were easy for the kids to make.
When I came across these photos of my girls in their fancy Easter dresses, I decided they were way too pretty to keep stashed away in a drawer. It was time to pull out the Modge Podge and get crafting! I loved making this craft so much that I even shared it on Sarasota’s Suncoast View…
Ready to make your own?
How To Make DIY Tile Photo Coasters
What you’ll need
4 – photos
4 – 4″x4″ tiles (see links below)
protective sealant (optional)
Start by finding four of your favorite 4×6 photographs.

You’ll also need four 4″x4″ tiles. They’ve gotten harder to find at the big hardware stores but I found mine at a flooring store. You can also find them on Amazon but you’ll pay more (however, you do get the convenience of having them delivered to your front door). Here are a few I liked: Turkish Crema Tile, Crema Marfil, Durango Cream and Walnut Travertine.
I like these stone ones and the price was right…$.52 each at Floor And Decor.

You’ll want to use a damp cloth to clean the tiles, then let them dry completely. Lay a dry tile over the top of your first picture and trace. Do the same for the other three pictures.

Once you’ve traced around the photo, you have two options. You can use scissors to give your photo a straight edge or you can tear along the lines to get more ragged edges. You also want to make sure that the photo is slightly smaller than the tile.

Paint the surface of the tile with Mod Podge.

Lay the picture over the top and smooth out any air bubbles.

It’s best to give it some time to dry completely but you can continue to the next step if you don’t want to wait. Next, paint over the top of the photo with more Mod Podge. If you didn’t give it time to dry, just be sure to hold the photo in place so that it doesn’t slide around.

Once the first coat dries, you can add a second one for extra protection and let them dry overnight. I also added a coat of sealant, even though the Mod Podge should be water resistant. I know there would probably be a spill or two, condensation and other liquids so I just like the extra layer. It’s totally up to you though.
Finally, you’ll want to use something on the bottom to keep the tile from scratching your table. I usually use little felt circles but just happened to have these rubber bumpers on hand this time.

Now you’re ready to enjoy your new coasters. I have to admit, this picture is my favorite! It kind of shows of both girl’s personalities. Keira is the silly, outgoing one and Ashling just kinds of hangs out in the background, entertained by her little sister’s antics!

These make such great gifts and I even made some for my mom awhile back. I learned a long time ago that I can give her anything with a picture of my girls on it and she’s happy! However, she loved these so much that she didn’t want to mess them up by putting drinks on them and uses them as decor instead. Even though I hadn’t initially thought of that, they really do look pretty as artwork!

What would you do with your tile photo coasters? Would you rest your drinks on them, use them as decor or give them away as a gift?
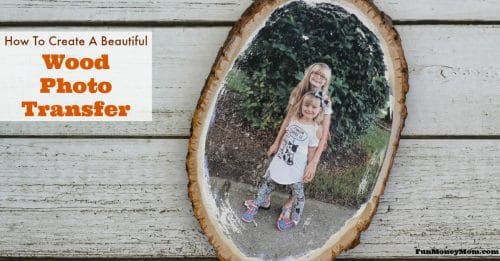
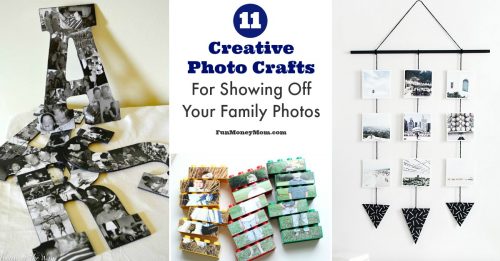
If you enjoyed this post, you may like these as well…

Let’s be friends!
Did you love this post? Make sure to comment below and let me know your thoughts! And don’t forget to follow on your favorite social network below!

About Lisa O’Driscoll
Lisa O’Driscoll is a lifestyle and parenting expert, cookbook author, and the creative force behind Fun Money Mom, a popular blog she’s run since 2014. She’s the author of the children’s cookbook Roll It, Slice It, Mash It, Dice It, designed to get kids excited about cooking. With multiple TV appearances under her belt, she loves sharing her expertise on family-friendly recipes, creative DIYs, and party planning and is always on a mission to inspire and entertain!


Hey
Can the coasters take cups with warm contents?
Thank you.
Hi Ann,
Yes, you can set warm mugs on the coasters 🙂
Do the photos need to be printed on photo paper or can they be printed on regular computer paper?
If you use regular computer paper, I would go very light on the first coat of Mod Podge so the ink doesn’t smear. I’m not sure it would but that’s just a precaution. Otherwise it should be totally fine. Have fun!
where did you find your tile squares? I have looked at lowes and home depot and they said they didn’t have any beside the glossy white ones. Thanks!
Hi Erin,
I had to go to a tile store (I think it was Floor and Decor) but you can also find them online at Amazon. They cost a little more but at least they’re delivered to your front door 🙂
There are several different ones so I’ll add the links to the post.
Hi,
I’m not a crafty person but I wanted to try this. I’m having a hard time finding tile so I’m wondering will this process work on wood coasters?
Hi Bethany,
I’m sorry for the delay in answering but yes, this will work on wood coasters as well 🙂
What kind of sealant did you use as your last step?
Mod Podge has a clear acrylic sealant that works great but any acrylic sealer will work.