Chocolate Christmas Mice
This post may contain affiliate links. As an Amazon Associate, I earn from qualifying purchases.
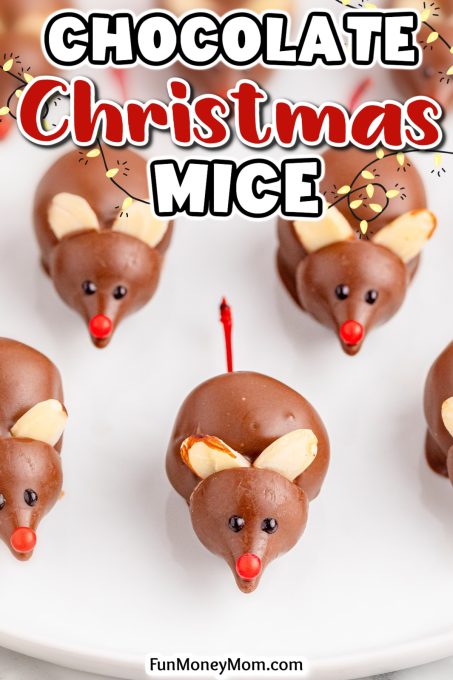
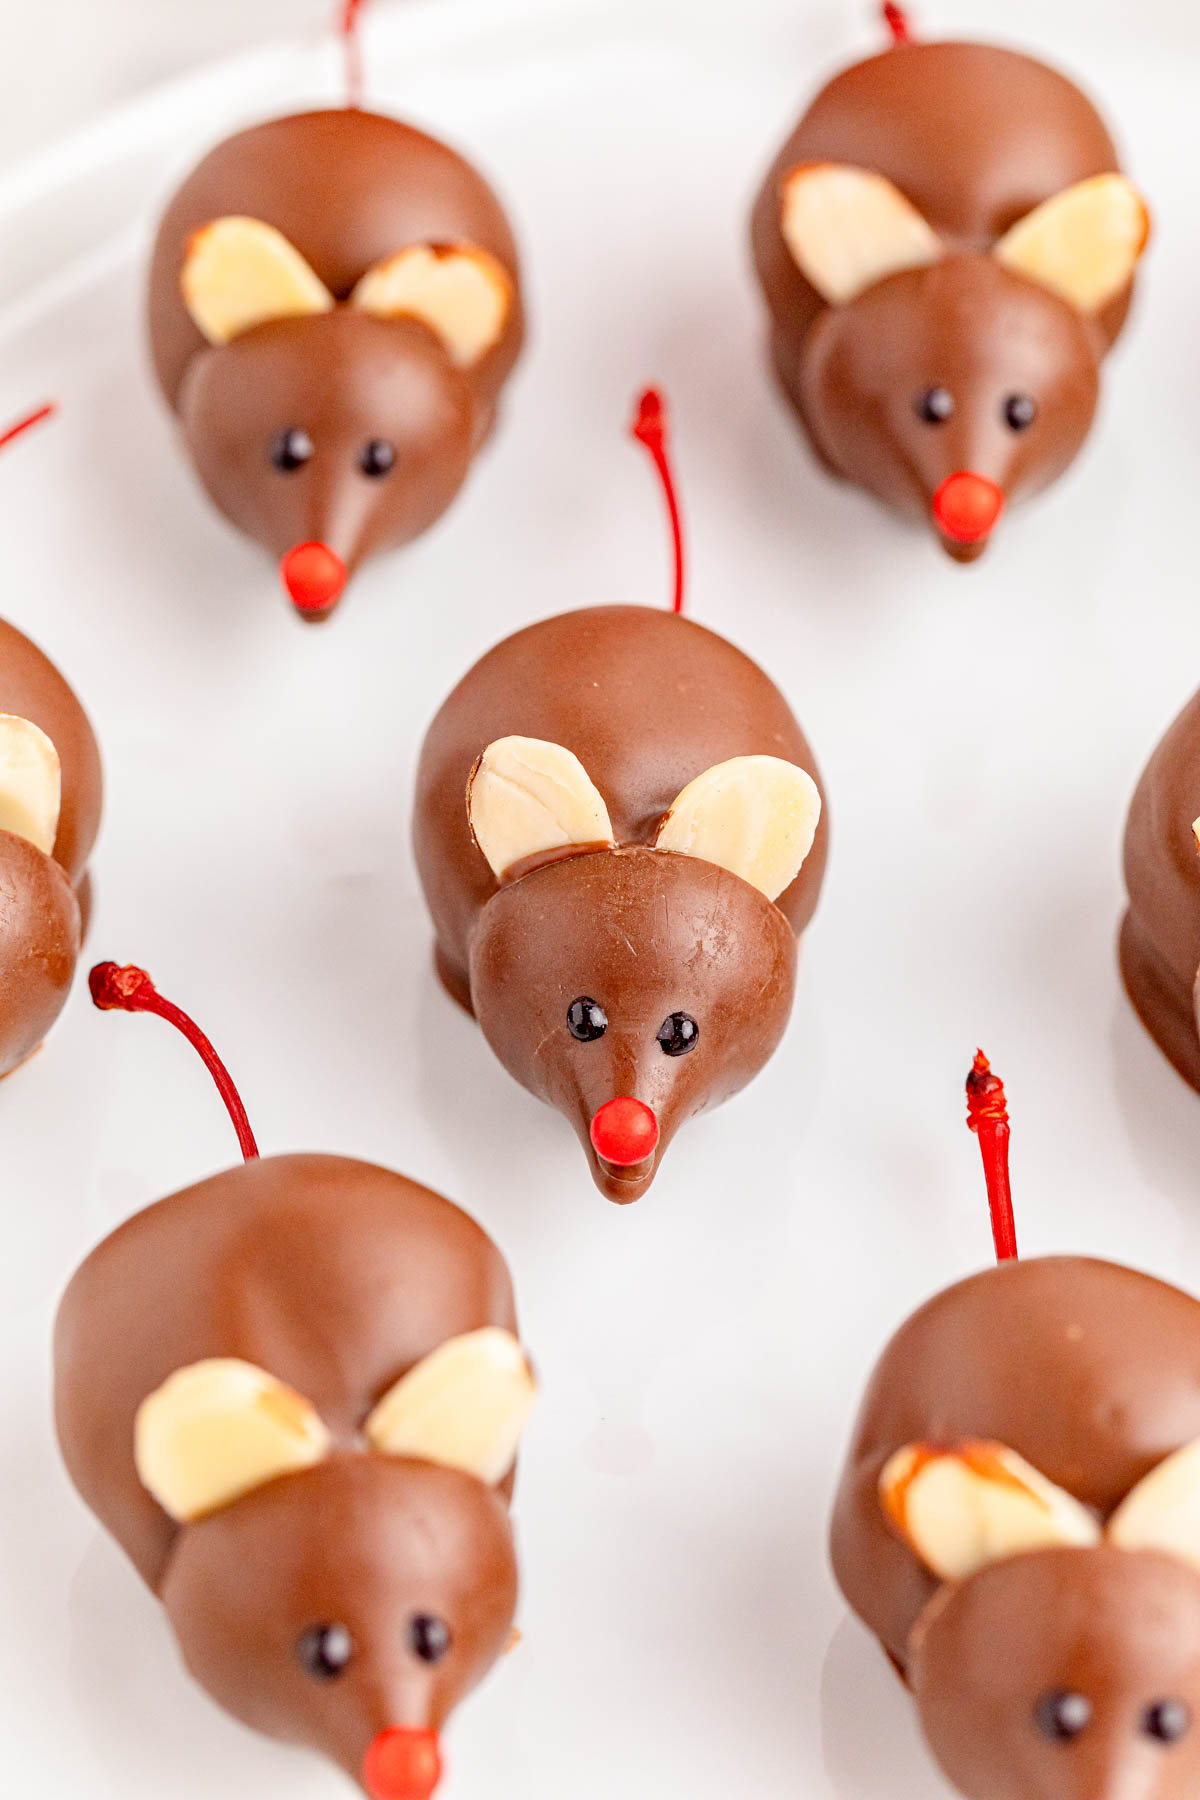
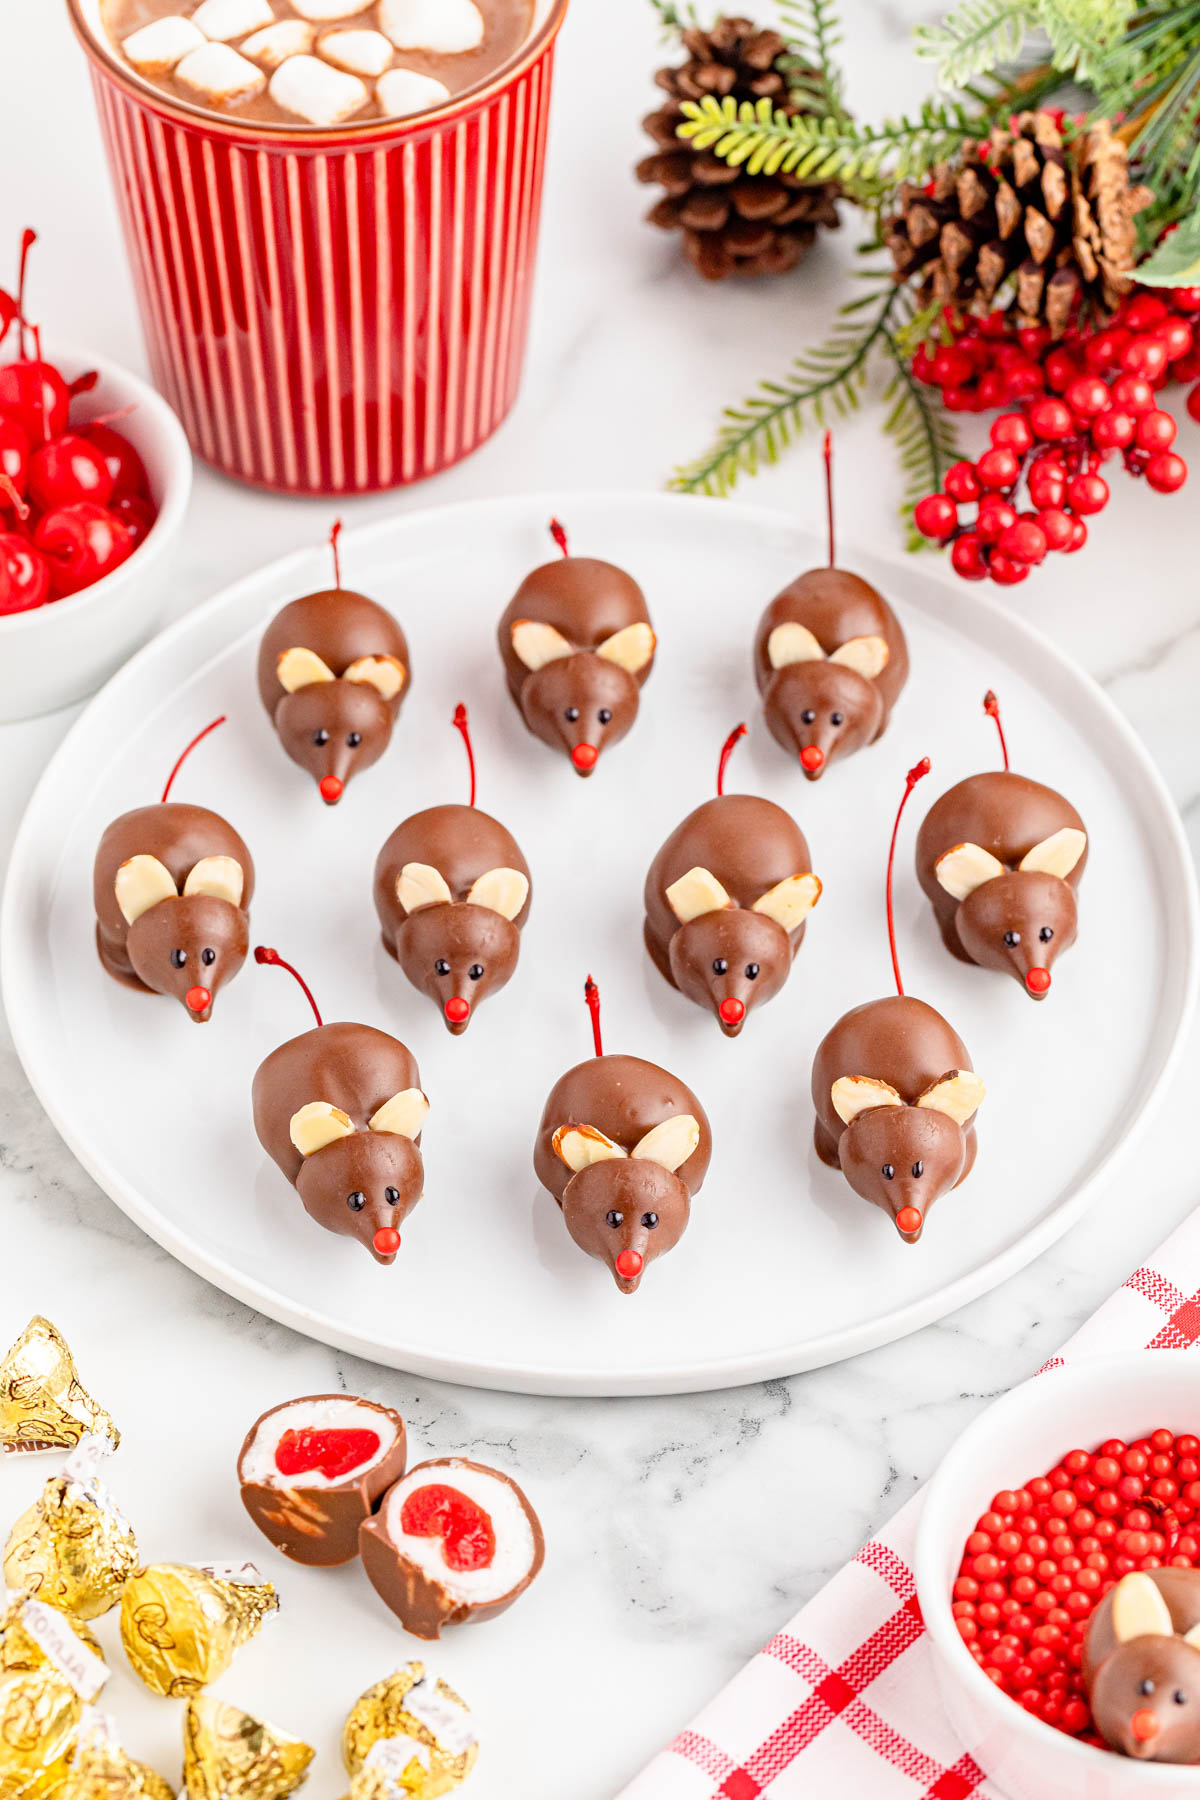
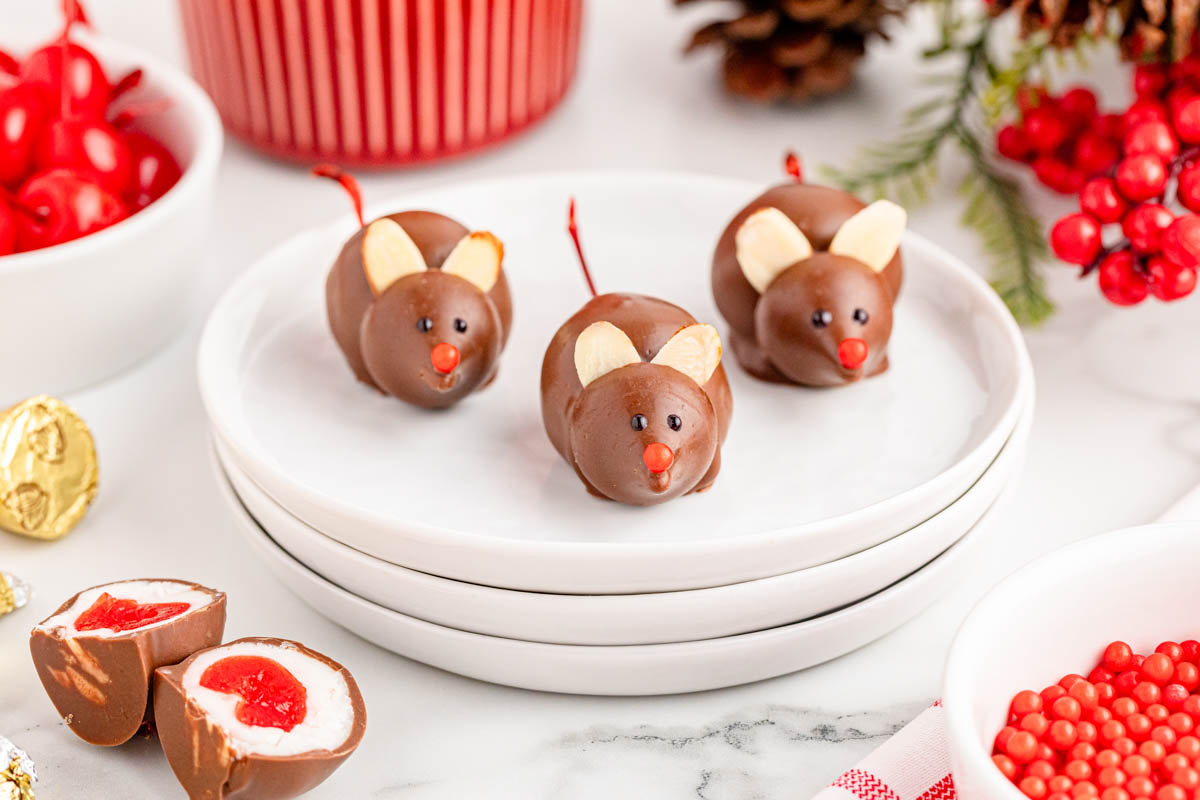
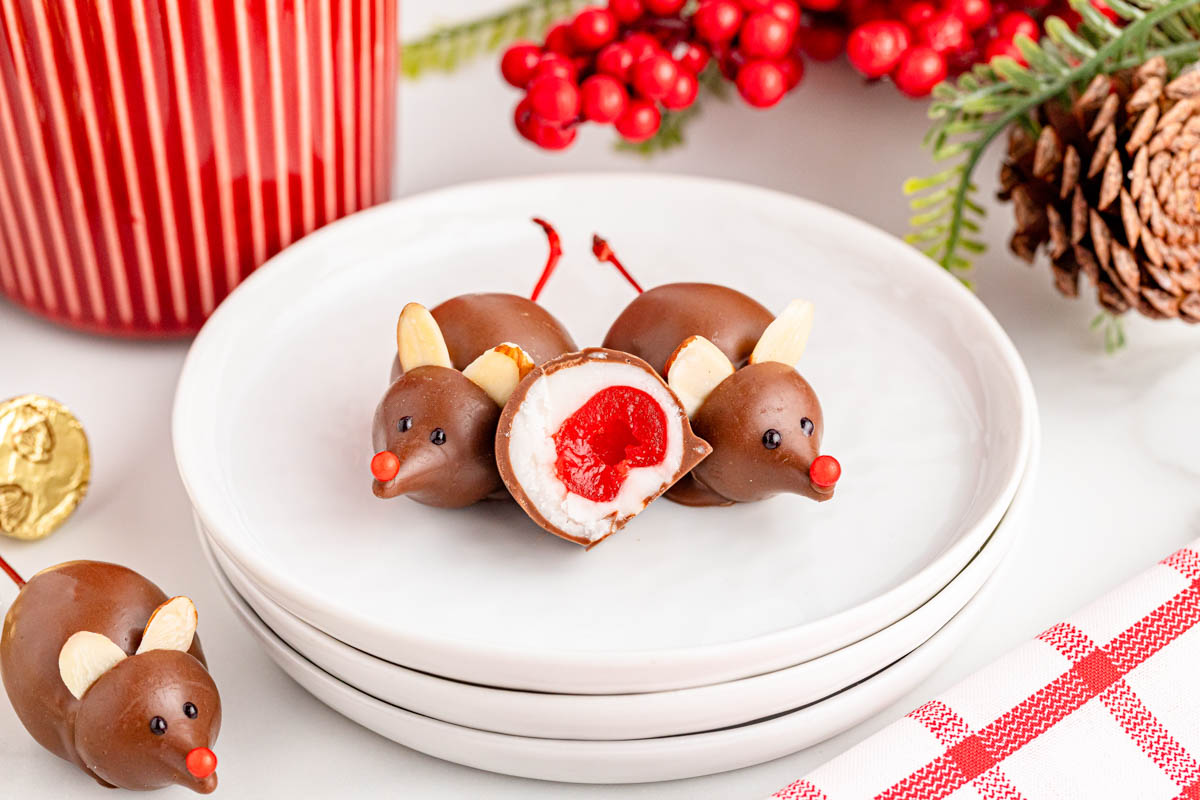
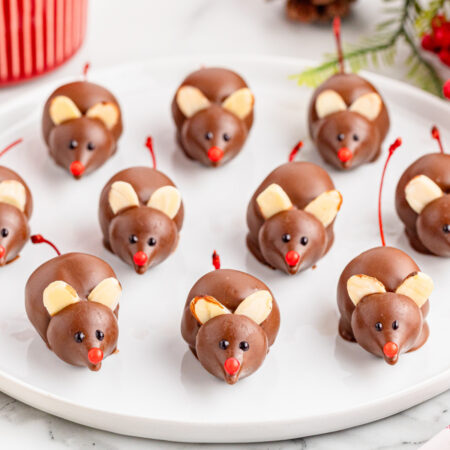
These adorable Chocolate Christmas Mice feature maraschino cherries wrapped in sweet almond dough and dipped in creamy milk chocolate. With bright red noses and cute little eyes, these whimsical treats are perfect for holiday festivities.
Chocolate Covered Mice
These little critters are just about the cutest treat you’ll ever make. But they’re not just adorable; these chocolate Christmas mice are incredibly delicious too.
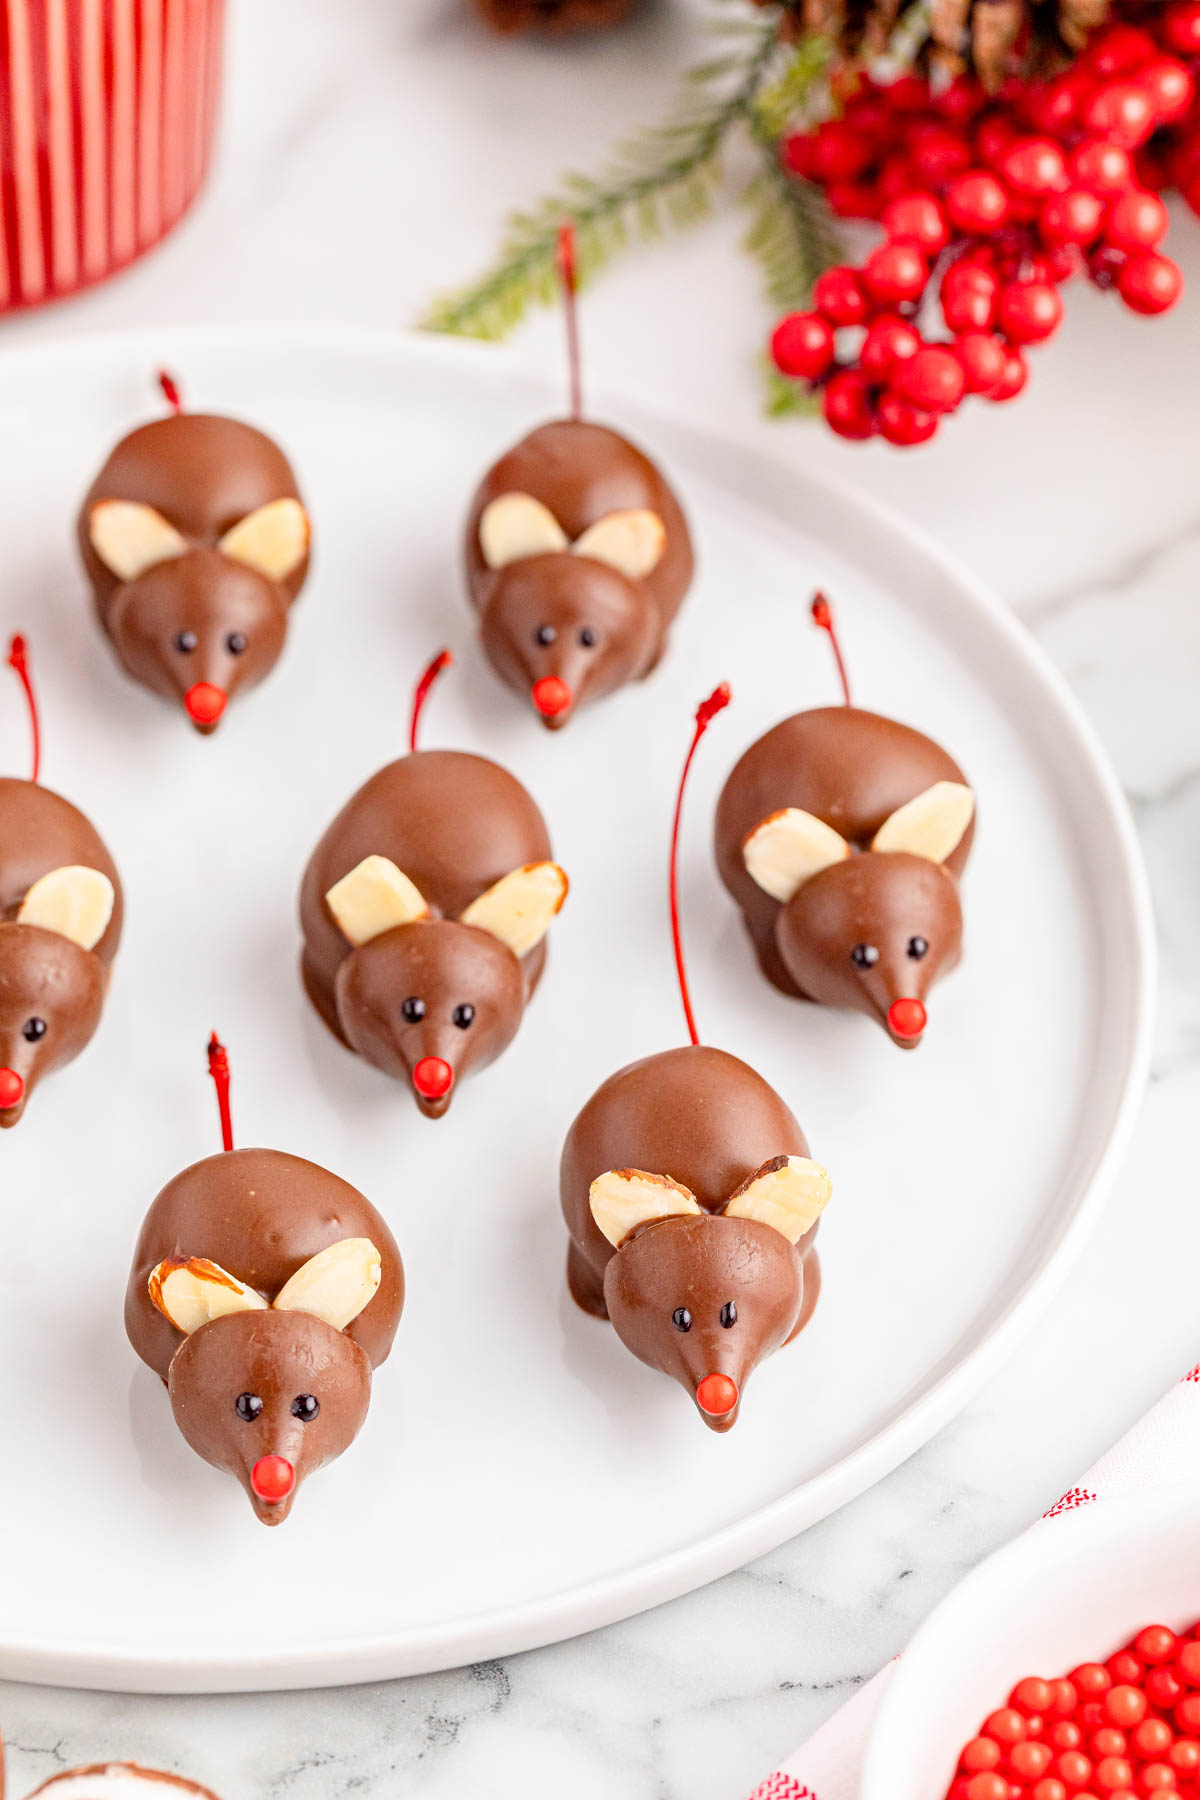
Made with smooth, chocolate-covered cherries, chocolate kisses, and almond slices for their cute little ears, these tasty treats are completely irresistible. The best part is that the kids will love helping you make them! You can set up an assembly line and let the fun begin!
They’re the perfect, whimsical treat for holiday gatherings, school parties, or even gift-giving. For more fun treats to make with the kids, check out these Reindeer Oreo Balls and these Christmas Donuts.
Why We Love This Recipe
- Fun to make: You can get the kids involved in the decorating process, making it a fun and easy family activity.
- Tasty treats: The combination of cherries, almond dough, and milk chocolate is a delicious holiday treat.
- Unique and festive: These adorable little mice are the cutest treats to serve at holiday gatherings.
Ingredients
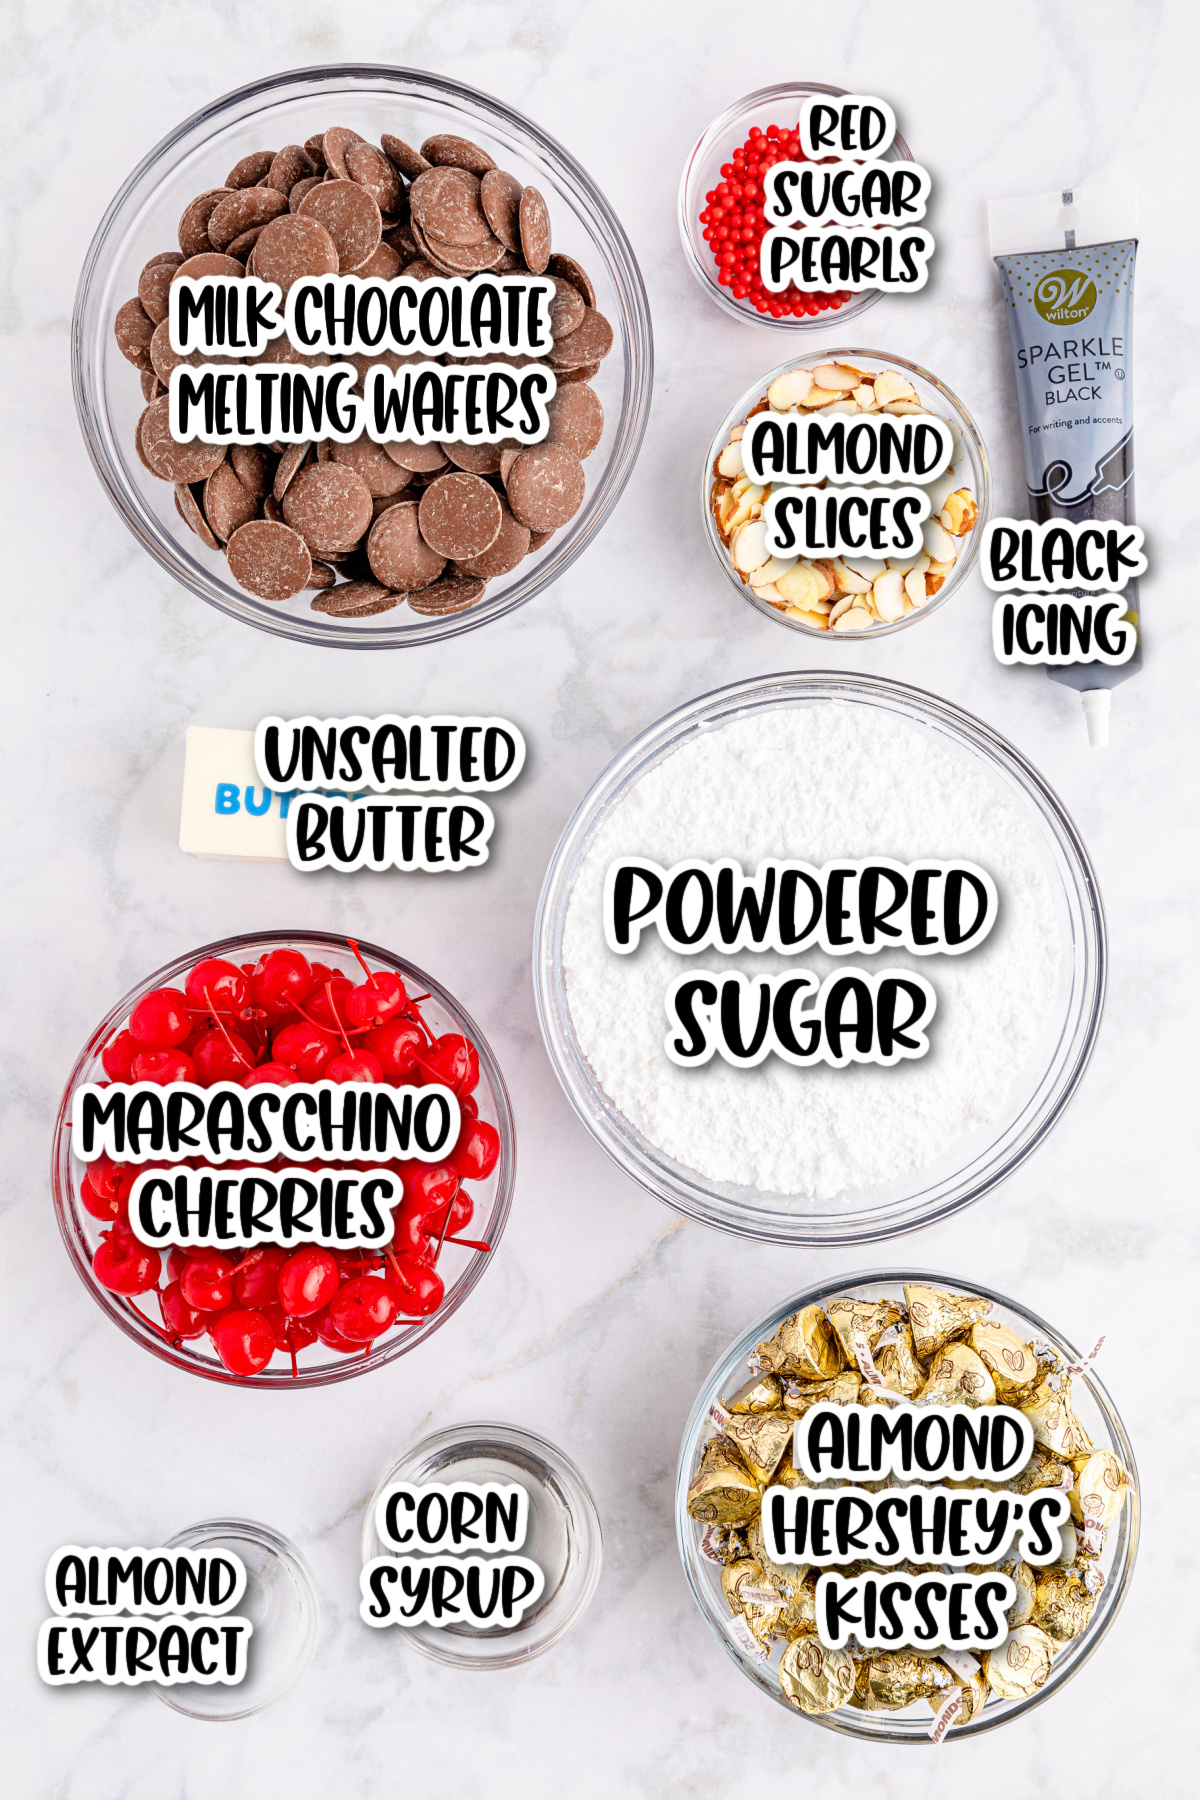
- Maraschino cherries (with stems) that are well-drained and dried
- Powdered sugar, sifted
- Unsalted butter softened at room temperature
- Corn syrup
- Almond extract
- Milk chocolate melting wafers
- Milk chocolate almond Hershey’s Kisses, for the head
- Sliced almond for the ears
- Black decorative icing for the eyes
- Red sugar pearls for the nose
How to Make Chocolate Mice
For The Body
Step 1. Line two baking trays with parchment paper or wax paper and set aside.
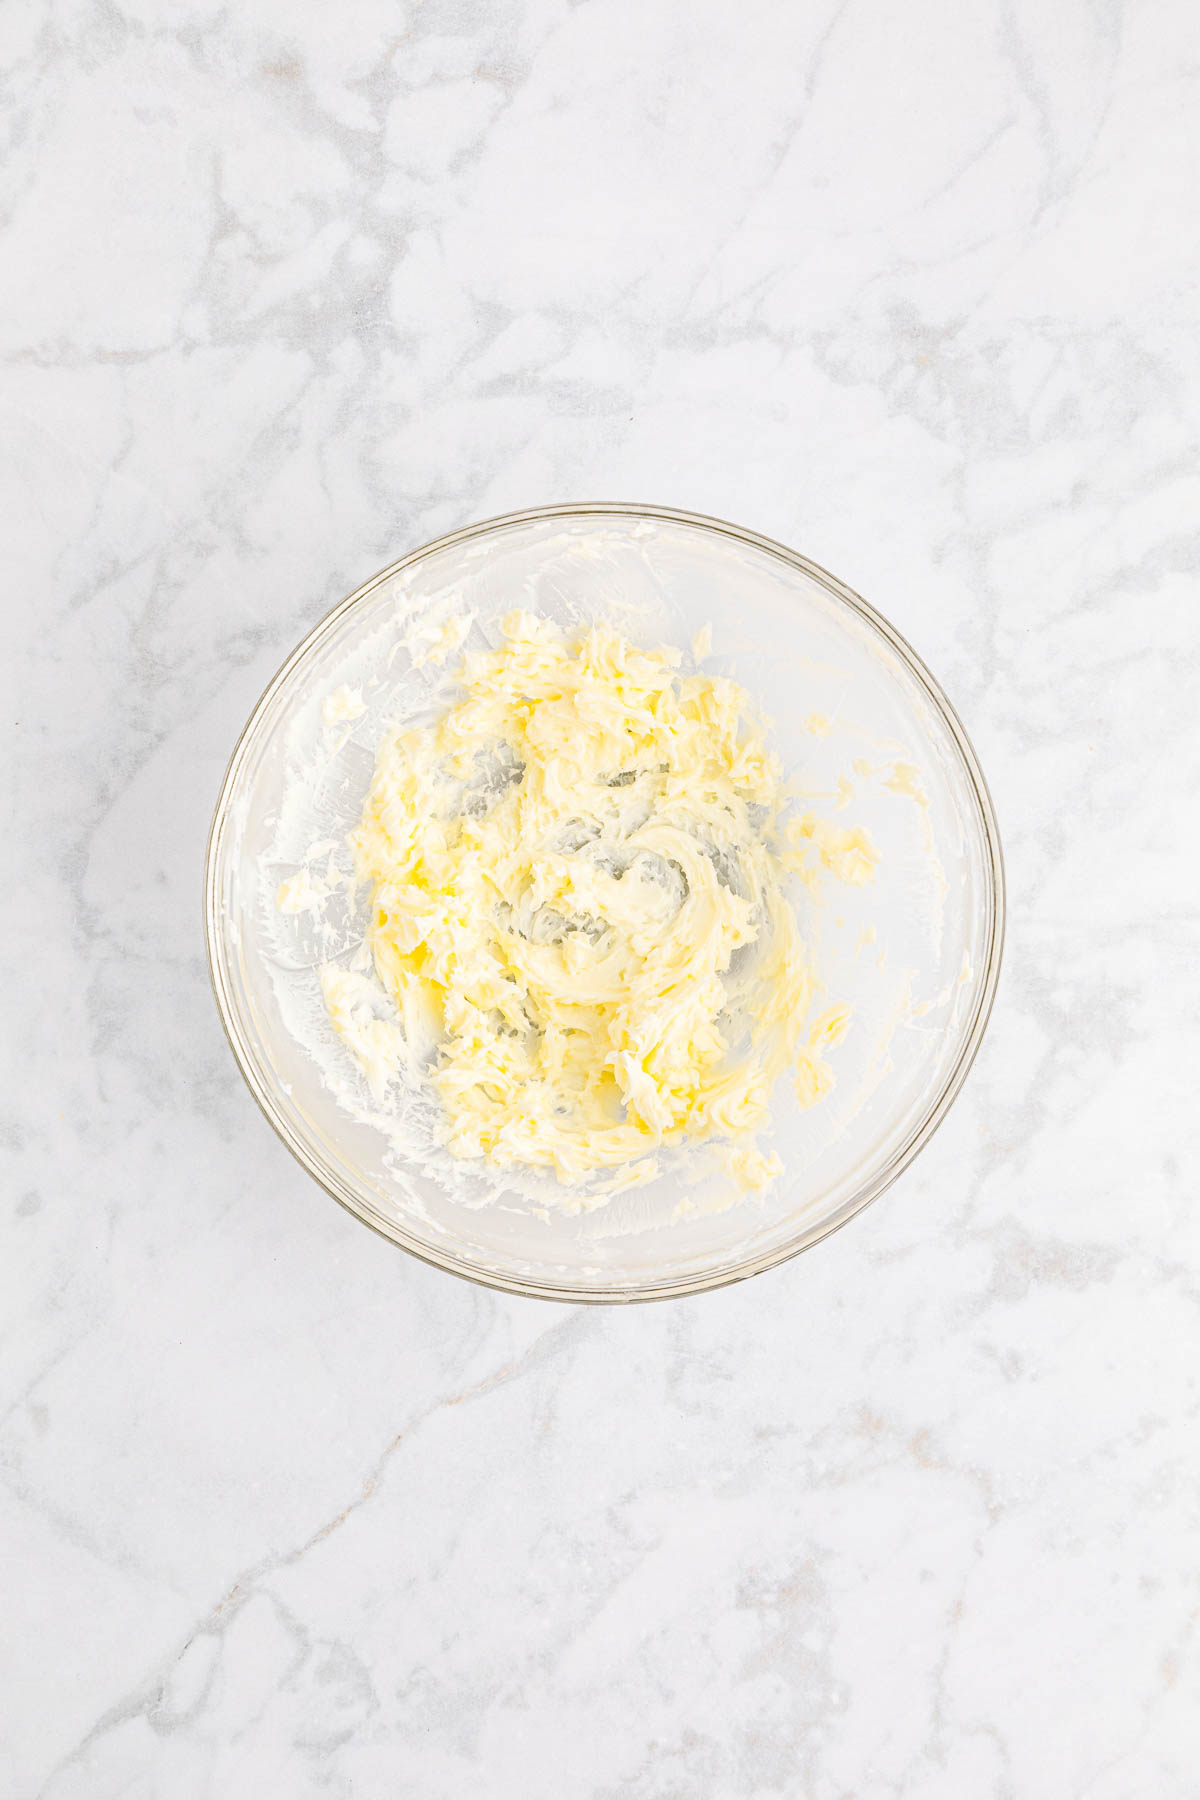
Step 2. In a large bowl, mix the butter, corn syrup, and almond extract together. Stir until smooth and well combined.
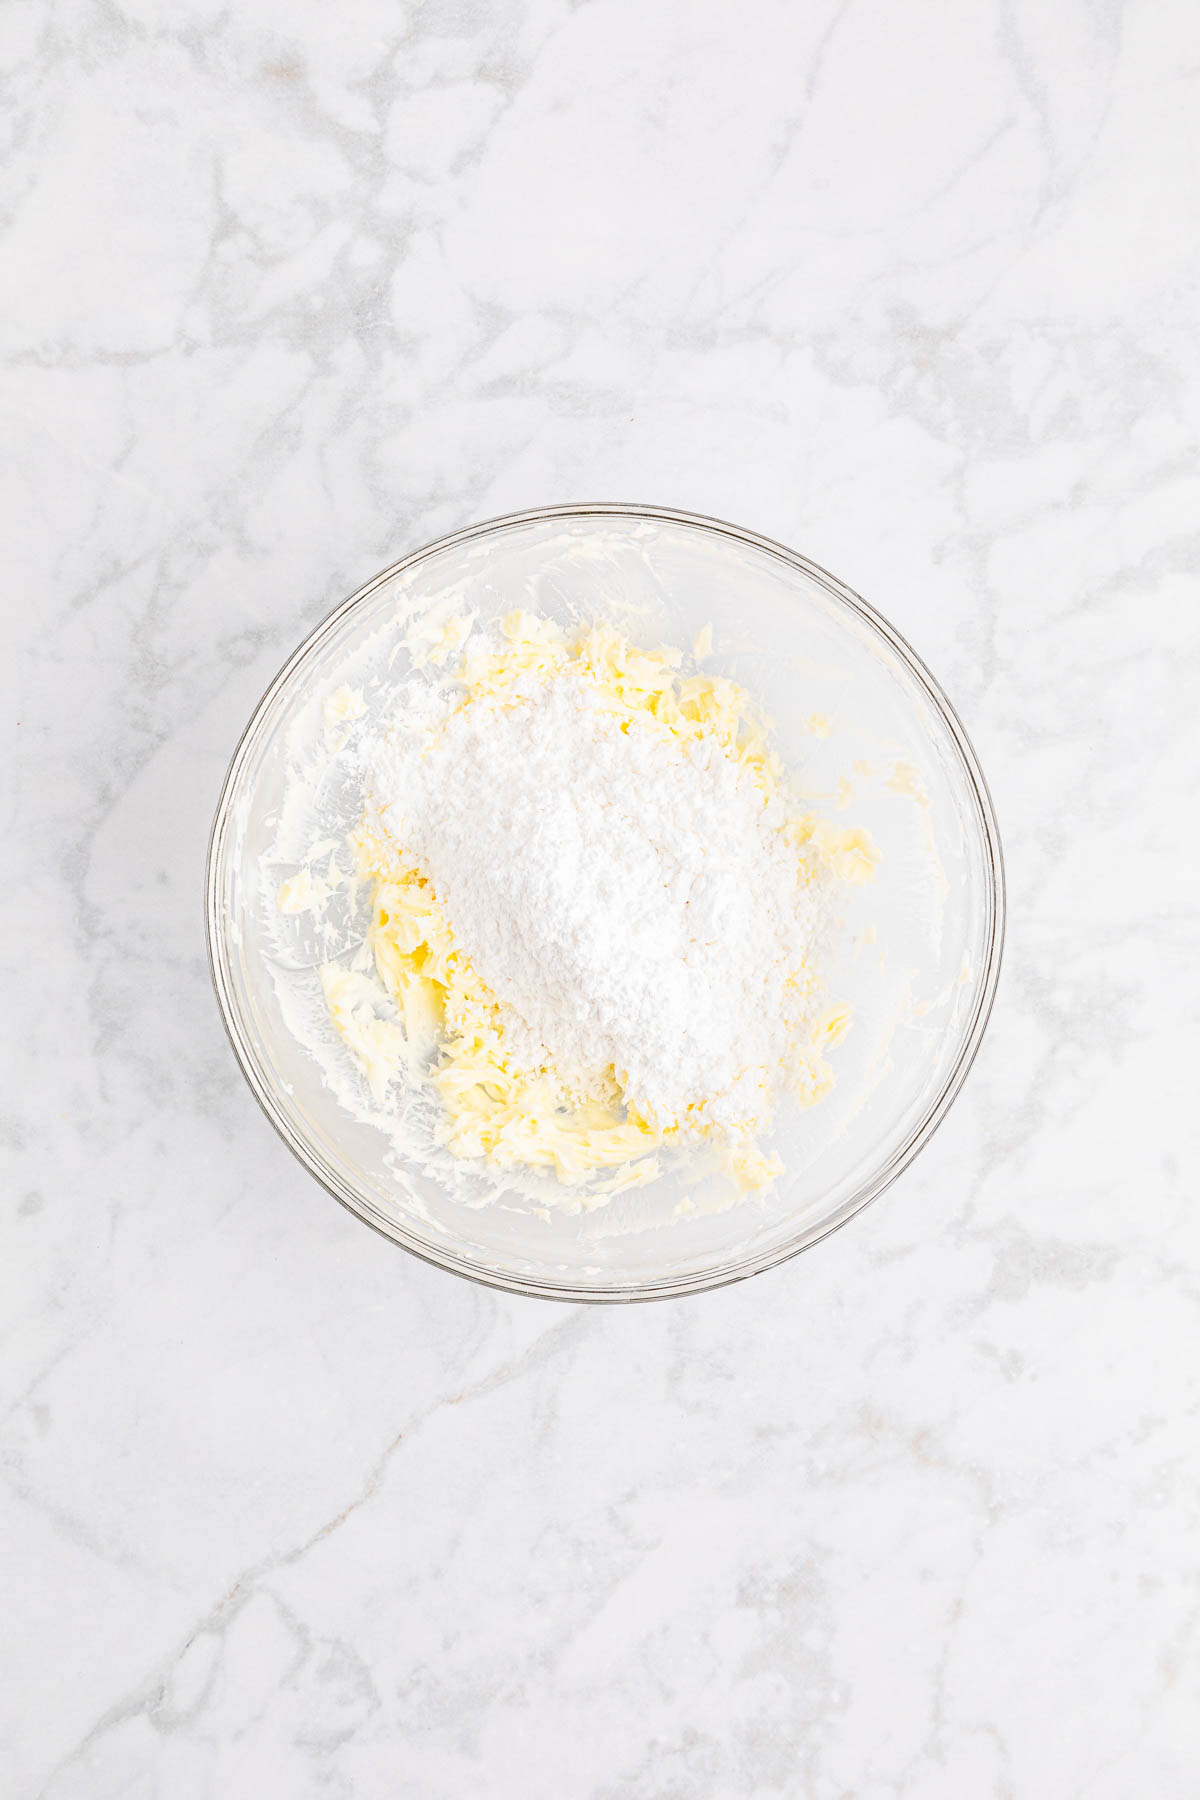
Step 3. Gradually add the powdered sugar to the bowl and knead together until a soft dough forms.
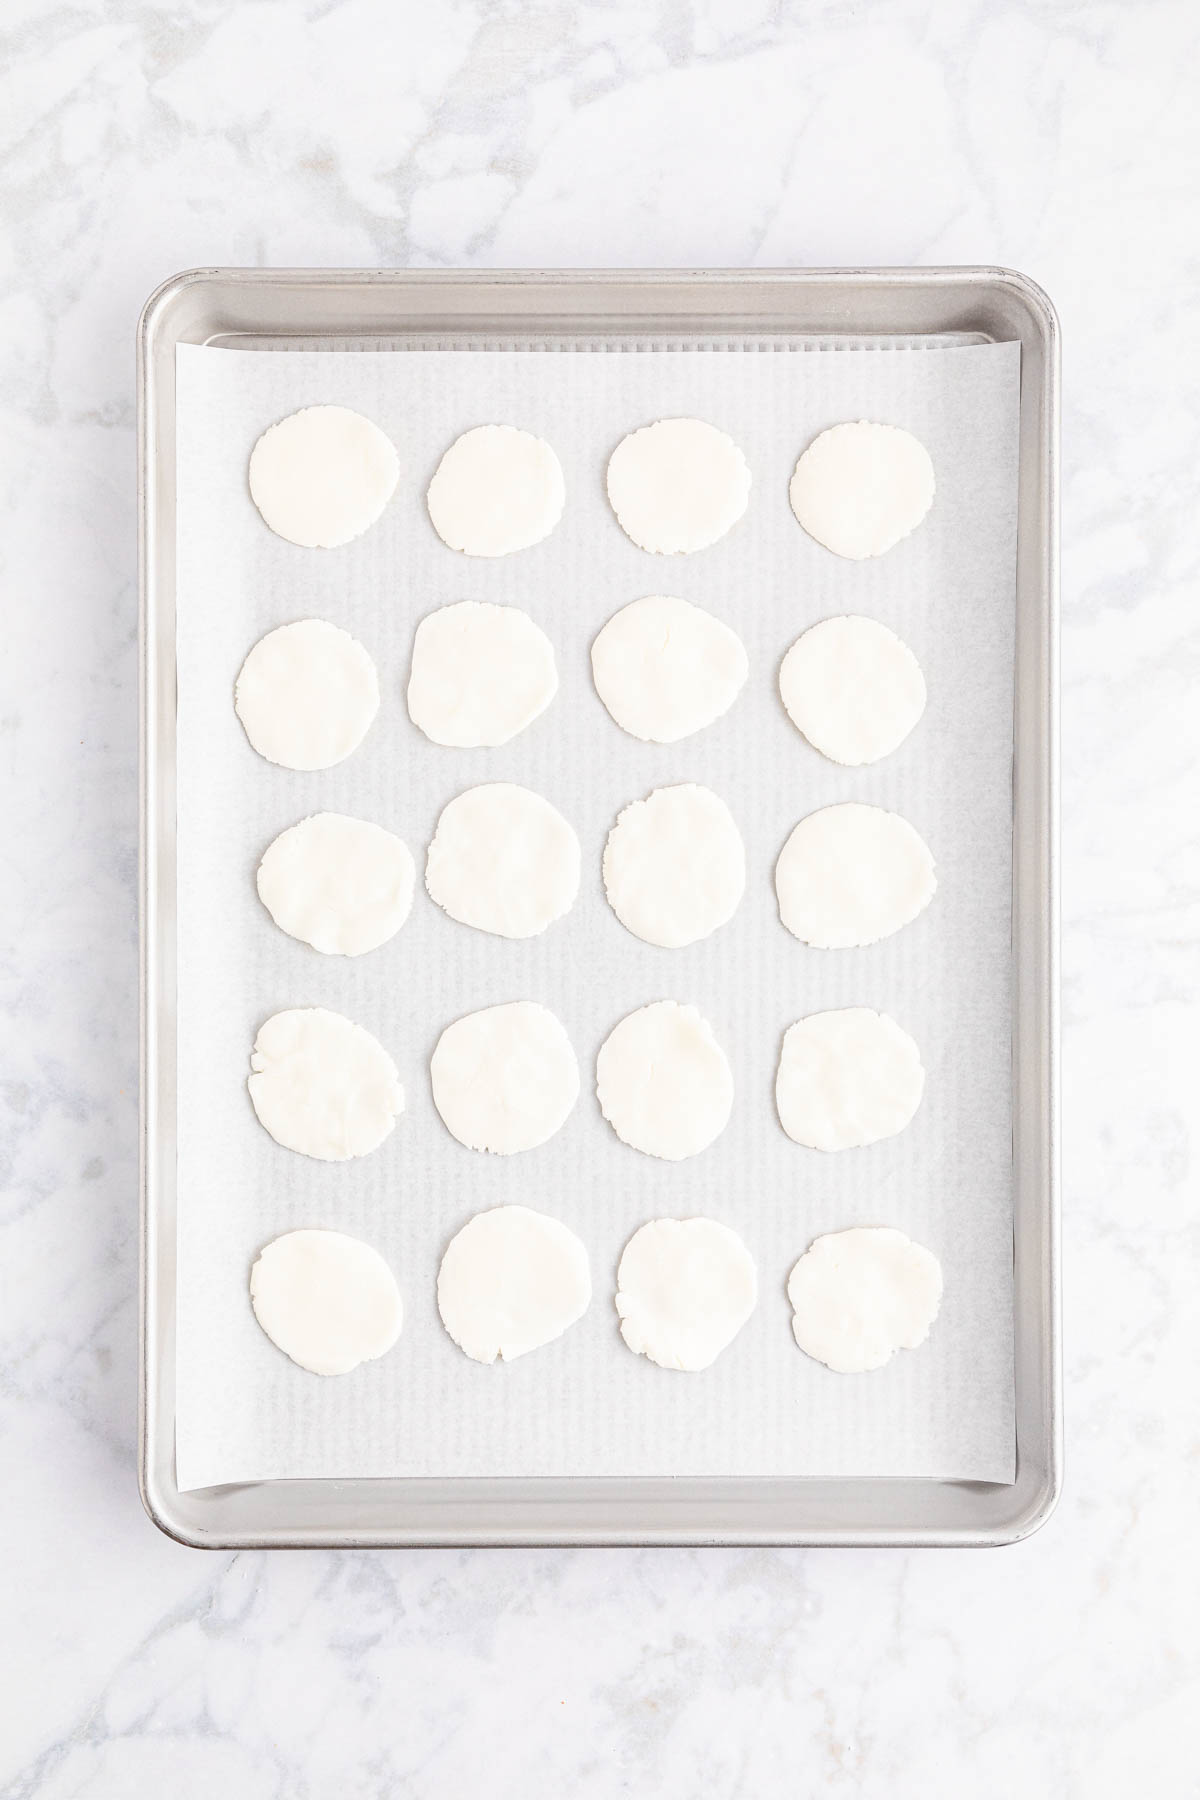
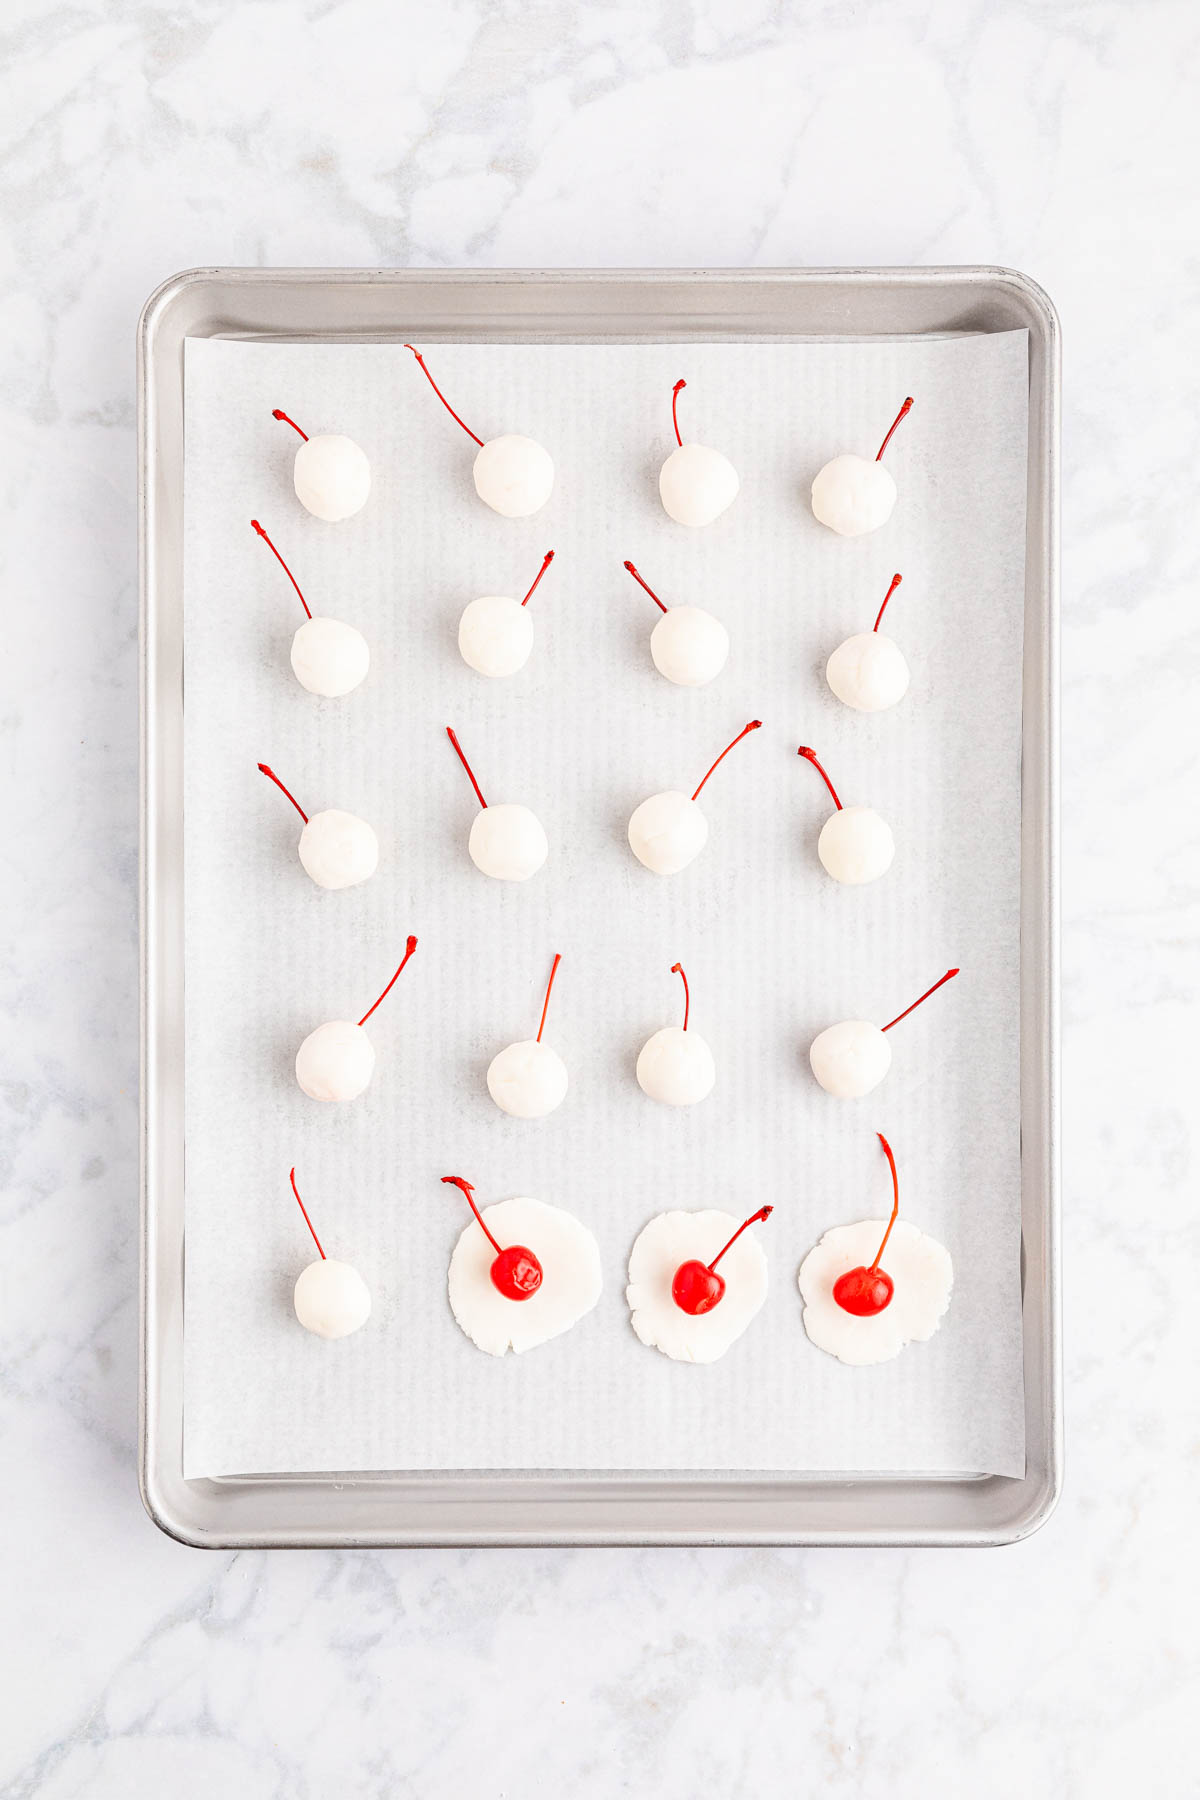
Step 4. Pinch off ½ tablespoon-sized pieces of dough, roll into a ball, and then flatten the balls into discs.
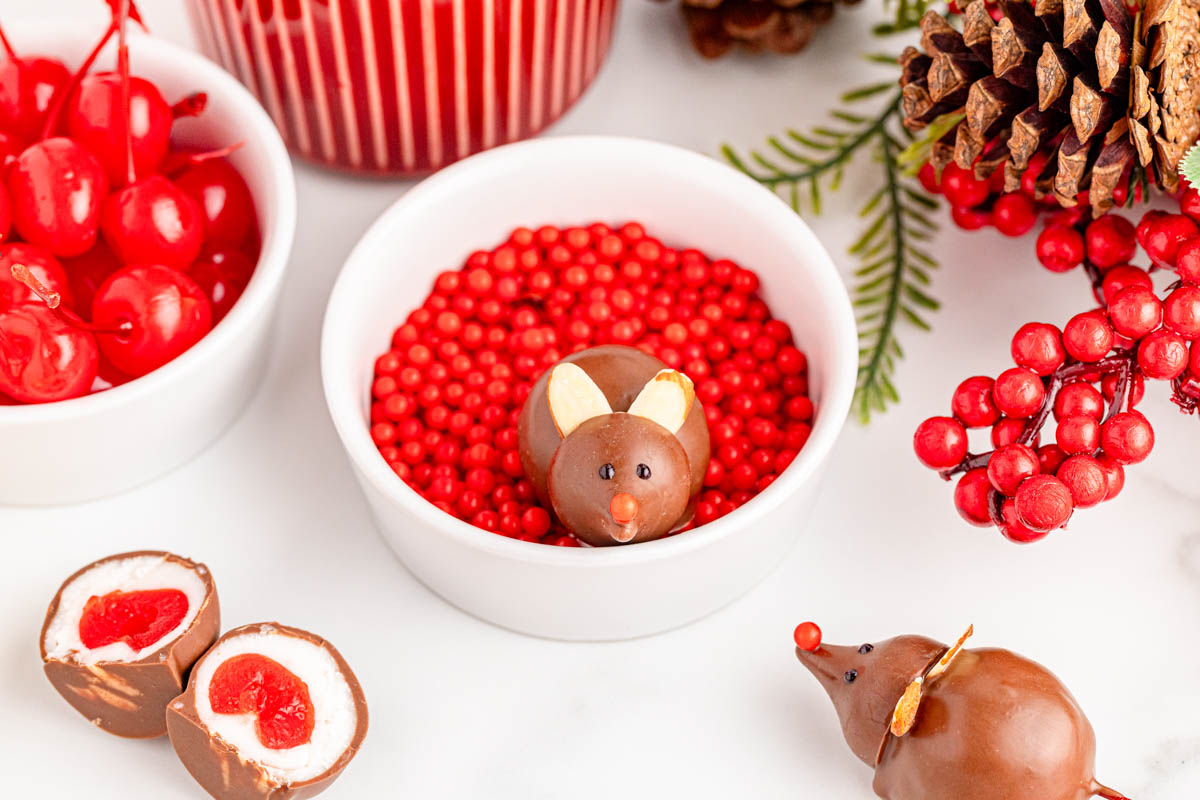
Step 5. Wrap each disc around a maraschino cherry, keeping the stems exposed. Use your hands to carefully roll each ball into shape.
Tip: Once you drain them from the jar, place the cherries on a paper towel-lined plate and pat them dry to remove as much moisture as you can. This helps the dough stick well.
Step 6. Repeat with the rest of the cherries and dough. Refrigerate for 2-4 hours, until firm.
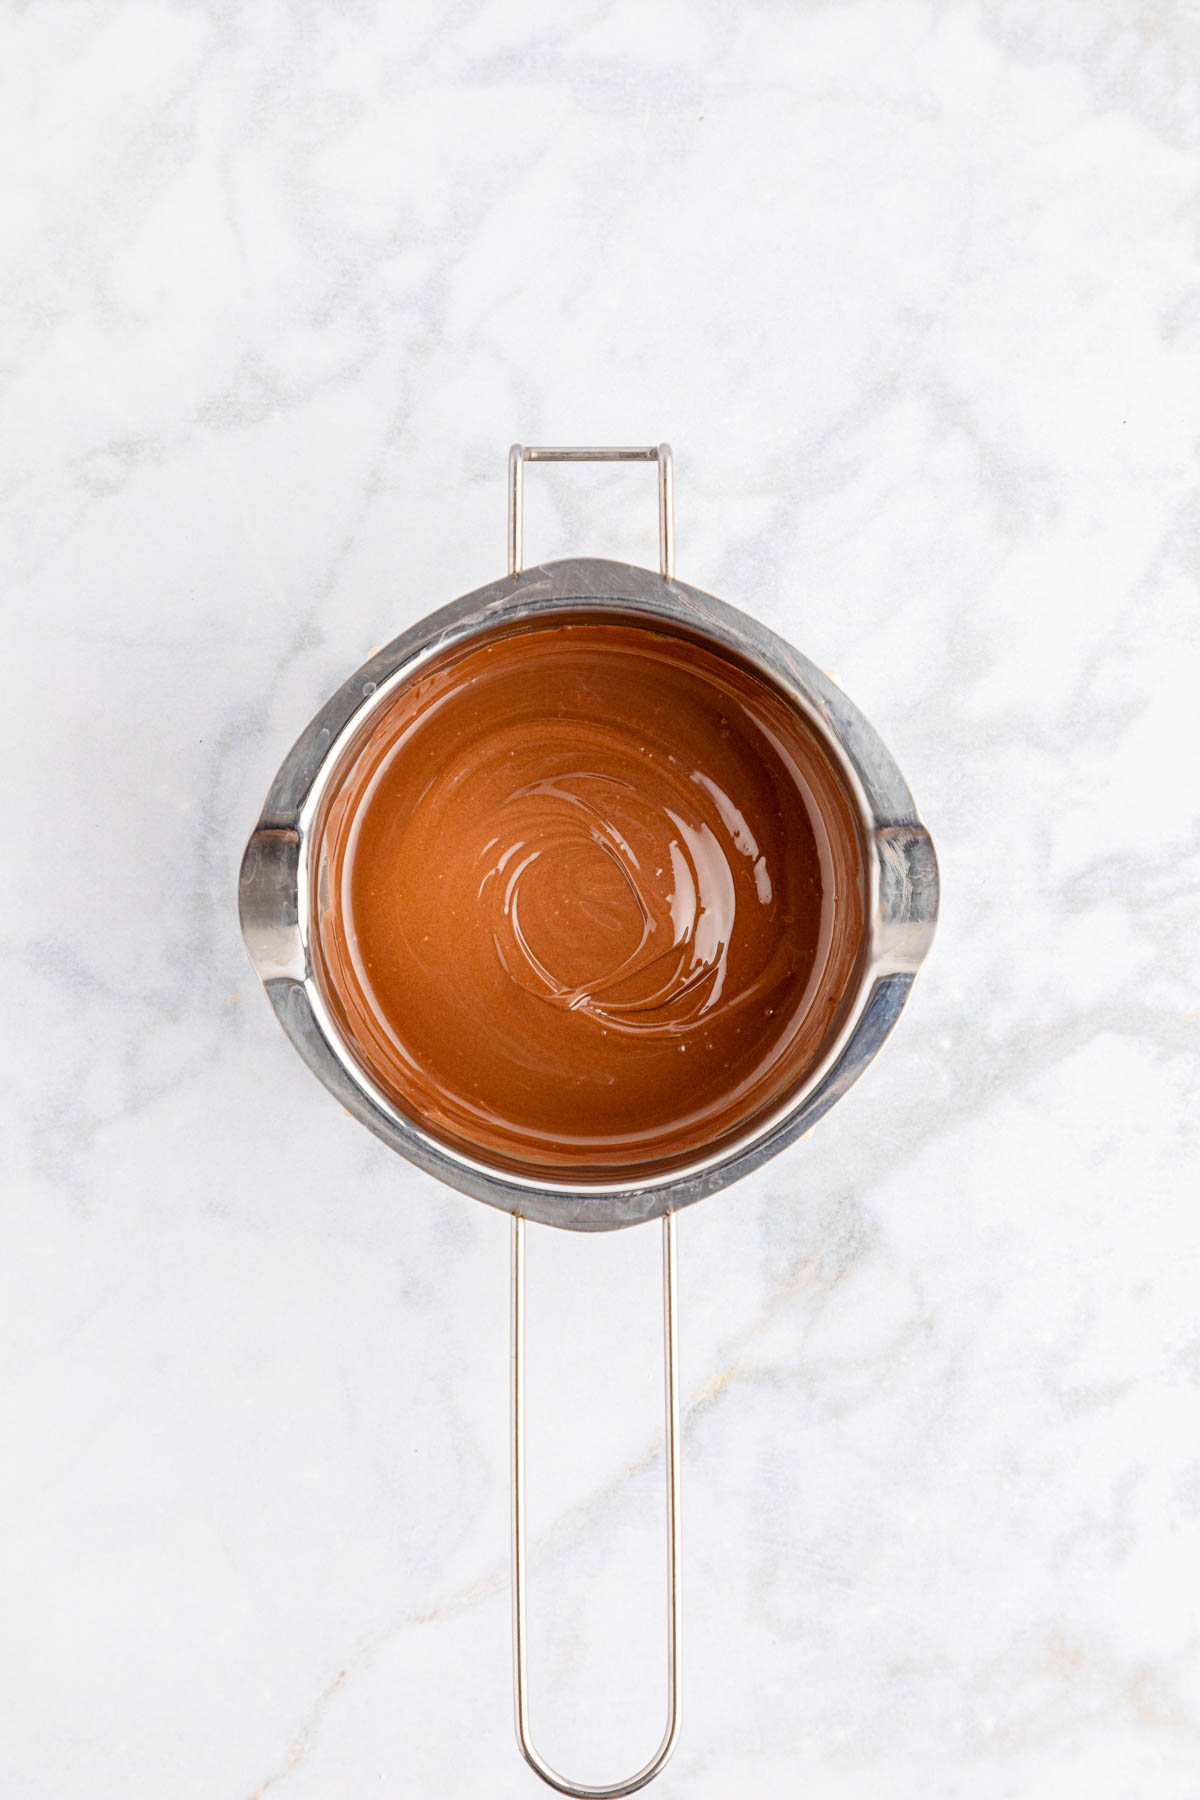
Step 7. Once the dough is firm, melt the chocolate wafers in a double boiler or candy melting pot over low heat. Stir occasionally to ensure it is heating evenly.
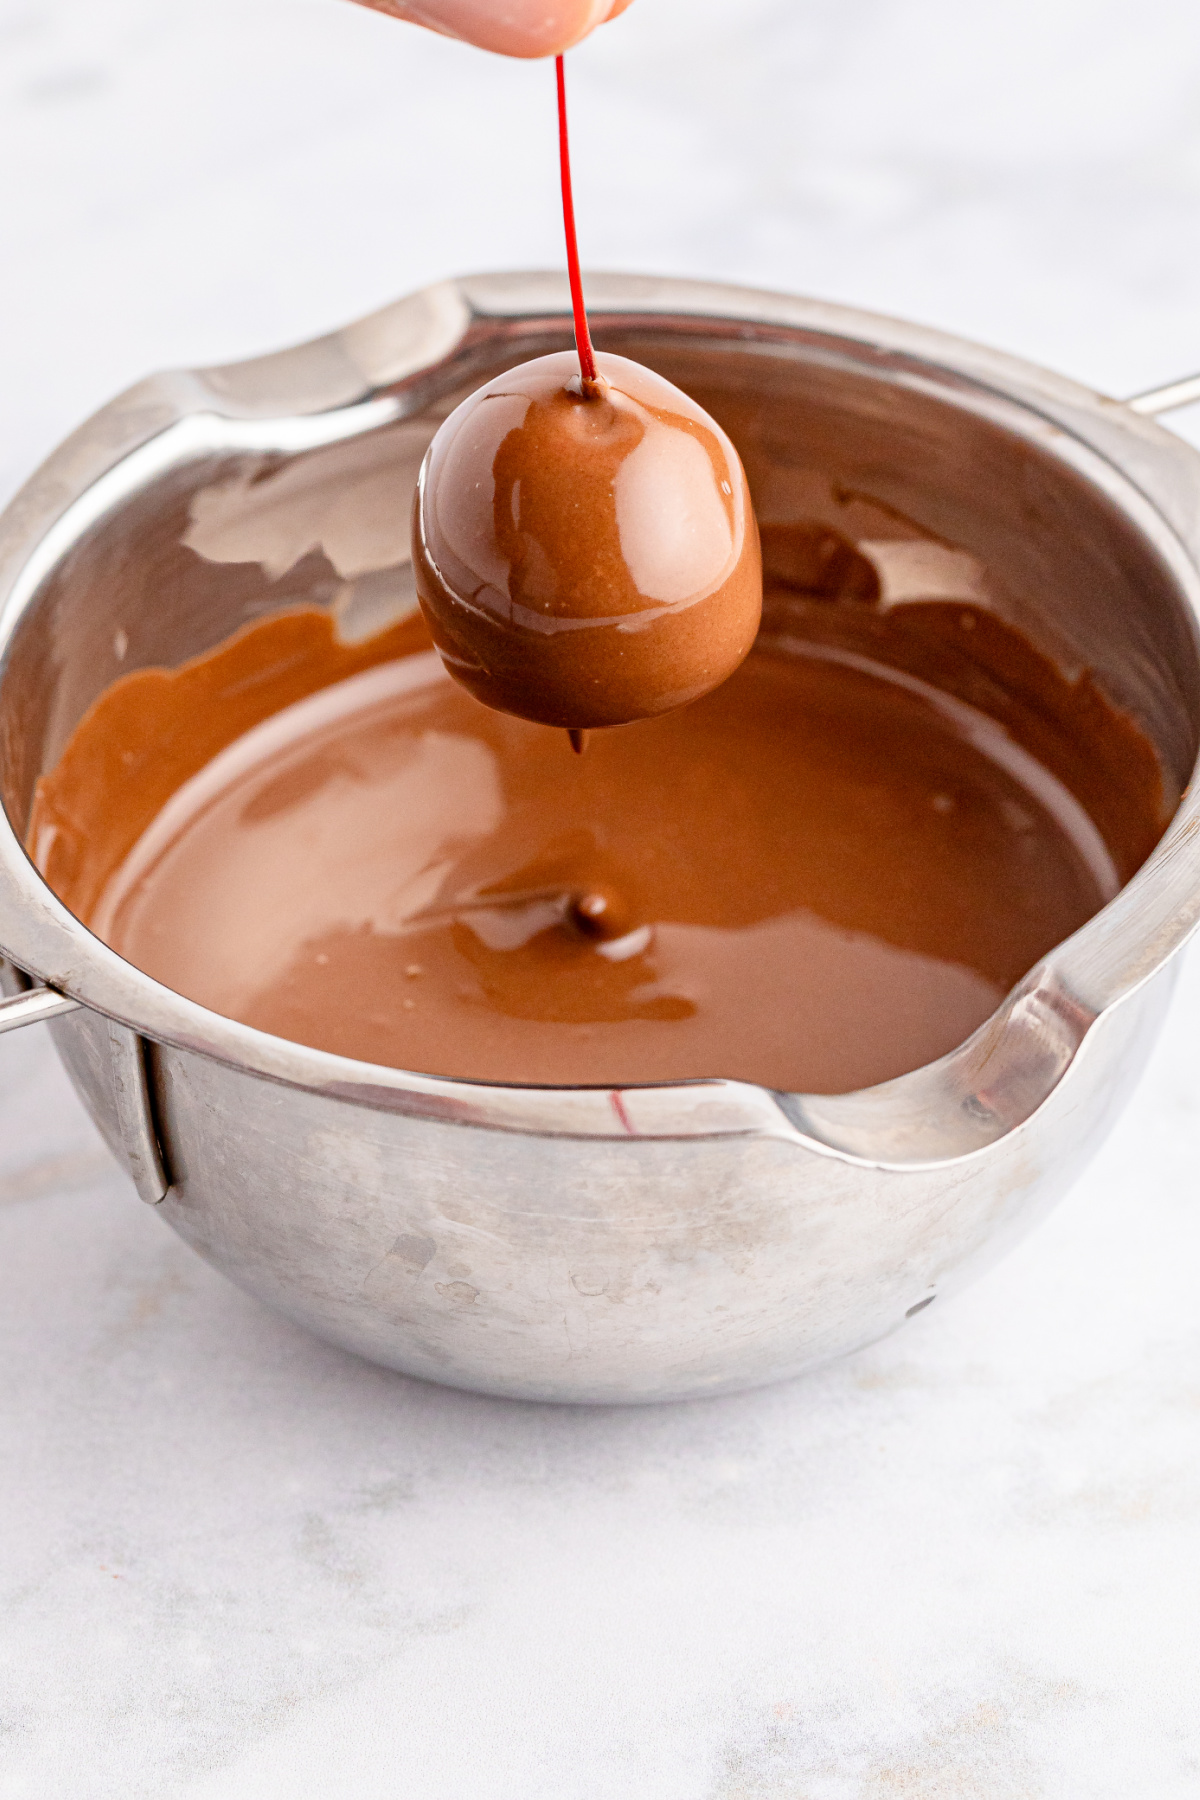
Step 8. Gently hold the cherry by the stem and dip it into the chocolate candy, one at a time. You can use a fork if needed to lift it out without breaking the stem off.
Step 9. Place the chocolate covered cherries back onto the prepared baking tray and lay them on the side.
Tip: Be careful not to break the stems off. The stem will be the mouse’s tail.
For The Head
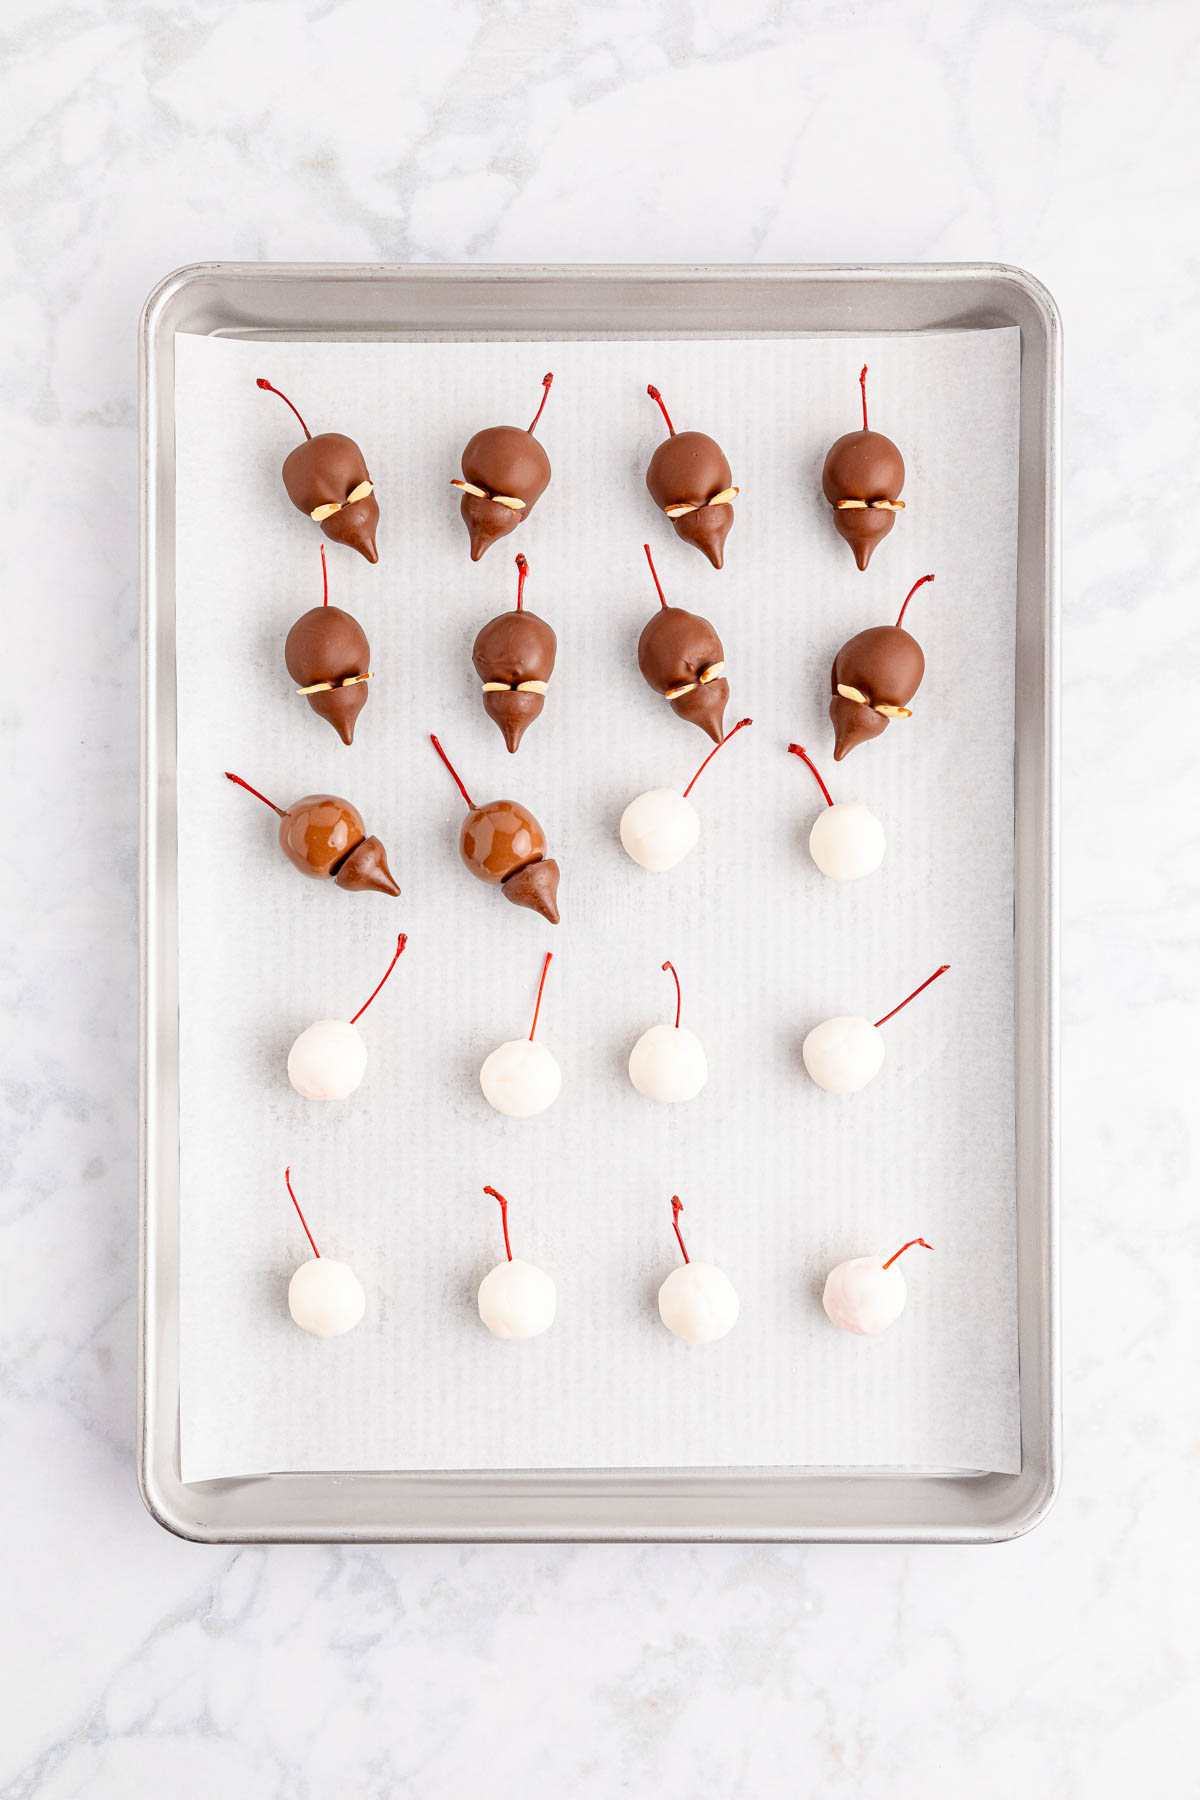
Step 1. Add a Hershey kiss to make the mouse’s head. Press the bottom of the kiss onto the opposite side of the tail.
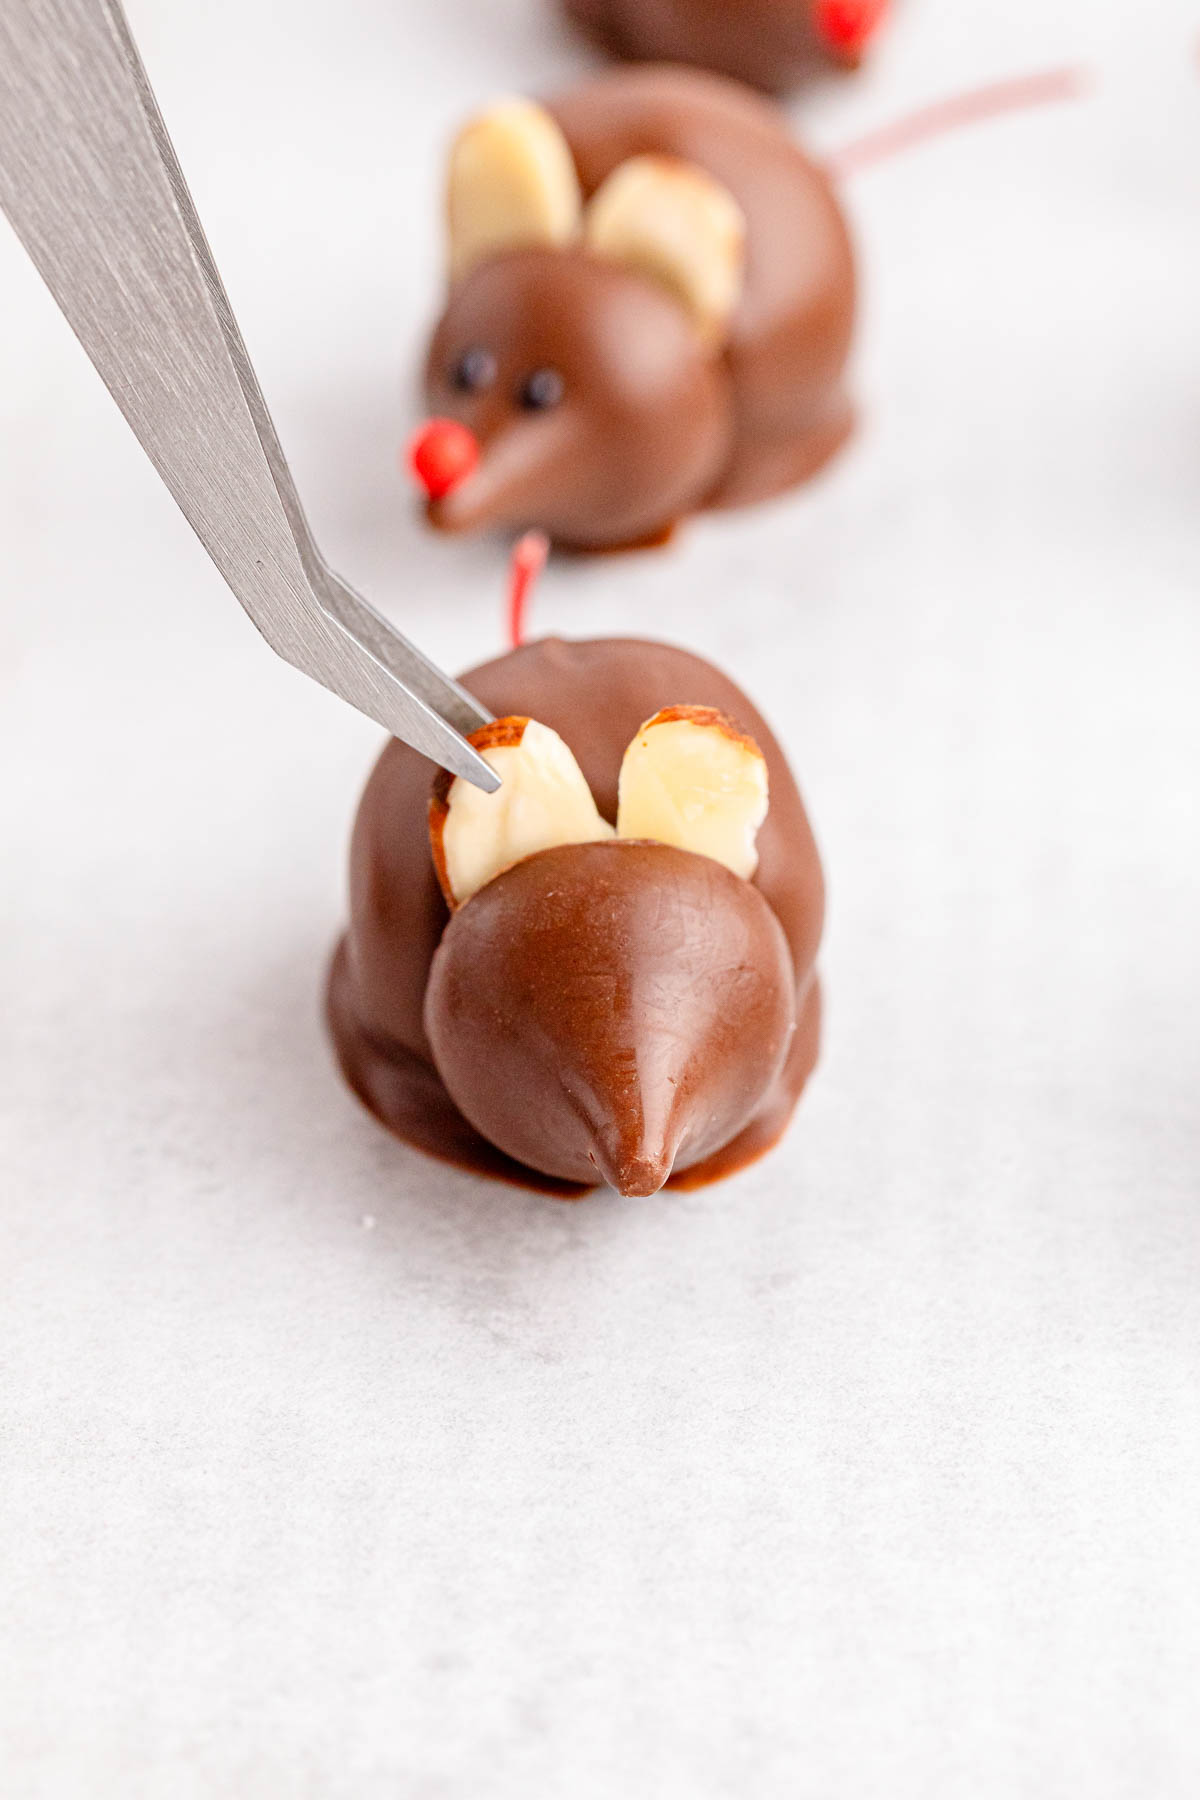
Step 2. Next, for ears, place two almond slices between the body and the head. You can put a little melted chocolate on the back of the kiss to help keep the ears in place. Repeat with the rest of the mice.
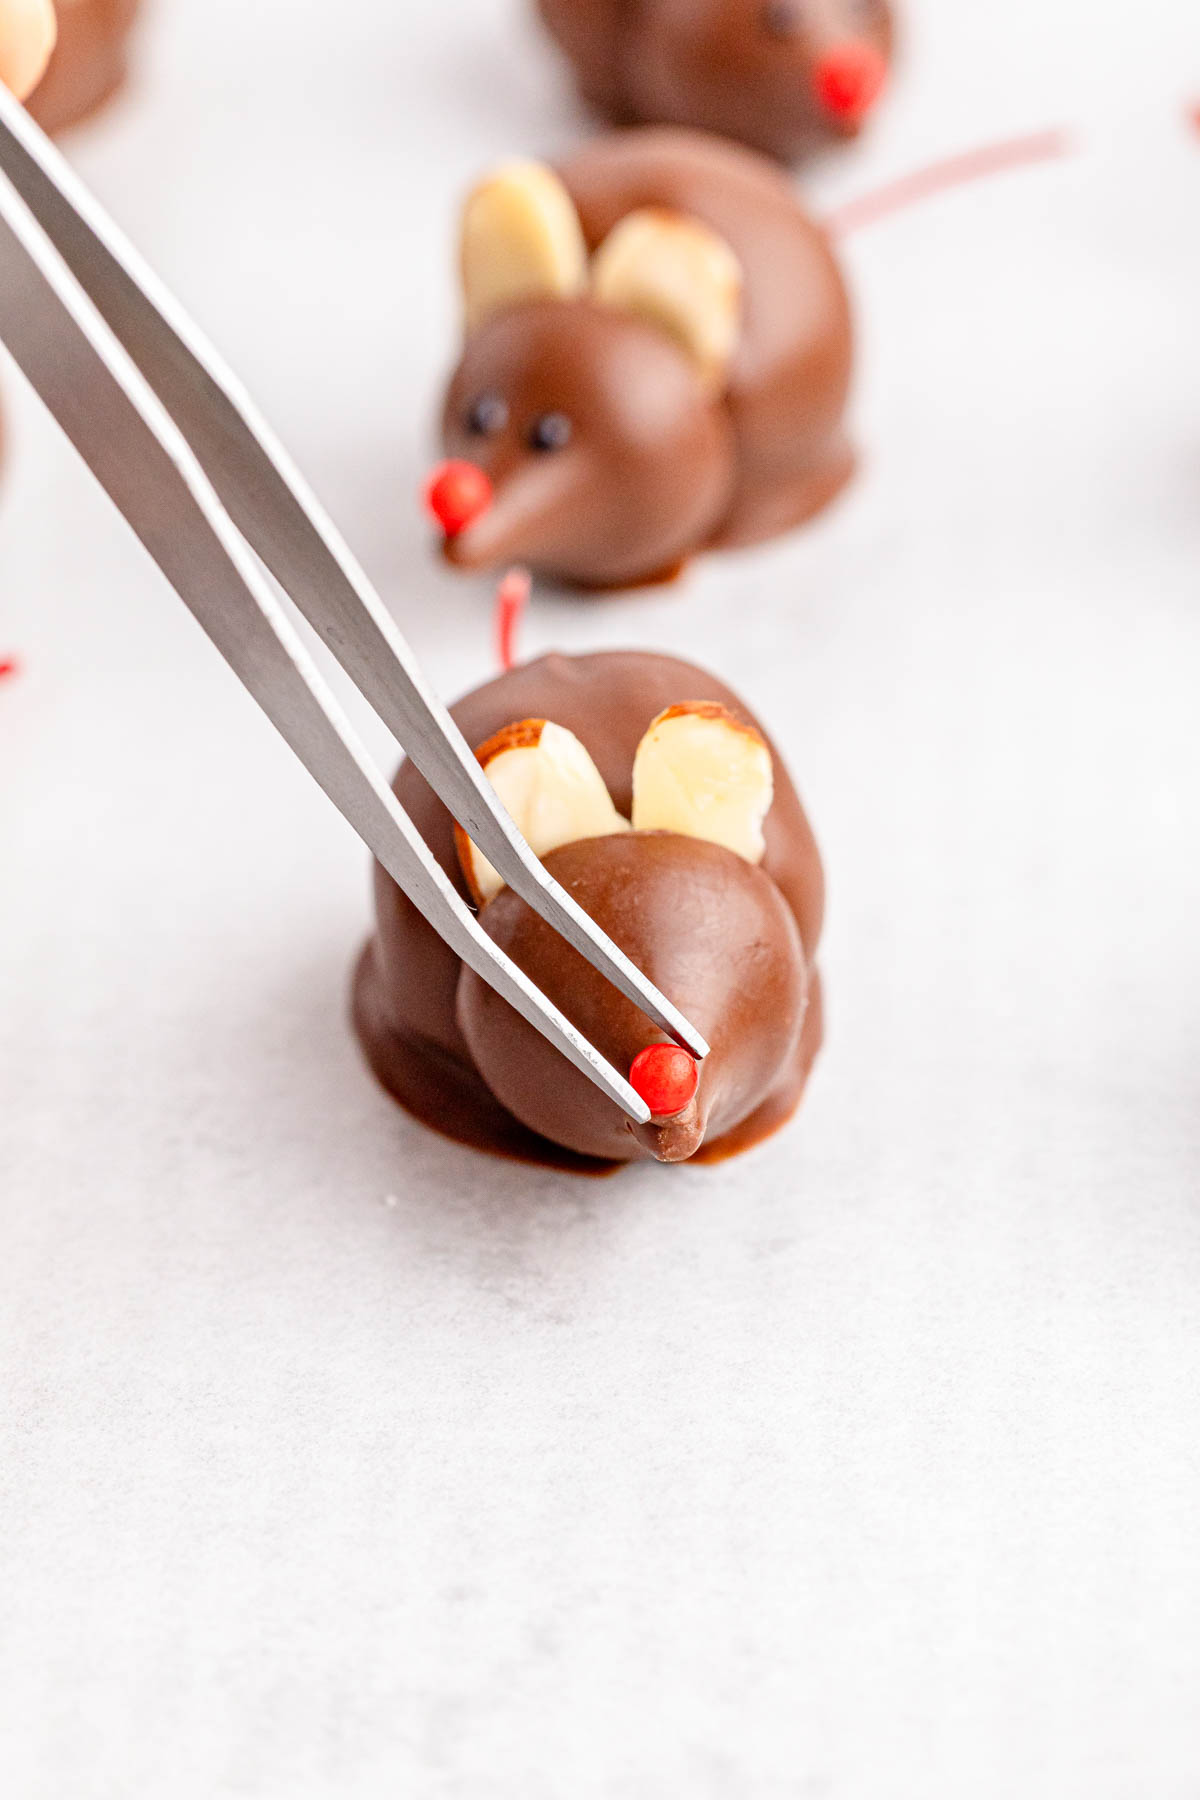
Step 3. Once the head, body, and ears are all attached, decorate the faces of the little mice. Using a toothpick or skewer, dab a tiny amount of melted chocolate onto the top part of the tip end of the kiss.
Step 4. While the chocolate is still wet, place a red sugar pearl for the nose. Repeat with the rest of the candy mice. To keep it from falling off, hold it in place for a few seconds
Tip: If needed, you can add a small amount of melted chocolate to bottom of the red pearl to help keep it in place.
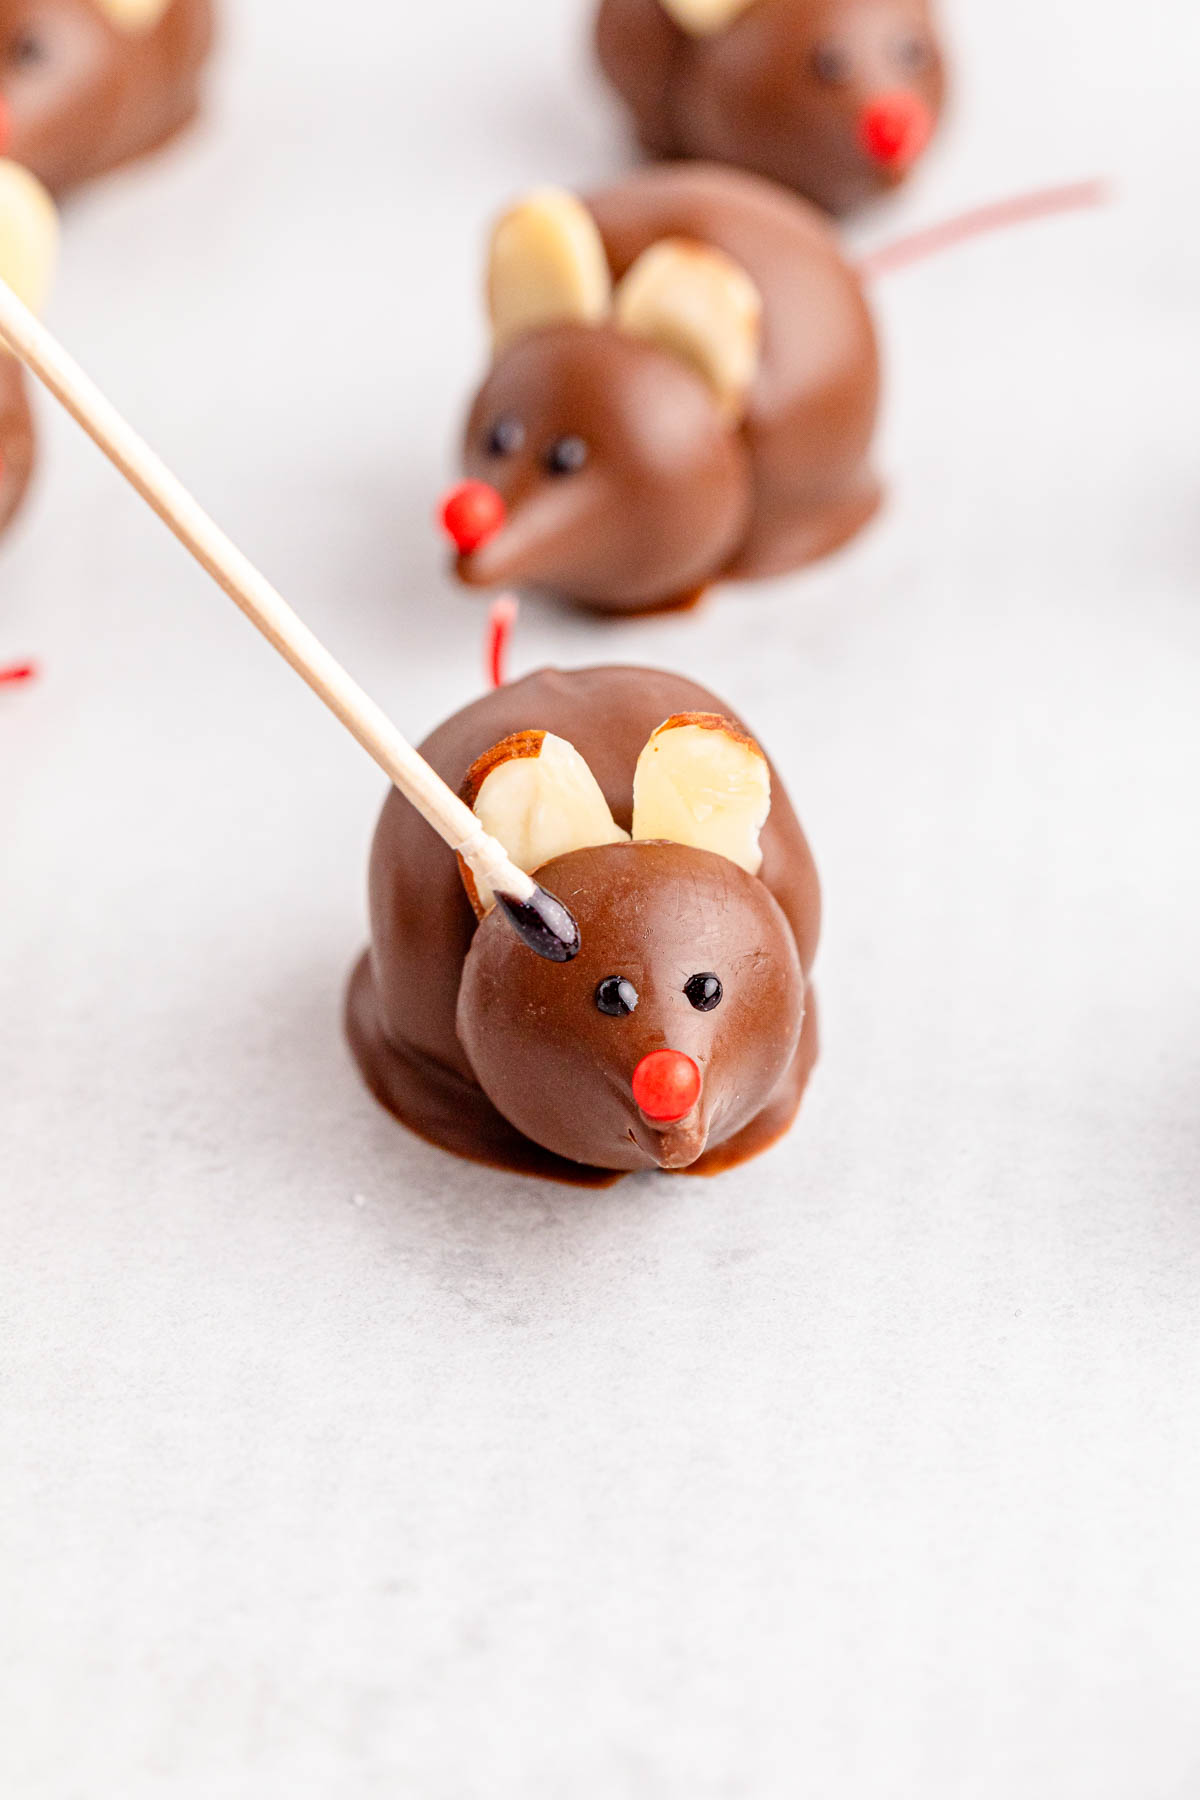
Step 5. For the eyes, add two little dots of black decorative icing onto the Hershey’s Kiss face.
Tip: Practice making the eyes on a piece of parchment paper or napkin to see how it comes out. If the icing is coming out of the tube too quickly, you can use a toothpick or skewer to dab a small amount where needed.
Step 6. Repeat with the rest of the mice.
Step 7. Refrigerate until ready to serve.
Chocolate Cherry Mice Variations
- Chocolate: Instead of regular chocolate melting wafers for the coating, you can use dark chocolate melting wafers. You may also use a premium chocolate baking bar or premium baking chocolate chips.
- Cherries: You can make chocolate mice with canned, pitted cherries. Just make sure you choose one with stems attached. Canned will taste a little different, but they will still be delicious.
- Almonds: If you don’t have sliced almonds, you could also use peanut halves for the mouse ears.
- Red hot candies: If you want your mice to have a large nose, you can use red hots instead of the red sugar pearls.
- Kisses: This recipe uses Almond Kisses, but any flavor will work. You’ll just want to make sure the kiss matches the candy coating used for the cherry so that the body and head are the same color. If using a dark chocolate coating, choose dark chocolate Kisses.
- Extract: We used almond, but feel free to swap up the flavor of the extract. Coconut extract, peppermint extract, or vanilla extract all work well with chocolate and cherries.
Storage Instructions:
Store leftovers in the refrigerator in an airtight container for up to 3 weeks. I do not recommend freezing them. The cherries will shrink and turn loose from the dough.
Christmas Mice FAQS
Try to firm it up by kneading in a little more powdered sugar, 1 tablespoon at a time. You may also refrigerate the dough for 5-10 minutes to help it get a little firmer and easier to mold over the cherries.
You sure can. Just prepare the powdered sugar mixture a day or two in advance and store it in an airtight container at room temperature.
You can experiment with other fruits like strawberries or other snacks like gumballs or marshmallows. You can also use Oreo cake balls. However, the stems are what make the tail so you may want to consider using small pretzel sticks or some marzipan for the tail instead.
More Christmas Treats
- Pine Cone Truffles
- Grinch Oreo Balls
- Gingerbread Reindeer Cookies
- Oreo Snowman Pops
- White Chocolate Dipped Gingerbread Cookies
- Snowman Rice Krispie Treats
- Oreo Reindeer Cookies
Find More On Pinterest!

Chocolate Christmas Mice
Equipment
- mixing bowl
Ingredients
- 1/4 cup unsalted butter softened at room temperature
- 3 tablespoons corn syrup
- 1 teaspoon almond extract
- 2 1/2 cups powdered sugar sifted
- 20 ounces maraschino cherries with stems 30 cherries, well drained and dried
- 10 ounces Ghirardelli milk chocolate melting wafers
- 30 milk chocolate almond Hershey’s Kisses for the head
- 60 Almond slices for the ears
- 30 Red sugar pearls for the nose
- Black decorative icing for the eyes
Instructions
For The Body
- Line two baking trays with parchment paper or wax paper and set aside.
- In a large bowl, mix the butter, corn syrup, and almond extract together. Stir until smooth and well combined.1/4 cup unsalted butter, 3 tablespoons corn syrup, 1 teaspoon almond extract
- Gradually add the powdered sugar to the bowl and knead together until a soft dough forms.2 1/2 cups powdered sugar
- Pinch off ½ tablespoon-sized pieces of dough, roll into a ball, and then flatten the balls into discs.
- Wrap each disc around a maraschino cherry, keeping the stems exposed. Use your hands to carefully roll each ball into shape.20 ounces maraschino cherries with stems
- Repeat with the rest of the cherries and dough. Refrigerate for 2-4 hours, until firm.
- Once the dough is firm, melt the chocolate wafers in a double boiler or candy melting pot over low heat. Stir occasionally to ensure it is heating evenly.10 ounces Ghirardelli milk chocolate melting wafers
- Gently hold the cherry by the stem and dip it into the chocolate candy, one at a time. You can use a fork if needed to lift it out without breaking the stem off.
- Place the chocolate covered cherries back onto the prepared baking tray and lay them on the side.
For The Head
- Add a Hershey kiss for the mouse’s head. Press the bottom of the kiss onto the opposite side of the cherry from the stem.30 milk chocolate almond Hershey’s Kisses
- Next, for mouse ears, place two almond slices between the cherry body and the head. Repeat with the rest of the cherries.60 Almond slices
- Once the head, body, and ears are all attached, decorate the faces of the little mice. Using a toothpick or skewer, dab a tiny amount of melted chocolate onto the top part of the tip end of the kiss.
- While the chocolate is still wet, place a red sugar pearl for the mouse nose. Repeat with the rest of the candy mice. To keep it from falling off, hold it in place for a few seconds.30 Red sugar pearls
- For the eyes, add two little dots of black decorative icing onto the Hershey’s Kiss face.Black decorative icing
- Repeat with the rest of the mice, then refrigerate until ready to serve.
Notes
- Once you drain the cherries, place them on a paper towel-lined plate and pat dry to remove as much moisture as you can. This will help the dough stick better.
- Be careful not to break the stems off. You need them for the mouse’s tail.
- If needed, dab a little melted chocolate to bottom of the red pearl to help keep it in place.
- You may want to practice making the eyes on a piece of parchment paper or napkin first. If the icing is coming out of the tube too quickly, you can use a toothpick or skewer to dab a small amount where needed.
Nutrition
Did You Make This Recipe?
Share it with me on Instagram @funmoneymom and follow on Pinterest @funmoneymom for more!
Let’s be friends!
Did you love this post? Make sure to comment below and let me know your thoughts! And don’t forget to follow on your favorite social network below!

About Lisa O’Driscoll
Lisa O’Driscoll is a lifestyle and parenting expert, cookbook author, and the creative force behind Fun Money Mom, a popular blog she’s run since 2014. She’s the author of the children’s cookbook Roll It, Slice It, Mash It, Dice It, designed to get kids excited about cooking. With multiple TV appearances under her belt, she loves sharing her expertise on family-friendly recipes, creative DIYs, and party planning and is always on a mission to inspire and entertain!