Santa Hat Cupcakes
This post may contain affiliate links. As an Amazon Associate, I earn from qualifying purchases.
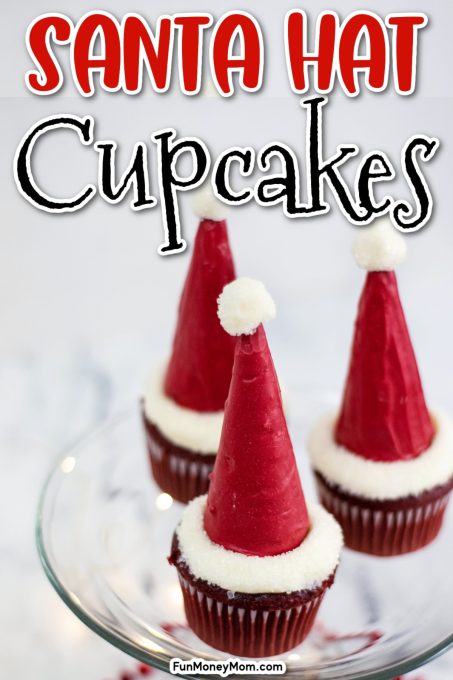
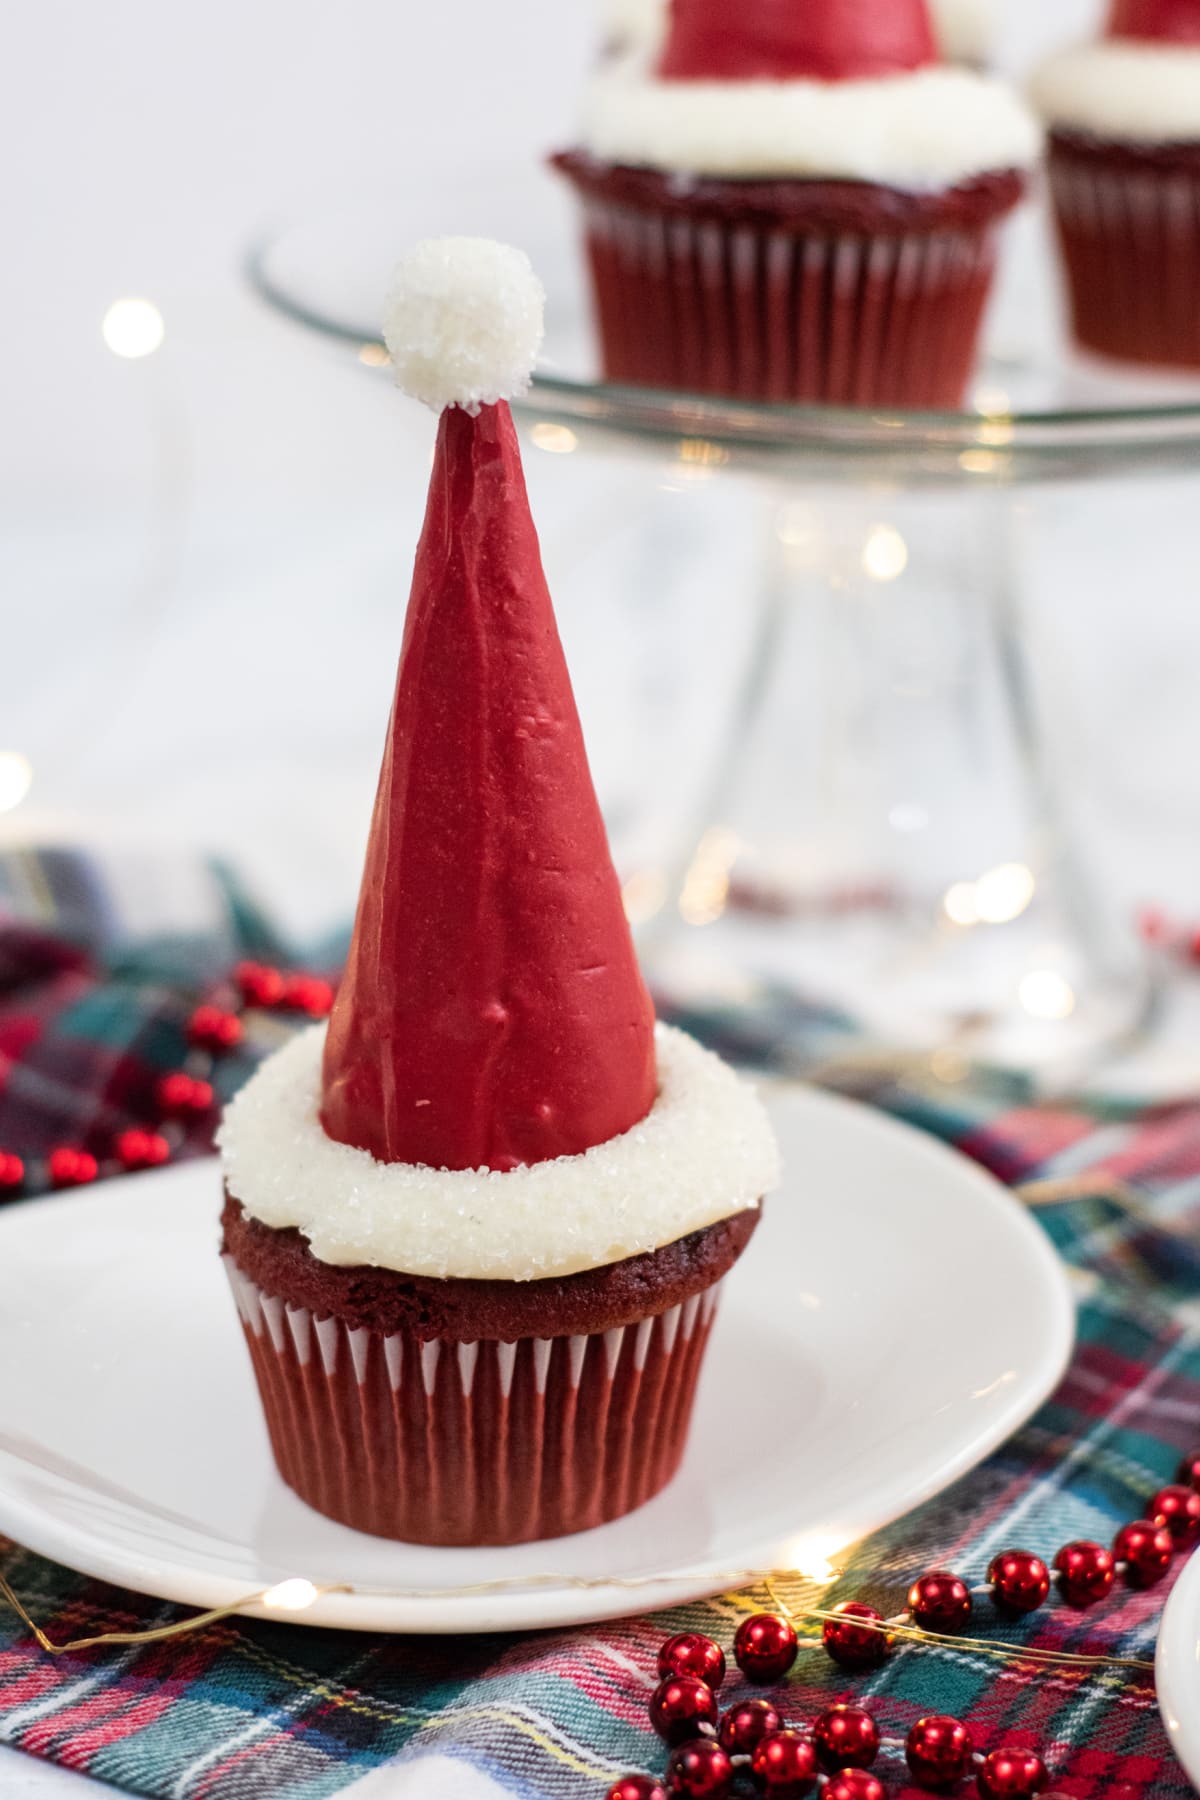
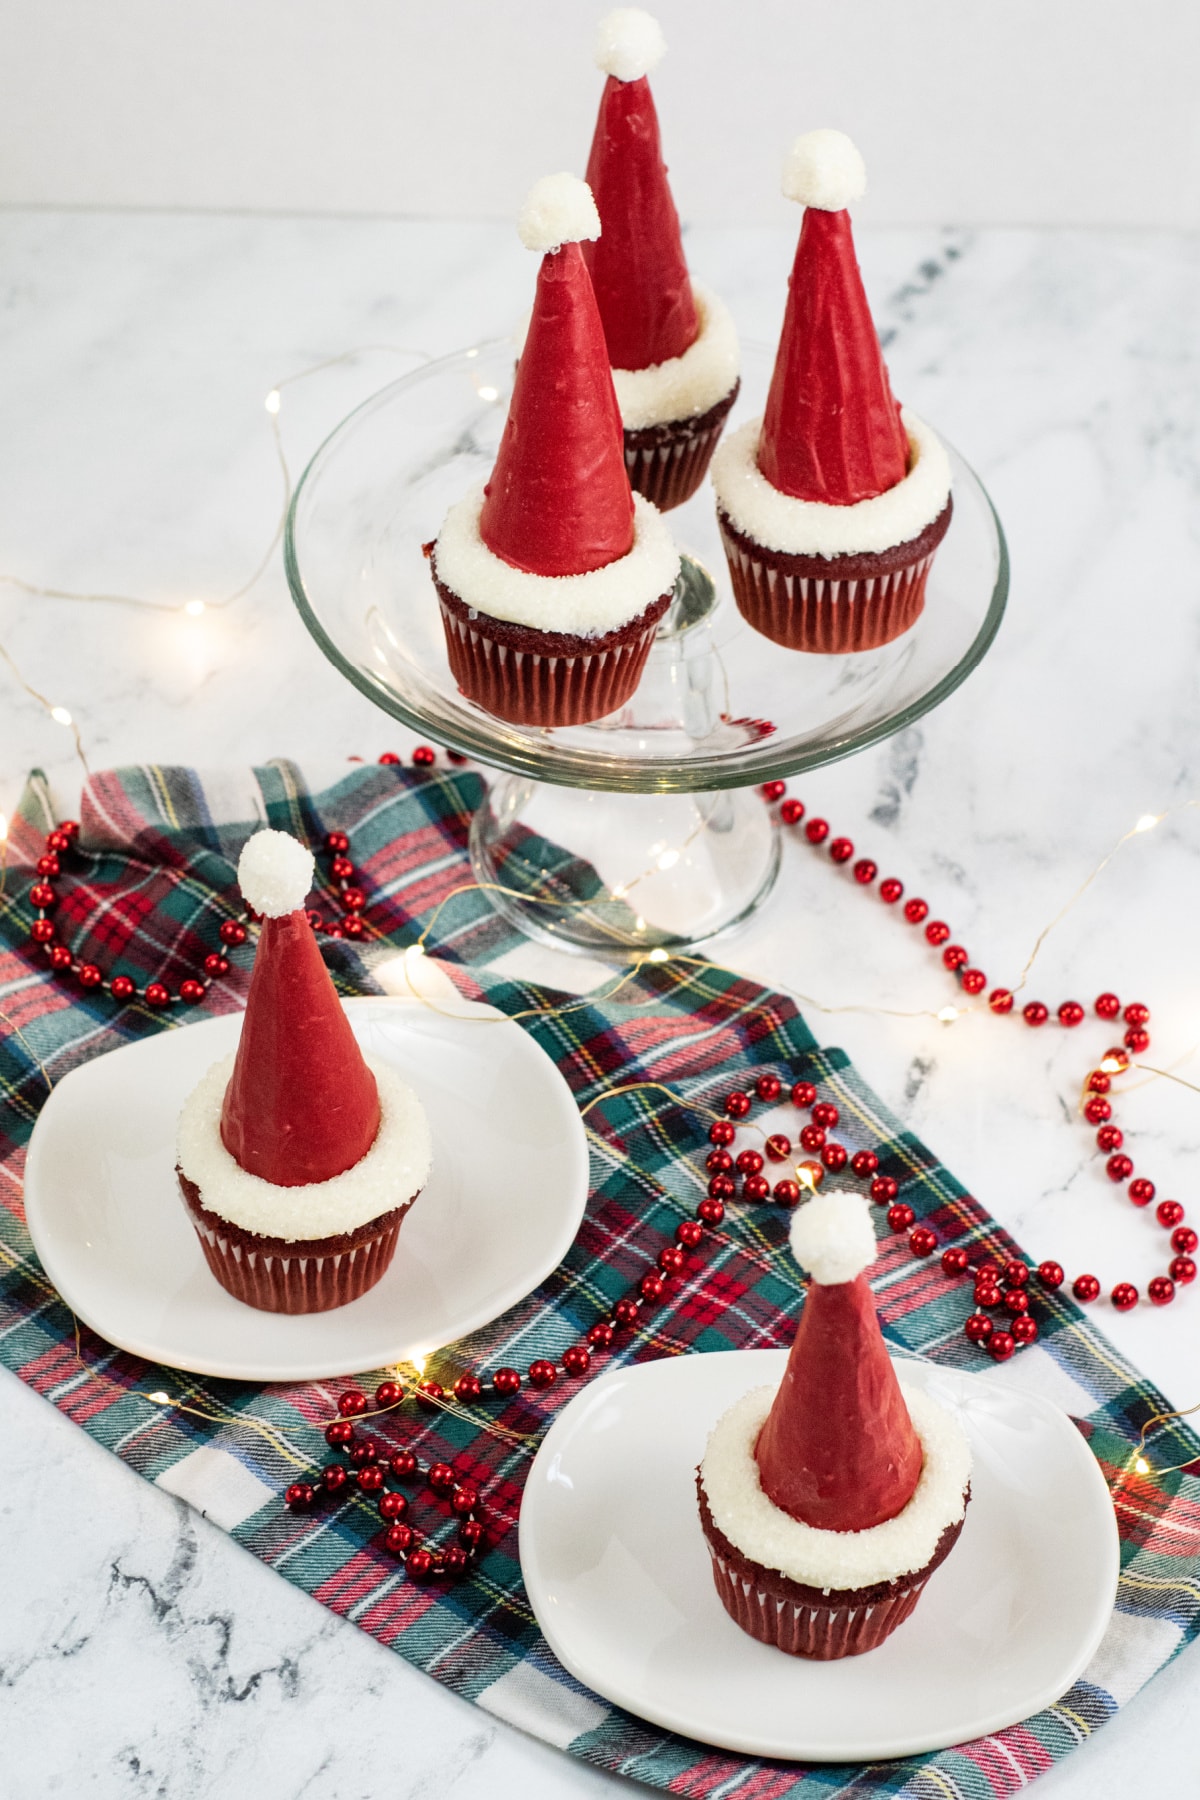
These adorable Santa Hat Cupcakes are a festive holiday treat that kids of all ages will love! Easy to make and super fun to eat, they’re guaranteed to be a huge hit at all your Christmas parties.
Christmas time is my very favorite time of year. From the festive holiday lights and decorations and family games, like this Christmas Scavenger Hunt, to the hustle and bustle of searching for all the hottest toys for the kids, the Christmas holidays are just so much fun!
Out of all the holiday activities, one of the best may just be baking Christmas treats. It’s even more fun when I do it with my girls and I knew they’d love kicking off the holiday season with these adorable Santa cupcakes.
Simple Santa Hat Cupcakes
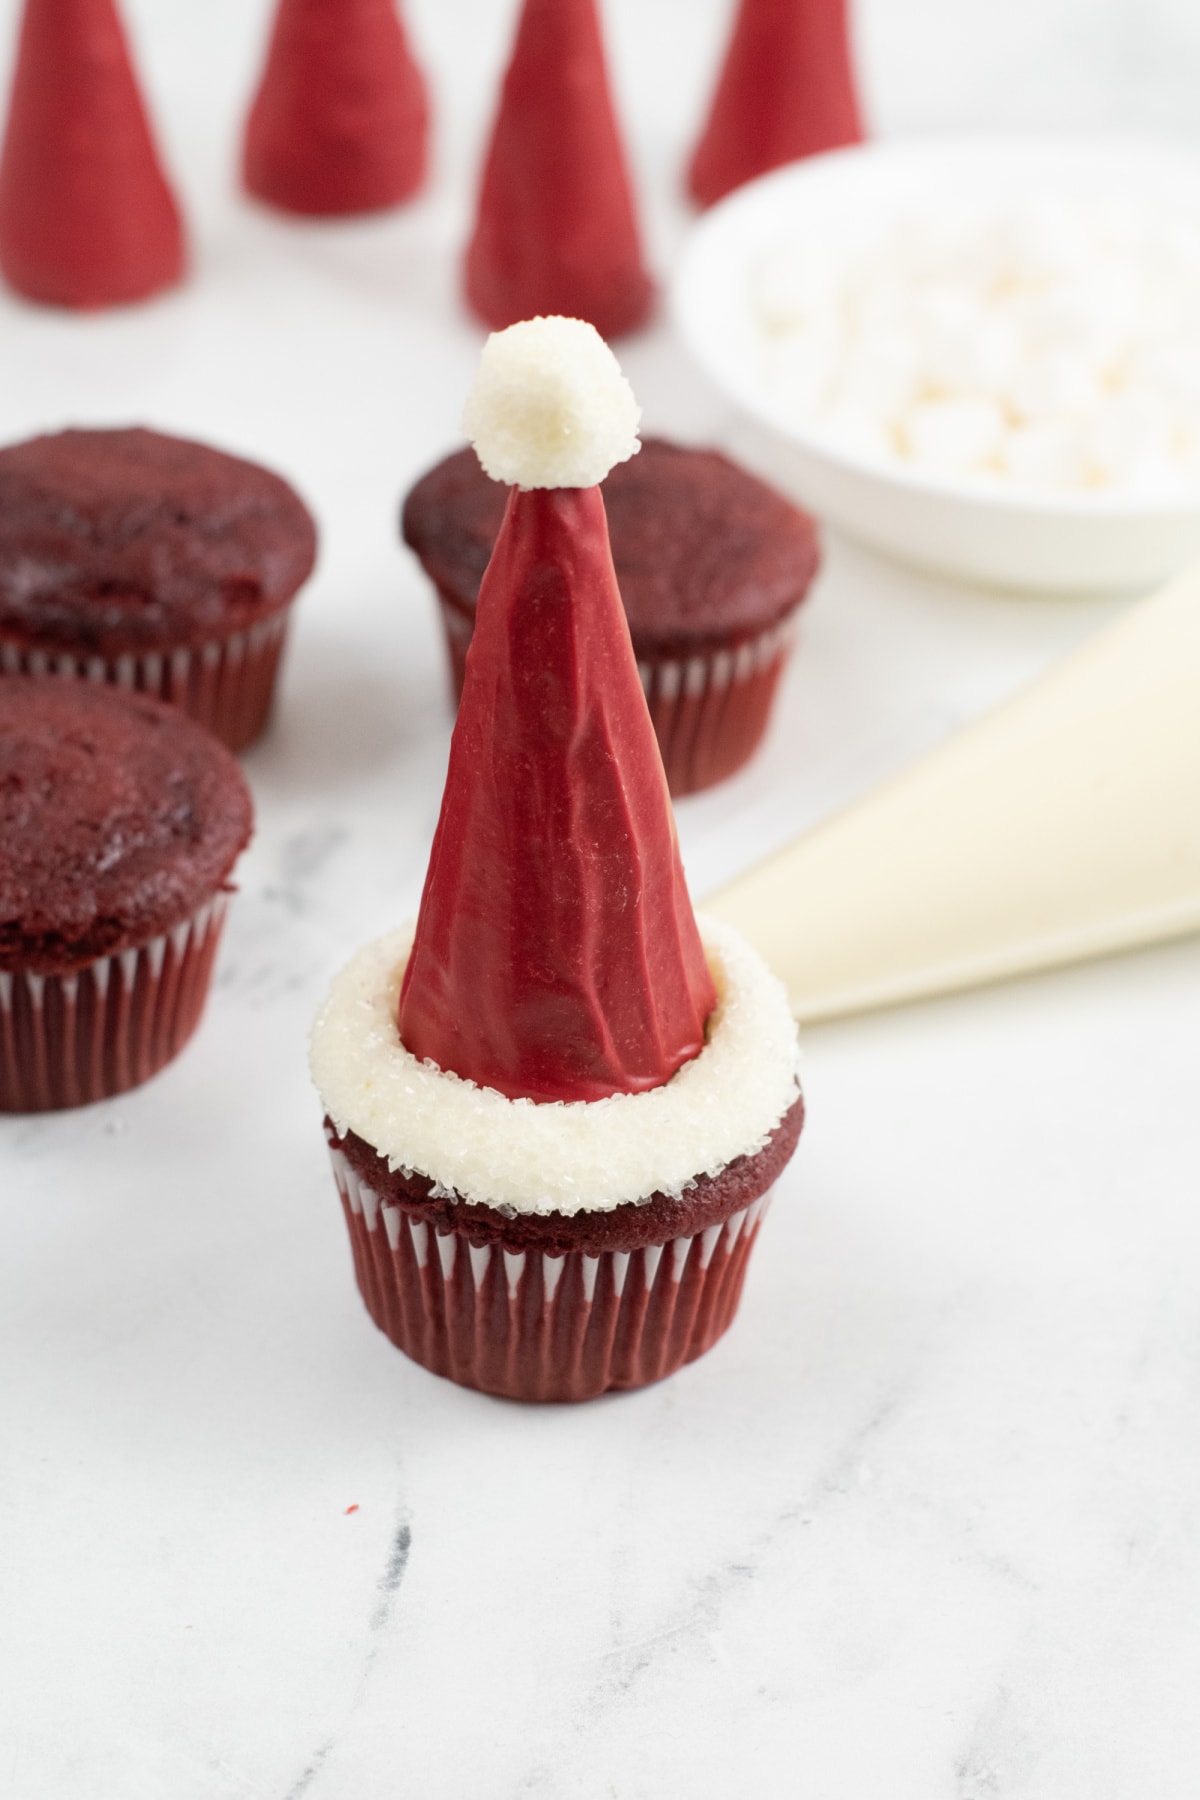
We went with red velvet cupcakes as the base for the hat. When we added white frosting to the top of the cupcake and topped it with red chocolate coated sugar cones to create the perfect Santa hat. For the grand finale, we finished off the top of each hat with a glistening white pom-pom.
These fun Christmas cupcakes are perfect for holiday parties, teacher’s gifts, family gatherings or a special treat for your neighbors. What better way to spread the Christmas spirit, right.
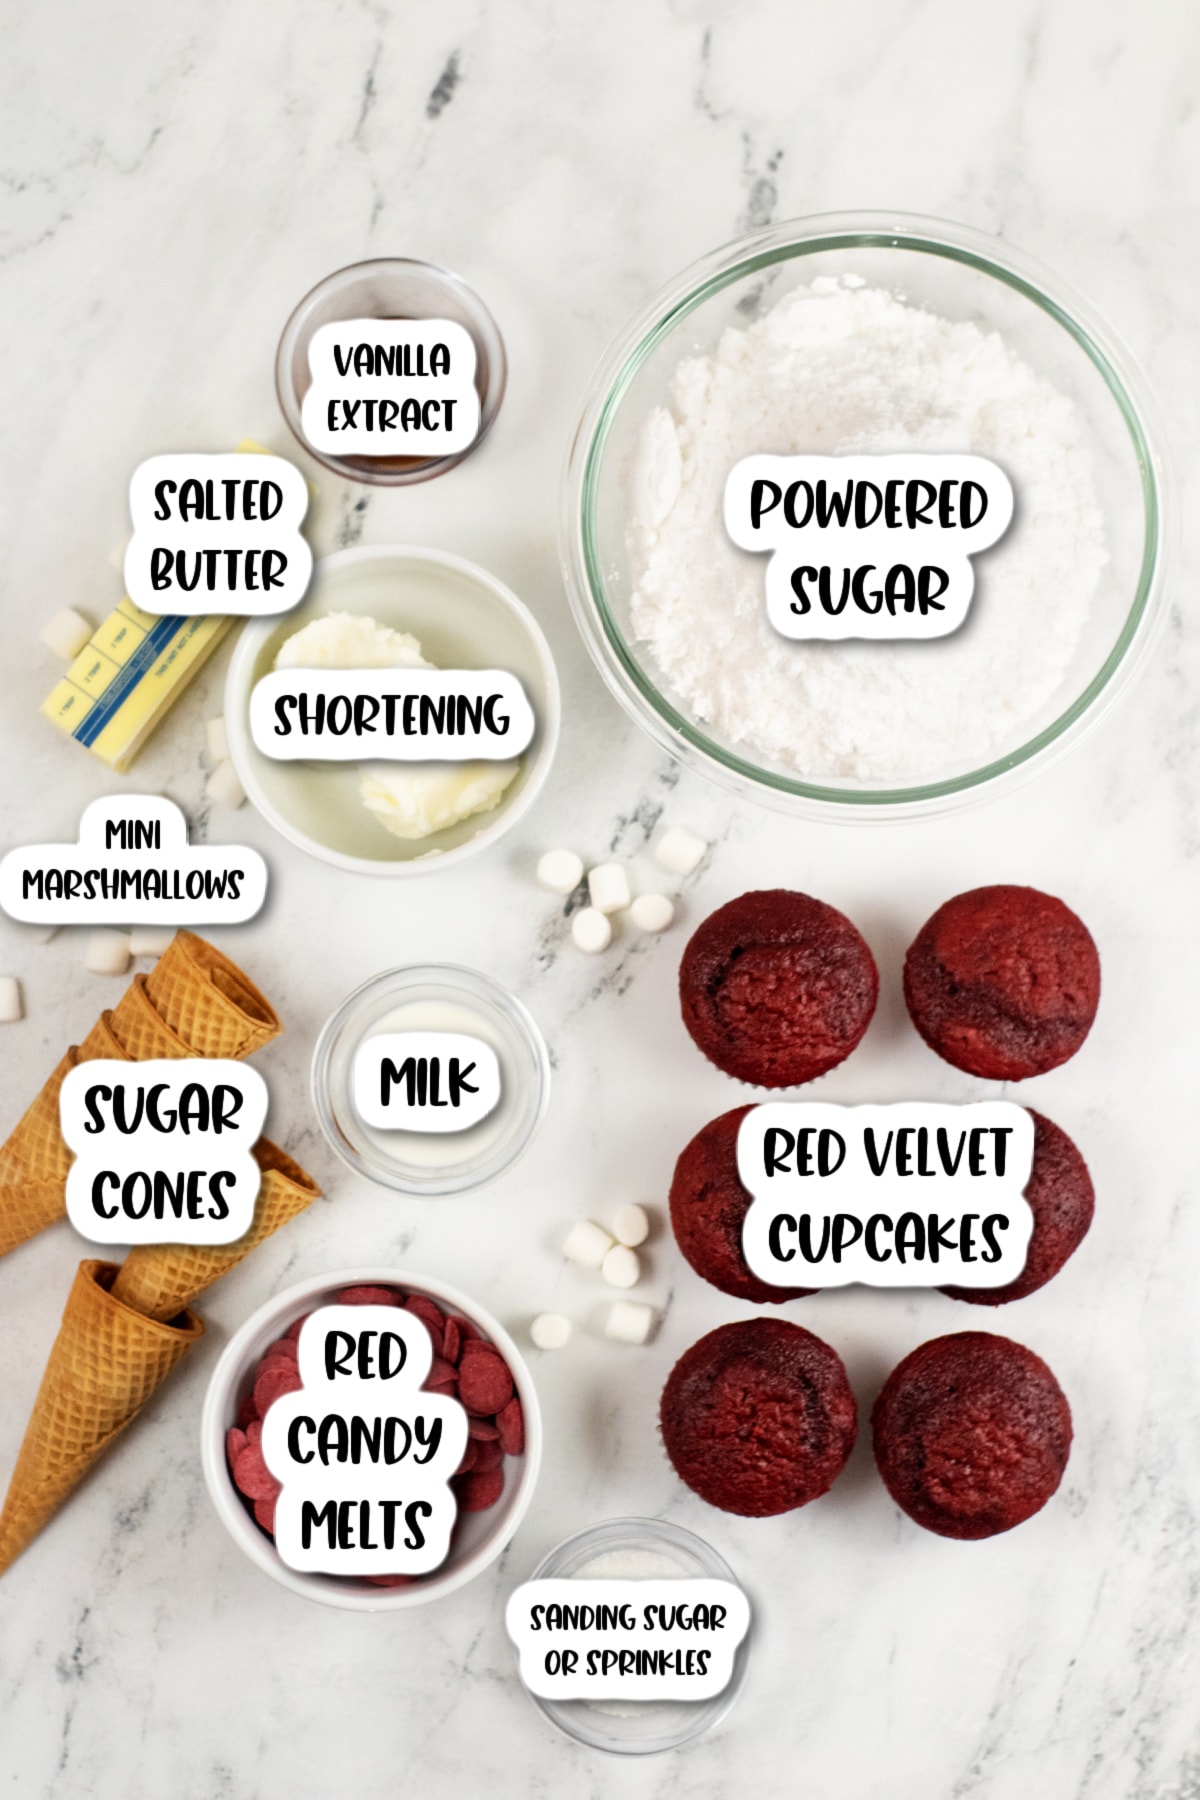
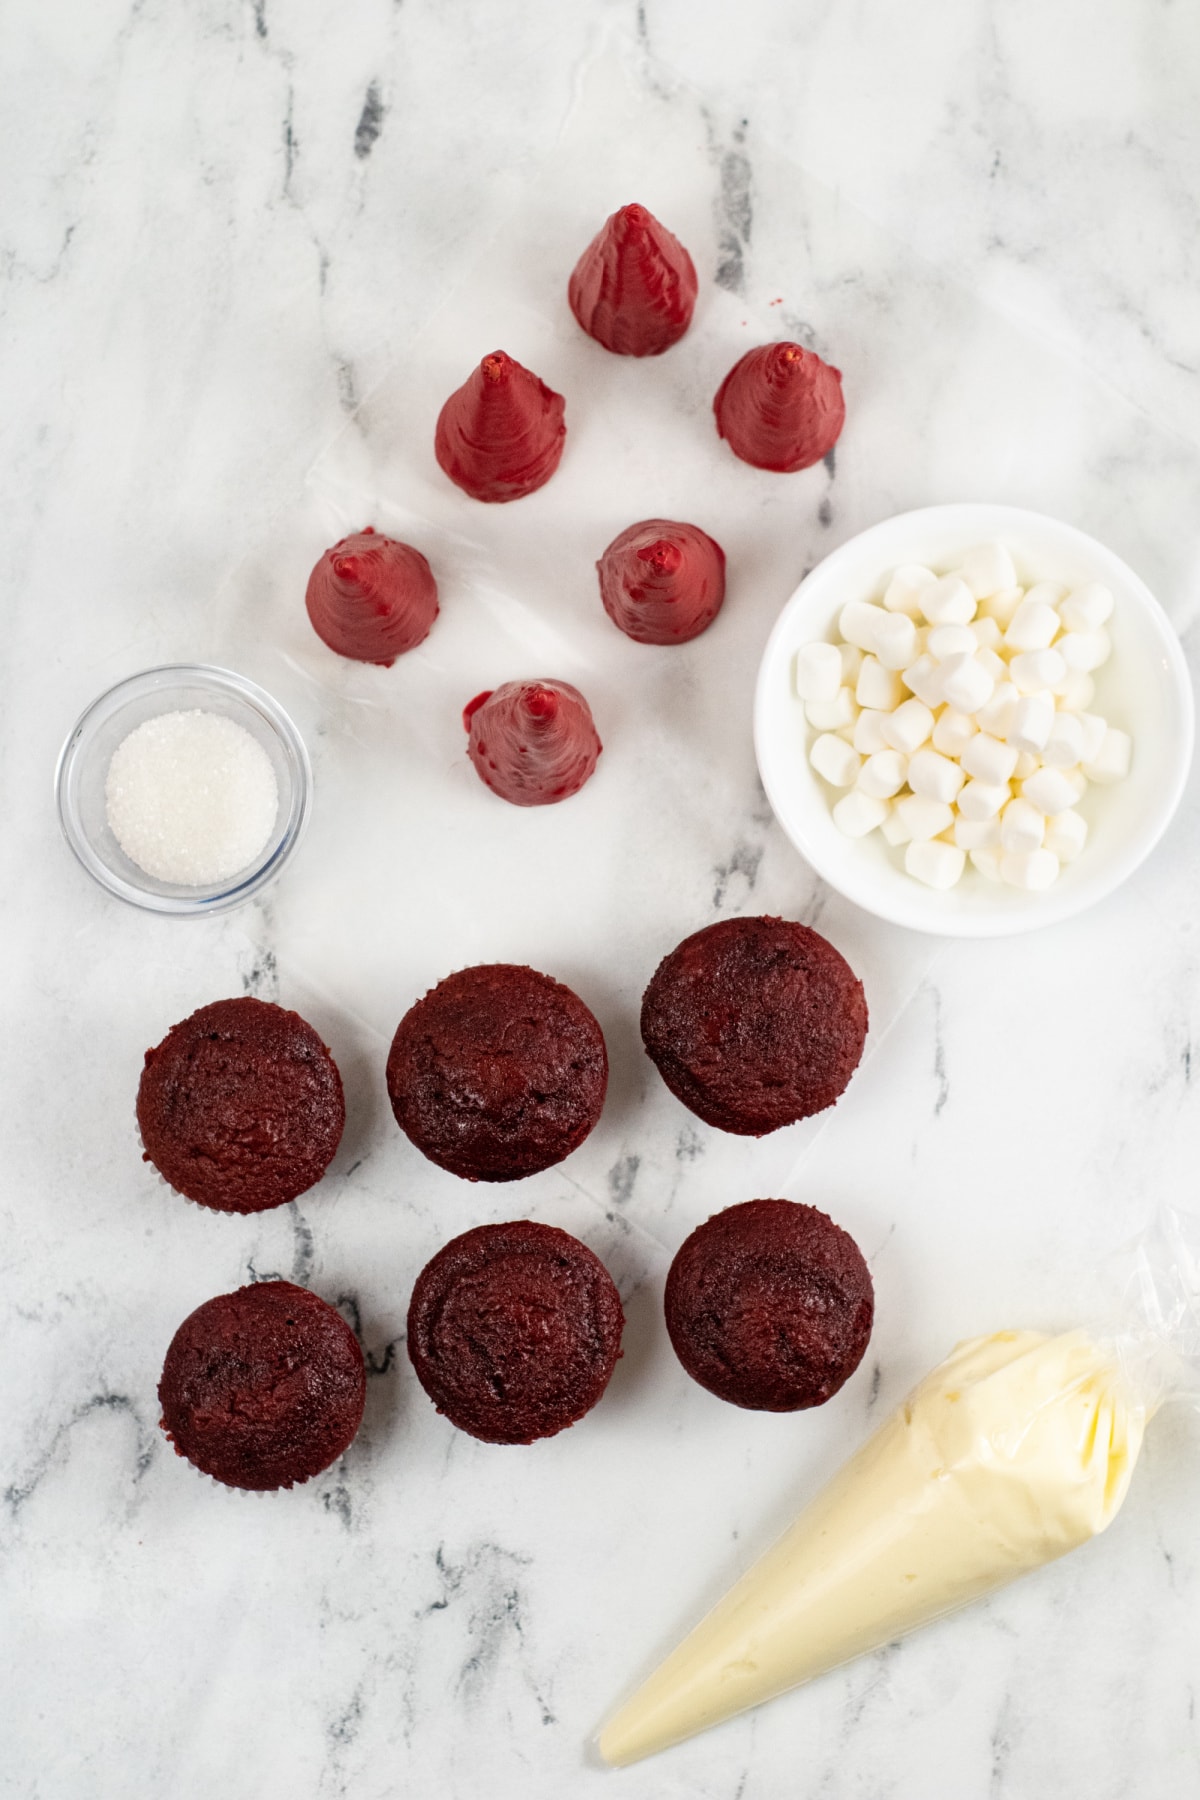
Ingredients
- 12 red velvet cupcakes, cooled completely
- ½ cup salted butter, softened
- ½ cup shortening
- 3-4 cups powdered sugar
- 1 ½ teaspoon vanilla extract
- 2 tablespoon milk
- 12 mini marshmallows
- 12 sugar cones
- 2 cups red candy melts
- 1-2 tbsp. shortening, as needed
- sanding sugar or white sprinkles
How To Make These Fun Santa Hat Cupcakes
For The Frosting:
Step 1: In a large bowl, cream the butter and shortening with an electric mixer until well blended. It should have a light and fluffy consistency.
Step 2: Add vanilla and milk, mixing well.
Step 3: Slowly add 3 cups of powdered sugar, a little at a time. Continue to mix as you keep adding more. The frosting should be soft but hold its shape in stiff peaks. If needed, you can add up to one more cup of sugar to get the desired texture. Set frosting aside.
For The Santa Hats
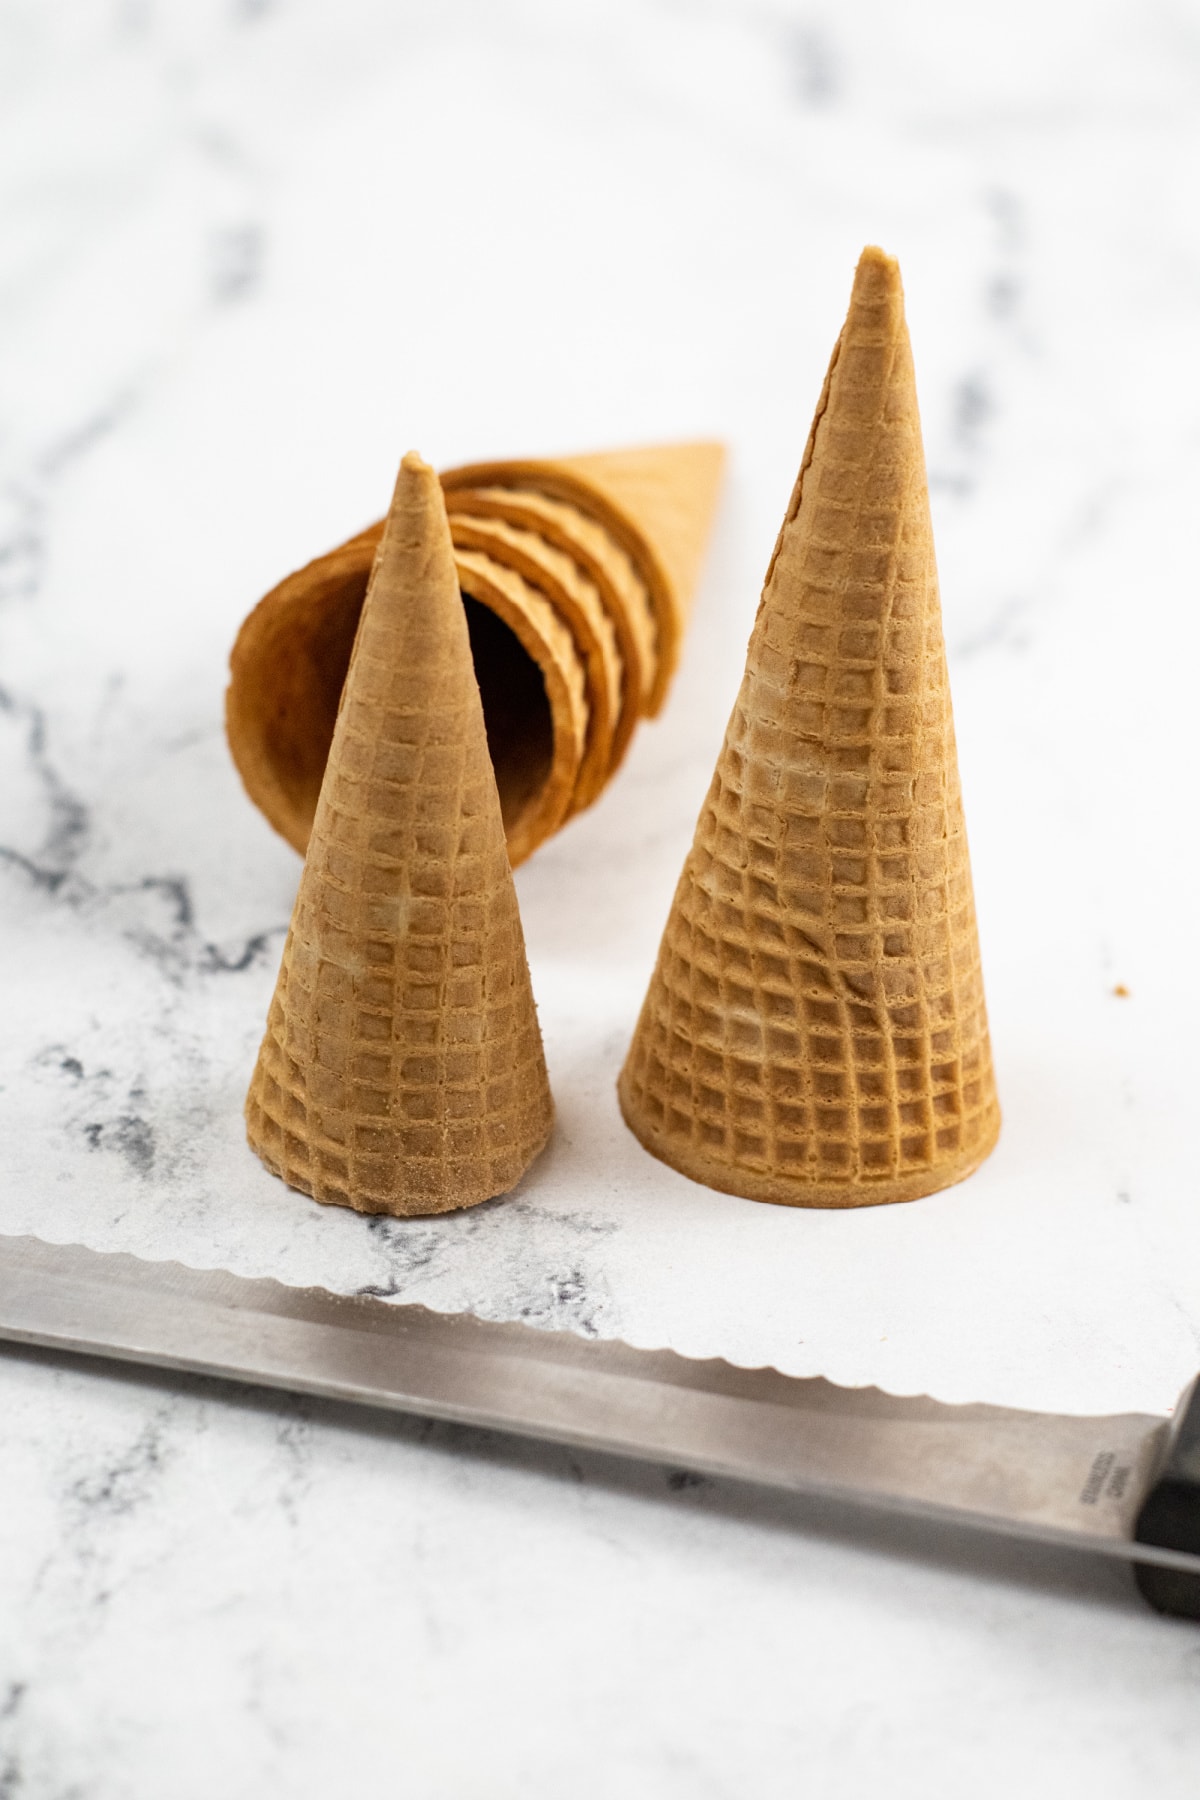
Step 1: Using a bread knife, trim about 1 1/2 inch off the open end of each ice cream cone to make it slightly shorter. It works best when you score all the way around, then snap the cone off.
Step 2: Place a piece of wax or parchment paper on your table or counter top.
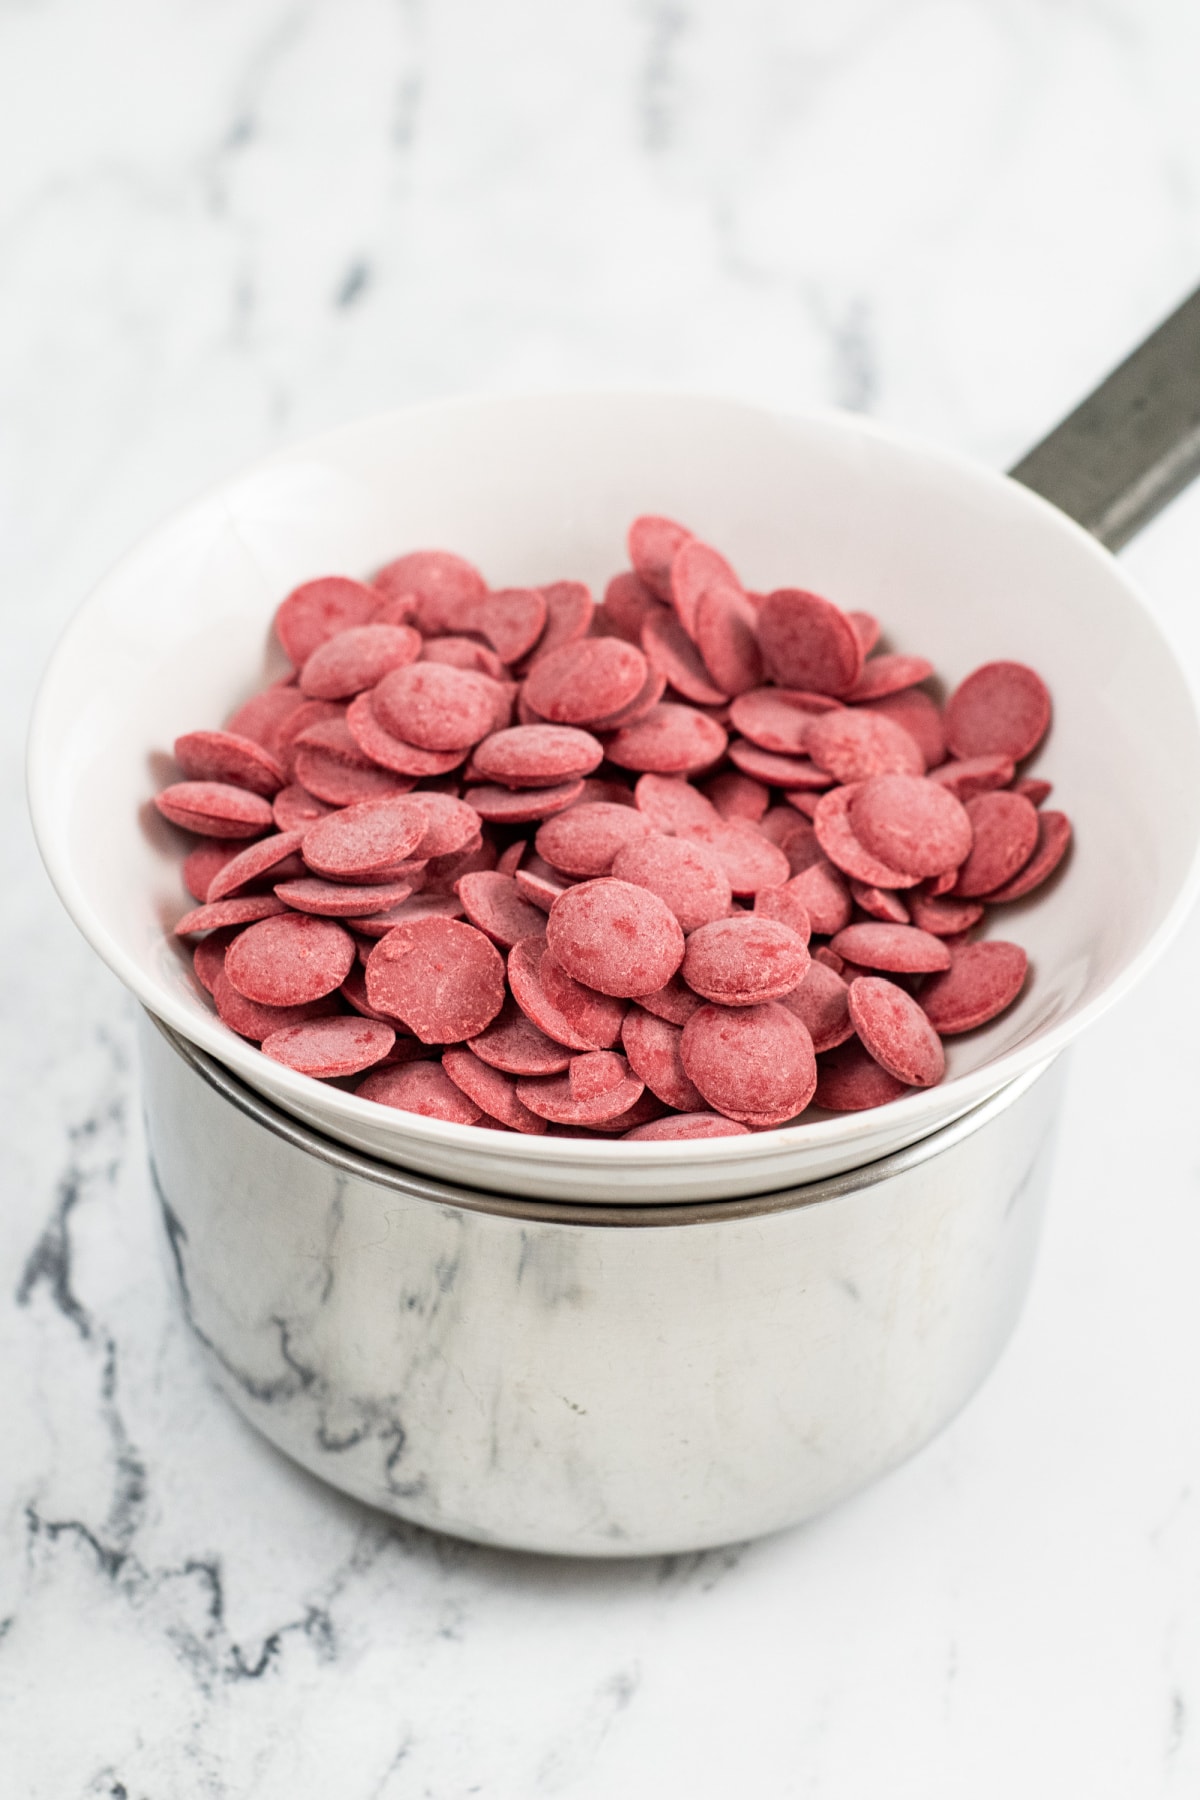
Step 3: In the bowl of a double boiler, melt the red candy melts over medium heat. If necessary, add 1-2 tablespoons of shortening or Wilton Dipping Aid to create a smooth texture.
Note: If you don’t have a double boiler, just place a heat safe bowl over a pot of simmering water instead.
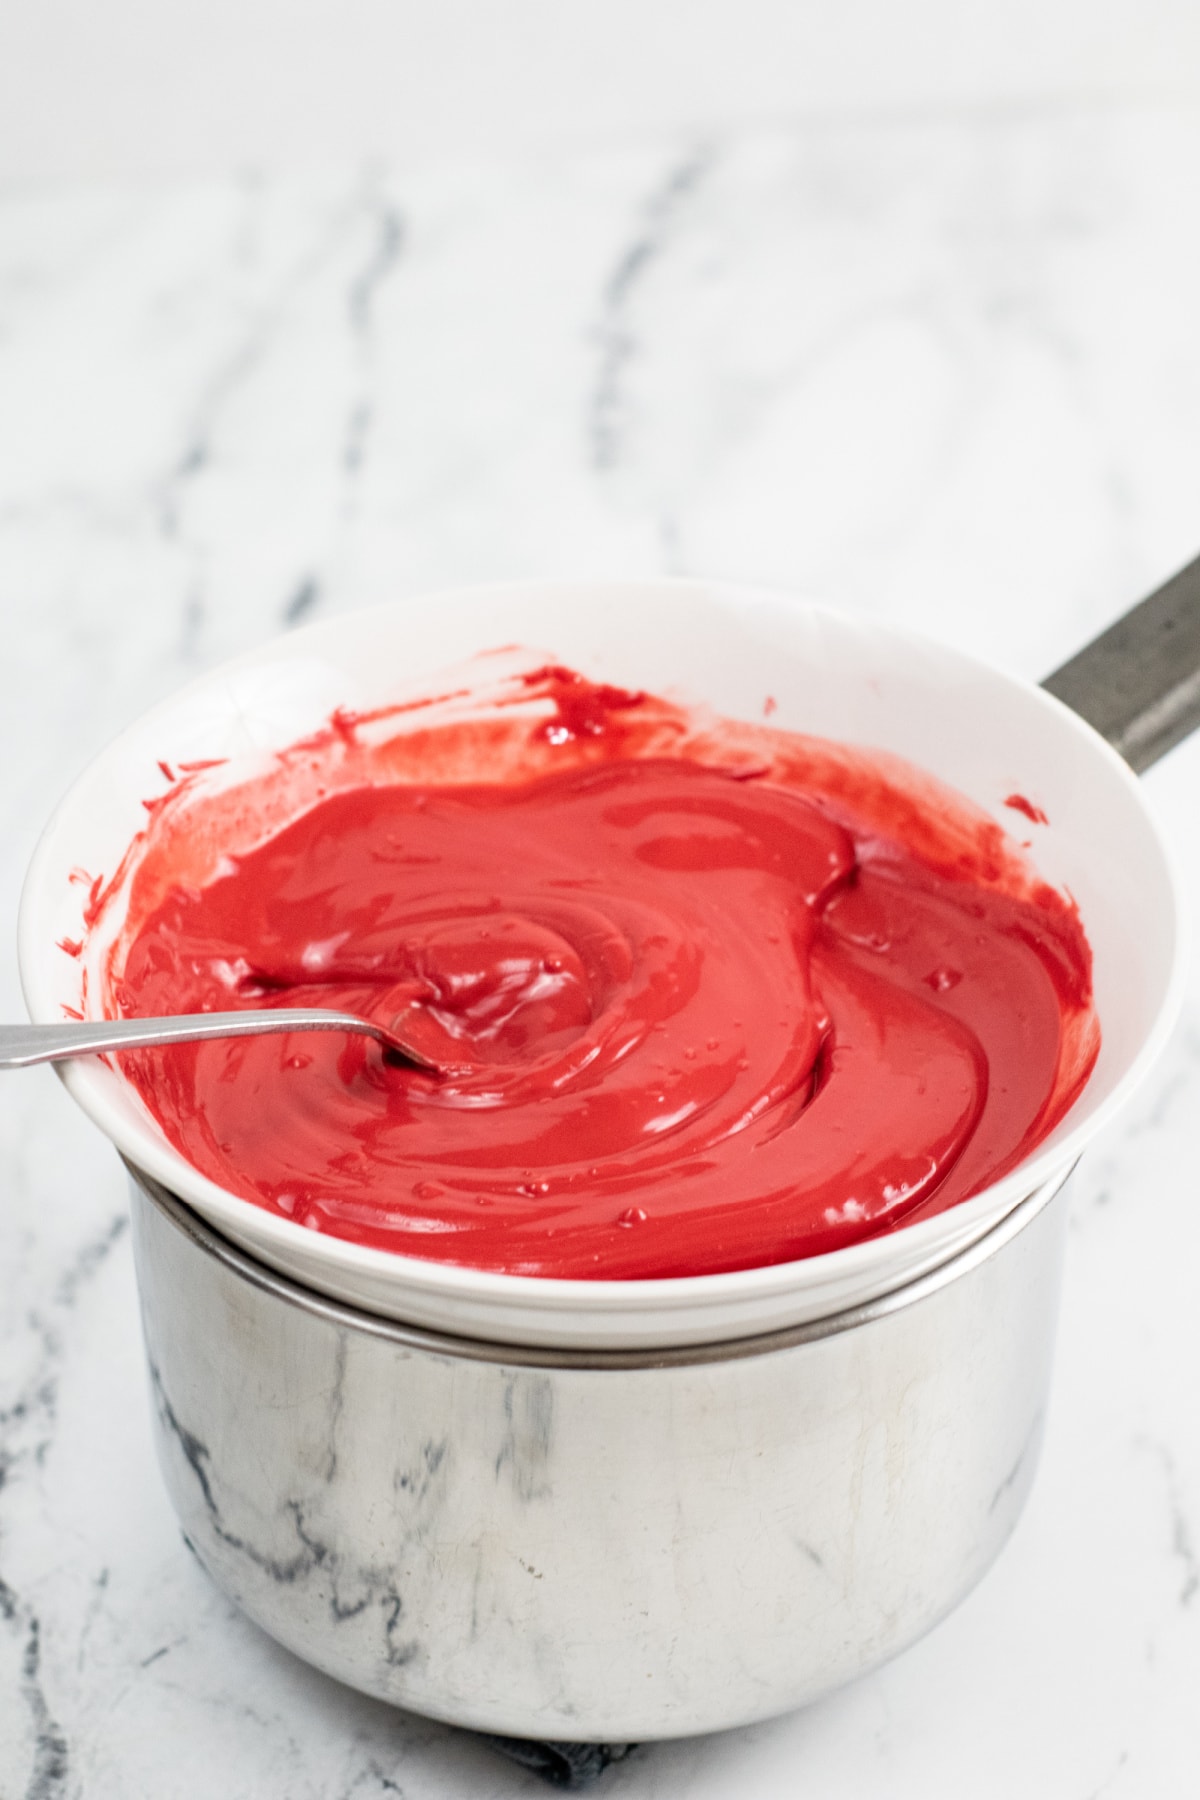
Step 4: Once candy melts are completely melted, roll the cones in it until the outside is completely covered. Place them on the prepared wax paper or wire rack to set.

Decorating The Cupcakes
Step 1: Place your sanding sugar or white sprinkles in a shallow dish.
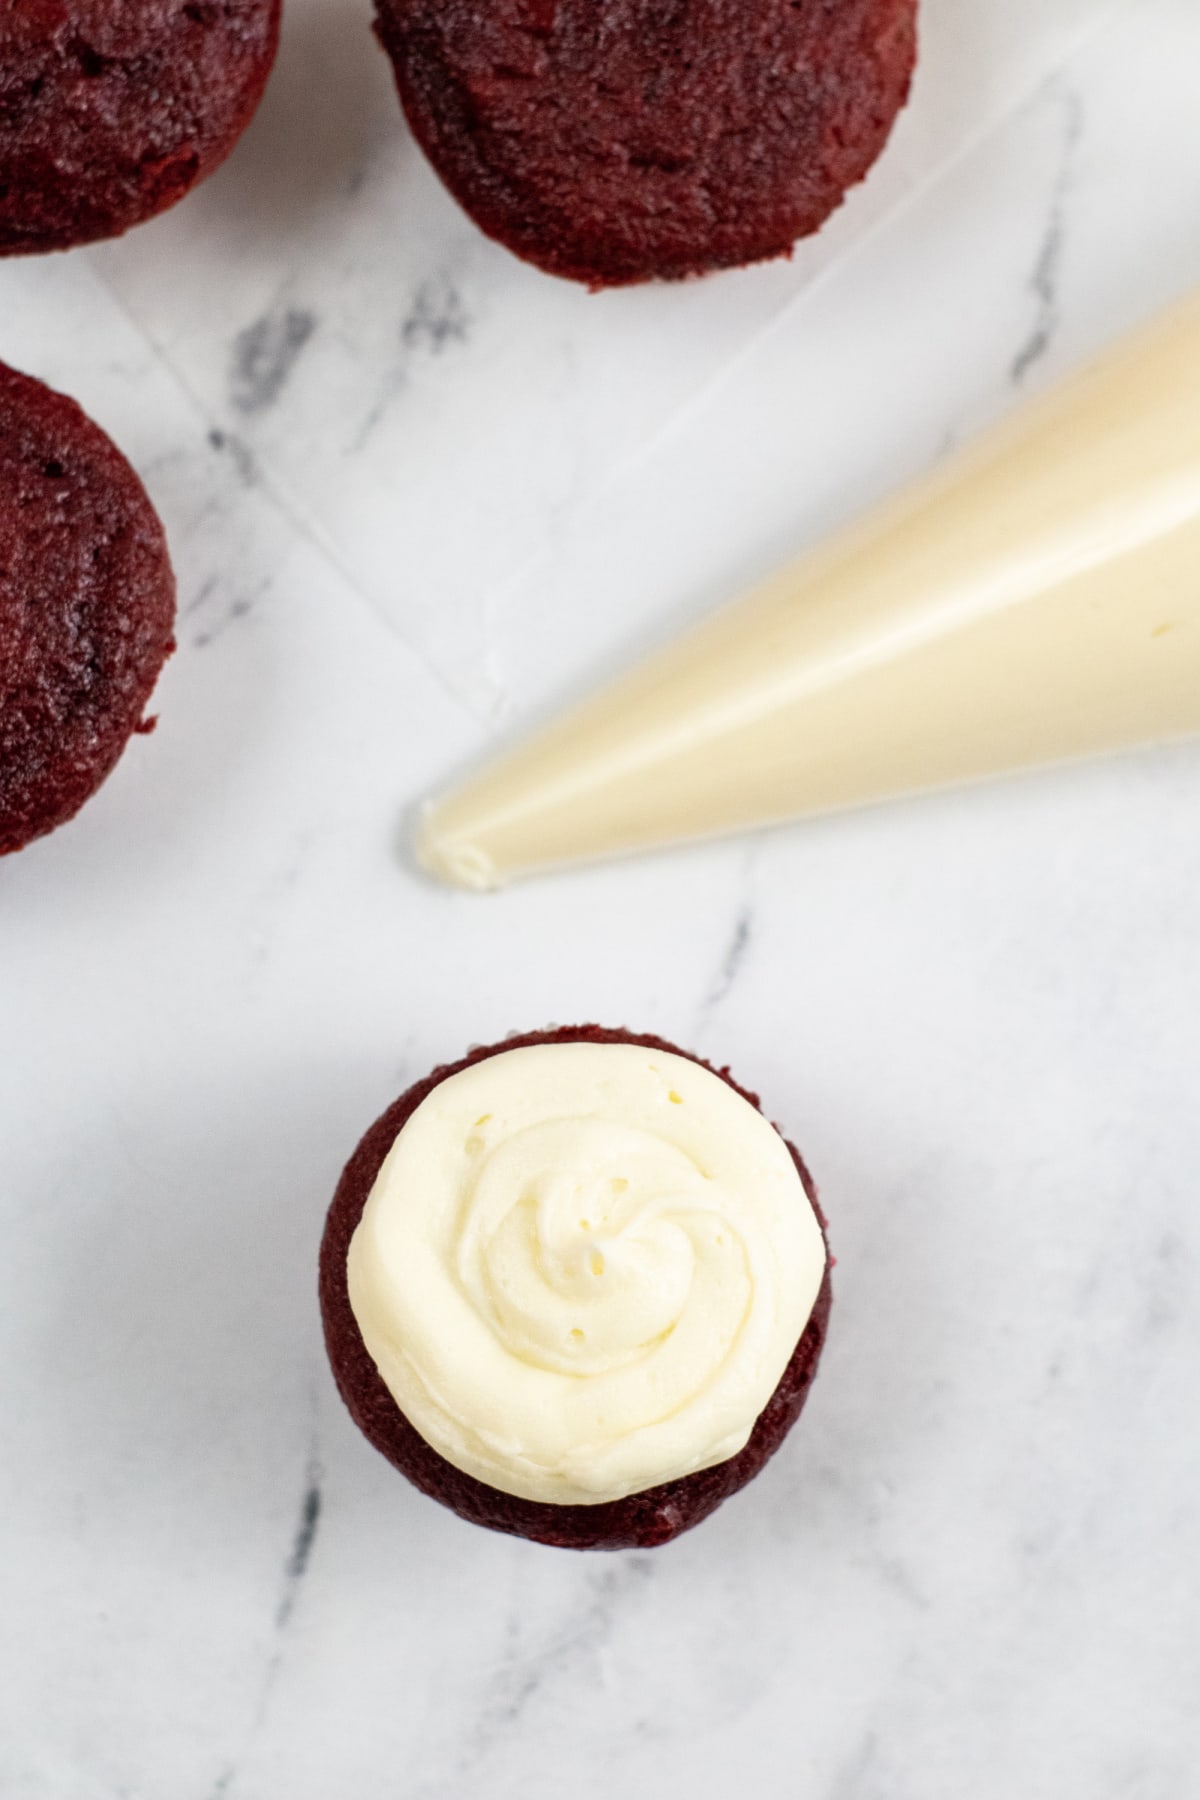
Step 2: Fit a pastry bag with a round tip (or just cut the tip off the bag) and fill with frosting. Pipe frosting onto the cupcakes.
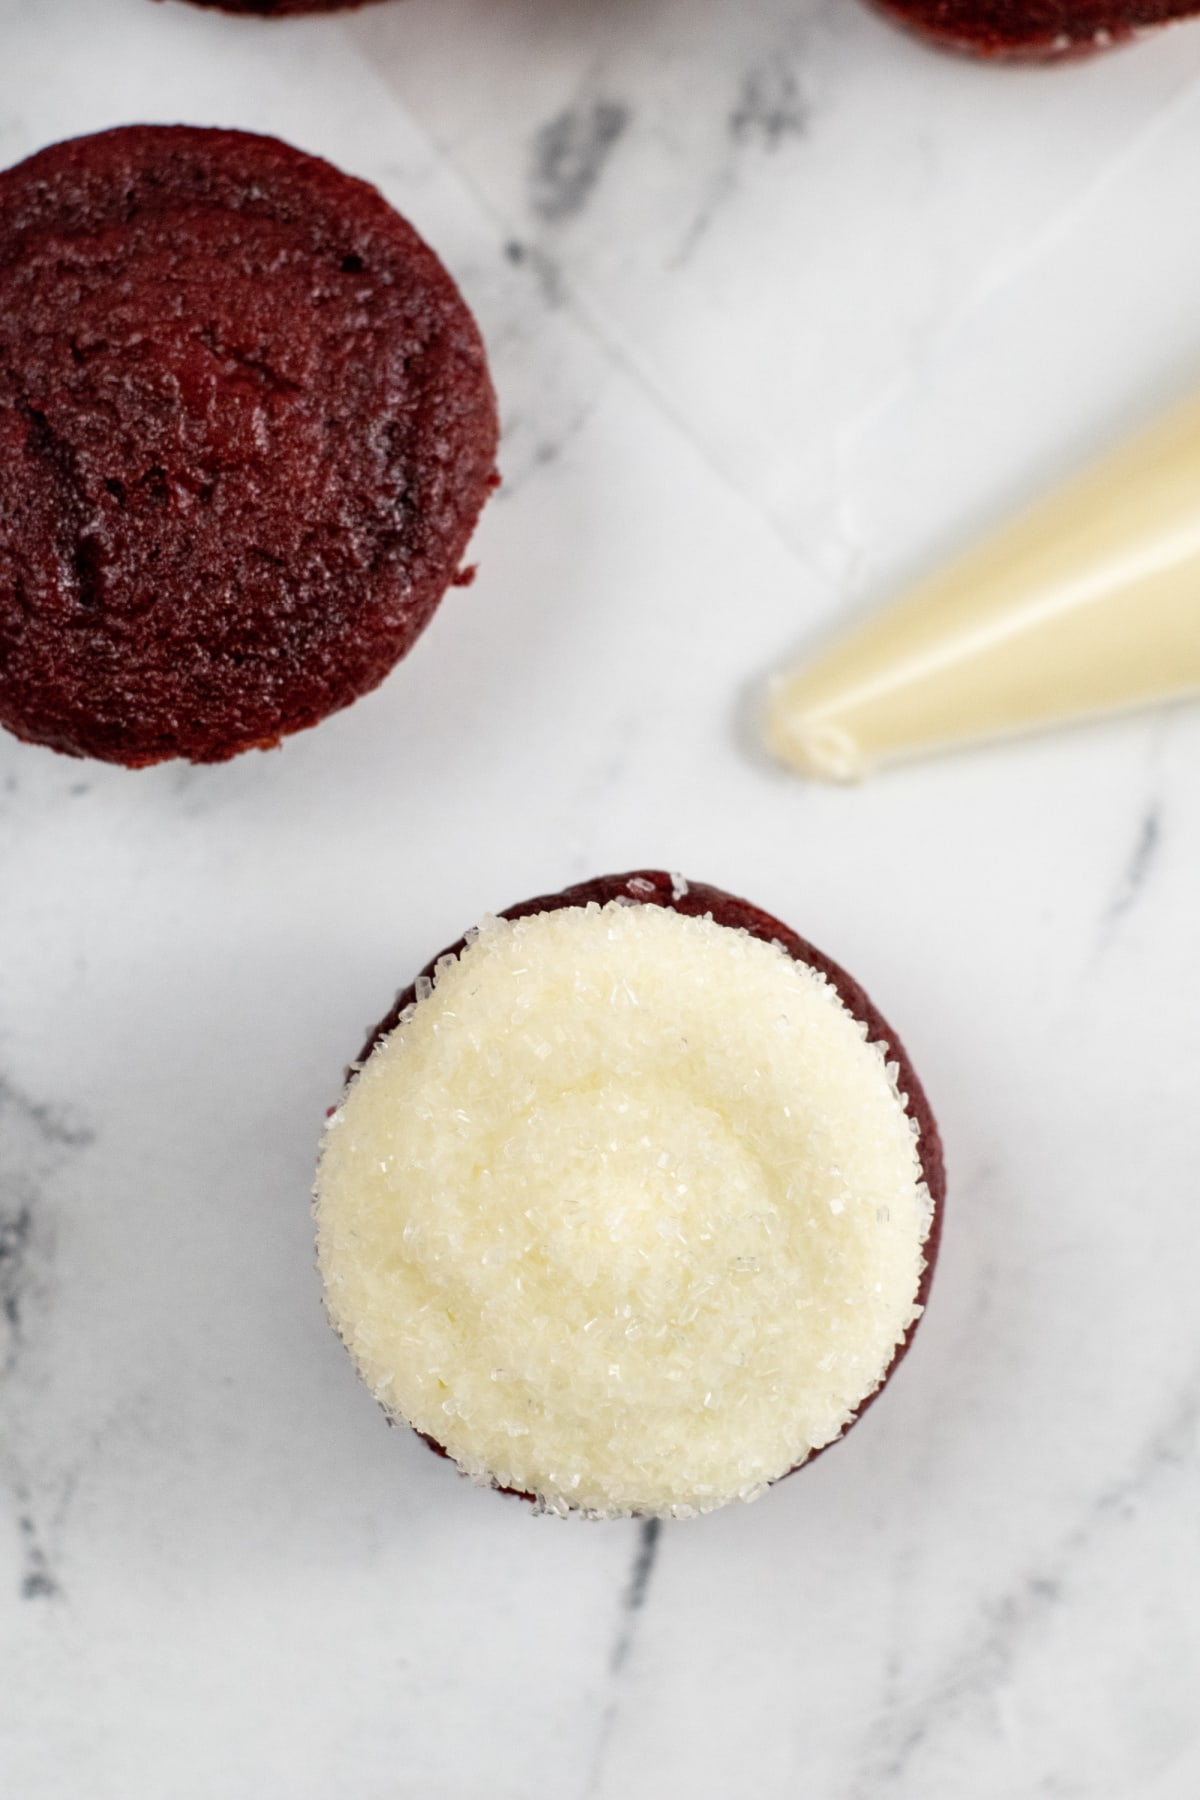
Step 3: Gently dip the frosted cupcakes into the sanding sugar.
Step 4: Next, place a marshmallow on a toothpick or bamboo skewer. Coat the marshmallow with frosting, then dip it into the sanding sugar or sprinkles. This will be the pom pom for the Santa hat.
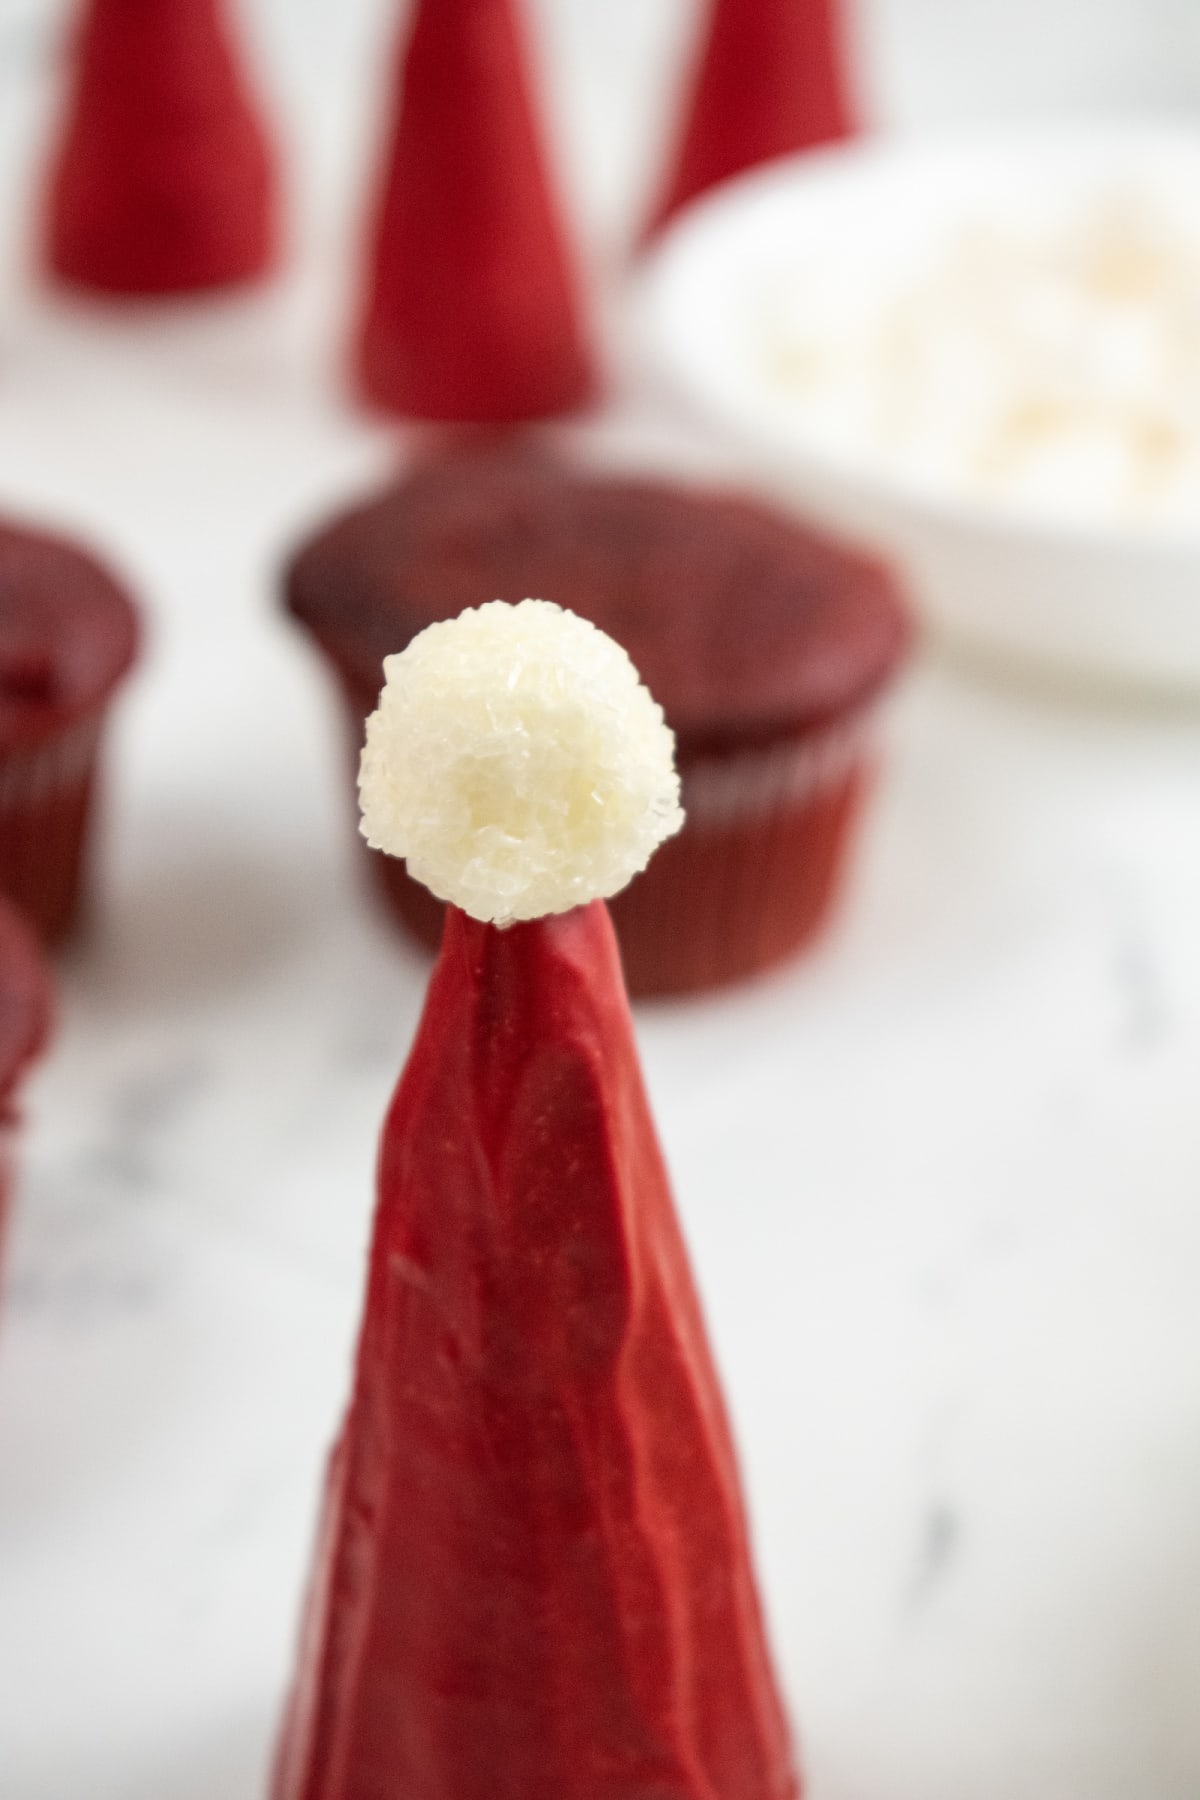
Step 5: Squeeze a small dot of frosting onto the tip of the ice cream cone and gently press the marshmallow into place. Repeat with remaining cones.
Step 6: Finally, place cones on the frosted cupcakes and gently press down to secure in place.
For your next Christmas party, why not add a few of these to a tray with other homemade goodies. These Christmas Tree Meringues, Candy Cane No Bake Cheesecakes and White Chocolate Peanut Butter Christmas Cookies are always fun choices!
Can I Make These Cupcakes in Advance?
Because the sugar cone can become soft over time, these cupcakes are best when you assemble them the same day you’re serving them.
If you want to save a little time, you can always make the individual components ahead of time, then put them all together when you’re ready.
Tips and Suggestions for the Best Santa’s Hat Cupcakes
- Coating the cones: The easiest way to chocolate dip the cones is by inserting a toothpick right into the tip end of the cone. Take another another toothpick and guide the cone as it rolls around in the melted chocolate.
- Frosting: Even though this recipe calls for homemade frosting, you can save time by using store-bought cream cheese frosting or buttercream frosting.
- Sanding sugar: If you can’t find sanding sugar, you can create the same cute cupcake using edible glitter.
- Piping bag: You can use a large zip lock bag as a decorating bag. Just snip off the tip end of the bag and insert your large round tip and proceed with frosting the Santa cupcakes.
- Red candy melts: If you can’t find red candy melts, you can use the white ones or white almond bark and add red food coloring. If you rather not use chocolate, you could use red icing on the sugar cones instead.

On Christmas Eve don’t forget to leave one of these cupcakes out for Santa Claus too. After all, delivering toys is hard work and when Santa sees this, you’re sure to end up on his “Nice List!”

More Delicious Christmas Treats
If you love these cupcakes, check out some of our other Christmas favorites!
- Nutter Butter Reindeer Cupcakes
- Christmas Tree Cupcakes
- Pine Cone Truffles
- Oreo Snowman Truffles
- Snowman Rice Krispie Treats
- Christmas Oreo Balls
- Chocolate Christmas Mice
Find More On Pinterest!

Santa Hat Cupcakes
Ingredients
- 12 red velvet cupcakes cooled completely
- 1/2 cup salted butter softened
- 1/2 cup shortening
- 3-4 cups powdered sugar
- 1 1/2 teaspoons vanilla extract
- 2 tablespoons milk
- 12 mini marshmallows
- 12 sugar cones
- 2 cups red candy melts
- Sanding sugar or white sprinkles
- 1-2 tablespoons shortening if needed
Instructions
- In a large bowl, cream the butter and shortening with an electric mixer until well blended. It should have a light and fluffy consistency.
- Add vanilla and milk, mixing well.
- Slowly add 3 cups of powdered sugar, a little at a time. Continue to mix as you keep adding more. The frosting should be soft but hold its shape in stiff peaks. If needed, you can add up to one more cup of sugar to get the desired texture. Set frosting aside.
- Using a bread knife, trim about 1 1/2 inch off the open end of each ice cream cone to make it slightly shorter. It works best when you score all the way around, then snap the cone off.
- Place a piece of wax or parchment paper on your table or counter top.
- In the bowl of a double boiler, melt the red candy melts over medium heat. If necessary, add 1-2 tablespoons of shortening to create a smooth texture.
- Once candy melts are completely melted, roll the cones in it until the outside is completely covered. Place them on the prepared wax paper or wire rack to set.
- Place your sanding sugar or white sprinkles in a shallow dish.
- Fit a pastry bag with a round tip (or just cut the tip off the bag) and fill with frosting. Pipe frosting onto the cupcakes.
- Gently dip the frosted cupcakes into the sanding sugar.
- Next, place a marshmallow on a toothpick or bamboo skewer. Coat the marshmallow with frosting, then dip it into the sanding sugar or sprinkles. This will be the pom pom for the Santa hat.
- Squeeze a small dot of frosting onto the tip of the ice cream cone and gently press the marshmallow into place. Repeat with remaining cones.
- Finally, place cones on the frosted cupcakes and gently press down to secure in place.
Notes
Nutrition
Did You Make This Recipe?
Share it with me on Instagram @funmoneymom and follow on Pinterest @funmoneymom for more!
Let’s be friends!
Did you love this post? Make sure to comment below and let me know your thoughts! And don’t forget to follow on your favorite social network below!

About Lisa O’Driscoll
Lisa O’Driscoll is a lifestyle and parenting expert, cookbook author, and the creative force behind Fun Money Mom, a popular blog she’s run since 2014. She’s the author of the children’s cookbook Roll It, Slice It, Mash It, Dice It, designed to get kids excited about cooking. With multiple TV appearances under her belt, she loves sharing her expertise on family-friendly recipes, creative DIYs, and party planning and is always on a mission to inspire and entertain!