How To Make A Magical Harry Potter Cake
This post may contain affiliate links. As an Amazon Associate, I earn from qualifying purchases.

Need a Harry Potter cake for your party? Originally a wedding cake, we’ve totally reworked this awesome cake to make it our own!

This post contains affiliate links
When we were planning my daughter’s Harry Potter party, I knew I’d have to figure out a Harry Potter cake. My girls have gotten used to me making their birthday cakes and Ashling insisted that I make one again this year.
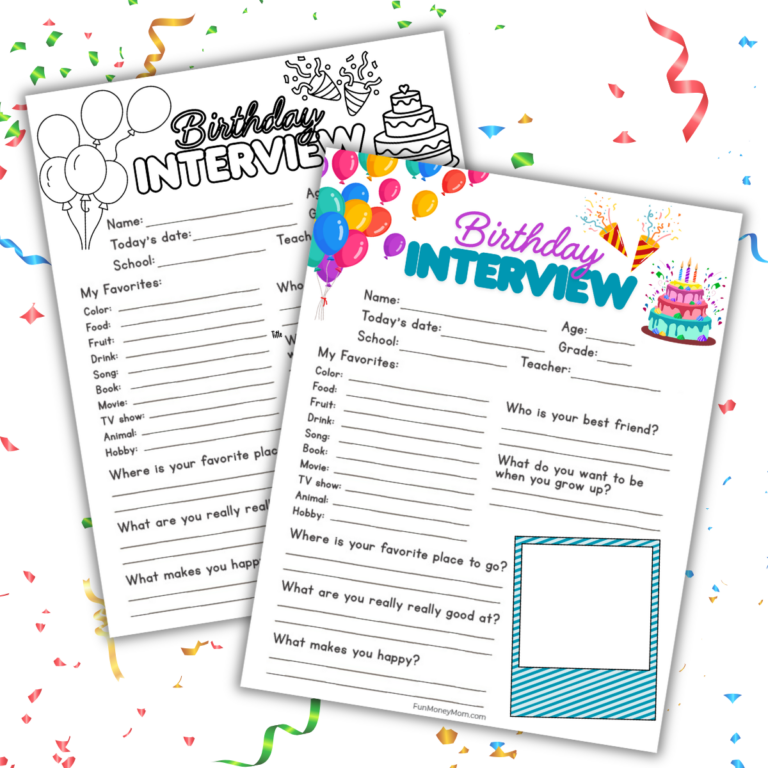
Related Post: Harry Potter Invitations
While it’s a lot more work, I have to admit that I’m kind of flattered that they like my cakes so much! I’ve made a Moana cake, Rapunzel cake, a castle cake and more. I even made a small beach cake for my mother-in-law’s birthday a couple years ago.
Now I needed to come up with a Harry Potter birthday cake. With the other cakes, I mostly came up with my own ideas. However, this time we hit up Pinterest to find Harry Potter cake ideas that would inspire us. The problem is that it was filled with cakes that I knew I’d never be able to pull off. Even my daughter knew better than to ask for this one…
Now THAT’S a Harry Potter cake but our goal was to find a cake that someone other than a professional baker could make. I suggested the Harry Potter cake Hagrid makes in the first movie.
That idea didn’t go over so well and it was back to the drawing board. We immediately found inspiration in this Harry Potter wedding cake. Ashling loved it and though I knew mine wouldn’t look quite like this, I was sure I could create something similar!
Harry Potter Cake
What you’ll need:
- 4 boxes cake mix
- 3 containers of icing
- 6 inch cake pan
- 8 inch cake pan (preferably two)
- 10 inch cake pan
(If you need all three, you can order a set of these cake pans)
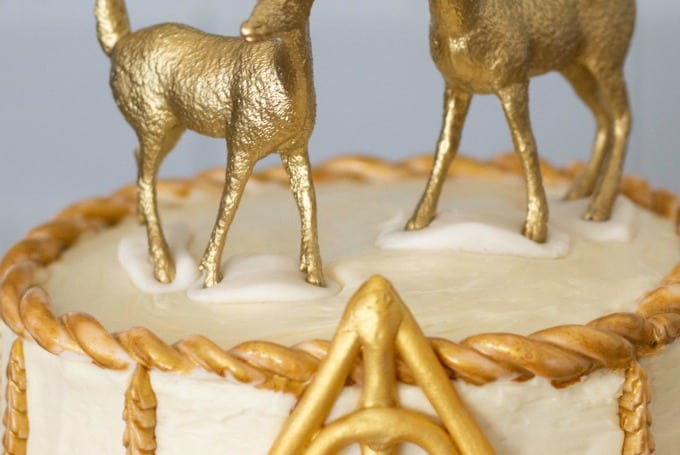
- Deer figurines
- Gold spray paint (for deer)
- Wilton Gold Color Mist OR brown food coloring gel and gold airbrush paint
- Fondant (you’ll need a lot so I bought the big box)
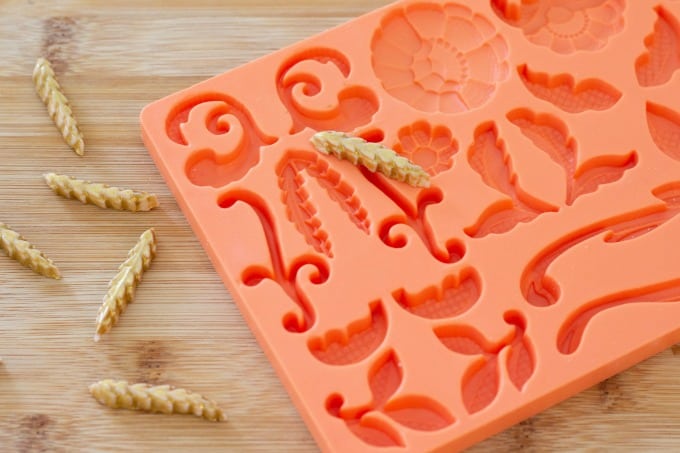
- Fondant Mold
Getting Started
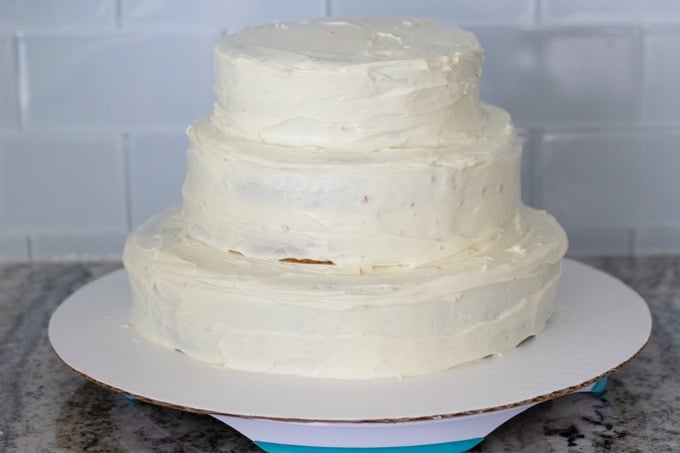
Start by baking the cakes. You’ll need (1) six inch, (2) eight inch and (1) ten inch cake. For our Saturday party, I baked our cakes and started on the decorations Thursday night. To make things easy (and because I was short on time) I used cake mix and store bought frosting. It always tastes great so why try to reinvent the wheel, right? This cake is all about the decorating!
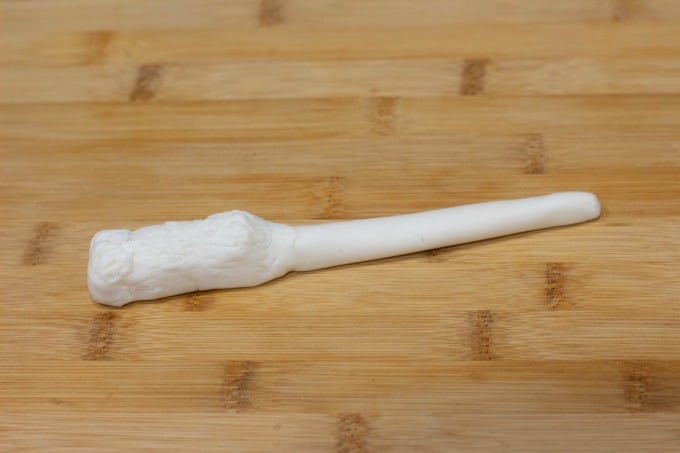
The first thing I made were the wands. They weren’t hard but it took a little time to get them just how I wanted. Start by taking a piece of fondant and rolling it into a snake-like shape. You’ll want to make it slightly pointy at one end.
I added more fondant around the bigger end until I got the look of a wand.
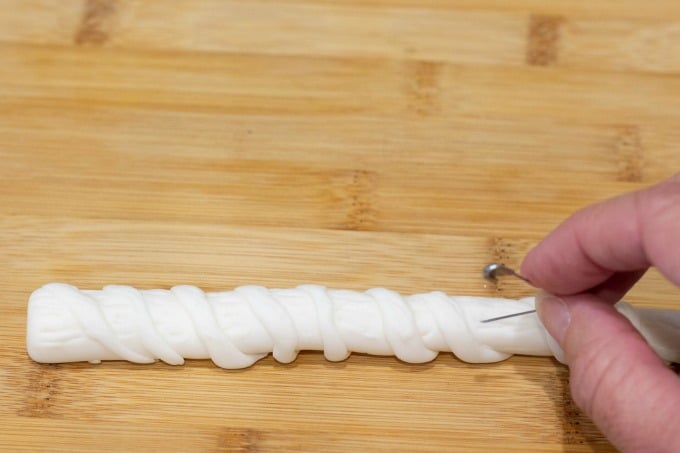
For the second wand, I rolled out another snake like rope from the fondant. Then I rolled a much thinner rope and wound it around the bigger one. Finally I used a safety pin to make lines on the wand, giving it a slightly wooden texture.
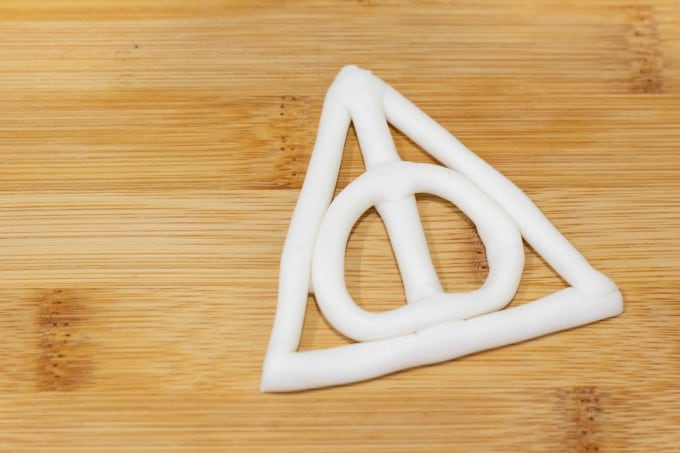
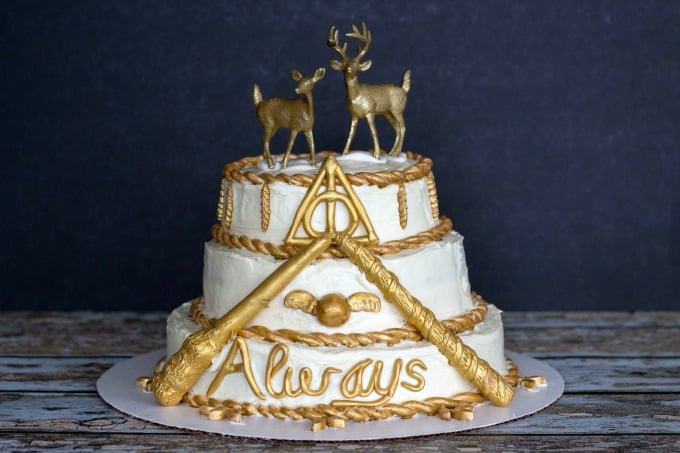
Next I made the Deathly Hallows symbol. I rolled three pieces of fondant, each about the length of a toothpick, and made a triangle.
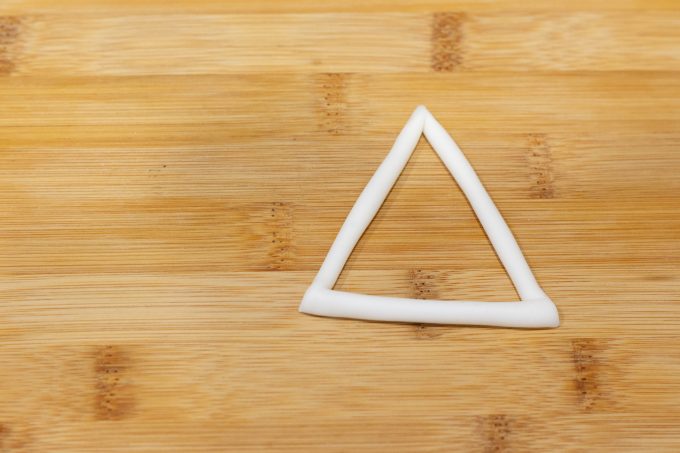
Then I made another piece for the middle. Finally, I made a circle to lay it over the top, blending it in with the other pieces.
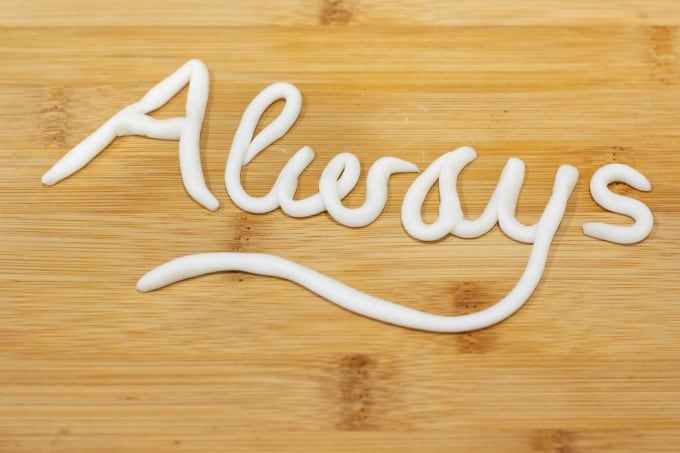
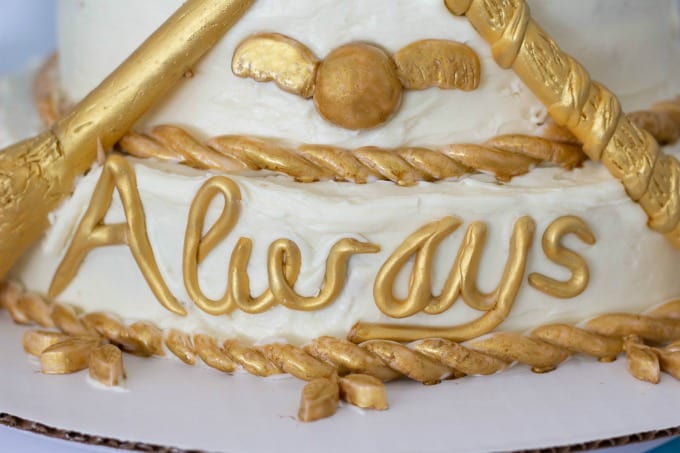
Roll more fondant and shape it into letters to form the word “Always”. My “y” didn’t end up this long because of lack of space. You may want to make yours a little shorter than this.
Next, paint your fondant pieces. This turned out to be the most time consuming job. Originally I used Wilton Gold Color Mist to spray these gold. Despite the fact that the lid was a pretty gold color, the end result looked a lot more yellow than expected.
There wasn’t enough time to order this metallic paint from Amazon so I went to Michael’s. The only thing I could find was gold paint that was meant to be airbrushed onto the cake. I didn’t have an airbrush but I figured I’d give it a try anyway.
My pieces still looked yellow so I decided to try mixing the gold with dark brown food coloring gel. That totally did the trick and I got the look I was going for.
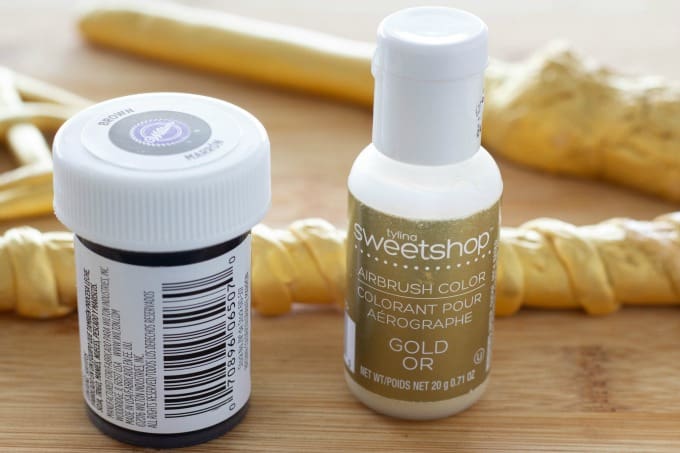
I started with just a little brown gel on the end of a toothpick and kept adding more until I had the right shade of gold.
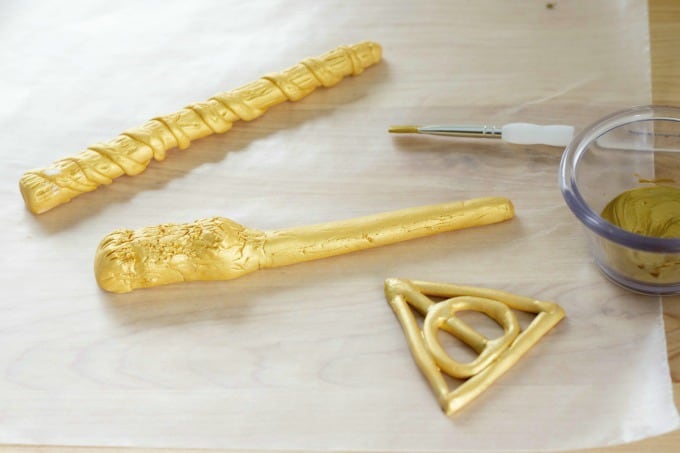
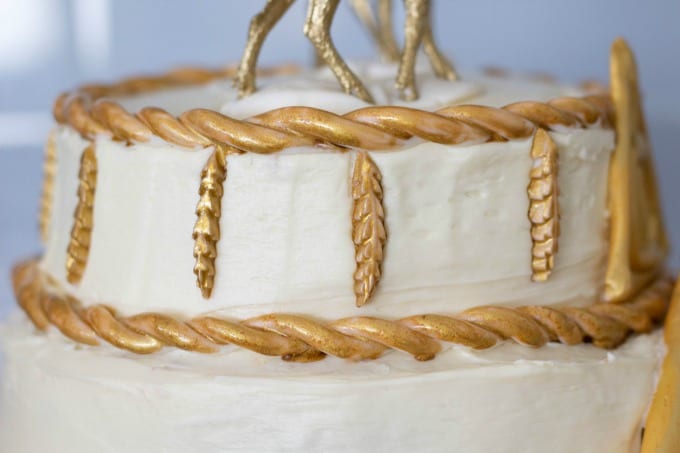
I also painted the leaves I had created with the fondant mold.
At this point, I frosted my cakes. Though the original cake uses fondant, my family likes the taste of regular frosting much better. This was the first layer. I smoothed it out, added a second layer, then worked on the trim.
While I made the wands, word and symbol ahead of time, I didn’t do the trim until I was ready to decorate the cake. Fondant can dry quickly and I didn’t want it to break as I was wrapping it around. To make it, just roll two long pieces and twist them together.
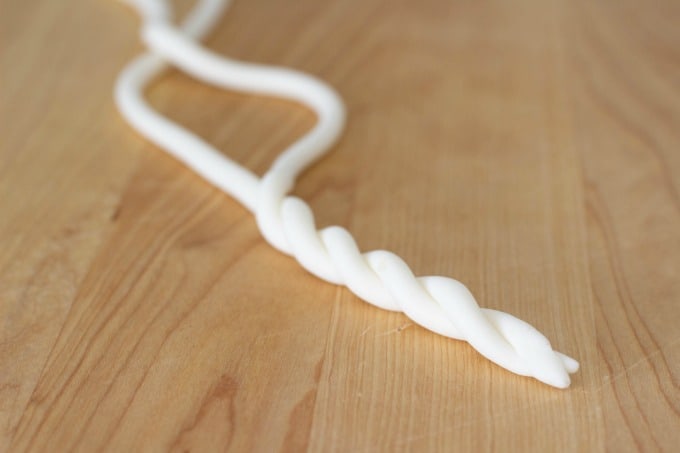
Paint them gold and add them to the base of each cake. This was when I wished I’d stuck with the Wilton Color Mist. It took FOREVER to paint these. If you look closely, you’ll see that by the time I got to the bottom, I had given up trying to get into every nook and cranny. At least I was able to get the gold color that I’d been hoping for.
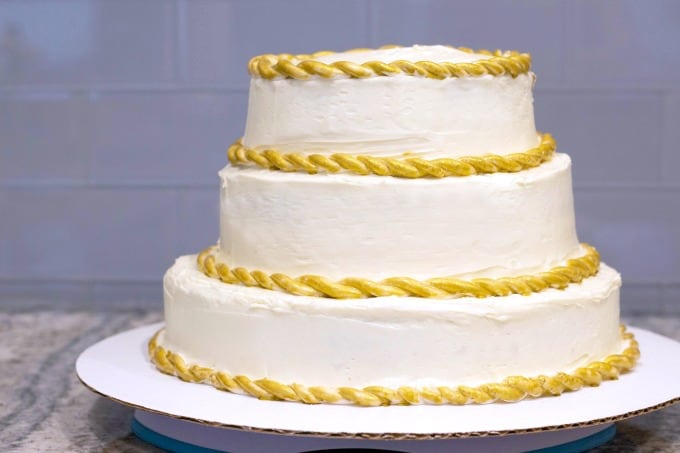
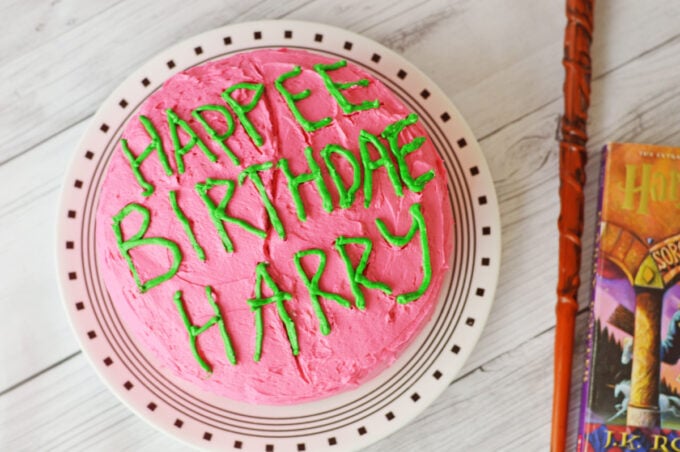
Now to decorate the rest of the cake. I added the writing first, then placed the wands to each side. I had trouble getting them to stay (they were sliding down) so I put toothpicks in the cake to help hold them up. If you look just to the top left of the “A”, you’ll see one poking out. There’s another just above that (just remember to take them out when you’re serving the cake).
I also rolled a ball of fondant and added wings to make a golden snitch. I stuck a toothpick through the back of the snitch and into the cake to hold it in place. Then I placed a few fondant leaves around the bottom.
Originally I was going to put the symbol in the center but there wasn’t enough room (my cake was not nearly as super tall as the original). I decided to place it against the top layer, then added the leaves around it.
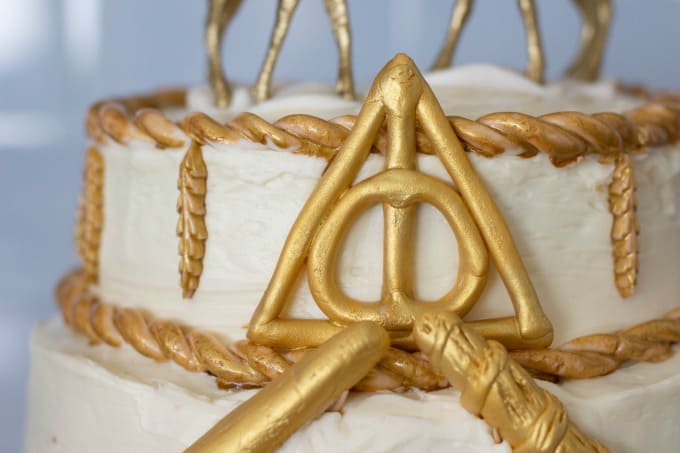
I added more leaves, spacing them evenly around the top layer of the cake.
For the grand finale (the part my girls were most excited about) we added the deer to the top of the cake. I had spray painted them gold the day before and the paint was dry but I didn’t want to stick them straight into the cake. It’s probably frowned upon to poison guests, right?
I didn’t know if the gold paint would actually do anything but I figured it was better to be safe than sorry. I flattened small pieces of fondant and placed them under the little reindeer feet. When we took the deer off to eat the cake, we took the fondant pieces off too.
That was it…our Harry Potter cake was finished. Though it wasn’t quite as picture perfect as the original, Ashling absolutely loved it. Mission accomplished!
Want more options? Check out these fun Harry Potter cake ideas!

If you’ve been looking at Harry Potter cakes trying to figure out which one you can pull off, try this one. It does take a little time but if I can do it, so can you!
Let’s be friends!
Did you love this post? Make sure to comment below and let me know your thoughts! And don’t forget to follow on your favorite social network below!

About Lisa O’Driscoll
Lisa O’Driscoll is a lifestyle and parenting expert, cookbook author, and the creative force behind Fun Money Mom, a popular blog she’s run since 2014. She’s the author of the children’s cookbook Roll It, Slice It, Mash It, Dice It, designed to get kids excited about cooking. With multiple TV appearances under her belt, she loves sharing her expertise on family-friendly recipes, creative DIYs, and party planning and is always on a mission to inspire and entertain!