
Robot Valentine Box
This post may contain affiliate links. As an Amazon Associate, I earn from qualifying purchases.
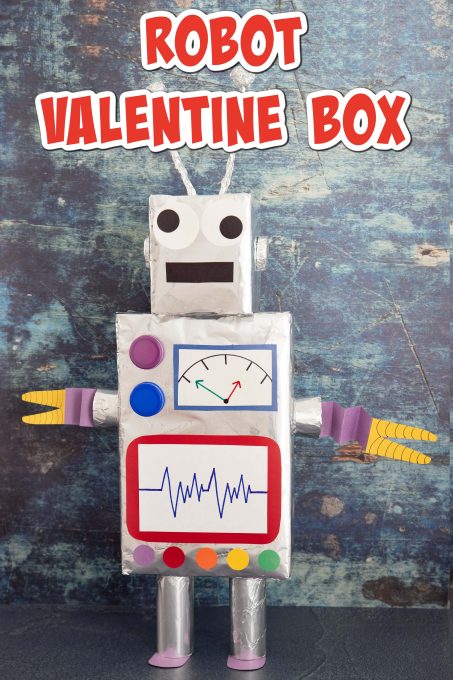
This Robot Valentine Box is such a great way for little ones to collect those classroom valentines. All you need are a few simple supplies, many of which you probably have already, and you’ve got an out-of-this-world valentine craft that everyone will love!
As seen in Good Housekeeping

Valentine’s Day is just around the corner and you know what that mean! It’s time to make those valentine boxes for school. After all, the kids are going to need something to collect those Valentine’s Day cards from classmates, right?
Every year I get so excited because I get to make all new boxes to share on Sarasota’s Suncoast View. In the past I’ve made everything from a dog to a unicorn valentine box. This year I’ve added a Gnome Valentine Box along with a Spiderman Valentine Box to the mix. Now they’re about to have a new robot friend!
How To Make A Robot Valentine Box
Kids have always been fascinated with robots and I thought this would make such a cute idea for our next box. It’s easy, inexpensive and so much fun; the perfect combination, right?
Here’s What You’ll Need
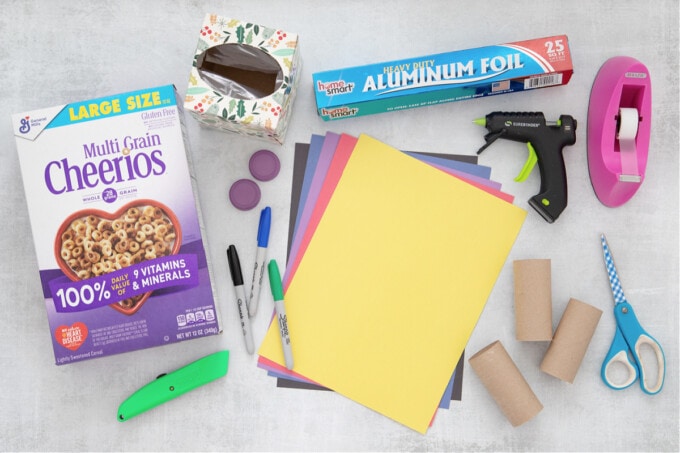
The great thing about this craft is that it uses materials that you probably already have around the house.
- Cereal box
- Square tissue box
- Toilet paper rolls
- Aluminum foil
- Construction paper
- Milk jug lids
- Box cutters
- Tape
- Hot glue
- Hot glue sticks
- Permanent markers
You’ll also need a few items to attach to the front of the robot box for buttons and knobs. You can use extra construction paper, more milk jug cartons, buttons or anything else that you think will work. Get as creative as you want.
Tips & Tricks
- Start saving those supplies early. Save those milk jug lids, cardboard boxes and toilet paper rolls so that you have them when you’re ready.
- If you’re worried that the foil will tear too easily, you can use gray construction paper or even silver duct tape instead.
- Don’t have toilet paper rolls? Cut a paper towel roll into smaller pieces instead.
- You can also use pipe cleaners or paper straws in place of tin foil antennae.
- Want a girl robot? Just give her lashes and attach a big red bow to the front of the antennae.
Now, let’s get started!

Robot Valentine Box
Equipment
- Box cutter or X-acto knife
- Tape
- Permanent marker(s)
Materials
- Cereal box
- Square tissue box
- 3 toilet paper rolls
- Aluminum foil
- Construction paper various colors
- Milk jug lids
- Items for knobs and buttons milk jug lids, buttons, stickers or other household items
Instructions
- Use the box cutters (or X-acto knife) to cut a hole in the back of the box for the valentine cards. (Parents should probably help with this part) Be sure to cut a big enough hole in case kids want to also give a small gift or piece of candy.
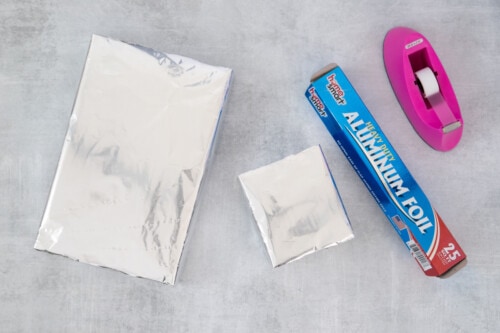
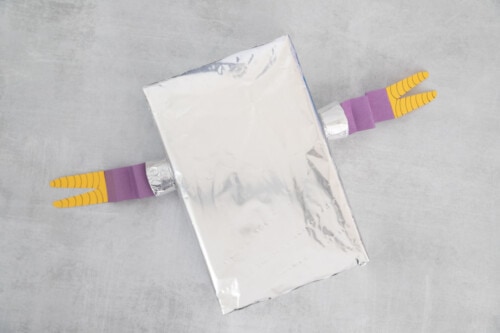
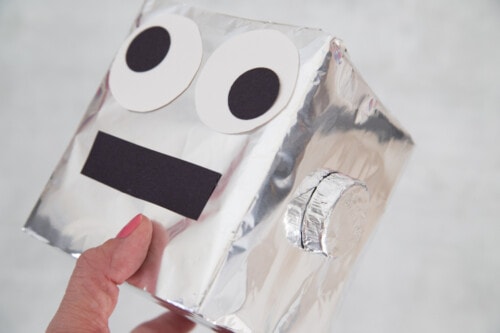
- Wrap the cereal box and the tissue box in aluminum foil and secure with tape. You can use hot glue if you prefer but I've found that it's easier to use tape when working with the foil. Cut a slit through the hole in the back and fold the extra foil inside the box.

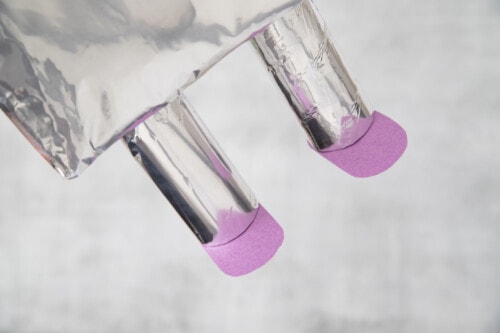
- Wrap two of the toilet paper rolls in aluminum foil. Cut the last roll into three equal sections. Wrap two of the sections in aluminum foil. You can toss the third piece…it's extra.
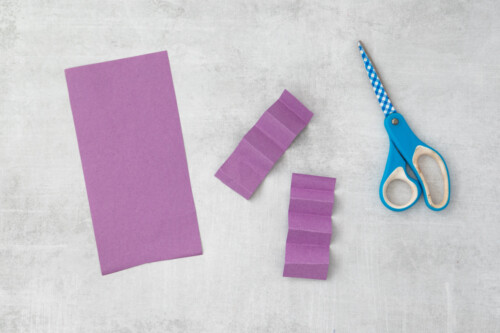
- Cut two strips of construction paper (about 4-5" long) and fold accordian style.
- Cut two "grippers" (a.k.a. robot hands) out of construction paper.
- Glue the grippers to the end of the accordian style strips. Use hot glue to attach the small toilet paper rolls to the sides of the box where arms would go. Glue one end of the accordian folded paper inside the small tube, then repeat with the other side.
- Use hot glue to attach the legs to the bottom of the robot. Add two pieces of construction paper for the feet.
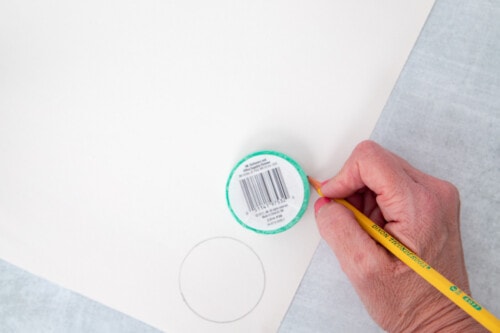
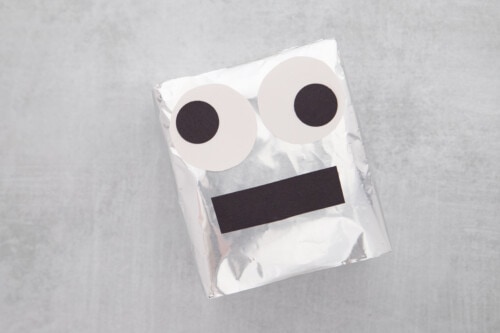
- Make two large white circles and two smaller black circles for the eyes. I usually find stuff around the house that I can trace. For example, a roll of washi tape or a spice jar lid for the large circle and a coin or something about that size for the smaller circle. I also like to make the eyes "looking" in different directions, to resemble giant googly eyes.
- Cut a rectangle out of black construction paper for the mouth, then glue both the eyes and mouth to the tissue paper box.
- Cover two milk jug lids in aluminum foil and attach to the side of the robot's head.
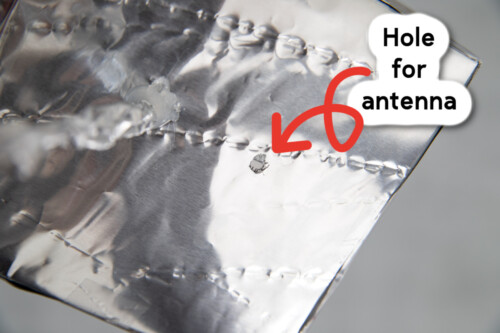
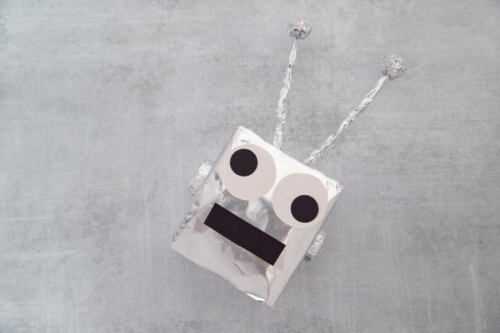
- Use the aluminum foil to create two antenna. Make two small foil balls and hot glue to the end of the antenna. When you're ready to glue the antenna to the robot head, cut a small hole in the foil where the antenna will be and add your glue dot there. That way some of the glue will attach to the top of the box in addition to the foil. If the antenna are only attached on the outside of the foil, the foil could rip. This gives it more stability.
- Glue the antenna to the robot's head.
- Use colored construction paper, white construction paper and permanent markers to create the control panels.
- Glue control panels to the front of the box and attach other objects to create knobs and buttons. I used extra milk jug lids and construction paper circles (made with the large hole puncher shown below). You could also create knobs from aluminum foil balls, buttons or other objects you have around the house.
- Now that you've added the finishing touches, your Valentine's Day box is ready to collect those cards!


Notes
Did You Make This Project?
Share it with me on Instagram @funmoneymom and follow on Pinterest @funmoneymom for more!
Let’s be friends!
Did you love this post? Make sure to comment below and let me know your thoughts! And don’t forget to follow on your favorite social network below!

About Lisa O’Driscoll
Lisa O’Driscoll is a lifestyle and parenting expert, cookbook author, and the creative force behind Fun Money Mom, a popular blog she’s run since 2014. She’s the author of the children’s cookbook Roll It, Slice It, Mash It, Dice It, designed to get kids excited about cooking. With multiple TV appearances under her belt, she loves sharing her expertise on family-friendly recipes, creative DIYs, and party planning and is always on a mission to inspire and entertain!


Whixh box do you cut the hole in?
I apologize that I saw this so late. I cut the hole in the back of the large box.