Rainbow Rice Krispie Treats
This post may contain affiliate links. As an Amazon Associate, I earn from qualifying purchases.
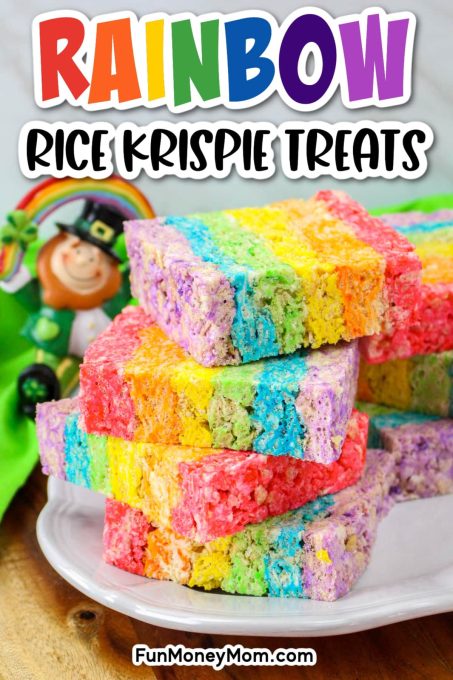
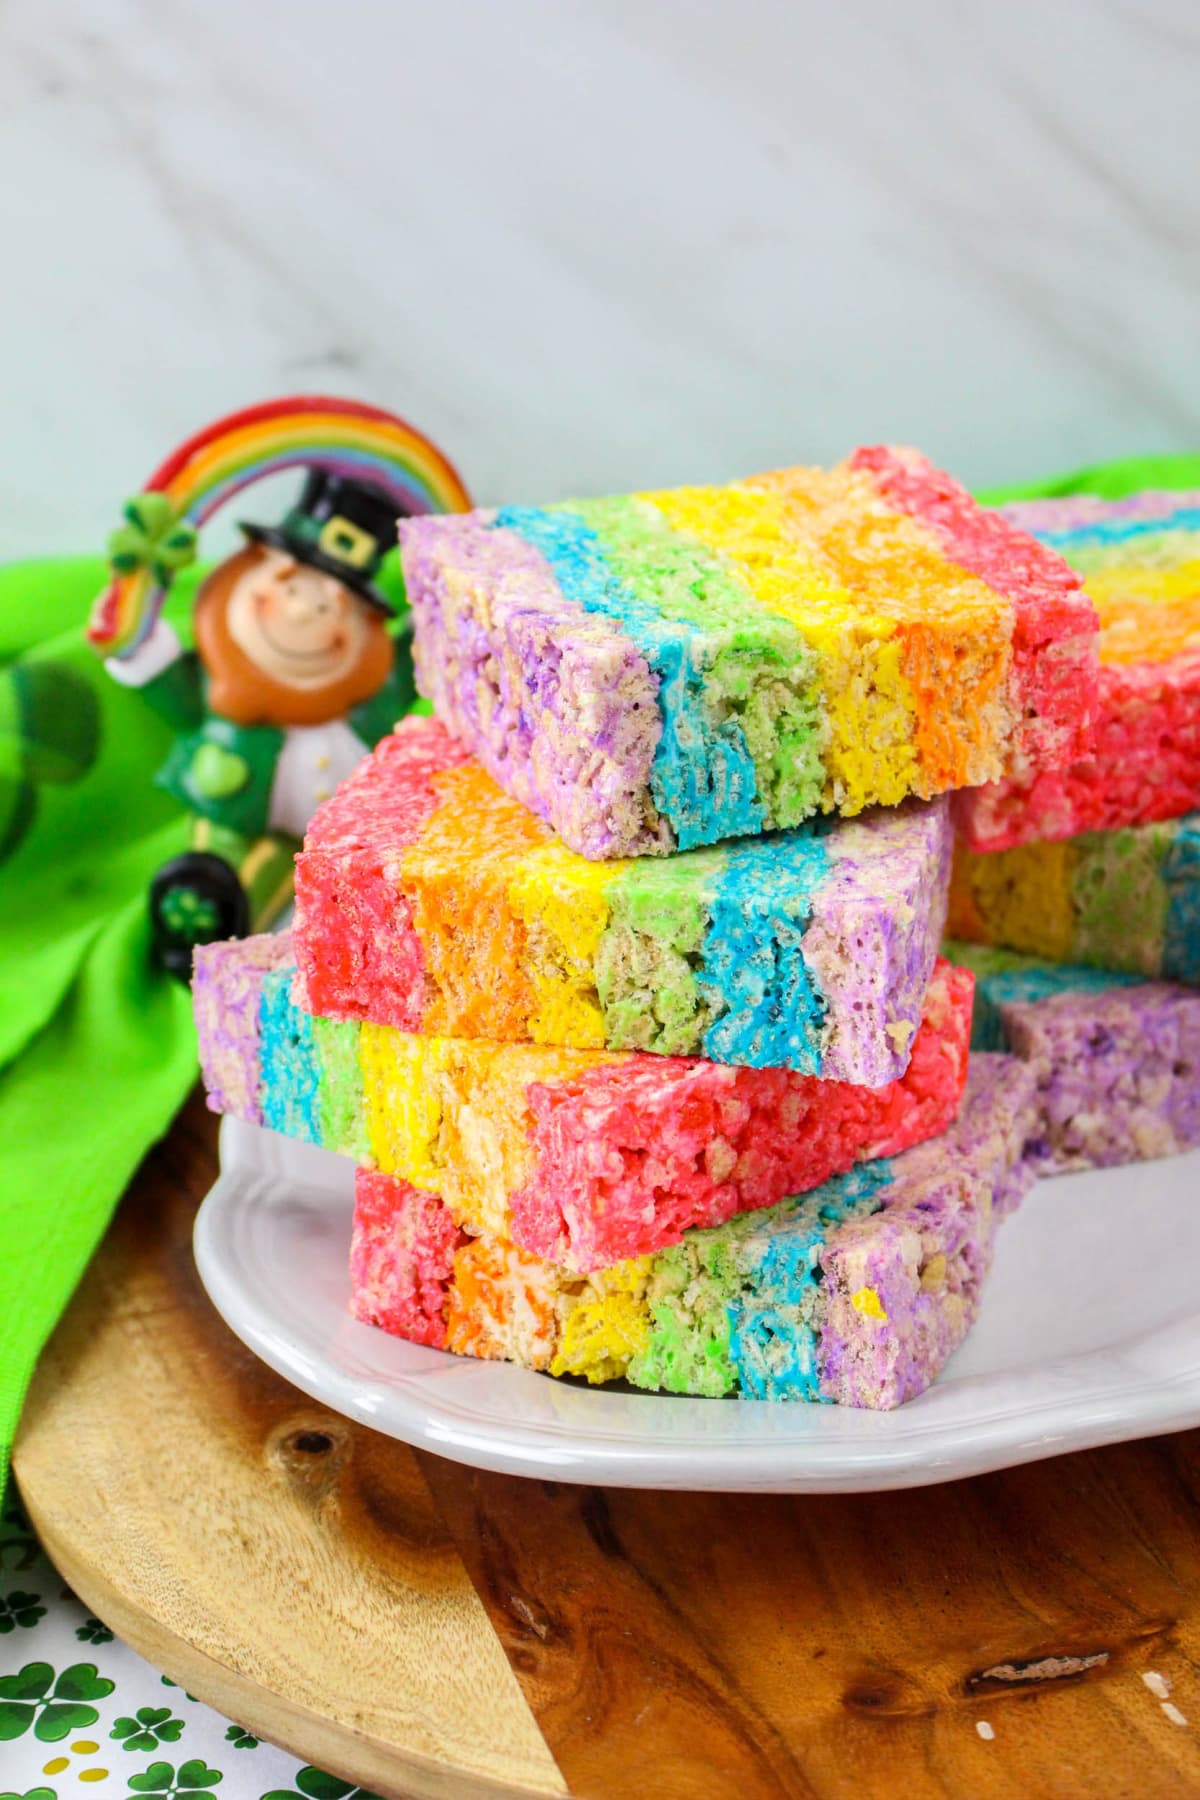
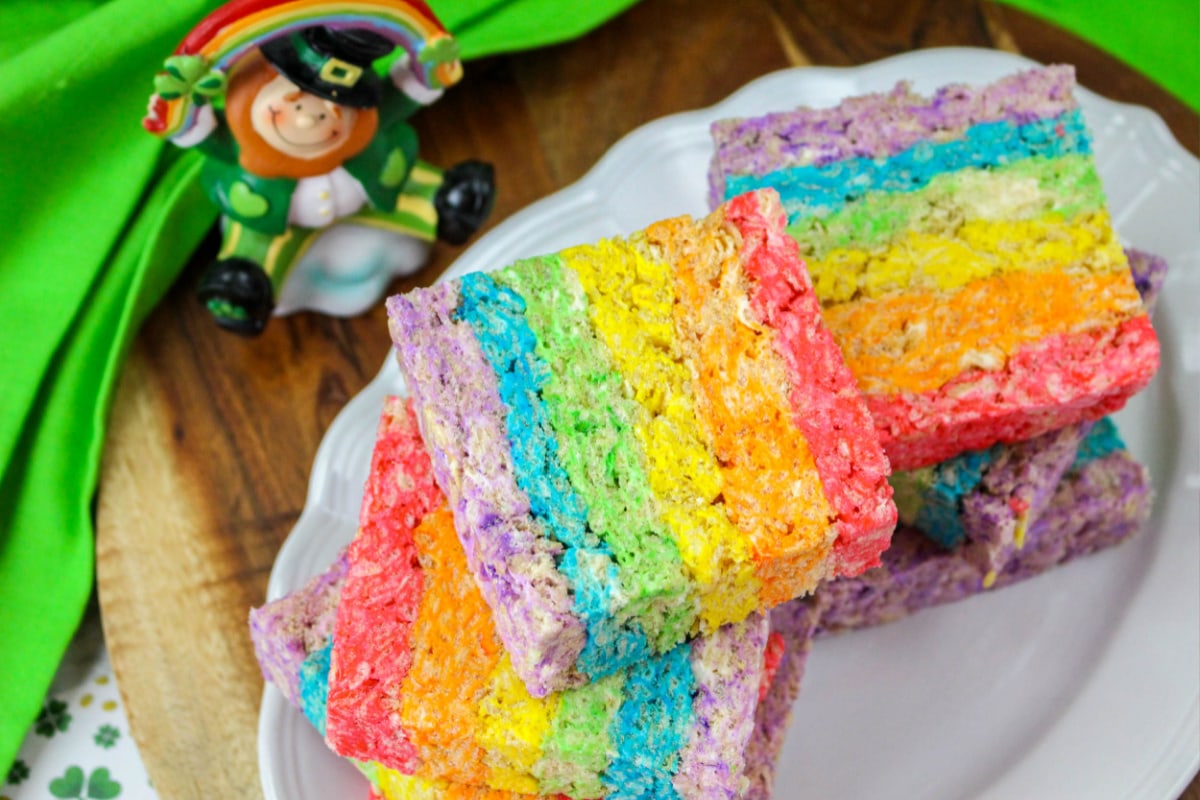
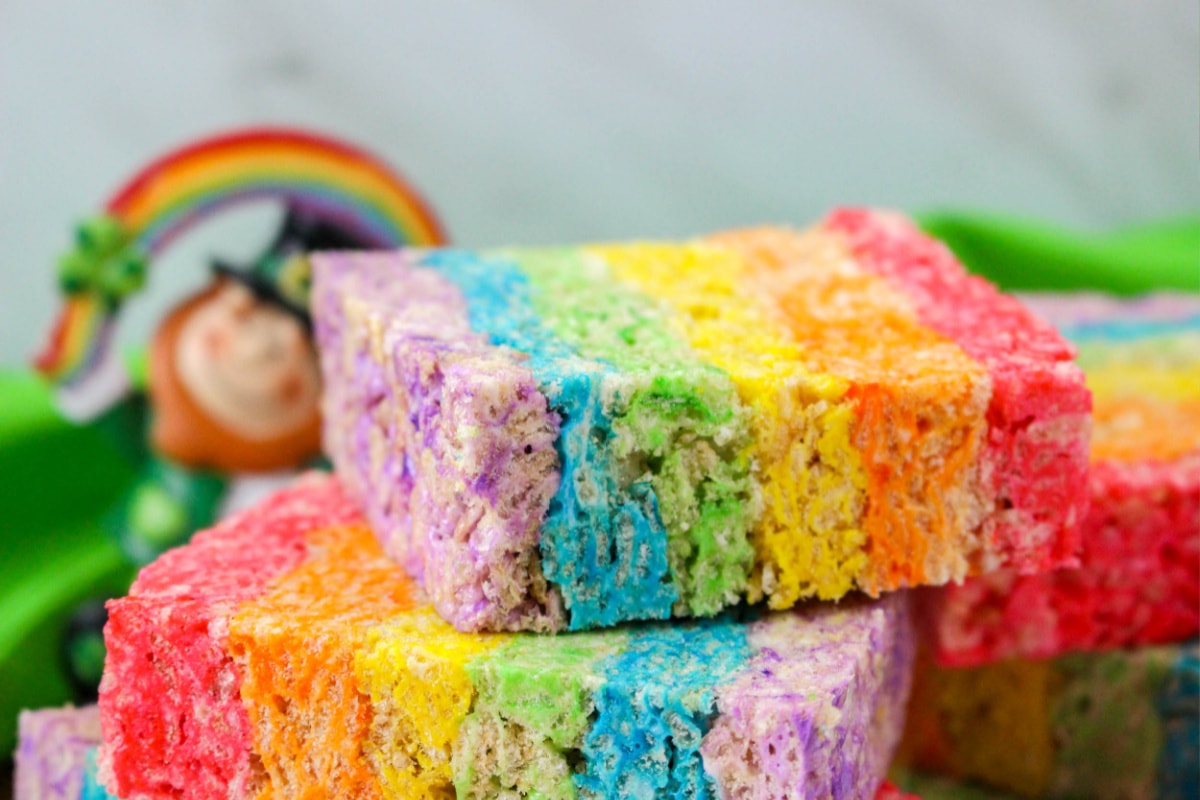
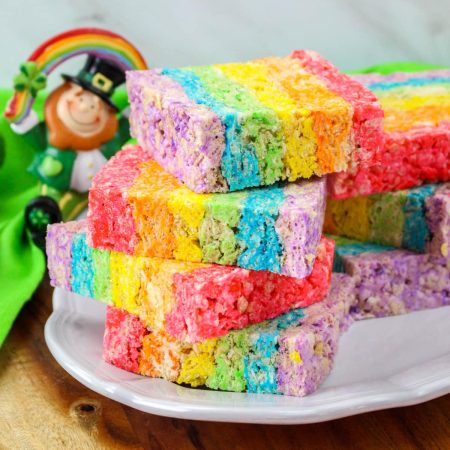
These Rainbow Rice Krispie Treats are just like your favorite childhood treats but with a twist. With all the colors of the rainbow, they are the perfect festive dessert for St Patrick’s Day or just any happy and fun occasion.
Rice Krispie Treats are ooey and gooey and SO yummy. A batch barely makes it two days around my house. And there are so many fun and creative ways to make them, like these Red Velvet Rice Krispie Treats, these cute little Valentine Rice Krispie Treats and these fun Chocolate Covered Rice Krispie Easter Eggs.
But there is something extra special about rainbow desserts that just makes everyone smile. These Rainbow Pinwheel Cookies and Rainbow Popsicles are always huge hits! So, with St. Patrick’s Day and springtime parties right around the corner, what could be better than these delicious Rainbow Rice Krispie Treats? They are so much fun and are guaranteed to be a crowd pleaser!
Get a personalized letter from your leprechaun! Customize it with your child’s name for a fun St. Patrick’s Day surprise!
Why We Love this Recipe:
- Just 4 Ingredients: Just four ingredients and they are turned into a colorful and fun snack in a matter of minutes! No baking required!
- Easy to Make: These festive treats are a great no-bake dessert that can be ready in minutes, especially if you have a few little hands eager to help.
- Perfect for Parties: The pretty rainbow colors in these treats make them a fun idea for a St. Paddy celebration, a little one’s themed rainbow birthday party or any time you want to add bright colors and a cheerful treat to the table!
Ingredients
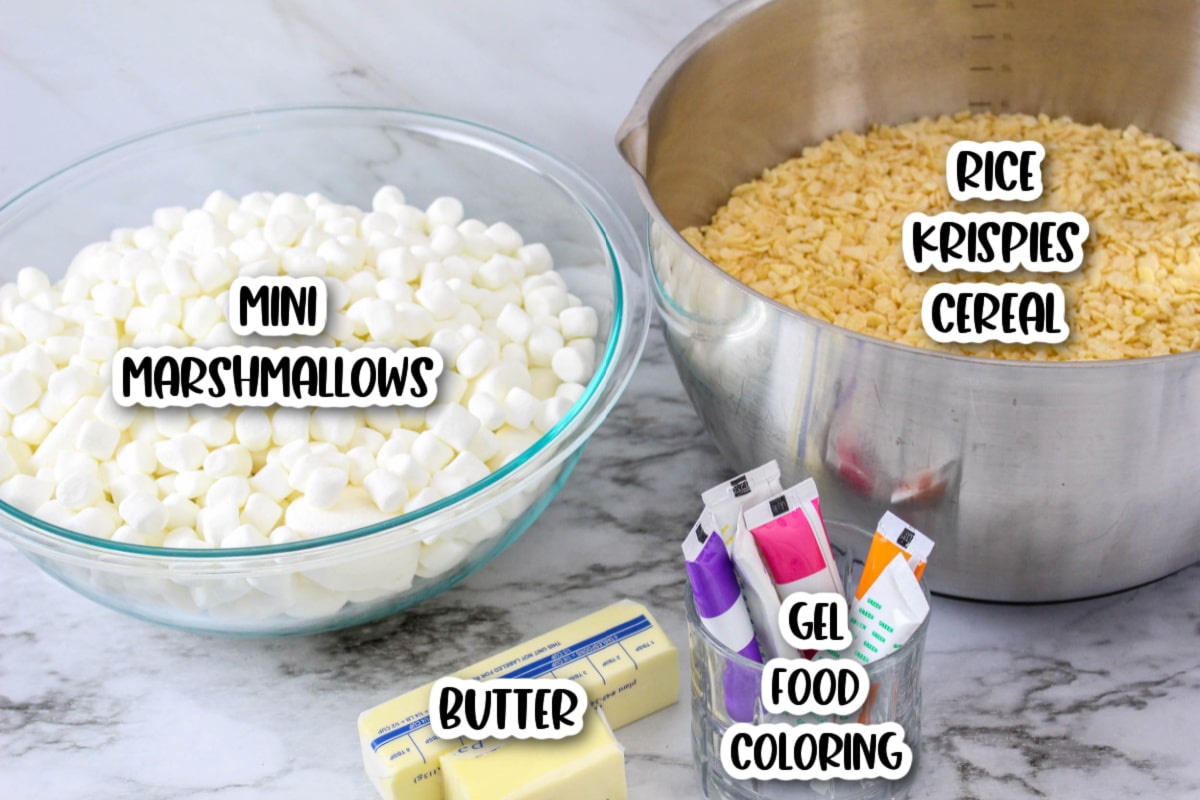
- Rice cereal: We used Rice Krispies
- Bag of Marshmallows: 16 oz. mini regular marshmallows
- Butter: You can use salted or unsalted
- Gel food coloring: Use your favorite colors-we used orange, yellow, green, blue, purple and red food coloring
How to Make Perfect Rice Krispies Treats
Step 1. Prepare an 8 or 9-inch square baking pan with wax paper. Spray the top of the paper with non-stick cooking spray.
Step 2. Add the marshmallows and butter to a large microwave-safe bowl.
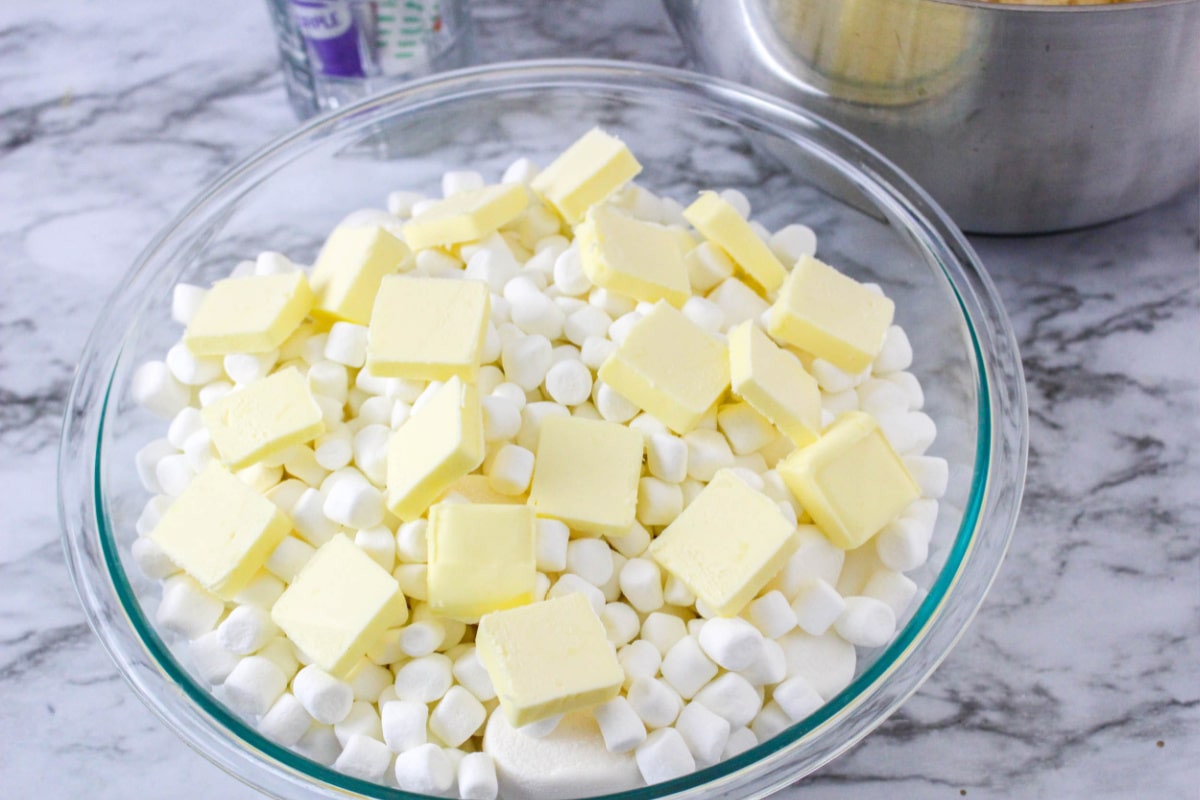
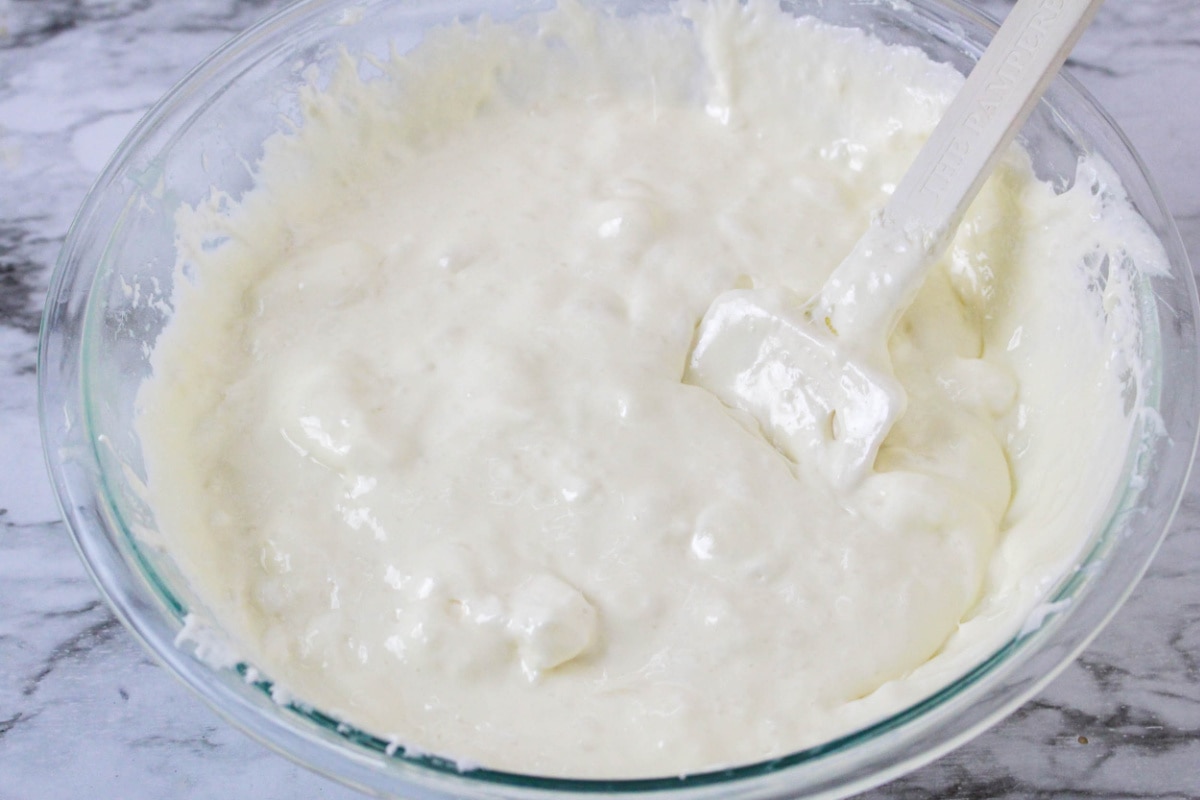
Step 3. Heat in the microwave for 1 minute and then stir. Heat for another minute and stir it again. Repeat this until the melted butter and marshmallow mixture is smooth.
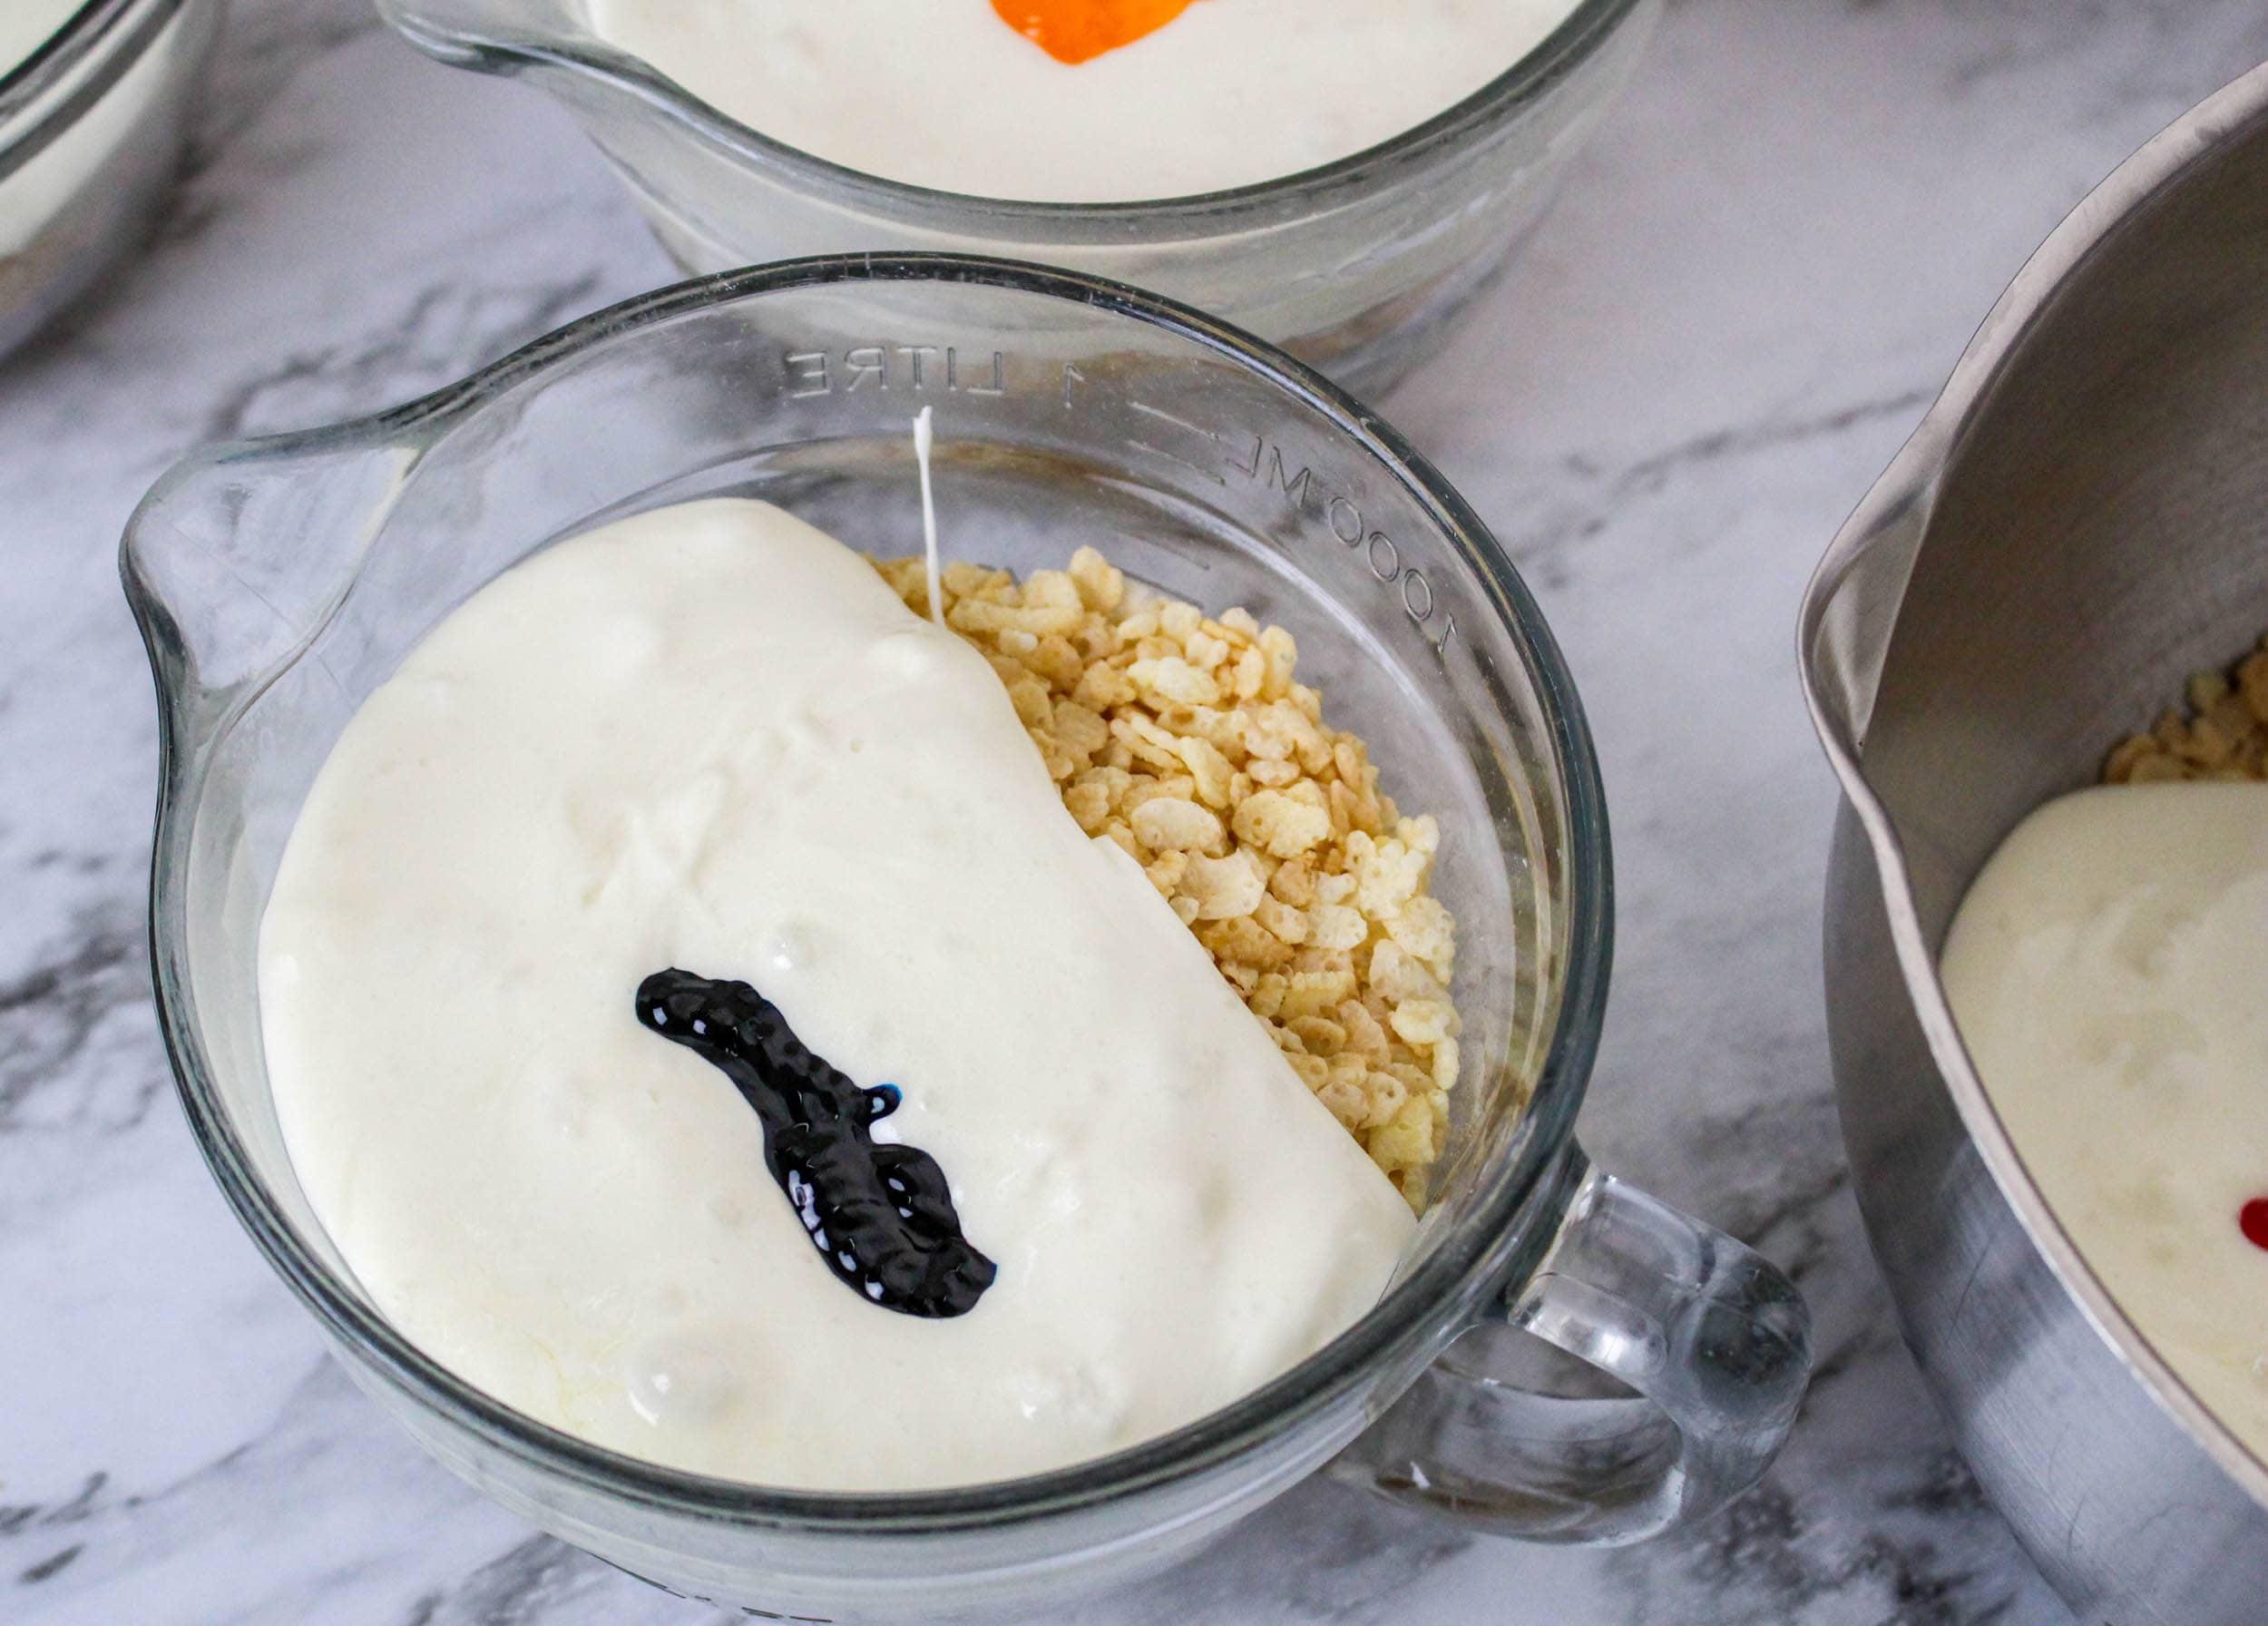
Step 4. Divide the melted marshmallow mixture between six different bowls. Add enough gel food coloring to each until you get the desired color you’re looking for. Stir well to combine.
Step 5. Fold 2 ½ cups of cereal into each bowl, until it’s coated in the marshmallow mixture.
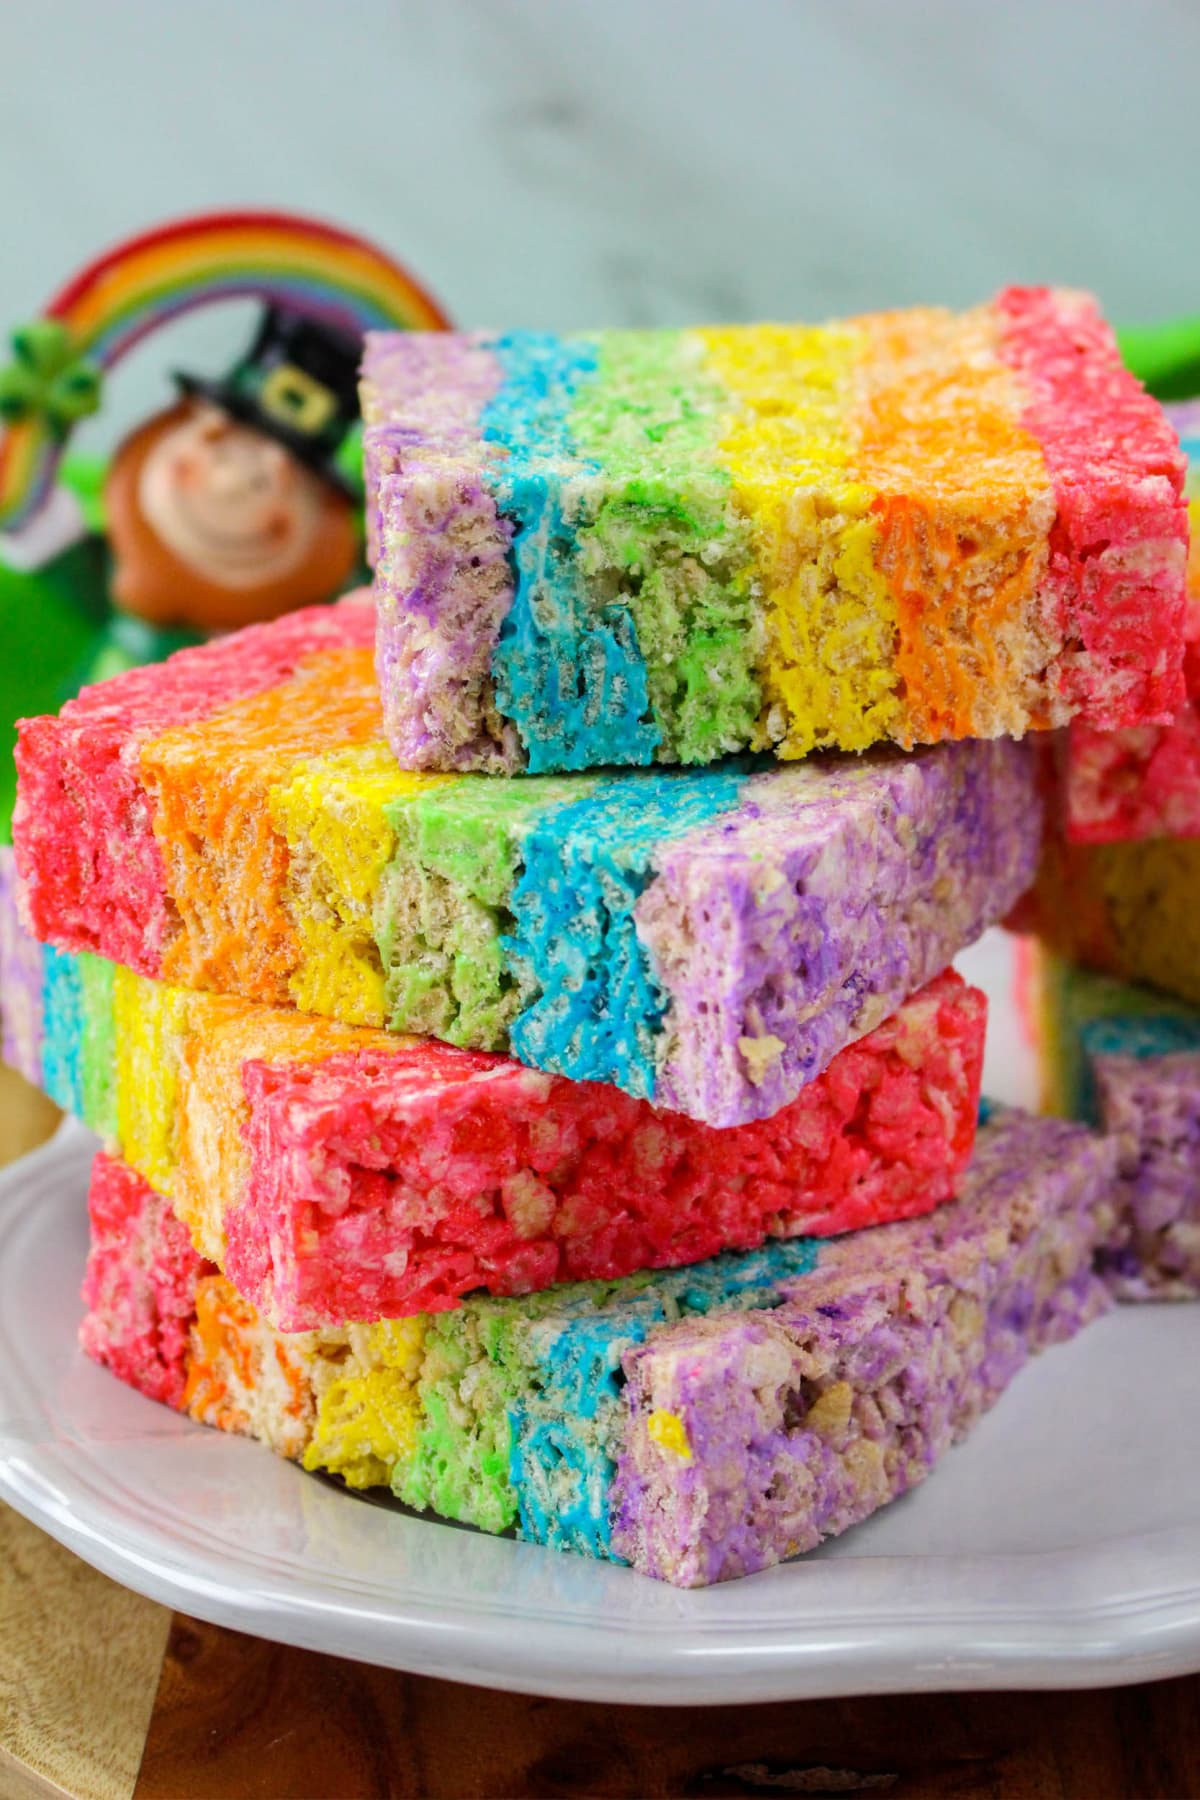
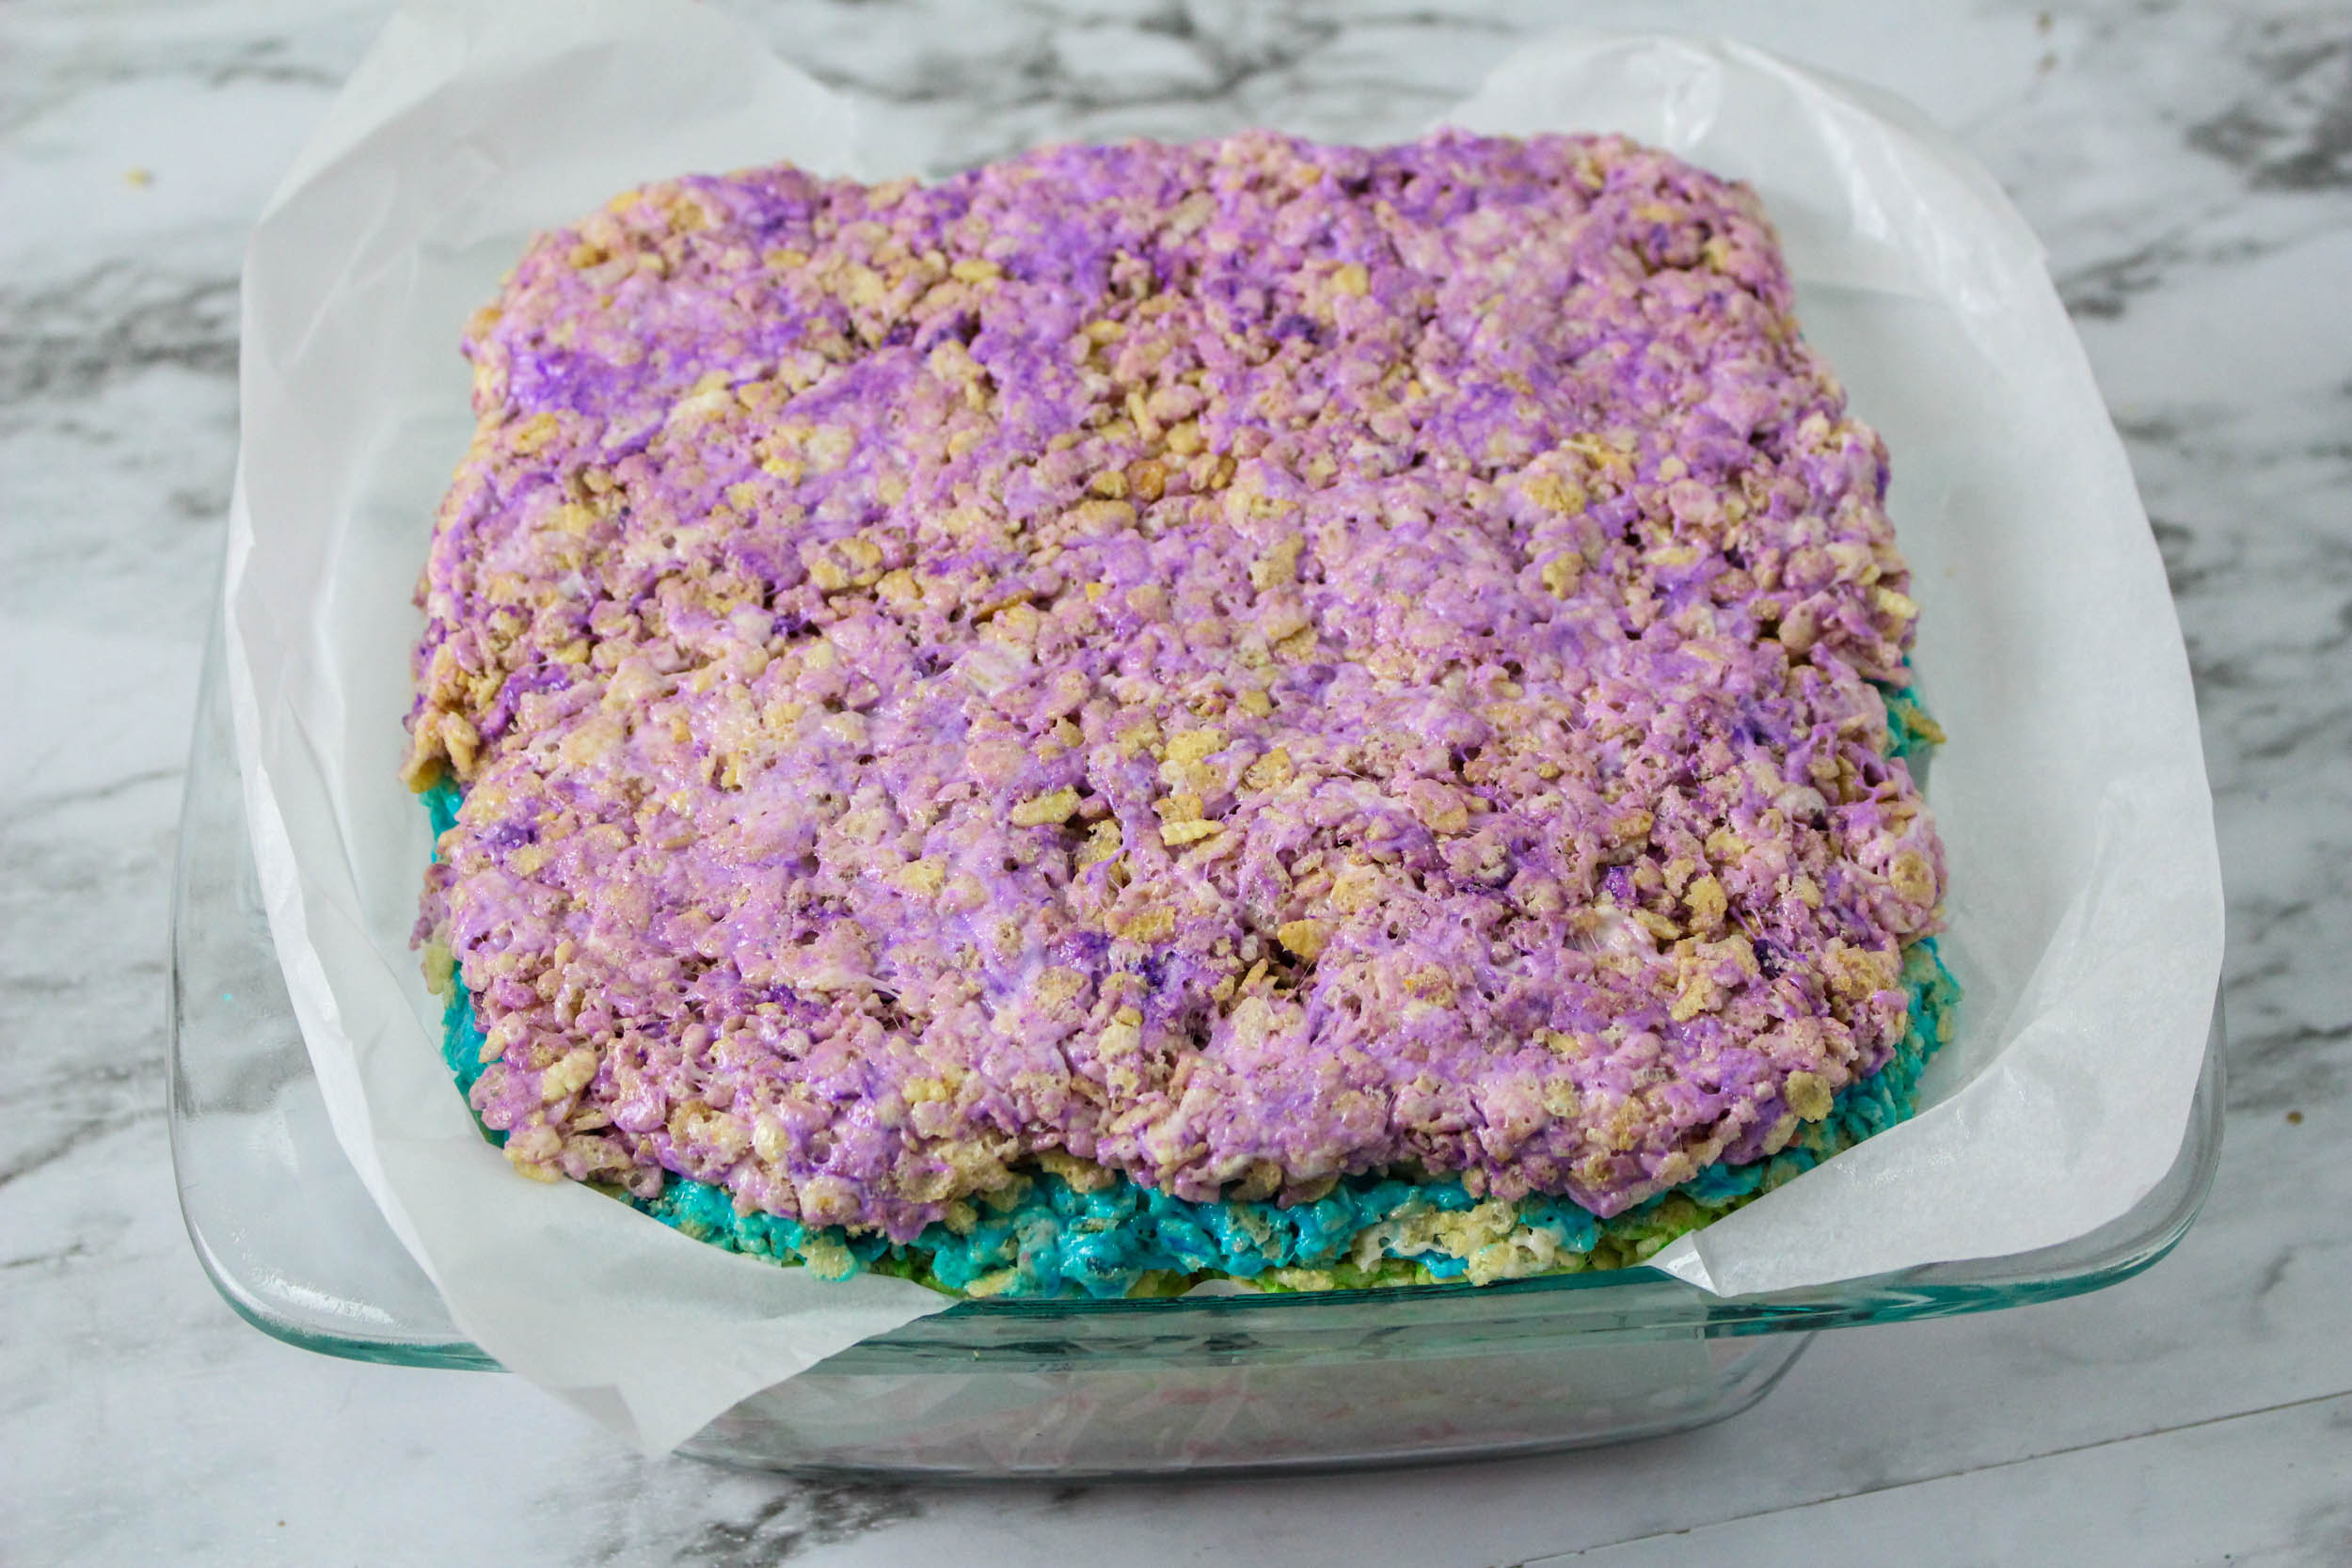
Step 6. Press the mixture into the prepared baking sheet in even layers using a buttered spatula. You’ll have thin layers of each color; red, orange, yellow, green, blue, purple.
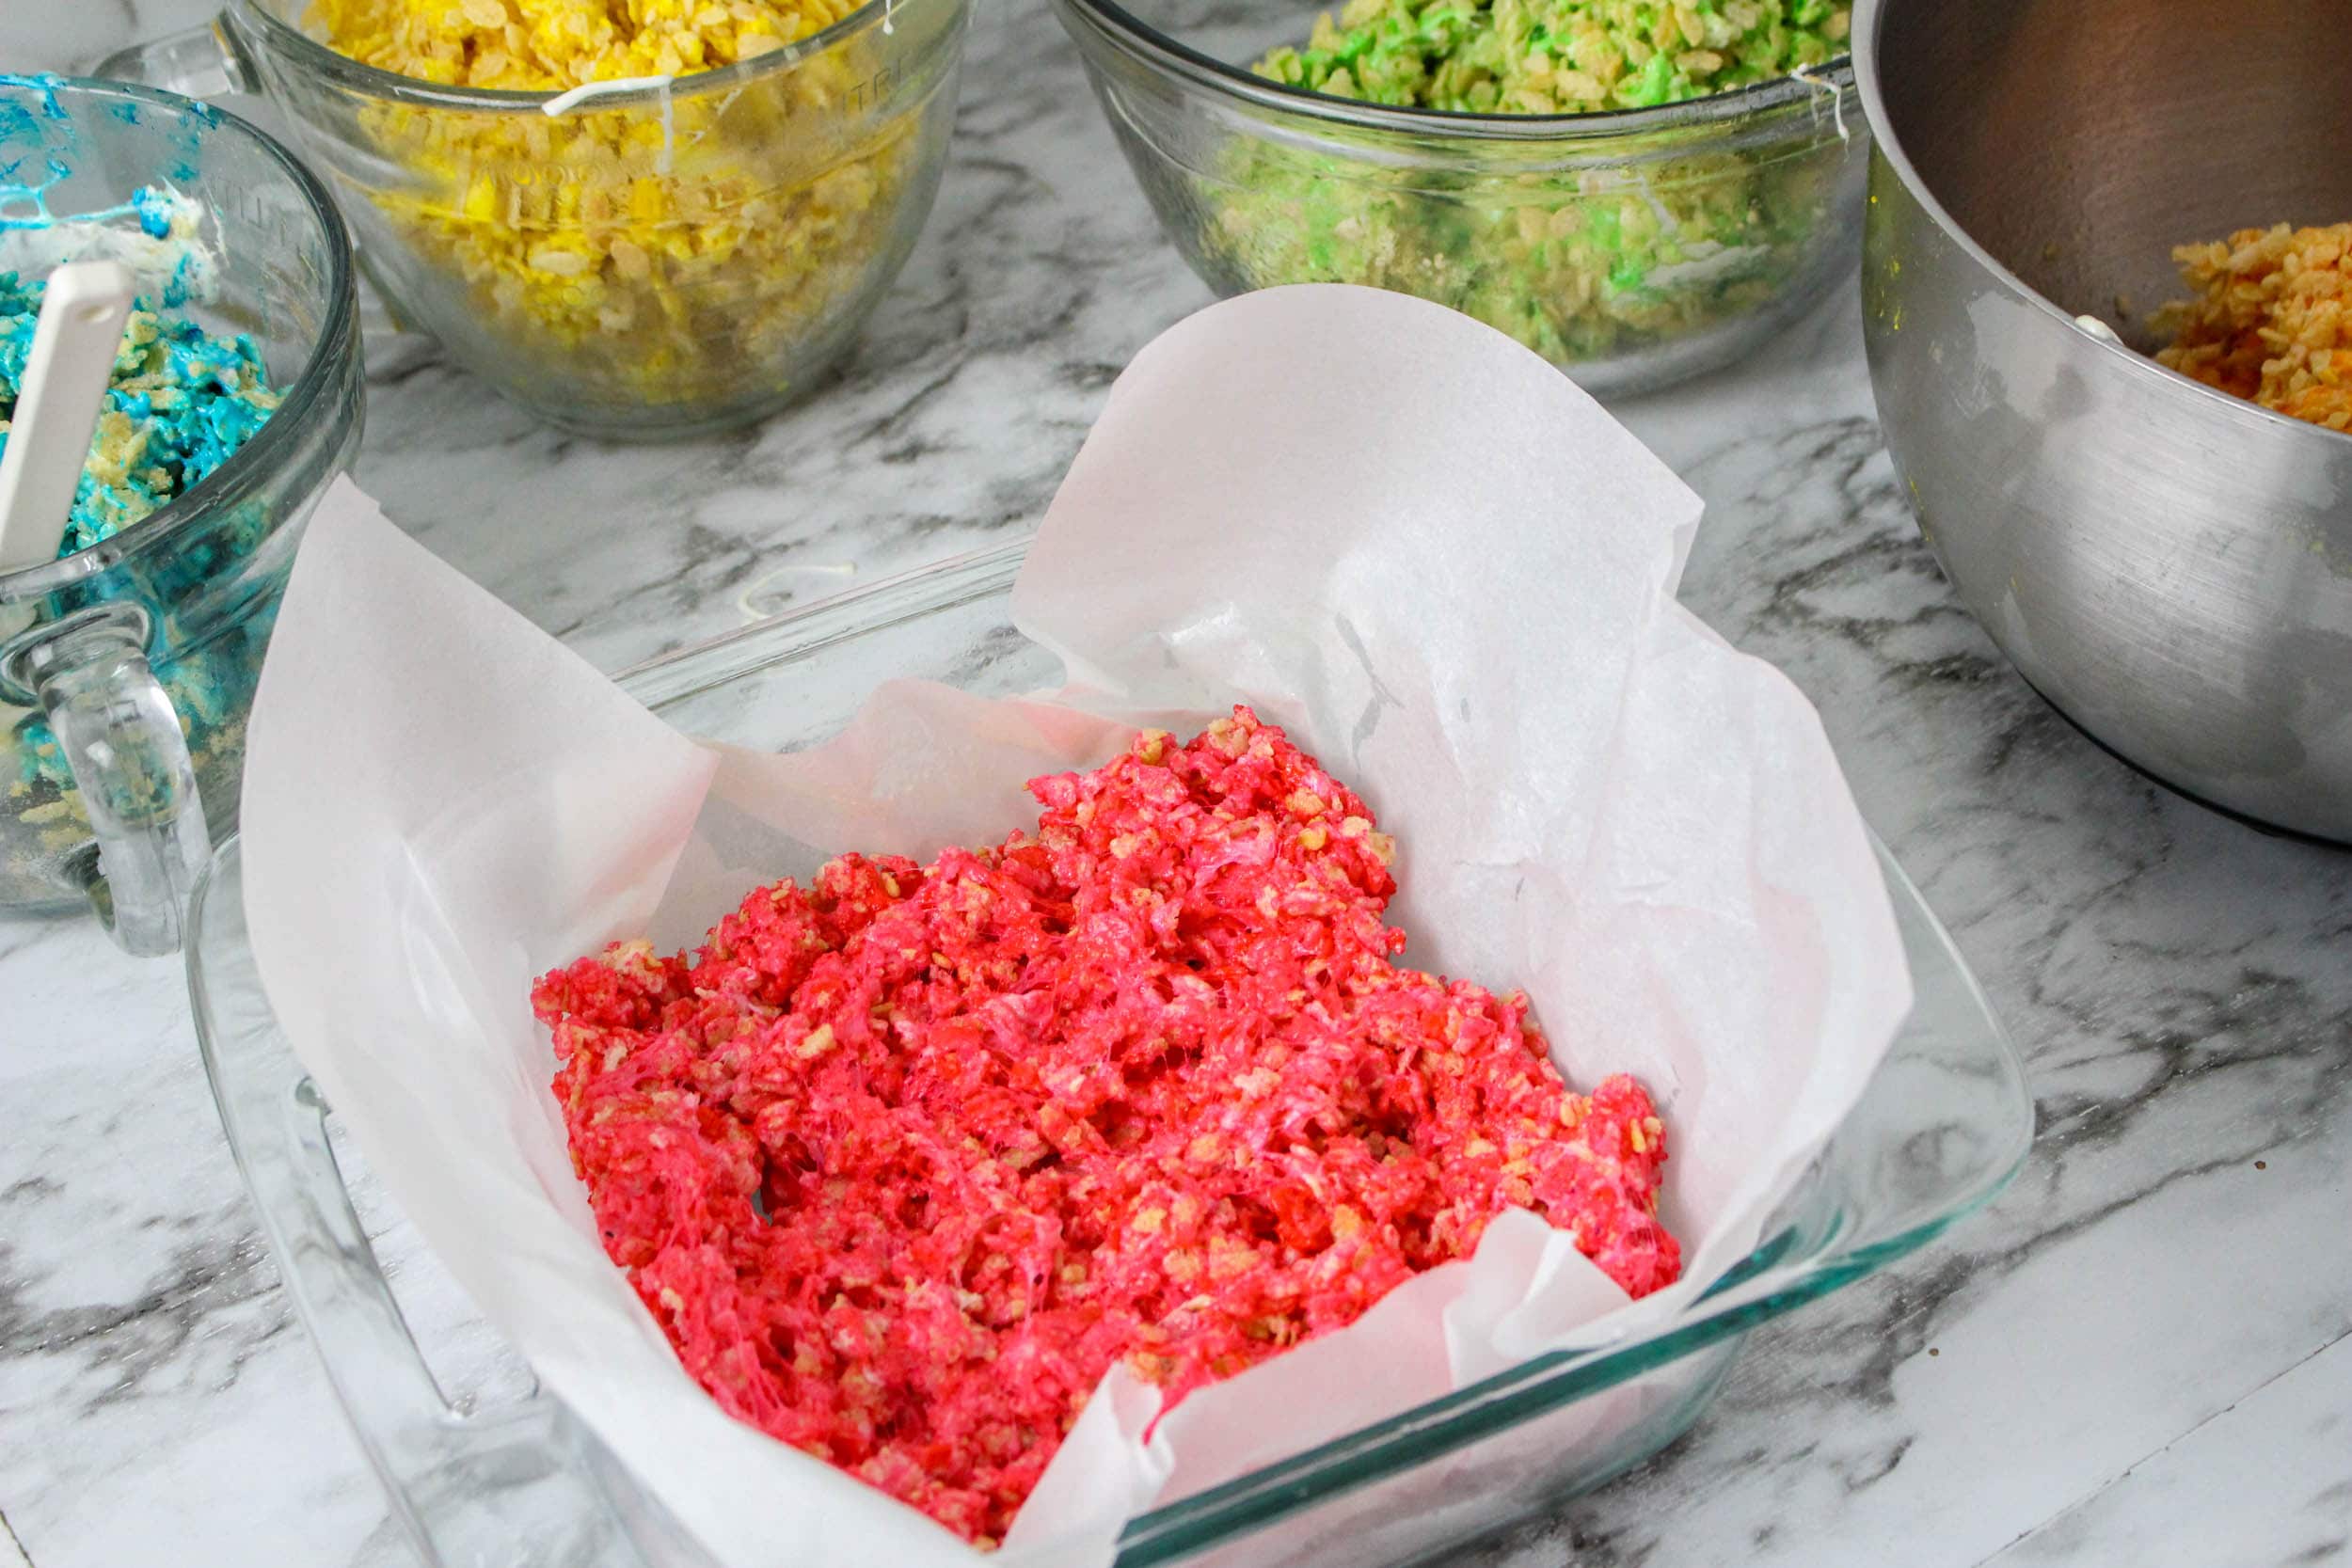
Step 7. Keep layering until you have all the layers pressed firmly together. Keep the square shape as you stack the layers. Then cool completely.
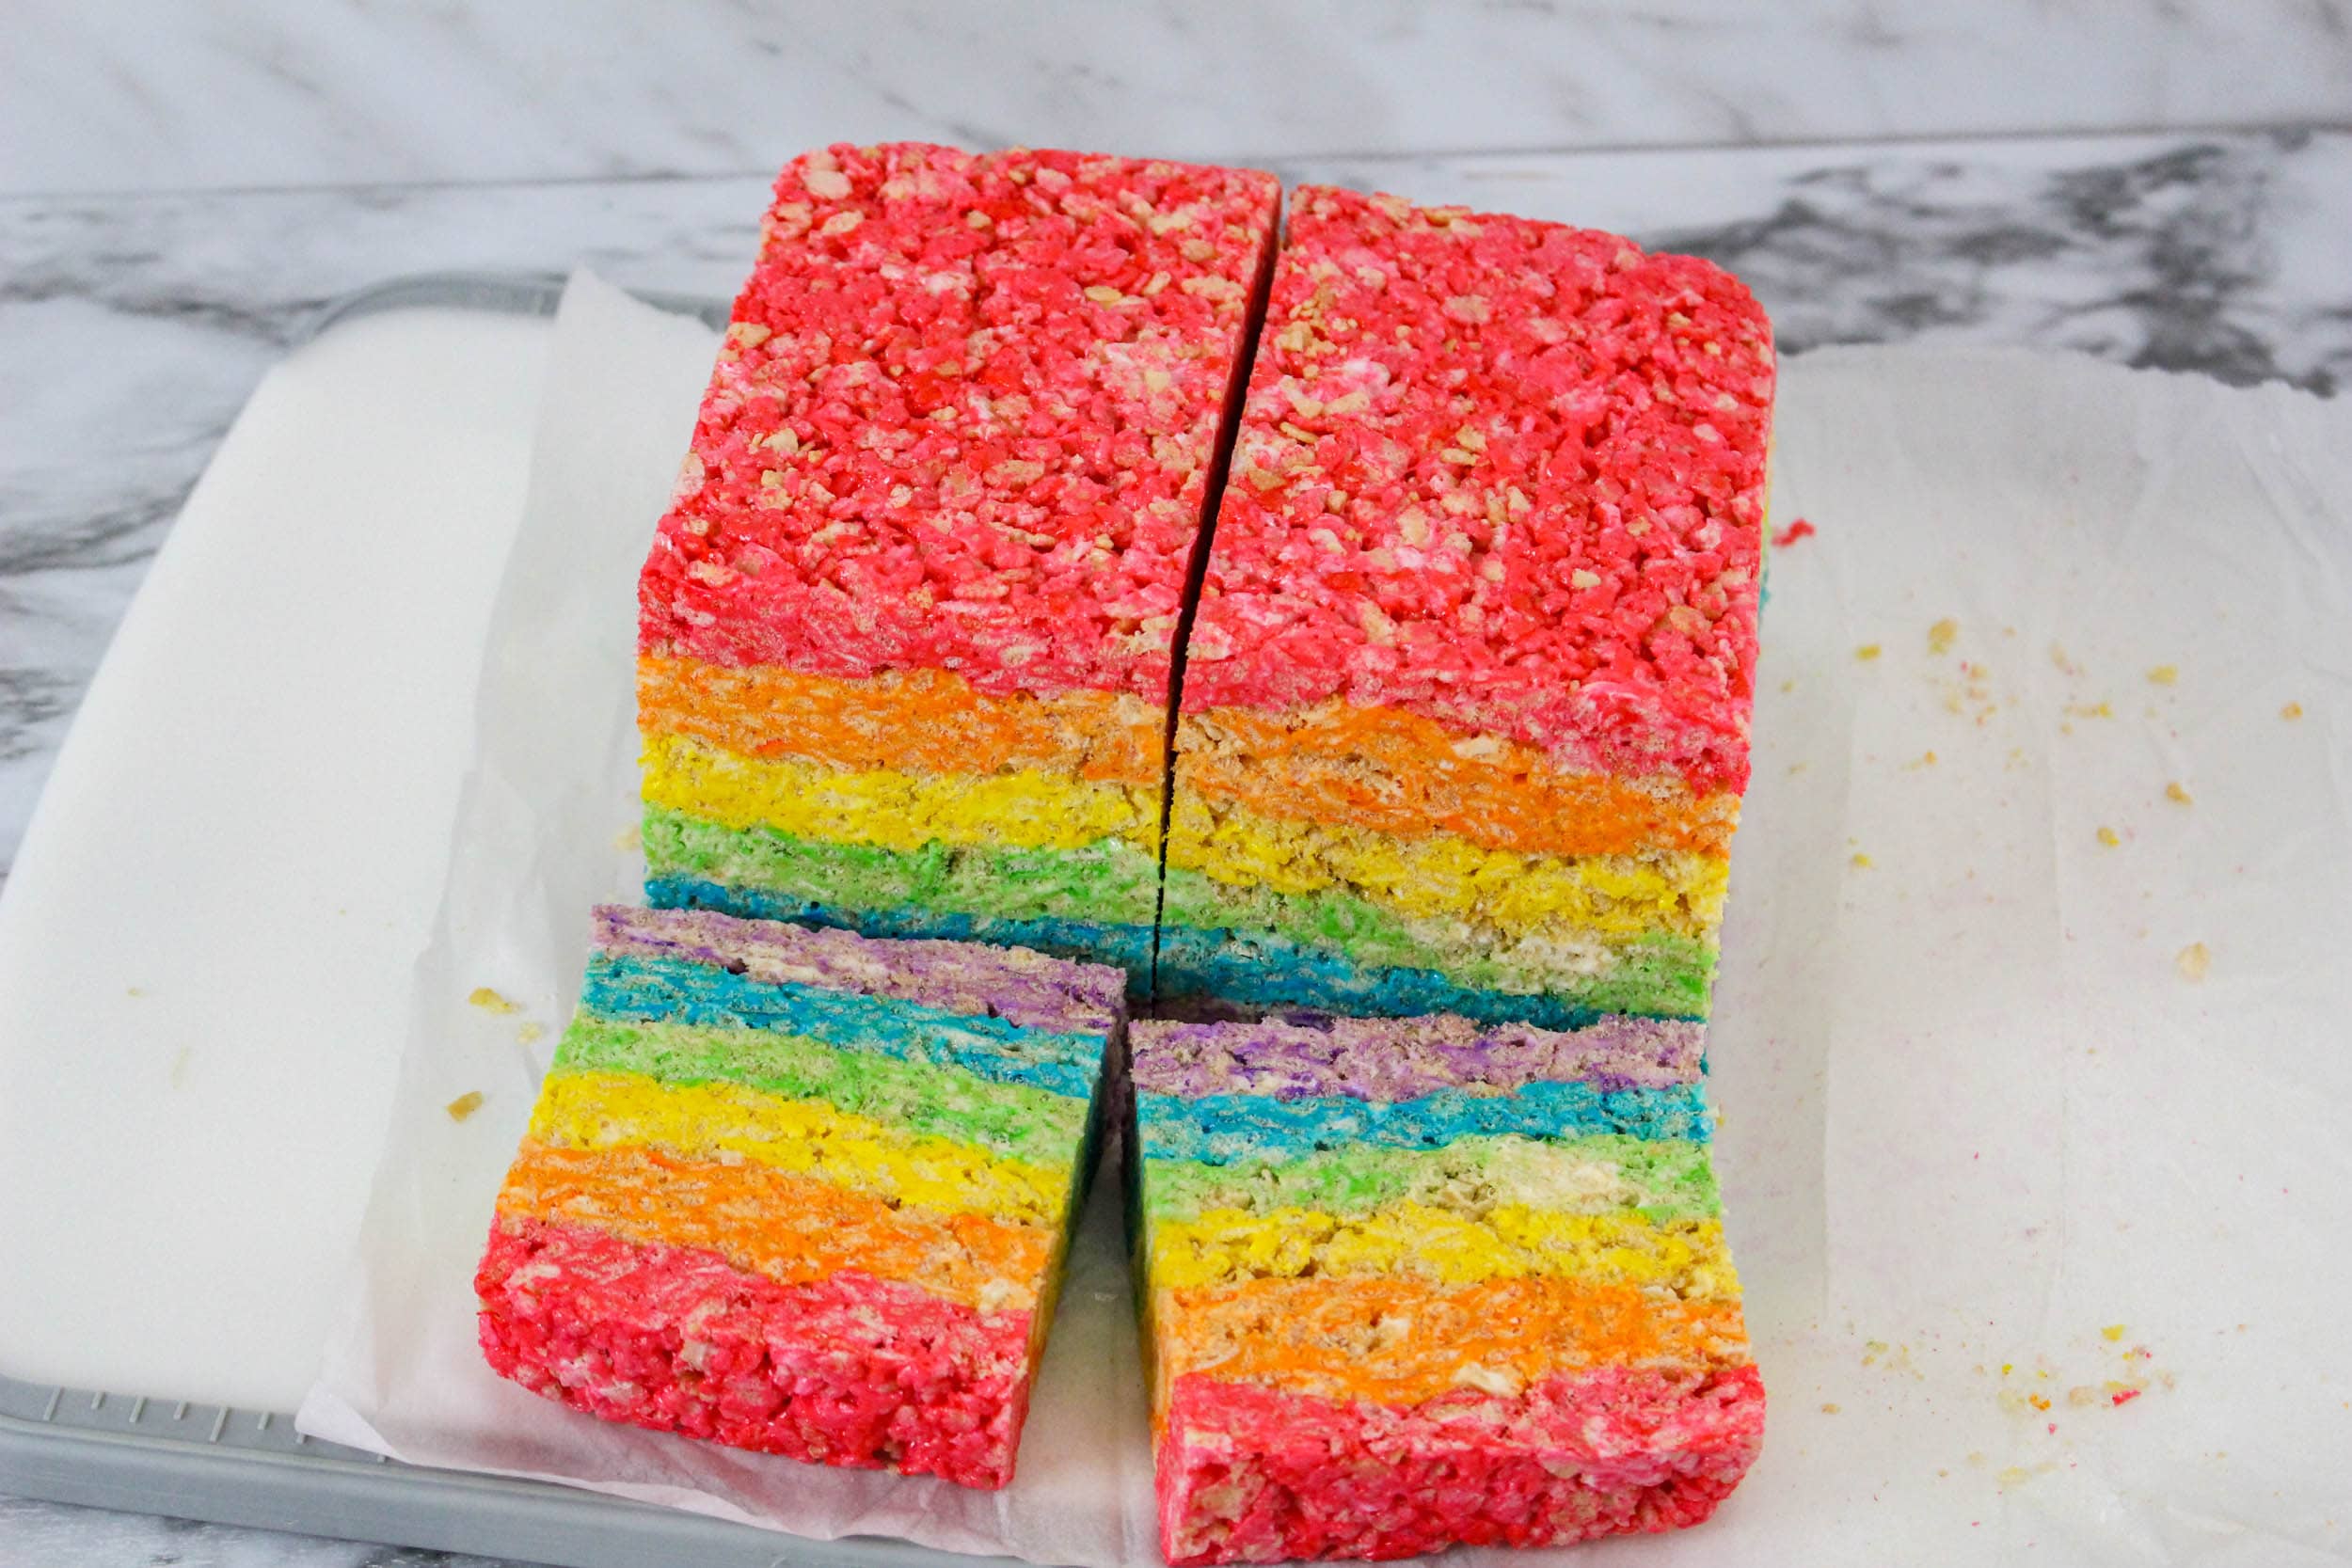
Step 8. Lift the layered square from the baking dish using the waxed paper and place it on a cutting board. Trim up any uneven edges if you need to.
Step 9: Cut the square in half and then slice each half in servings, approximately 1-inch thick. Enjoy!
To keep the treats from sticking together, place a piece of wax paper or parchment paper between each layer. Store them in an airtight container at room temperature for up to 3-4 days.
What’s the Best Way to Color the Layers for Cereal Treats?
For best results, mix the food coloring into the melted marshmallows before adding the cereal.
If you forget to blend the colors into the marshmallow mixture, you can spray your hands with some cooking spray and mix it in with our hands until the colors are nicely blended in.
Why did My Rice Krispie Treats Get Hard?
There are really only a couple of reasons this happens. The first, and most common, reason is because you cooked the marshmallows too long in the microwave (or on the stove making the stove top version).
The only other reason your treats have harden is because they passed their prime. These treats are best eaten within 4-5 days. But the good news is, this is such an easy recipe, you can make up a brand-new batch in minutes!
Can I Make these Rainbow Rice Crispy Treats on the Stove?
You sure can. All you have to do is melt the butter and marshmallows in a large pot or large Dutch oven over medium to low heat just until melted. Then follow the rest of the instructions the same way.
Variations and Add-ins:
- Melted Chocolate: For an extra special touch, you can take white candy melts, or almond bark and drizzle over the tops of the treats.
- Sprinkles: Sprinkles make EVERYTHING better. You can add some to the marshmallow mixture or wait and add some rainbow sprinkles on the top.
- Fun Shapes: Cutting them into squares are great but take them to a whole new level of cuteness, you can take your favorite cookie cutter and make them into all sorts of fun shapes!
- Extra Marshmallows: If you like little white pops of color from the mini marshmallows, you can add extra. Once you have mixed the crispy cereal in with the melted marshmallow mixture, fold in the extra marshmallows. Don’t add too many though because they can keep your treats from sticking together really well.
Want More Easy No Bake Dessert Recipes?
- No Bake Peanut Butter Cookies
- No Bake White Chocolate Raspberry Cheesecake
- Candy Corn Rice Krispie Treats
- Valentine No Bake Brownie Truffles
- Easy Oreo Fluff
- Chocolate Chip Cookie Cheesecake Bites
Rainbow Rice Krispie Treats
Equipment
Ingredients
- 32 ounces miniature marshmallows 2 bags
- 12 Tablespoons butter
- 15 cups Rice Krispies cereal
- Gel food coloring – red orange, yellow, green, blue, purple
Instructions
- Prepare an 8 or 9-inch square baking pan with wax paper. Spray the top of the paper with non-stick cooking spray.
- Add the marshmallows and butter to a large microwave-safe bowl.32 ounces miniature marshmallows, 12 Tablespoons butter
- Heat in the microwave for 1 minute and then stir. Heat for another minute and stir it again. Repeat this until the melted butter and marshmallow mixture is smooth.
- Divide the melted marshmallow mixture between six different bowls. Add enough gel food coloring to each until you get the desired color you’re looking for. Stir well to combine.Gel food coloring – red
- Fold 2 ½ cups of cereal into each bowl, until it’s coated in the marshmallow mixture.15 cups Rice Krispies cereal
- Press the mixture into the prepared baking sheet in even layers using a buttered spatula. You’ll have thin layers of each color; red, orange, yellow, green, blue, purple.
- Keep layering until you have all the layers pressed firmly together. Keep the square shape as you stack the layers. Then cool completely.
- Lift the layered square from the baking dish using the waxed paper and place it on a cutting board. Trim up any uneven edges if you need to.
- Cut the square in half and then slice each half in servings, approximately 1-inch thick.
Notes
Nutrition
Did You Make This Recipe?
Share it with me on Instagram @funmoneymom and follow on Pinterest @funmoneymom for more!
Let’s be friends!
Did you love this post? Make sure to comment below and let me know your thoughts! And don’t forget to follow on your favorite social network below!

About Lisa O’Driscoll
Lisa O’Driscoll is a lifestyle and parenting expert, cookbook author, and the creative force behind Fun Money Mom, a popular blog she’s run since 2014. She’s the author of the children’s cookbook Roll It, Slice It, Mash It, Dice It, designed to get kids excited about cooking. With multiple TV appearances under her belt, she loves sharing her expertise on family-friendly recipes, creative DIYs, and party planning and is always on a mission to inspire and entertain!