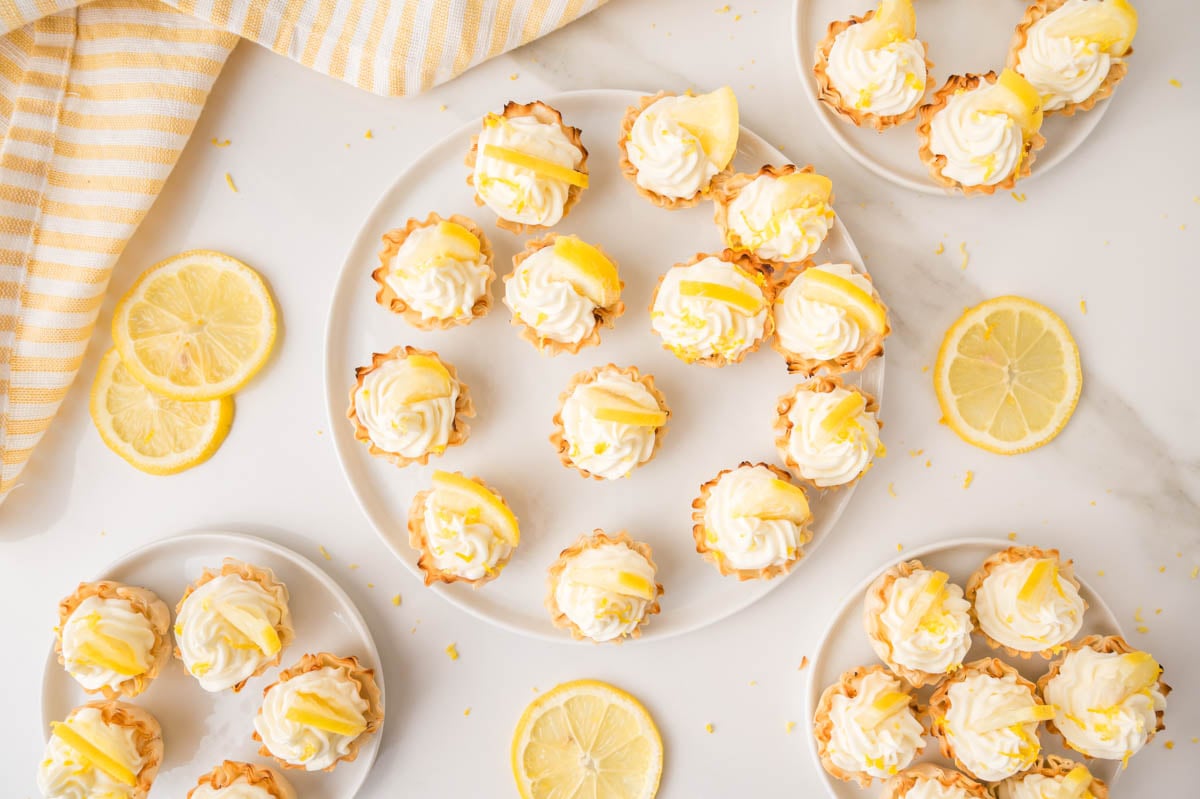
Lemon Cheesecake Bites
This post may contain affiliate links. As an Amazon Associate, I earn from qualifying purchases.
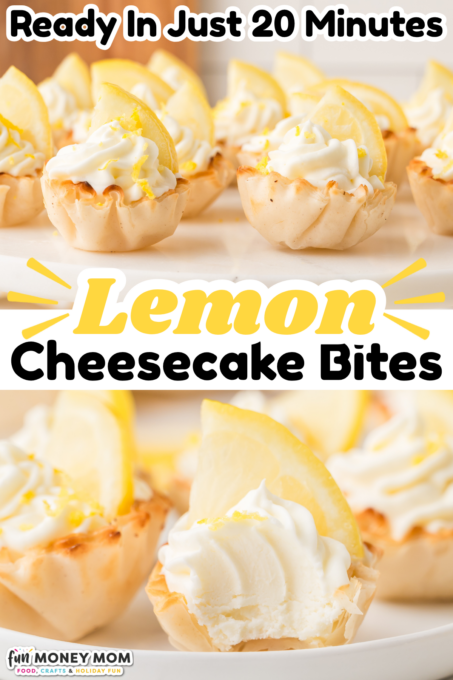
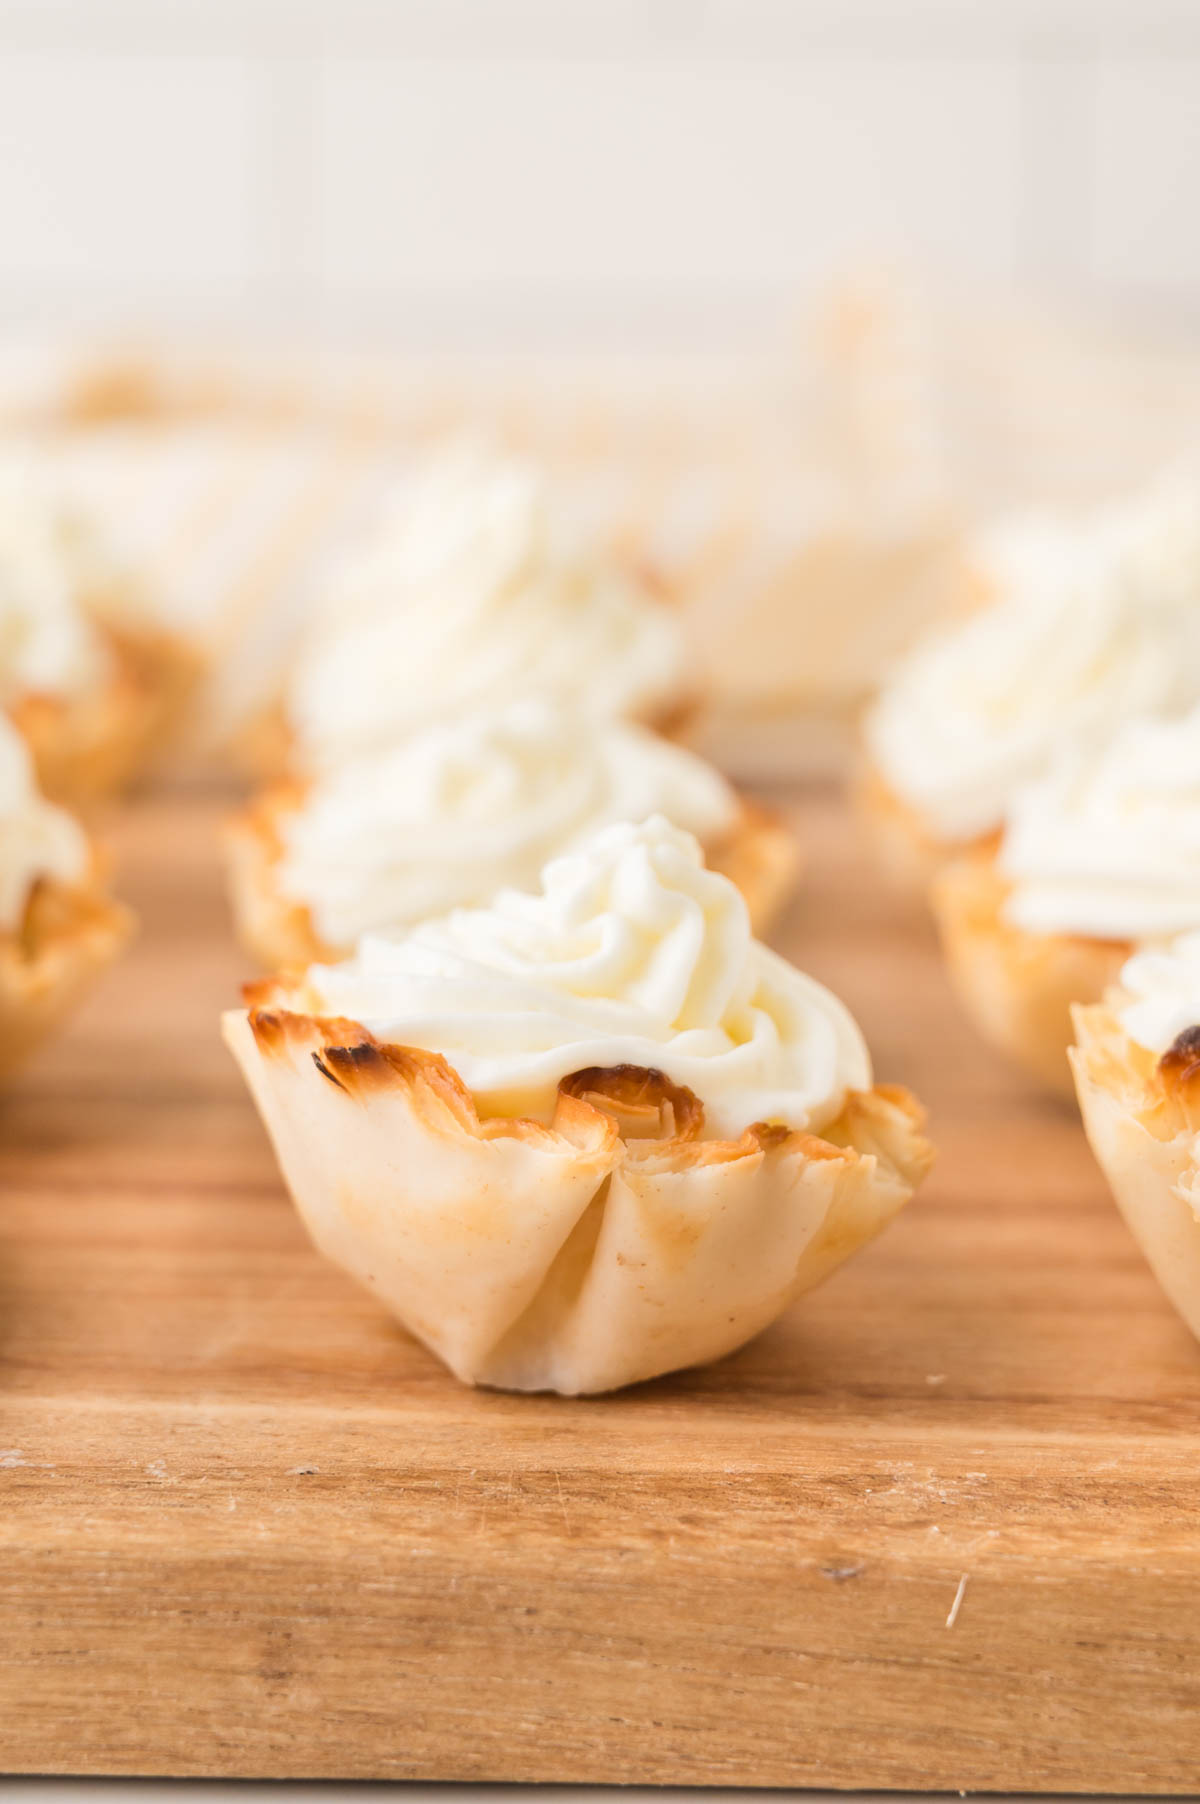
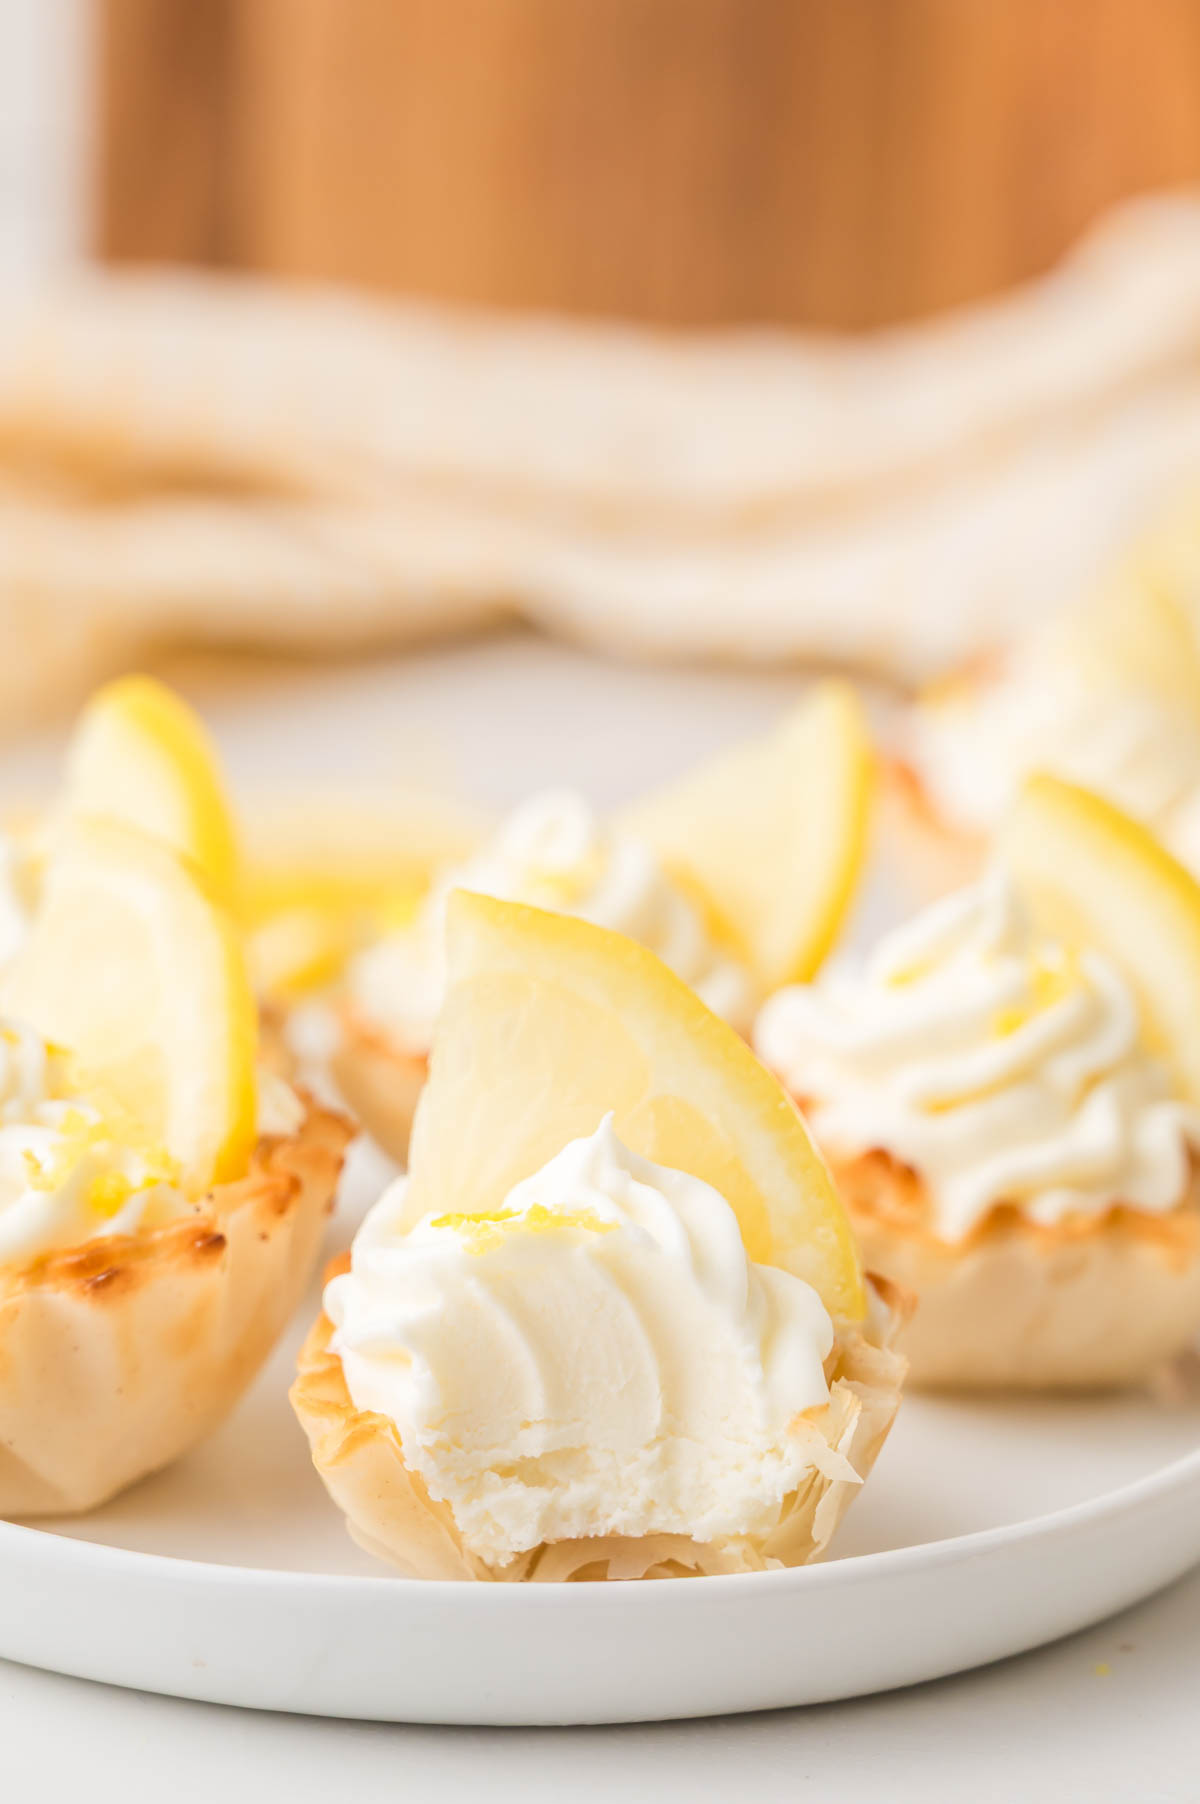
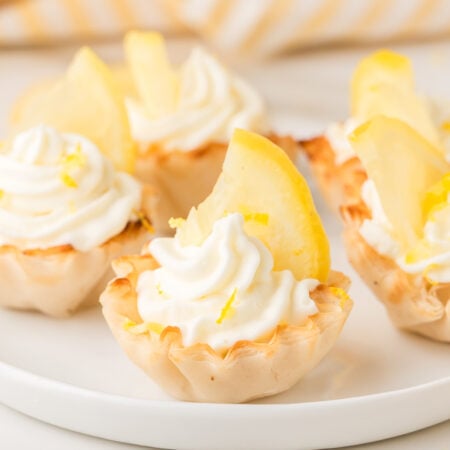
These Lemon Cheesecake Bites prove that the cutest desserts on the table don’t have to be the hardest to pull off. Crisp phyllo shells are filled with a bright, creamy lemon filling, for a delicious mini dessert that comes together in about 20 minutes (and disappears even faster)!
Mini Lemon Cheesecake Bites
These mini lemon cheesecake bites are such a fun twist on my original no-bake cheesecake bites and have become one of my favorite desserts for parties. I started making them last summer when it was too hot for baking and they disappeared in a matter of minutes. Be warned though: the combination of that crisp, flaky phyllo shell and the light, creamy cheesecake filling makes it impossible to eat just one.
I also love how incredibly easy they are to make. There’s no water bath, no oven, and no crumb crust to press into a pan. Just whip up the filling, pipe it into the shells, and refrigerate until you’re ready to serve. These little cheesecakes disappear fast and are the kind of make-ahead lemon dessert that makes hosting easy and totally stress-free.
Looking for the perfect drink to serve with these cheesecake bites? This Peach Lemonade and my Raspberry Lemonade are both fun and fruity options. Or for something a little more decadent, this homemade Lemon Milkshake is always a big hit.
Why We Love This Recipe
- Beginner-friendly recipe: The whole process is just mix, pipe, chill. It really couldn’t be easier!
- Ready-made crispy crust: Store-bought mini phyllo shells mean you can skip making a crust from scratch…just fill and go!
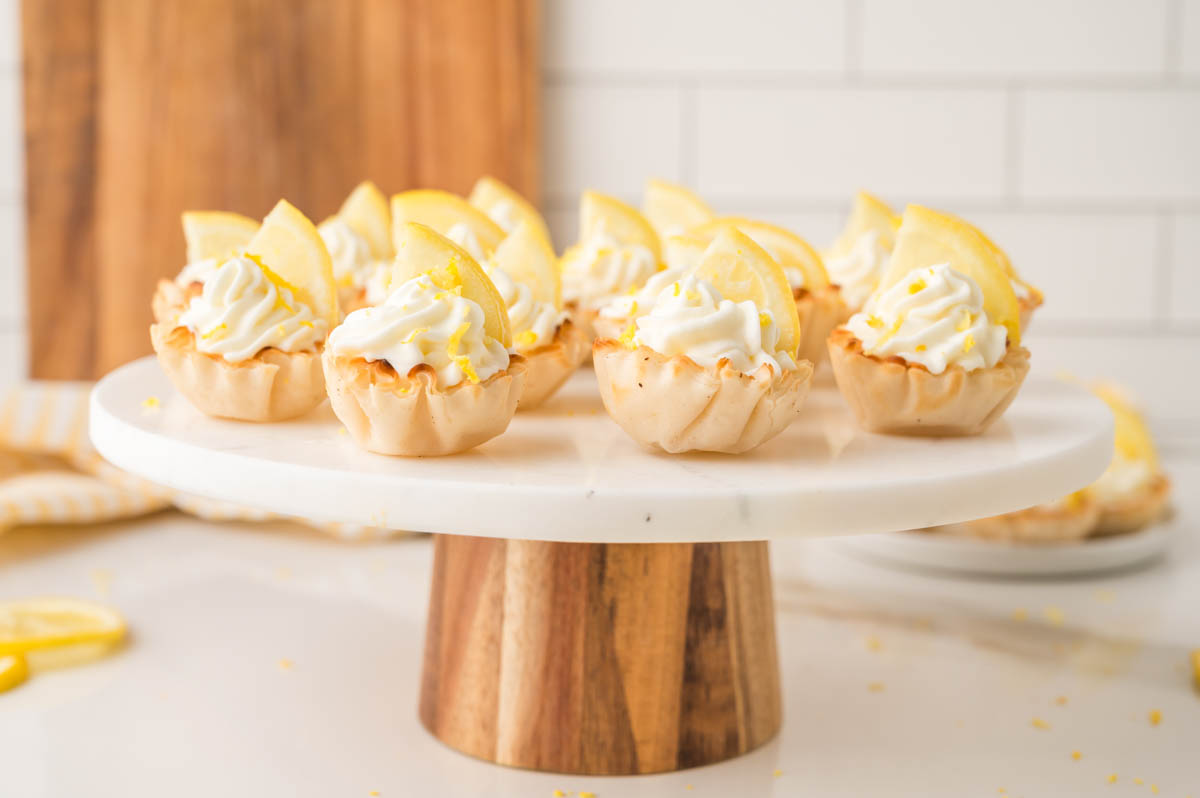
- Fun for sharing: Their fun size makes them ideal for parties, showers, holiday trays, or any time you want a dessert that’s easy for guests to grab and go.
Ingredients
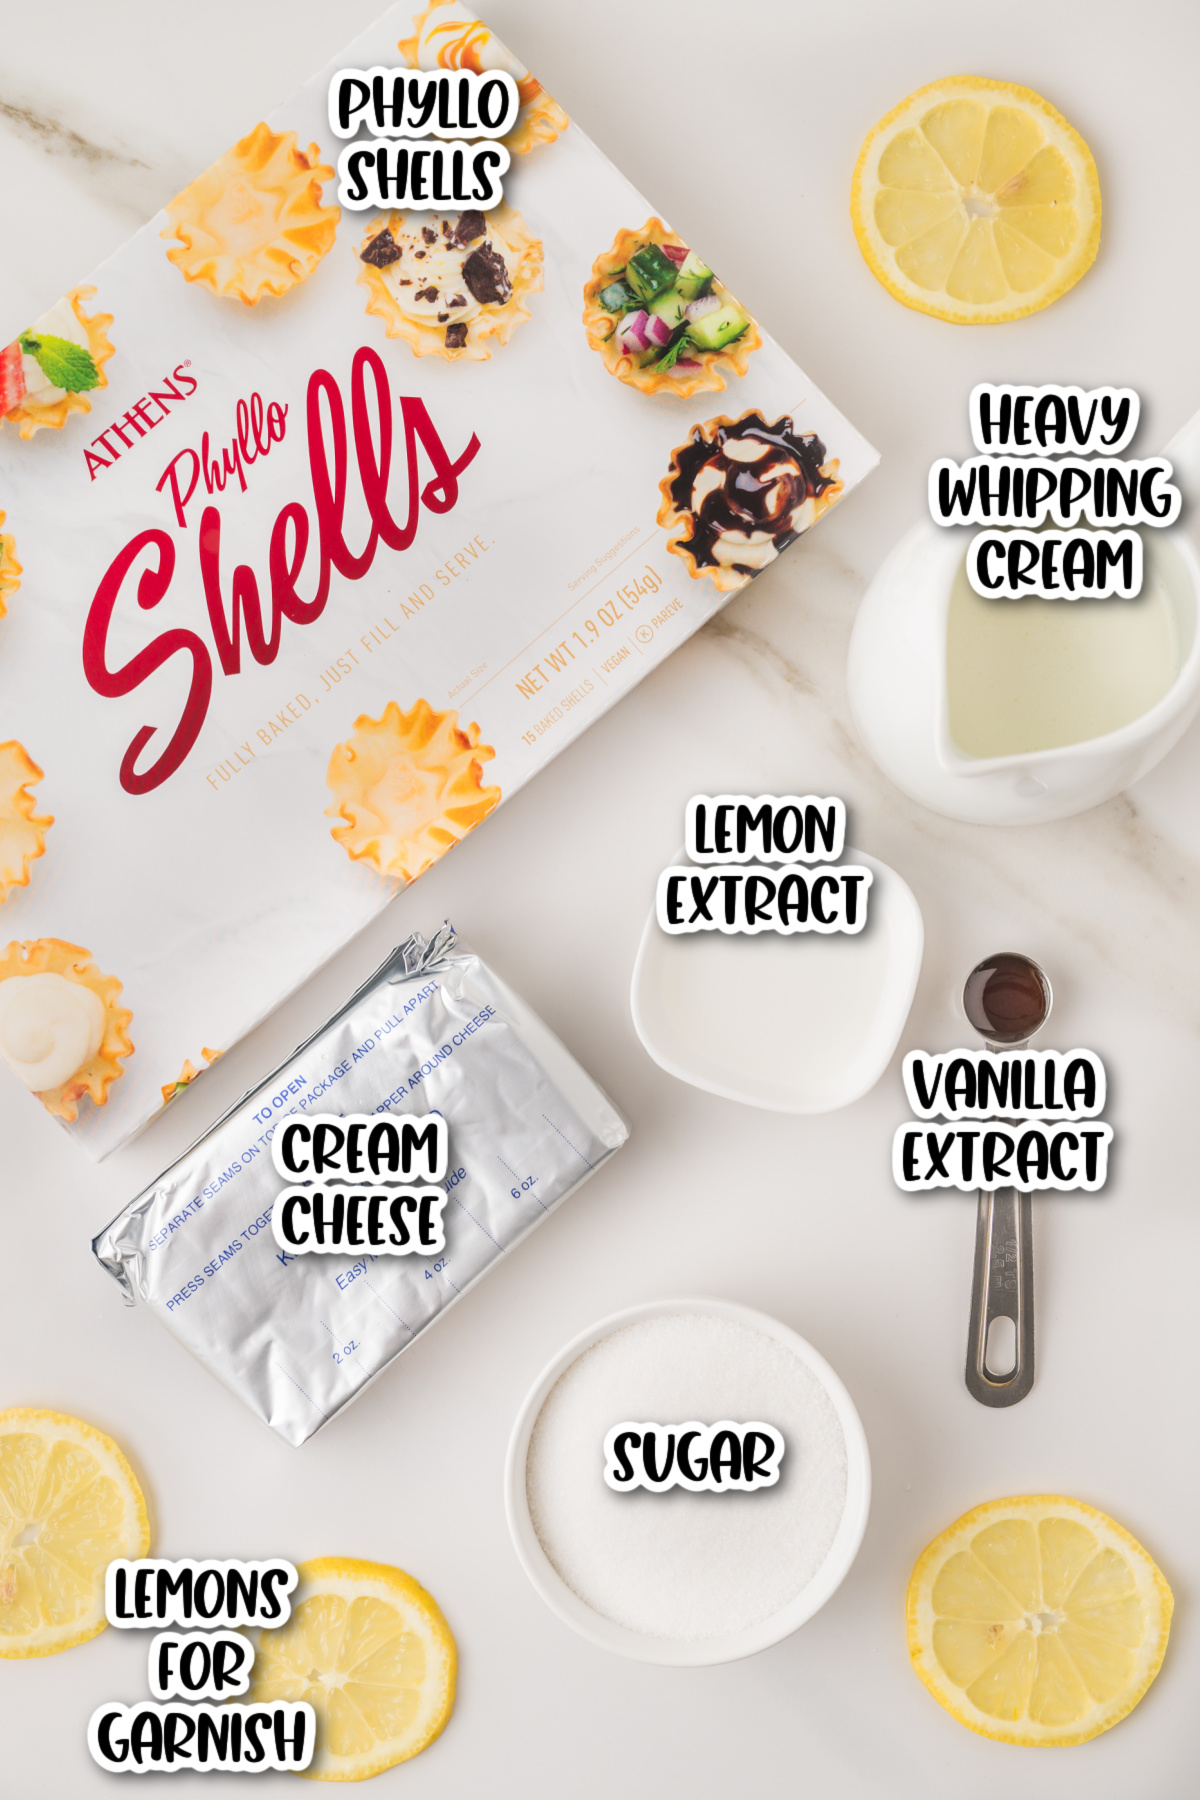
Find the full printable recipe with measurements and directions in the recipe card below.
How To Make Lemon Cheesecake Bites
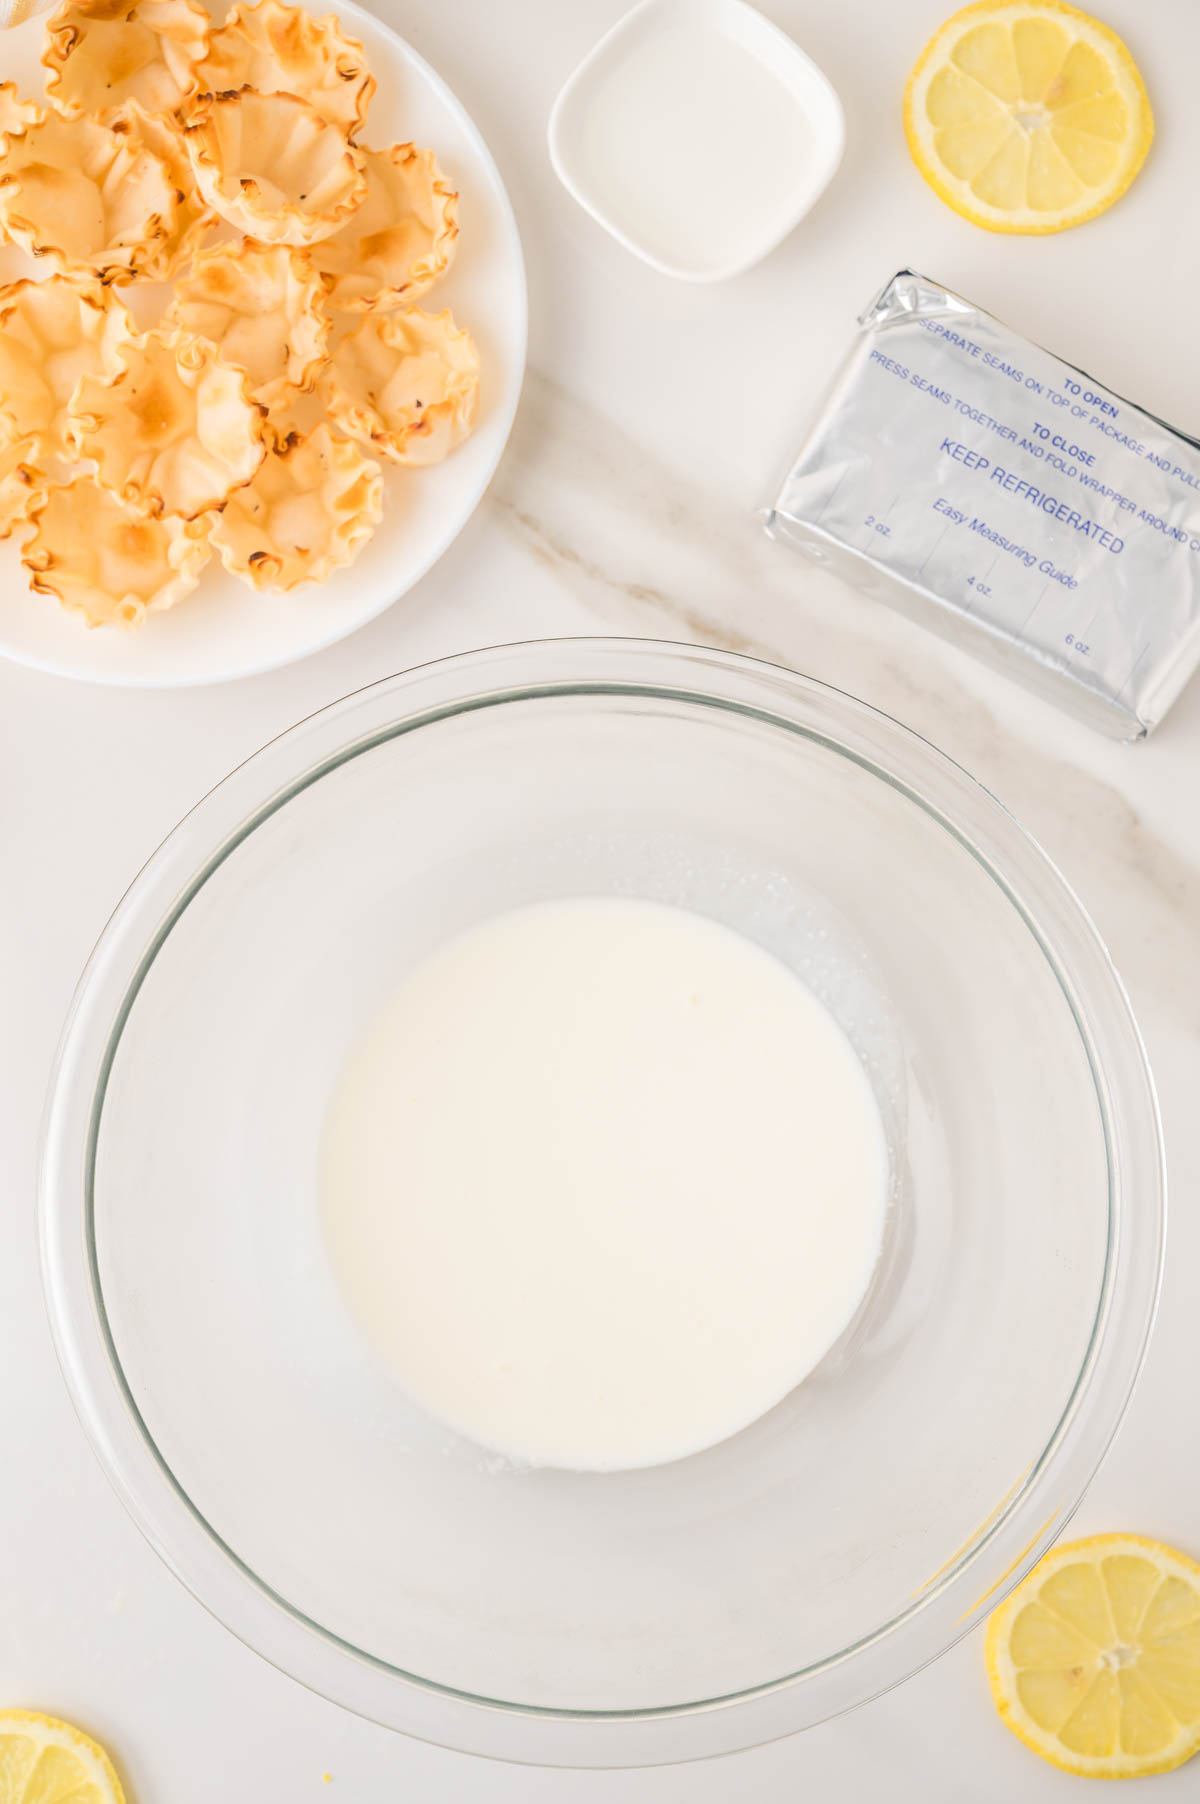
Step 1. Bake your phyllo shells at 350° for 3-5 minutes. Let cool. (optional)
Step 2. In a large mixing bowl, beat the heavy whipping cream until stiff peaks form. Set it aside.
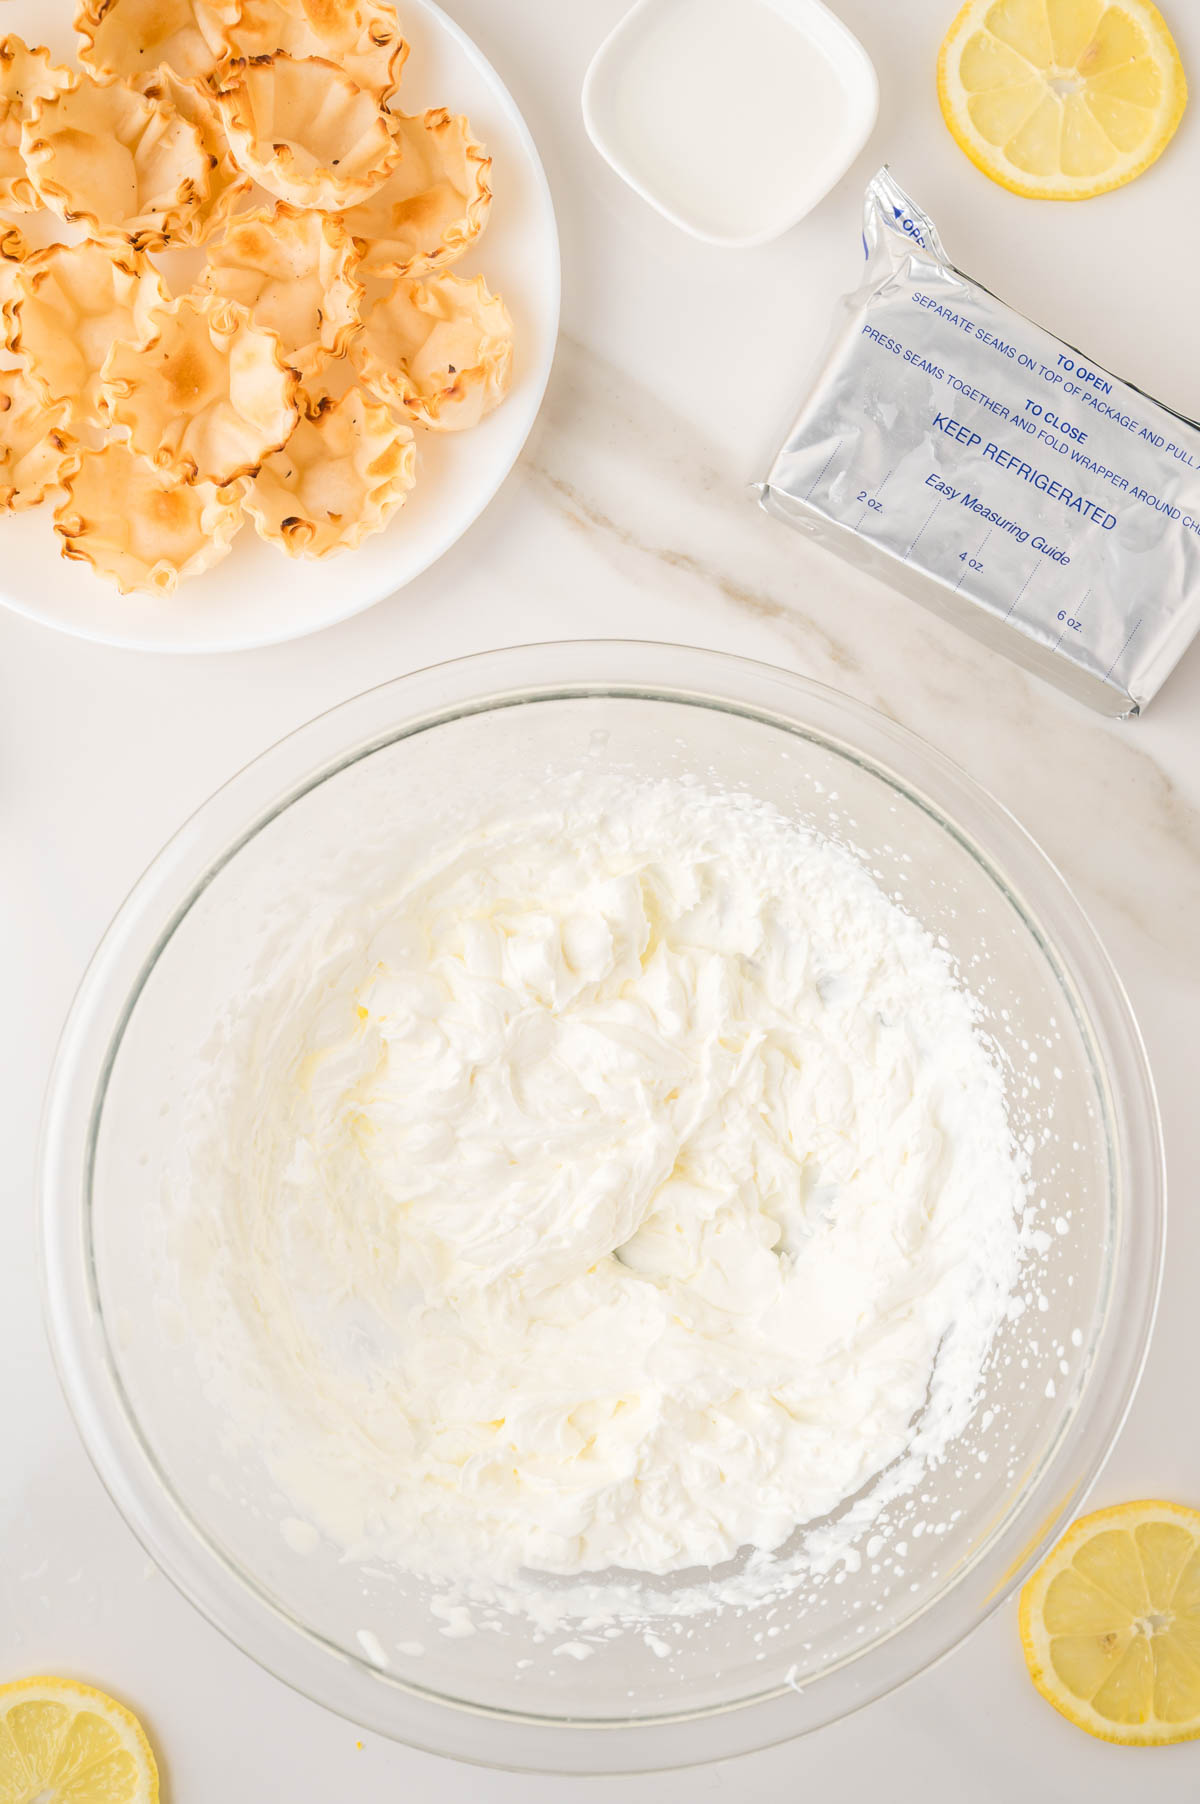
Step 3. In a second large bowl, beat the cream cheese, sugar, lemon extract, and vanilla extract until smooth and well combined.
Step 4. Gently fold the whipped cream into the cream cheese mixture until fully incorporated.


Step 5. Transfer the cheesecake filling to a piping bag fitted with your preferred tip. Fill all 30 mini phyllo shells with the lemon cheesecake mixture.
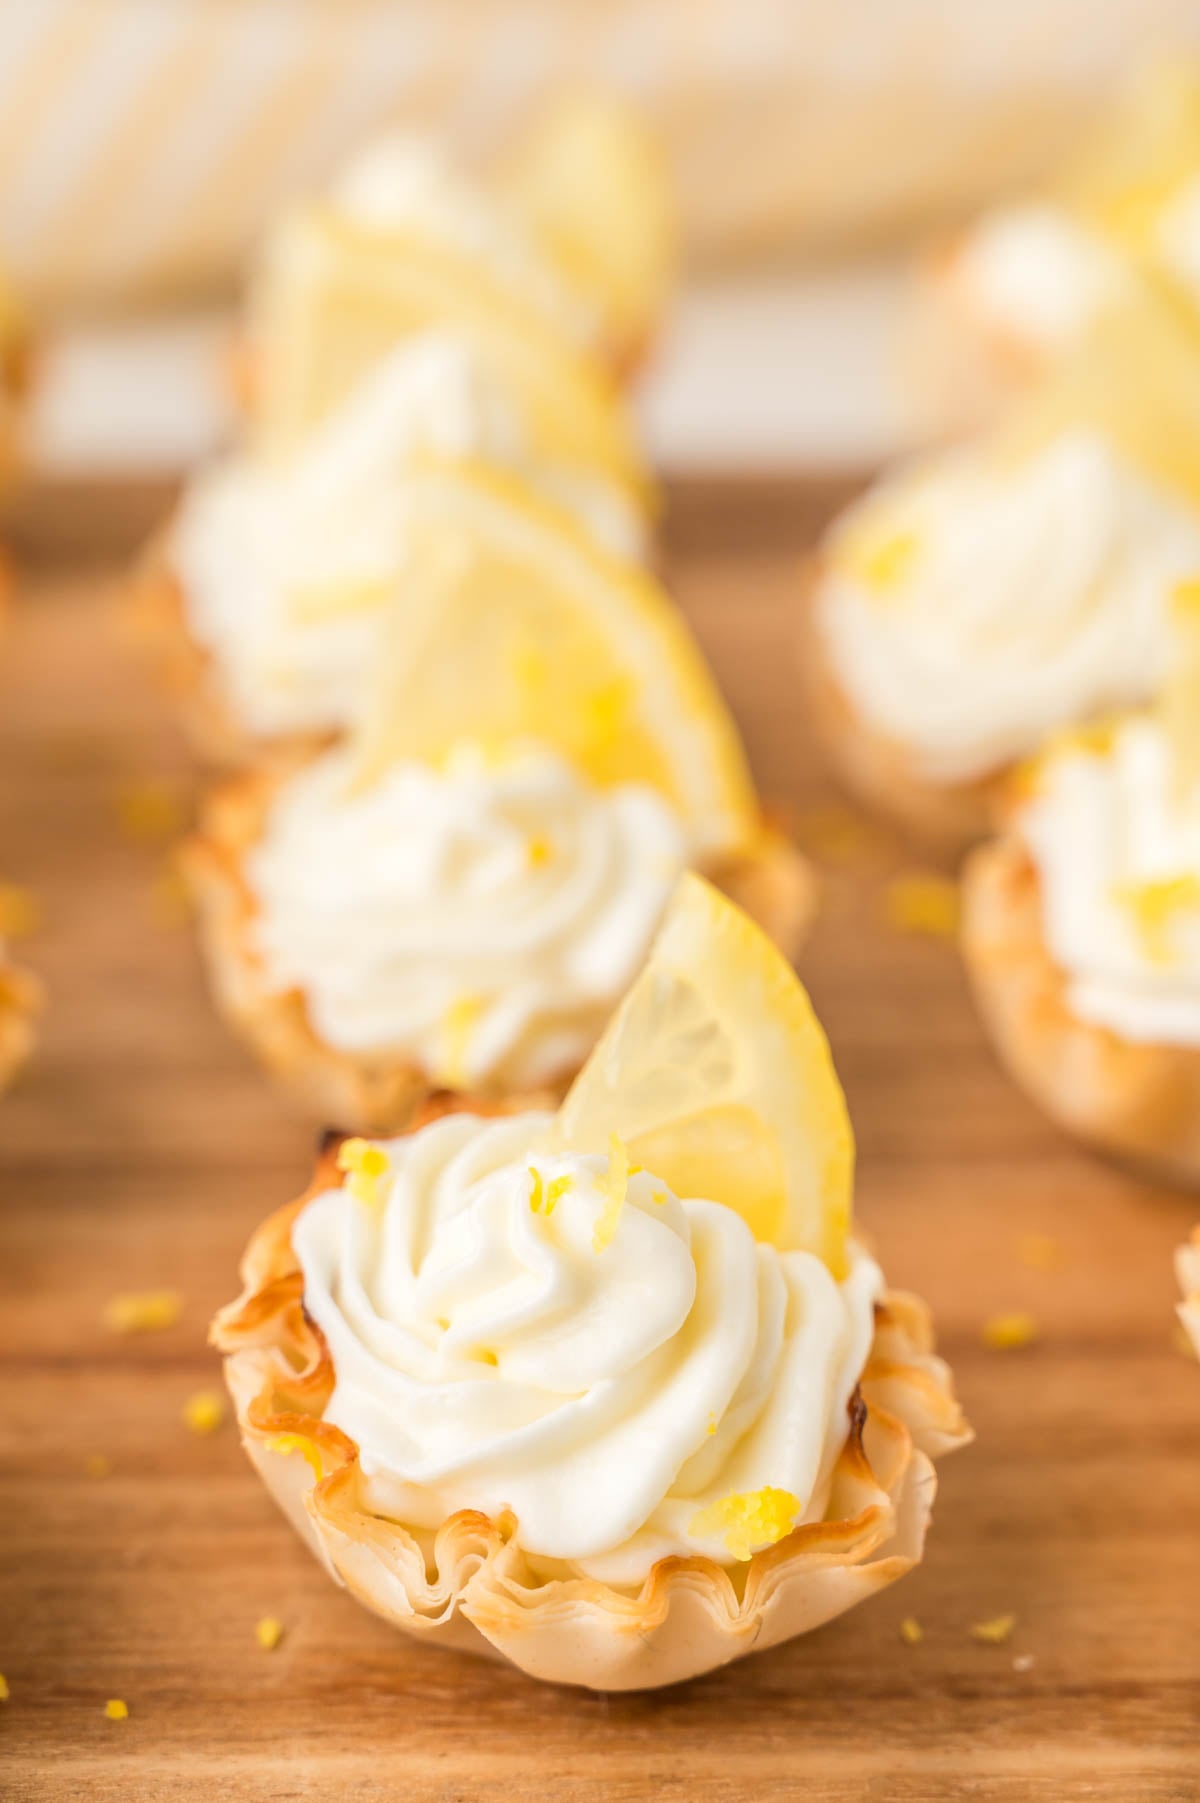
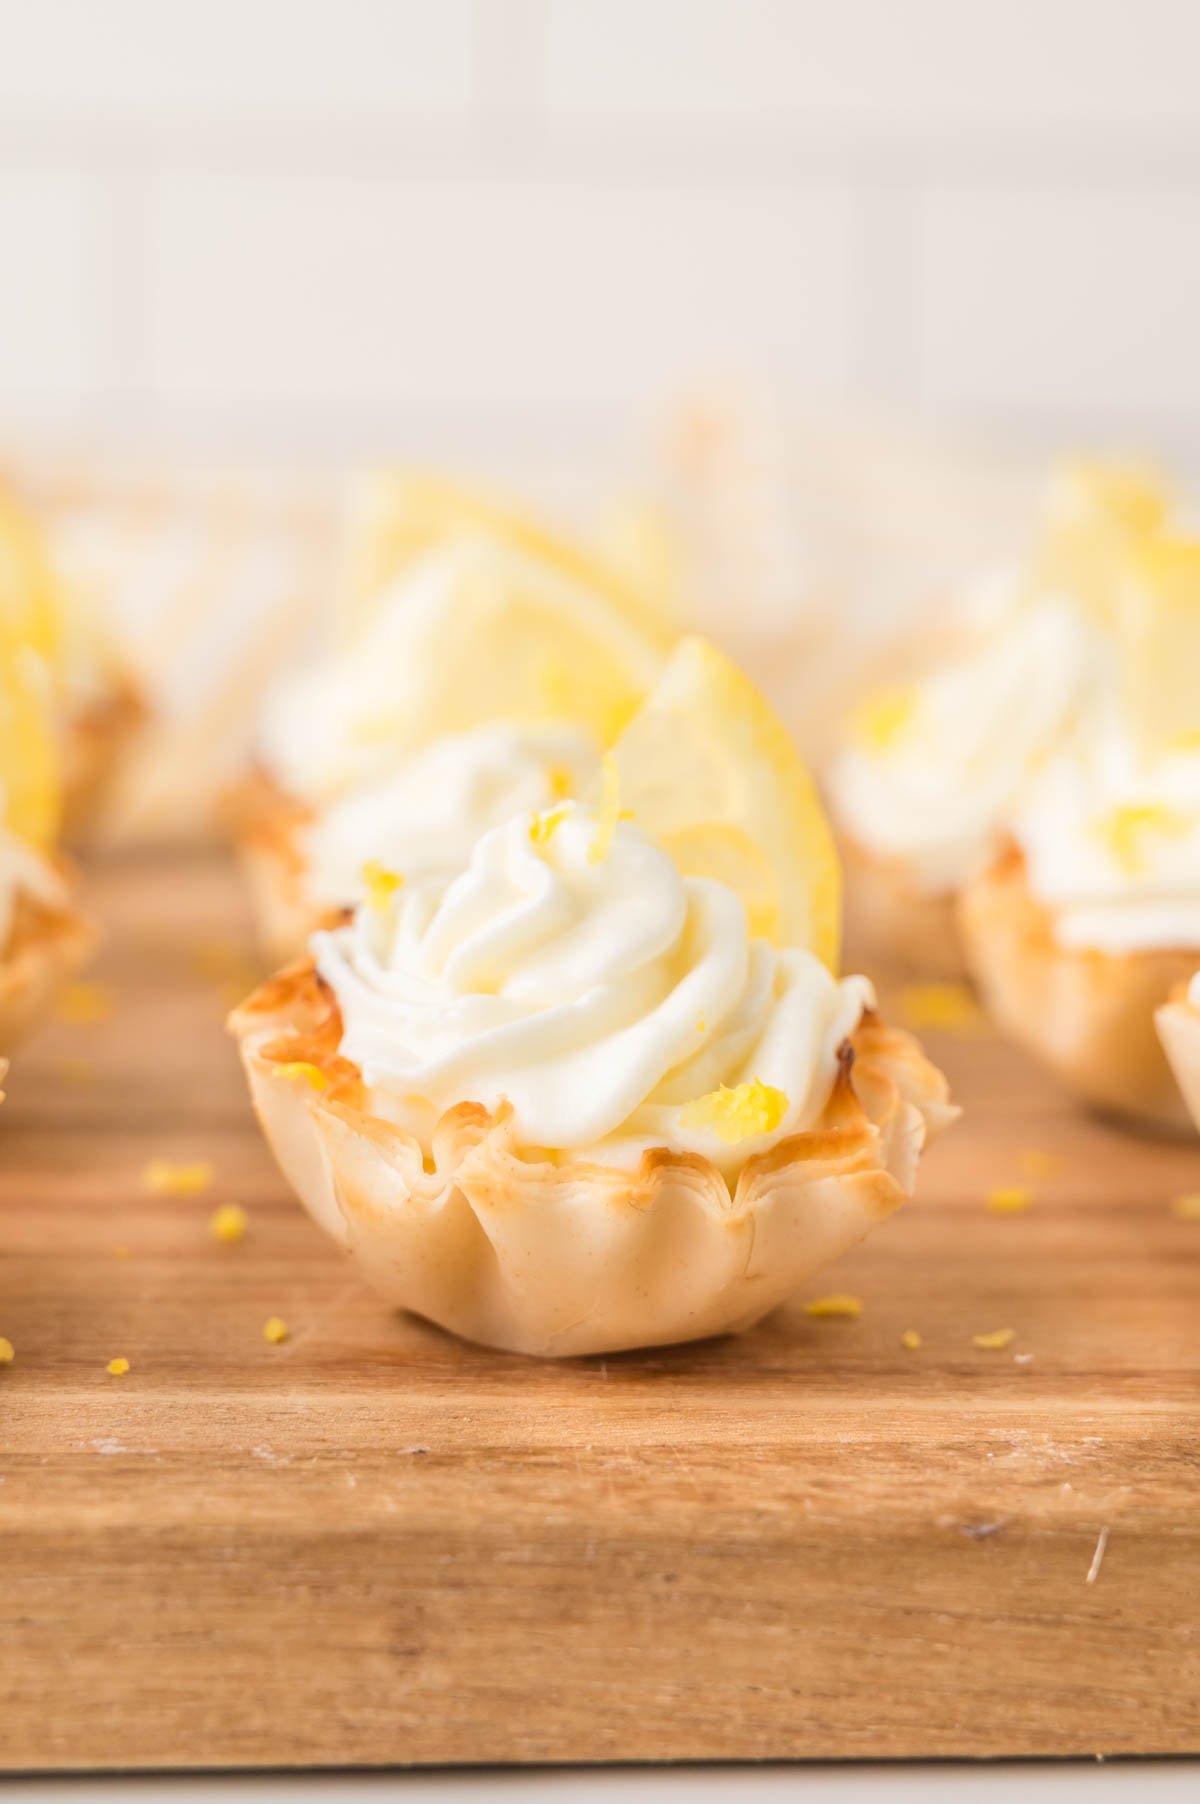
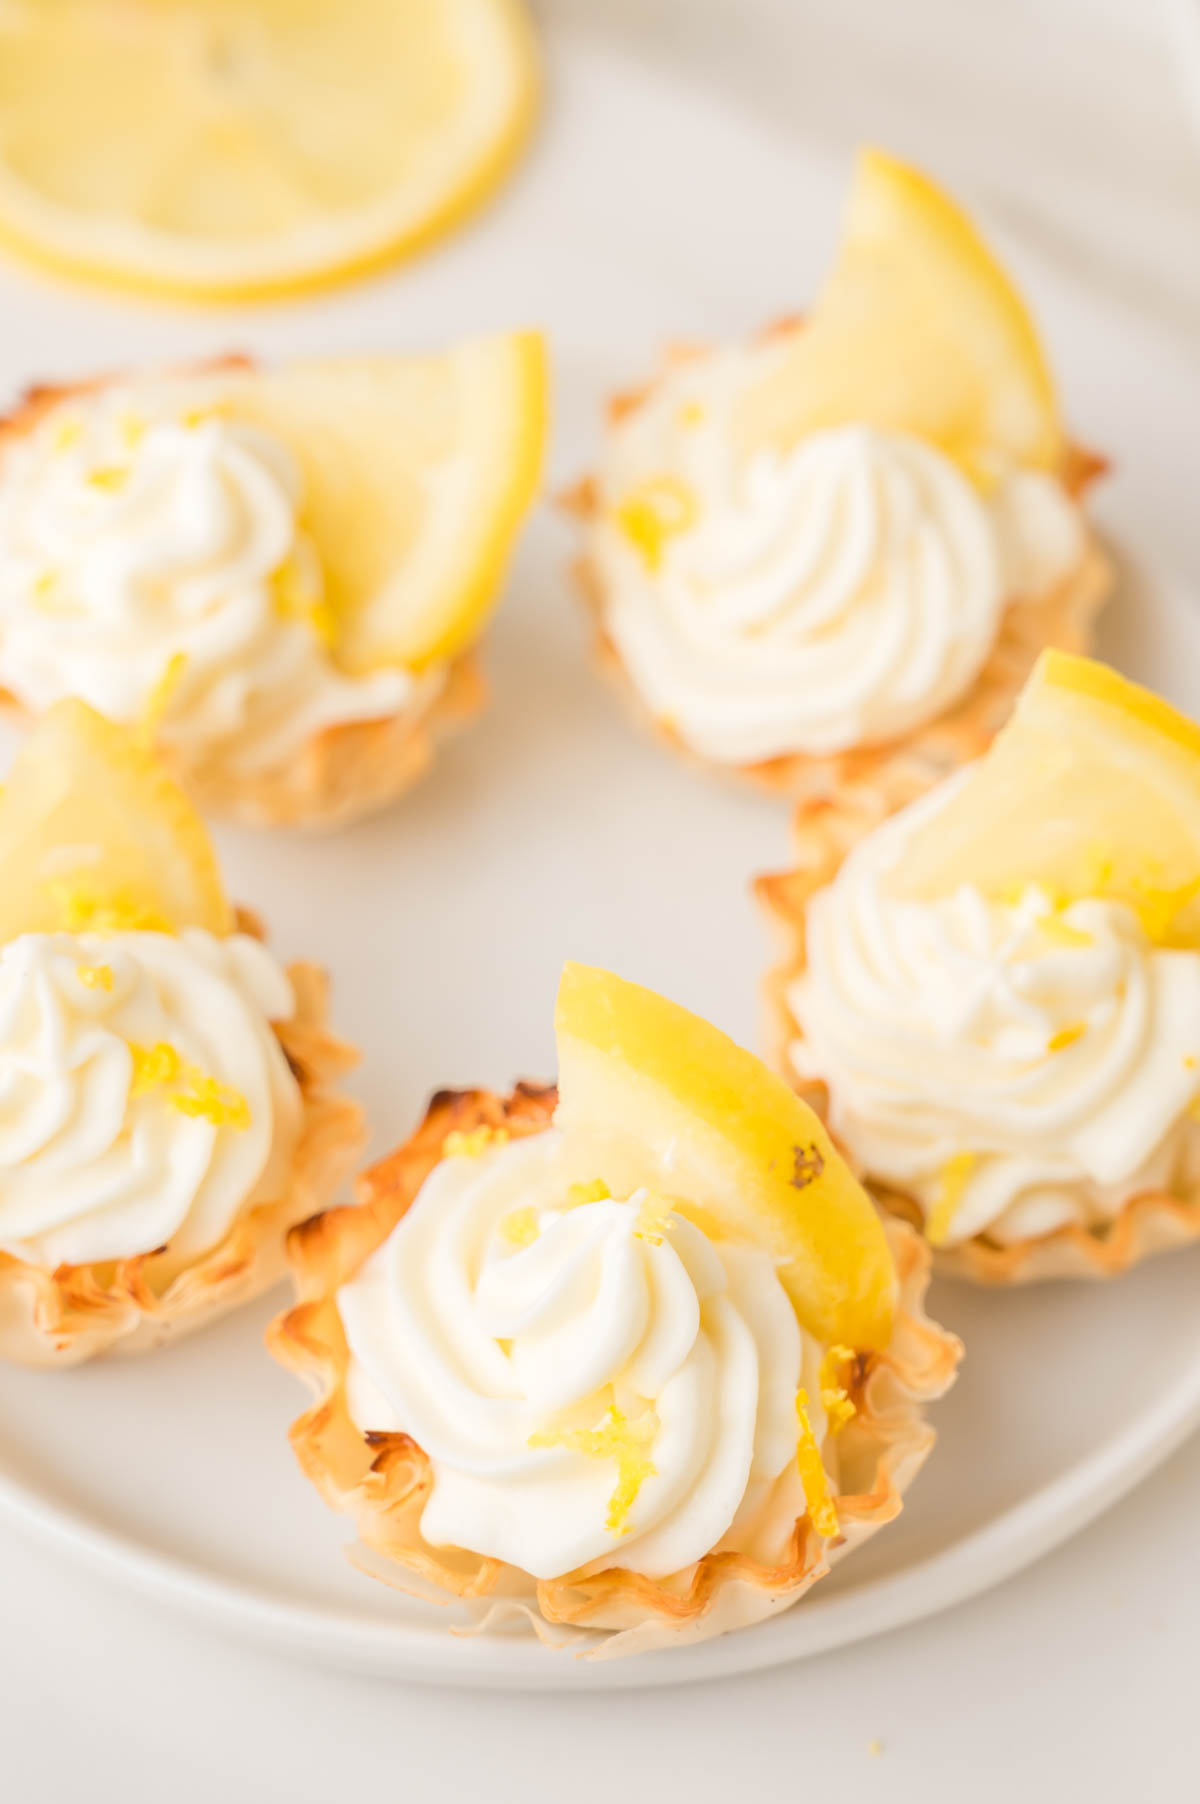
Step 6. Garnish with quartered lemon slices and a sprinkle of lemon zest. Chill in the refrigerator until ready to serve.
Storage Instructions
Refrigerator: In the rare event that you actually have leftovers, you can store these in an airtight container in the refrigerator for 3-4 days. Just know the shells will soften over time, but they will still taste delicious!
Freezer: These can also be frozen in a freezer safe airtight container. You’ll want to thaw them at room temperature for 5 to 10 minutes before serving. For the best quality, serve them within 1 month. The shells will soften when thawed, but you’ll still want to eat every last one!
Tips And Tricks
These simple tips will help you get the creamiest filling, the prettiest presentation, and the best texture every time.
- Keep your cream cold: Cold heavy whipping cream is essential for getting stiff peaks.
- Soften the cream cheese first: If the cream cheese is too cold, the filling will be lumpy no matter how long you mix it.
- Use an electric mixer for both steps: A handheld or stand mixer makes quick work of both the whipped cream and the cream cheese mixture.
- Pick your piping tip: A large round tip gives a clean, casual look. A star tip adds a little texture and makes them look extra fancy for parties.
- Don’t fill the shells too far in advance: The phyllo shells will soften slightly over time as the filling sits in them. For the crispiest texture, fill them within a few hours of serving.
- Make them ahead of time: I love to make the filling 1-2 days beforehand, add it to the piping bag, and store it until ready to serve. Then just pipe and garnish!
Variations And Add-ins
Whether you want to dress them up for a party or put your own spin on the flavor, there are plenty of fun ways to make them your own.
- Add lemon curd on top: A small dollop of homemade lemon curd or store-bought lemon curd on top of the filling takes the lemon flavor to the next level.
- Mix lemon zest into the filling: For extra citrus punch, stir a teaspoon of lemon zest directly into the cheesecake filling along with the lemon extract.
- Swap lemon for lime or orange: This same filling works beautifully with lime extract for a key lime twist, or orange extract for something a little different.
- Add a berry on top: A single fresh blueberry, raspberry, or sliced strawberry makes a gorgeous garnish alongside or instead of the lemon slice.
- Make them pastel: If you want to give them a pretty pink color, you can add a drop of red food coloring gel. This is always a fun idea for baby showers or bridal showers.
Yes, you can make the cheesecake filling up to a day or two in advance and store it right in the piping bag in the fridge. Wait to fill the shells until just before serving so that they don’t lose their crispness.
You definitely don’t have to, but baking them for 3 to 5 minutes gives them a little extra crispness. If I have the time, I always do it! Just let them cool for 5 minutes before filling. That said, filling them straight out of the package works great too and they still taste amazing.
Other No-Bake Cheesecake Desserts
- No Bake Cheesecake with Cool Whip
- Oreo Cheesecake Bites
- No Bake Biscoff Cheesecake
- No-Bake White Chocolate Raspberry Cheesecake
- Chocolate Chip Cookie Cheesecake Bites
- Cool Whip Cheesecake
Lemon Cheesecake Bites
Equipment
- Stand mixer or hand mixer
Ingredients
- 30 mini phyllo shells
- 3/4 cup heavy whipping cream
- 8 oz cream cheese softened
- 1/2 cup granulated sugar
- 1 1/2 teaspoons lemon extract
- 1/2 teaspoon vanilla extract
- quartered lemon slices & lemon zest for garnish
Instructions
- Start by beating the whipping cream until stiff peaks form, then set aside.3/4 cup heavy whipping cream
- Beat the cream cheese, sugar and extracts until well blended.8 oz cream cheese, 1/2 cup granulated sugar, 1 1/2 teaspoons lemon extract, 1/2 teaspoon vanilla extract
- Fold in whipped cream.
- Add the mixture to a decorating bag to fill 30 mini phyllo shells.30 mini phyllo shells
- Top with quartered lemon slices and lemon zest.quartered lemon slices & lemon zest
- Refrigerate until ready to serve.
Notes
- Store properly: Store these cheesecake bites in the refrigerator in an airtight container. They will stay fresh for up to 3 to 4 days. You can also freeze them in a freezer safe airtight container. You will want to that them at room temperature for 5 to 10 minutes before serving. For the best quality, serve them within 1 month. Note: If refrigerated or frozen in the shells, the shells will soften (but still be delicious).
- Keep your cream cold: Cold heavy whipping cream is essential for getting stiff peaks.
- Soften the cream cheese: If the cream cheese is too cold, the filling will be lumpy no matter how long you mix it.
- Use an electric mixer for both steps: A handheld mixer makes quick work of both the whipped cream and the cream cheese mixture.
- Pick your piping it: A large round tip gives a clean, casual look. A star tip adds a little texture and makes them look extra fancy for parties.
- Do not fill the shells too far in advance: The phyllo shells will soften slightly over time as the filling sits in them. For the crispiest texture, fill them within a few hours of serving.
- Make the filling ahead: You can make the cheesecake filling up to a day in advance and keep it in the piping bag in the fridge.
Nutrition
Did You Make This Recipe?
Share it with me on Instagram @funmoneymom and follow on Pinterest @funmoneymom for more!
Let’s be friends!
Did you love this post? Make sure to comment below and let me know your thoughts! And don’t forget to follow on your favorite social network below!

About Lisa O’Driscoll
Lisa O’Driscoll is a lifestyle and parenting expert, cookbook author, and the creative force behind Fun Money Mom, a popular blog she’s run since 2014. She’s the author of the children’s cookbook Roll It, Slice It, Mash It, Dice It, designed to get kids excited about cooking. With multiple TV appearances under her belt, she loves sharing her expertise on family-friendly recipes, creative DIYs, and party planning and is always on a mission to inspire and entertain!