
How To Create A Beautiful Wood Photo Transfer
This post may contain affiliate links. As an Amazon Associate, I earn from qualifying purchases.
Looking for a thoughtful gift for someone special? How about a beautiful way to display a favorite photo? This easy to make wood photo transfer is perfect for those occasions and more…just be sure not to make the same mistake that I did!
As seen on Shutterfly.com
I came across some wood photo transfer crafts awhile back on Pinterest and absolutely loved them. It was on my list of things to do but somehow I got busy and it never happened. When I was recently asked to join the ladies of Sarasota’s Suncoast View to share fun photo crafts, I finally had a good excuse!
First things first, I had to find a picture. Since I was planning to make this as a gift for my mom (I sure hope she’s not reading this right now), I chose a picture from my oldest daughter Ashling’s first communion.
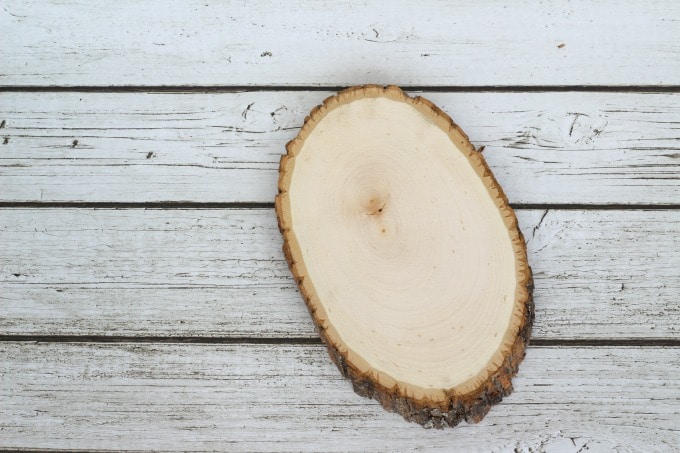
Since I’d never made this craft before, I chose a second photo too…just in case I did something wrong the first time. That turned out to be a very good idea, as you’ll see in a minute!
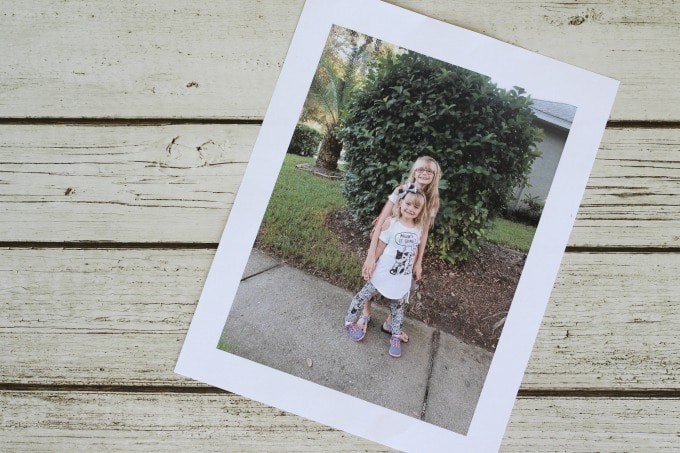
This wood photo transfer method only works with photos printed on a laser jet printer, so I sent both pictures to Staples for printing. At $.52 a photo, it was pretty inexpensive. I don’t know why regular ink jet paper doesn’t work but everything I’ve read about this says to use laser jet printed photos. Even though my husband says I never follow directions, I actually proved him wrong for once.
Once I had my photos, I needed some wood. I swung by Michael’s and found just what I was looking for.
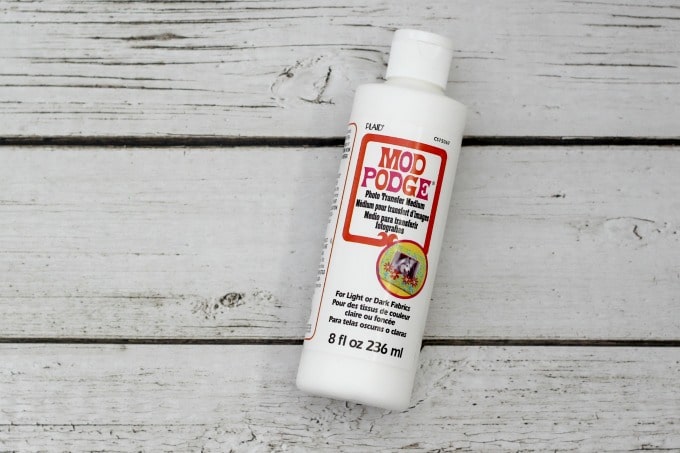
I also picked up a bottle of Modge Podge Medium while I was there. There are actually several different ways that you can make these crafts but I chose to go with the Modge Podge Photo Transfer Medium, since it’s specially made for this sort of project.
Now that I had all my supplies, I was ready to get started.
How To Make A Wood Photo Transfer
What You’ll Need:
1 photo printed on laser jet printer
1 piece of wood
Modge Podge Medium
Paintbrush
Ruler or other straight edge for removing air bubbles
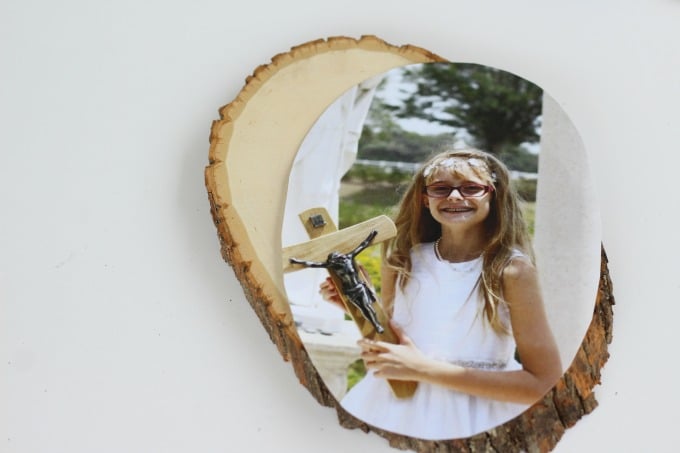
Start by placing the wood over the photo and tracing around it.

Cut it out, then cut a little more so that the photo doesn’t quite reach all the way to the edges.
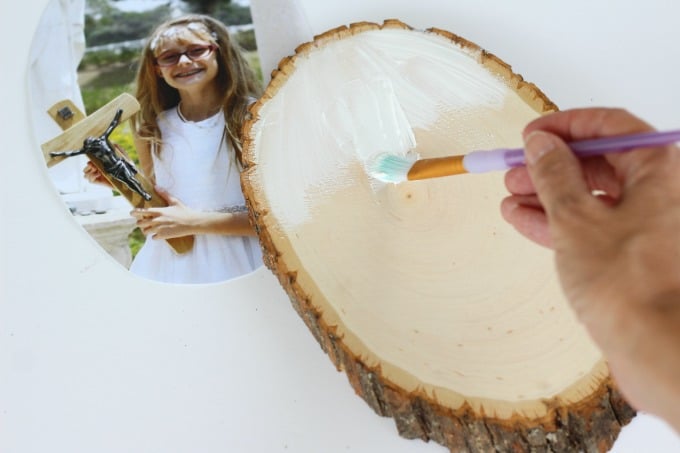
Paint the wood with the Modge Podge Medium. Try to stay within the area where the photo will be, without going “outside the lines”. You’ll find out why.
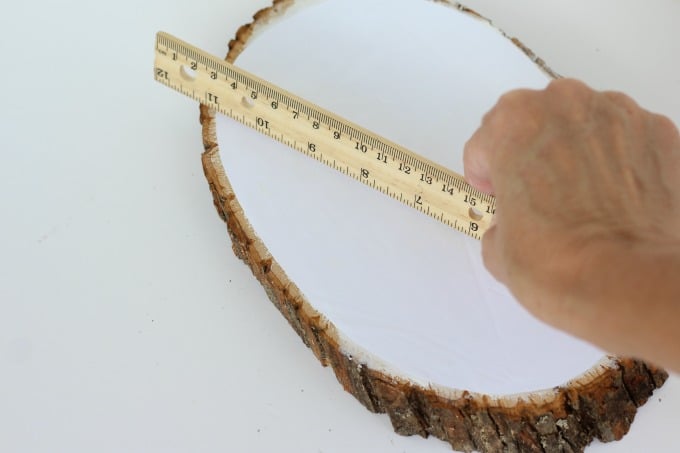
Place the photo, face down, over the glue. Use a straight edge to smooth out any air bubbles. Take your time on this part because if there are still air bubbles, your transfer won’t work as well.
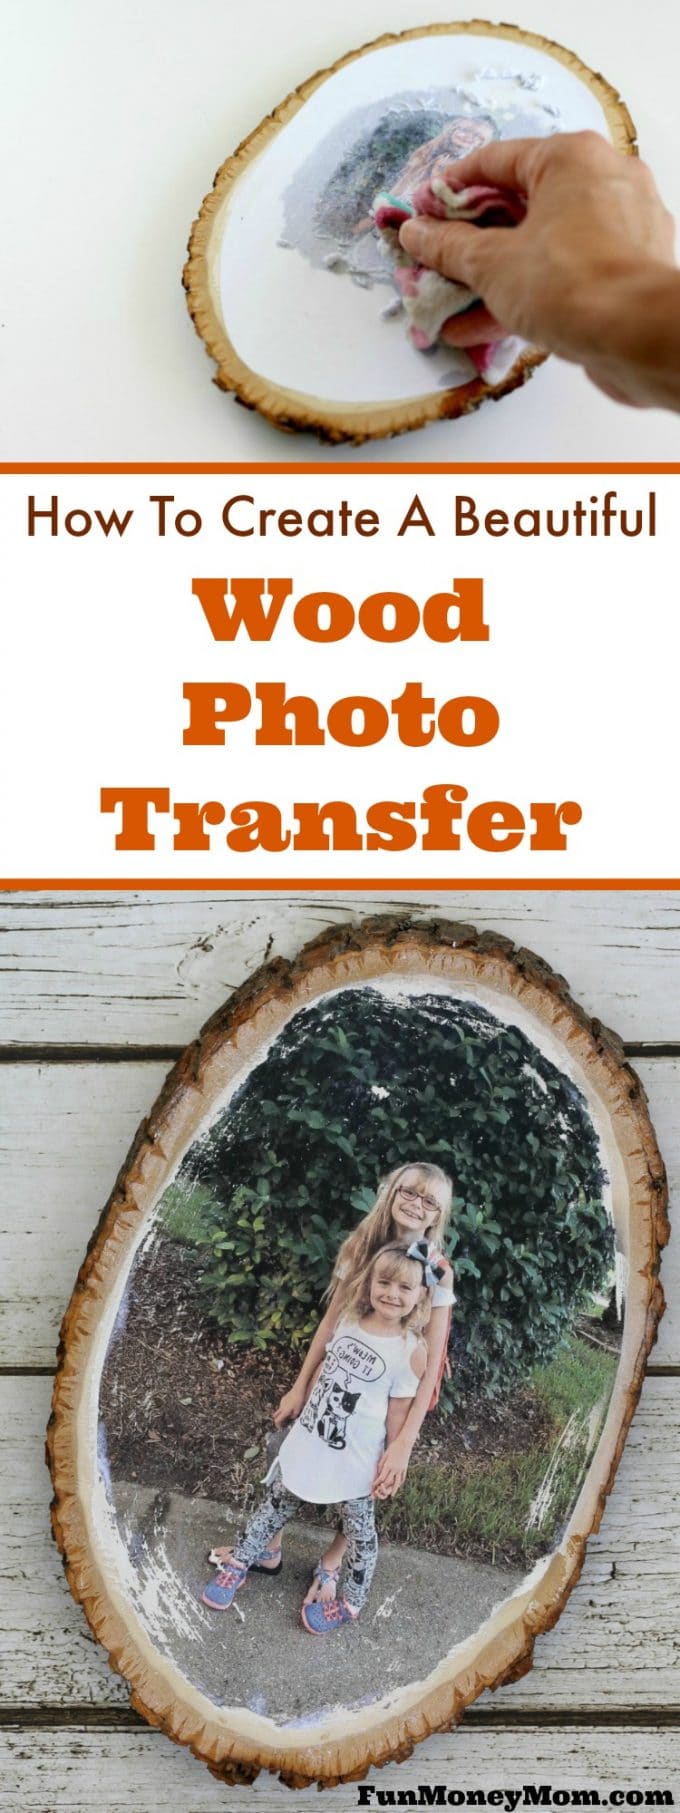
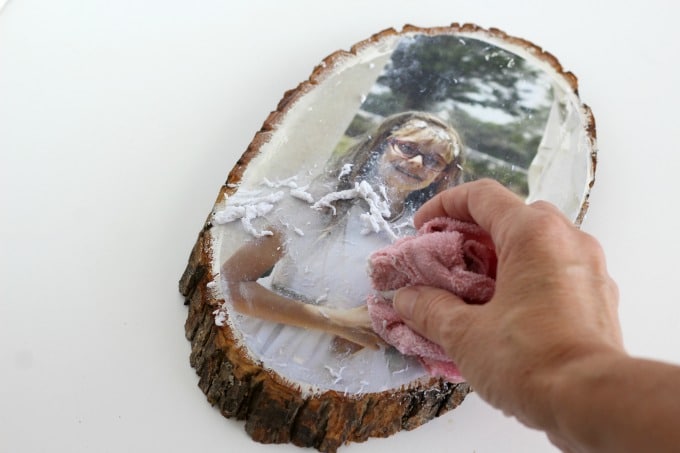
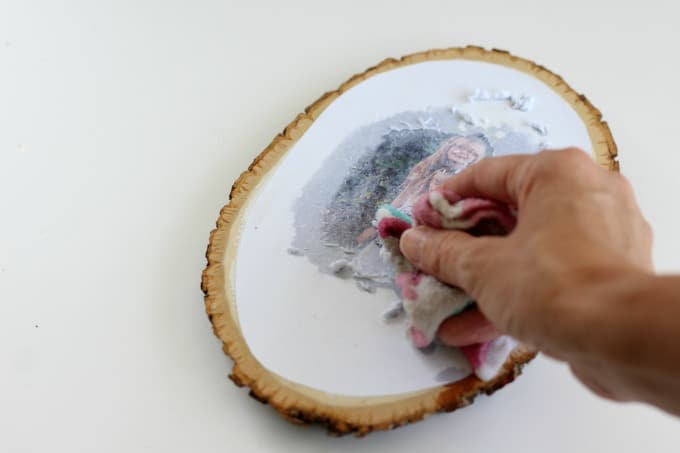
Let the Modge Podge dry overnight, then take a wet cloth and rub off the paper.
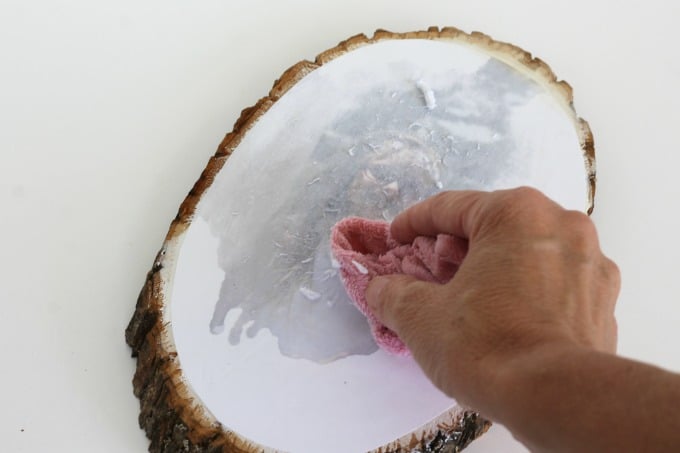
Keep rubbing the paper until your picture is clear. It may look clear at first but then show small signs of paper as it dries. If this happens, just give it another rub with the wet cloth. Keep doing that until your photo doesn’t show any signs of paper when it dries.
It was during this part of the process that I discovered my biggest mistake.
When I’d painted the glue over the wood, I assumed that it would dry clear like other types of Modge Podge I’ve used. Because of that, I had painted almost all the way to the edges. It didn’t look completely horrible but it definitely bothered the perfectionist in me.
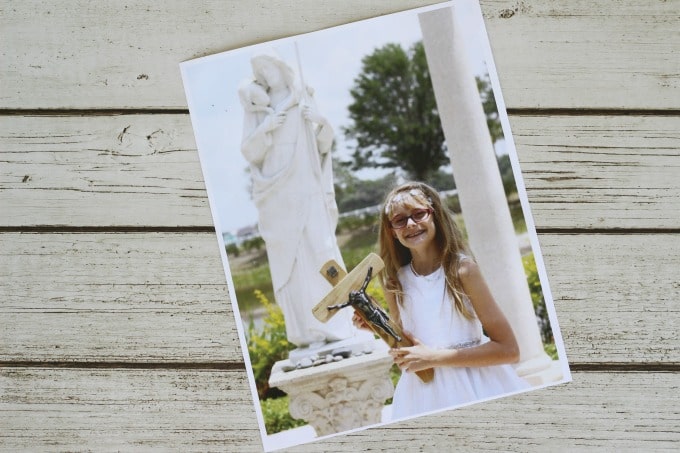
This is when I was happy to have thought ahead to have a second photo printed. I repeated the process one more time, paying a little more attention to where I painted the Modge Podge this time.
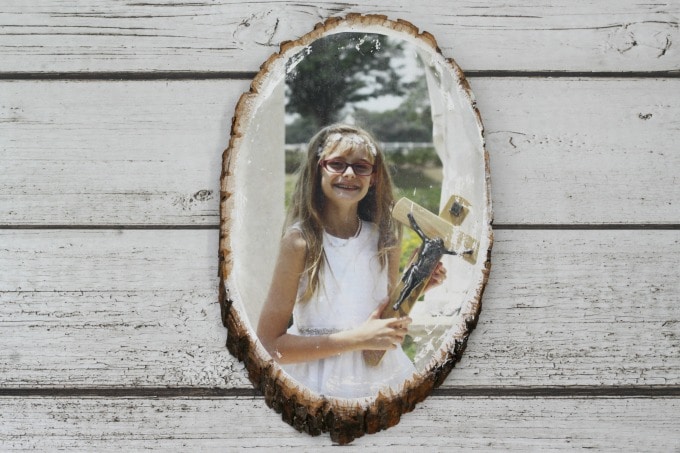
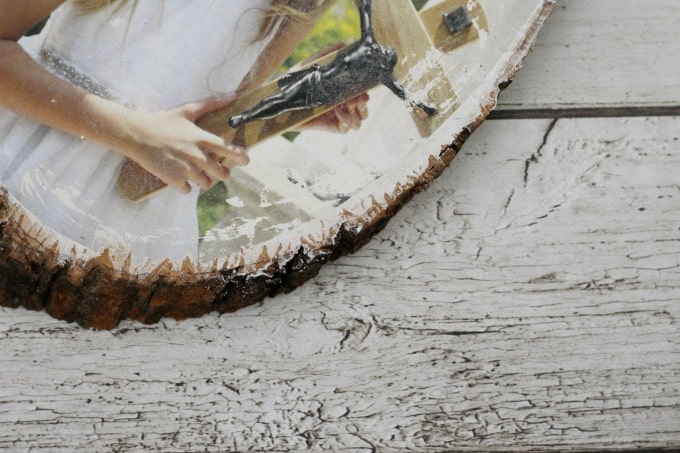
I guess the second time is the charm in this case. You can rub the paper just enough to see the photo, or a little extra for a more distressed look. I went for the distressed look and love the way it turned out!
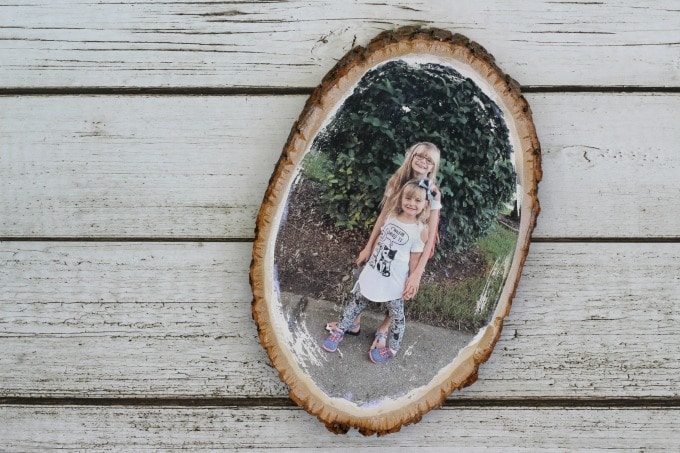
I’m pretty sure my mom is going to love this! (Mom, if you’re reading, just act surprised when you open it!) The problem is that I like it so much, now I need to make another one for myself. At least I’ll know how to do it right this time!
What crafting mistakes have you made? Were you able to get it right eventually?
If you enjoy photo crafts, you may want to check out these posts too!

Let’s be friends!
Did you love this post? Make sure to comment below and let me know your thoughts! And don’t forget to follow on your favorite social network below!

About Lisa O’Driscoll
Lisa O’Driscoll is a lifestyle and parenting expert, cookbook author, and the creative force behind Fun Money Mom, a popular blog she’s run since 2014. She’s the author of the children’s cookbook Roll It, Slice It, Mash It, Dice It, designed to get kids excited about cooking. With multiple TV appearances under her belt, she loves sharing her expertise on family-friendly recipes, creative DIYs, and party planning and is always on a mission to inspire and entertain!


This is so lovely, Lisa! If I may share, I’m going to participate in a weekend market next month and it makes me a lot more excited knowing I could find some pretty wood cuttings to try this craft idea. Jotting this in my journal, thanks for sharing! 🙂
I’m so glad you liked it! It was really easy and I think you’ll have fun making it! Let me know how it turns out 🙂
If I was going to make these into coasters would I need to put any special coating on top of the photo after it’s all done?
Hi Kelly! Yes, if you’re going to use these as coasters, you’ll want to spray them with a sealant first 🙂
So for the one wood that you messed up on, is there a way to salvage it? Like sanding it? I totally messed mine up on both sides (long story 🤣) and I’m on a budget and can’t buy another slice of wood so I desperately need to salvage this one piece and reduce for a gift to my stepdad. Any ideas? Or scrap the whole project 😬?
Hi Luciana,
I’m sorry for the delay in answering. If you still have the wood, I would think that you could probably sand it. I’ve never actually tried but it may be your best bet. Good luck!