Ice Cream Cone Cake Pops
This post may contain affiliate links. As an Amazon Associate, I earn from qualifying purchases.
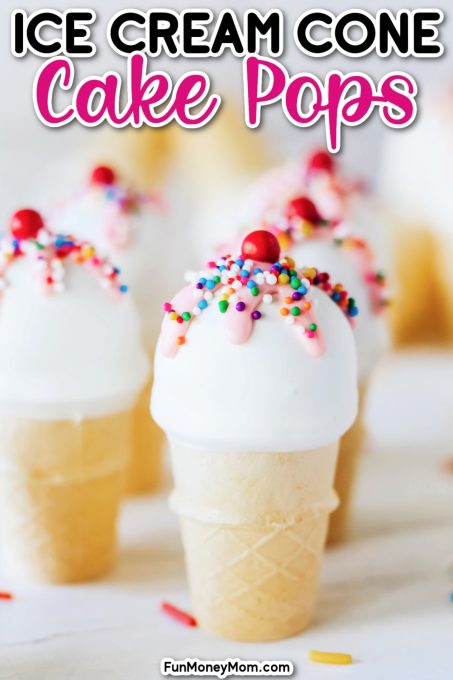
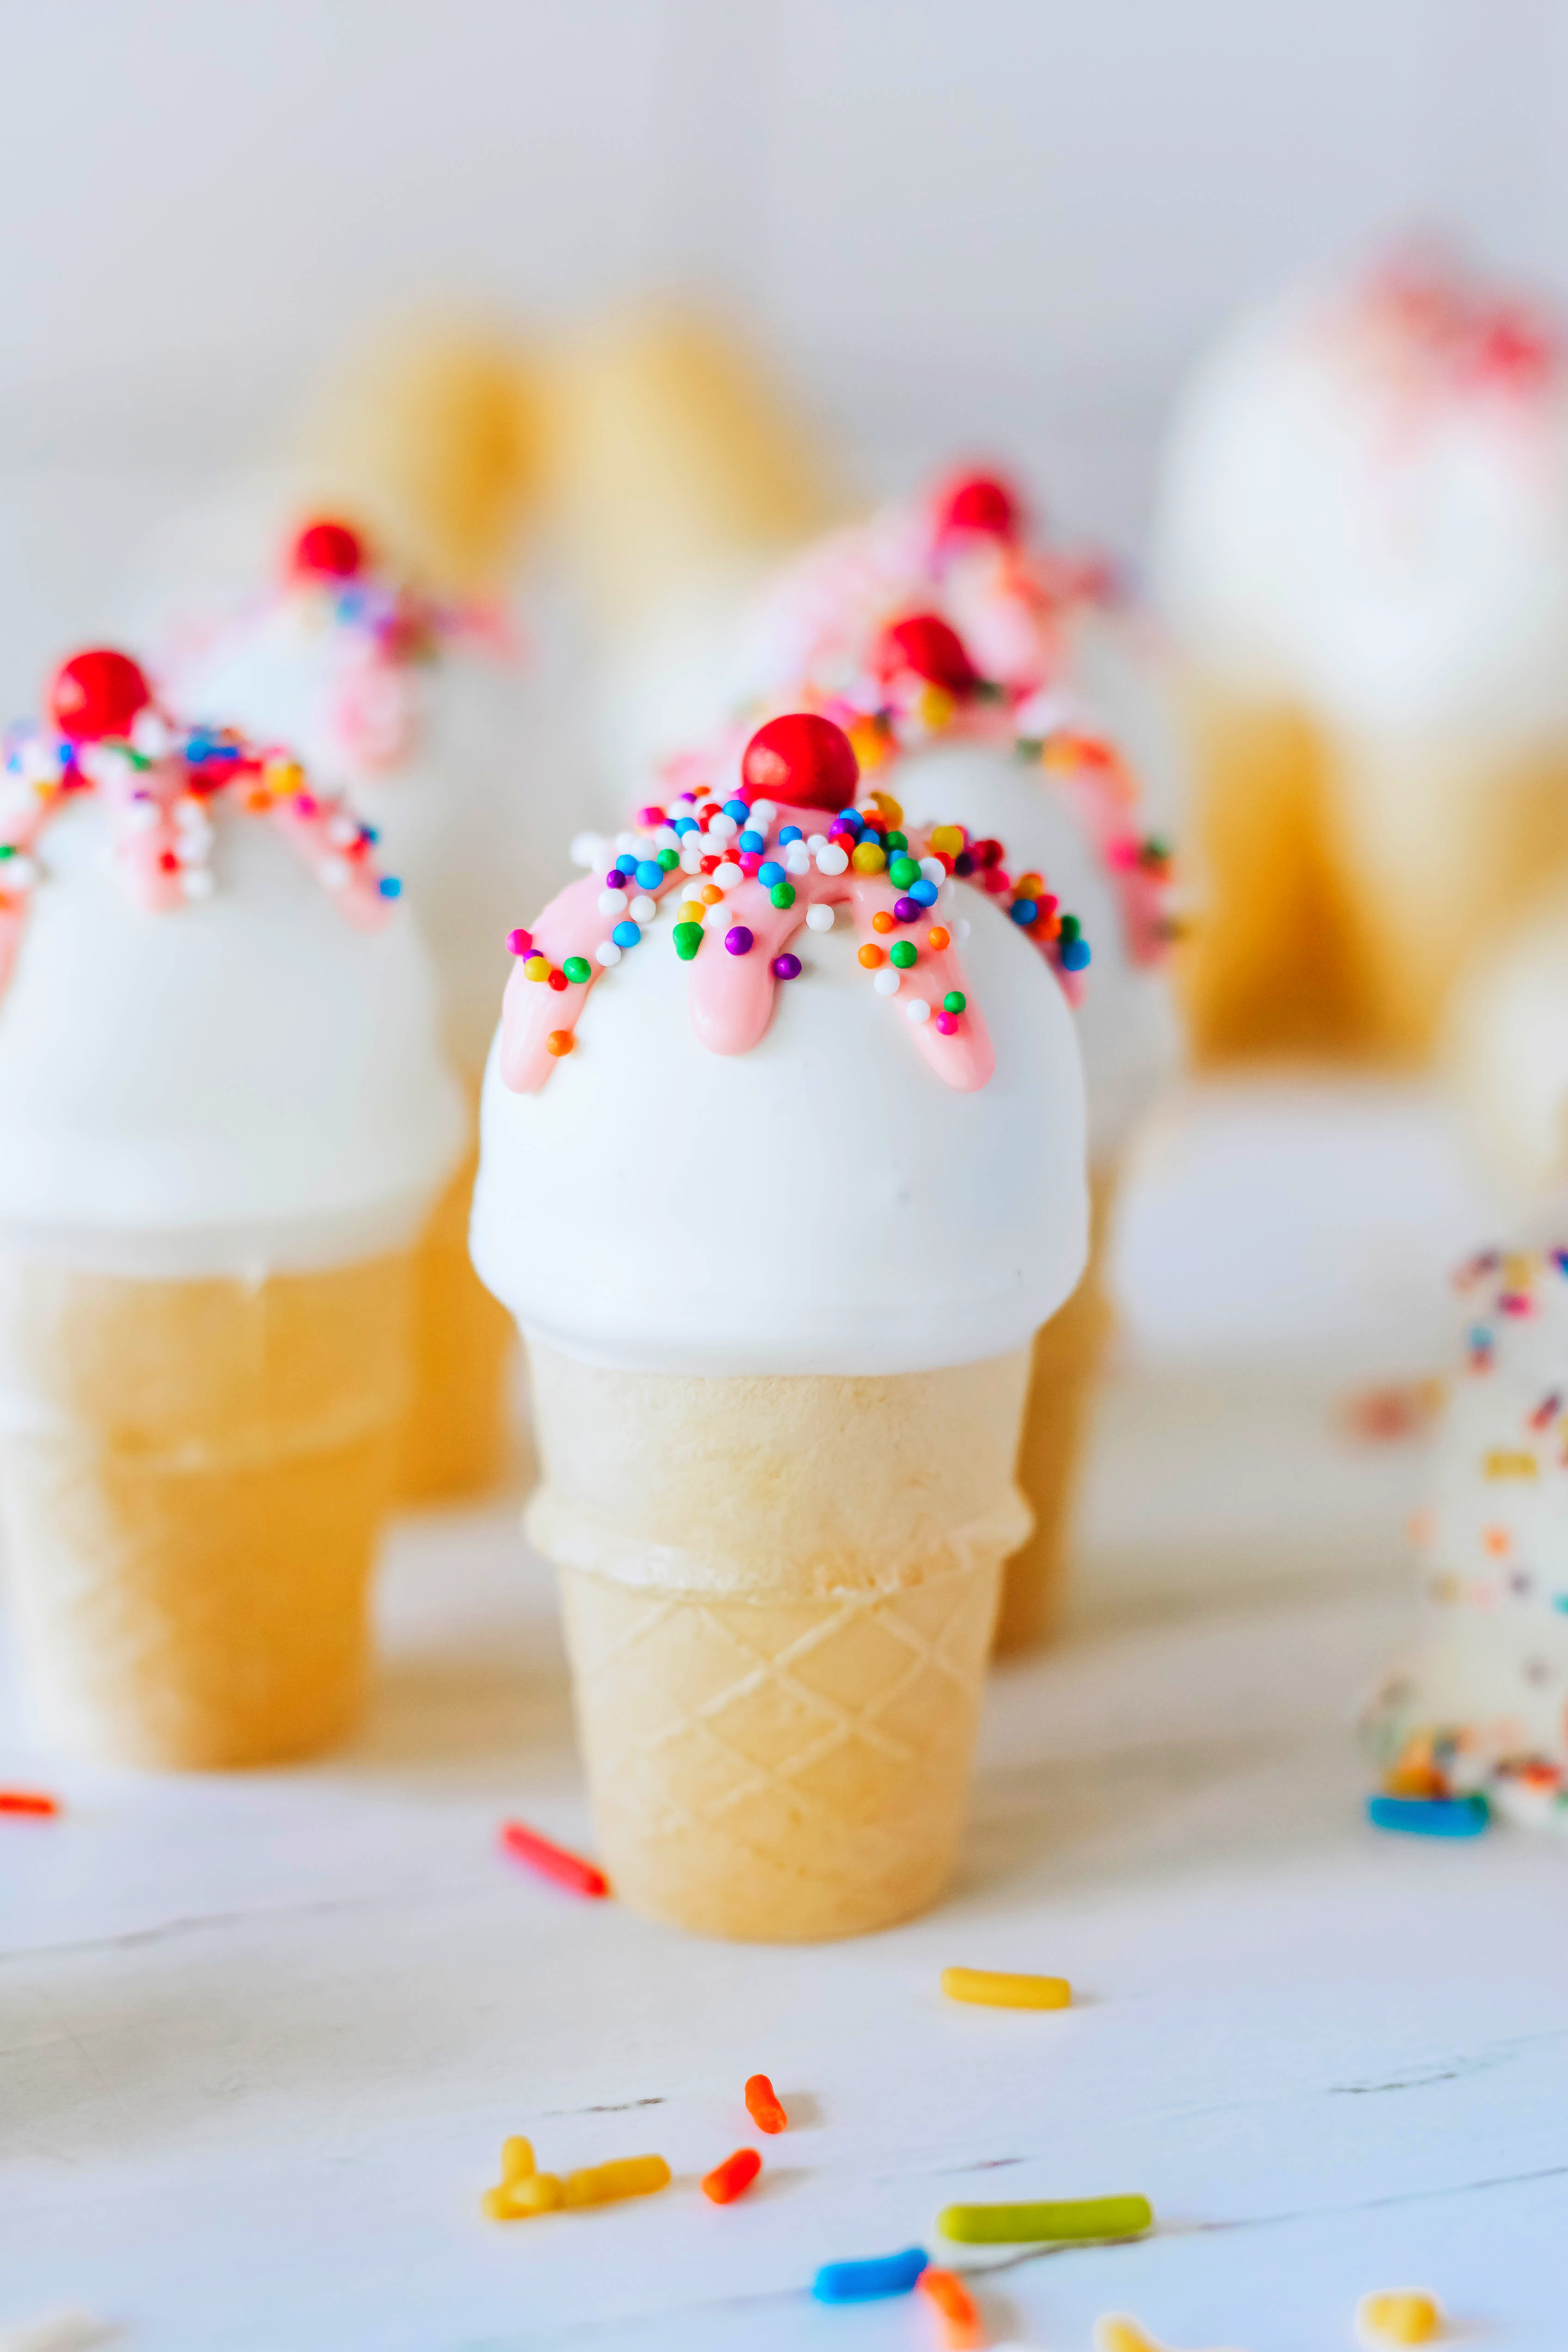
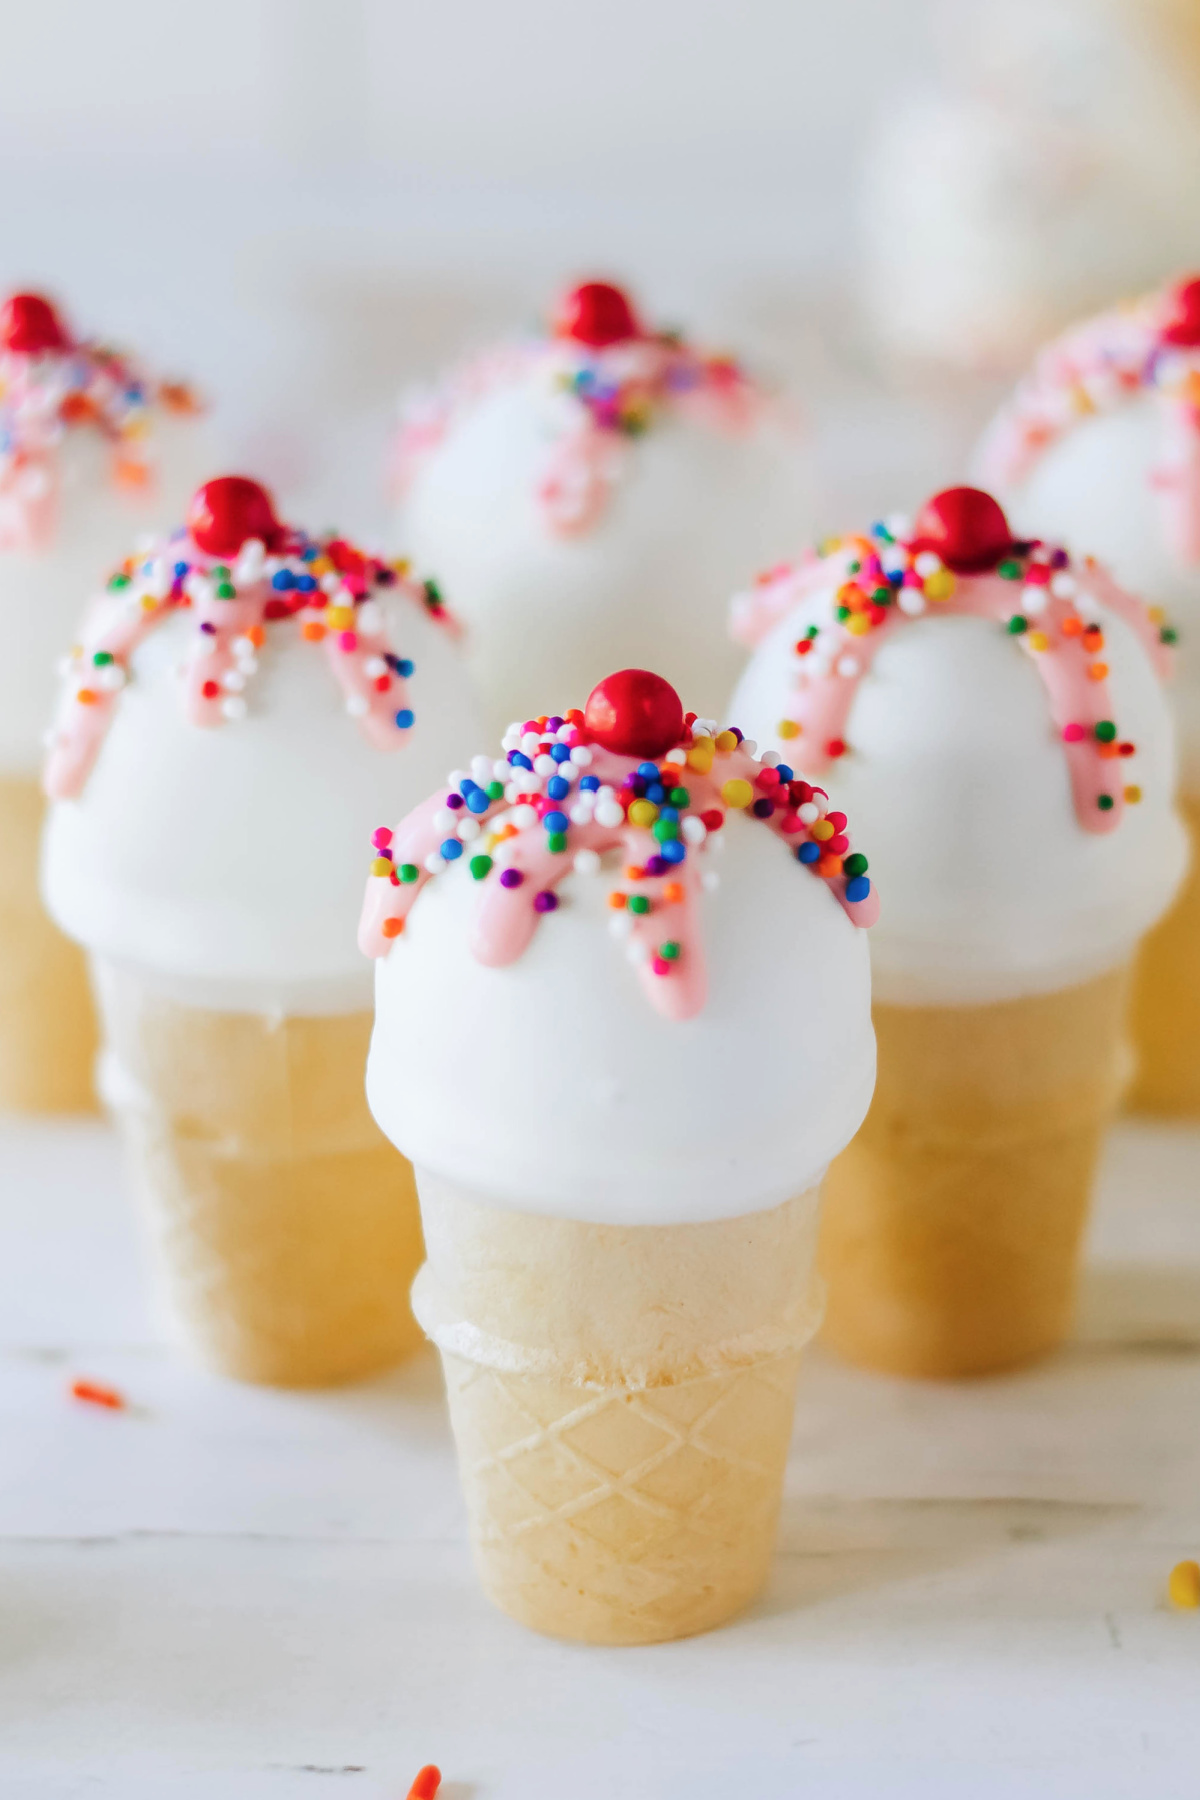
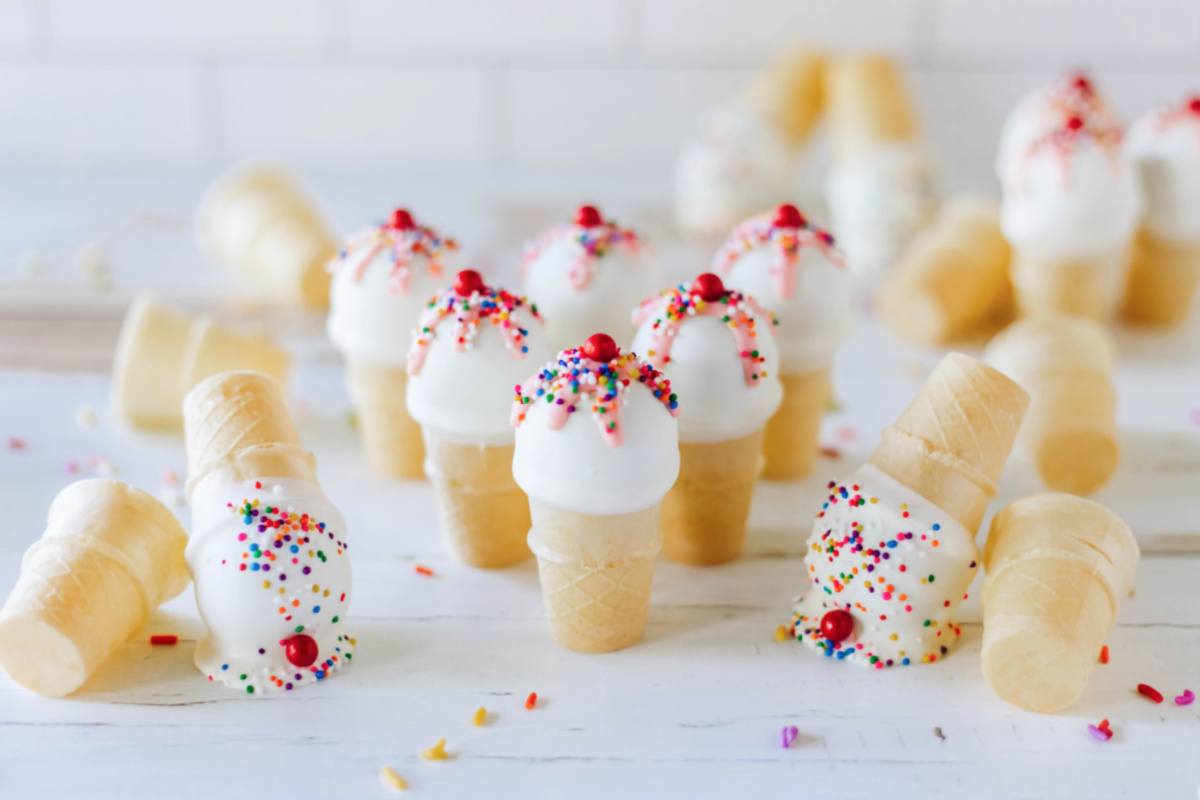
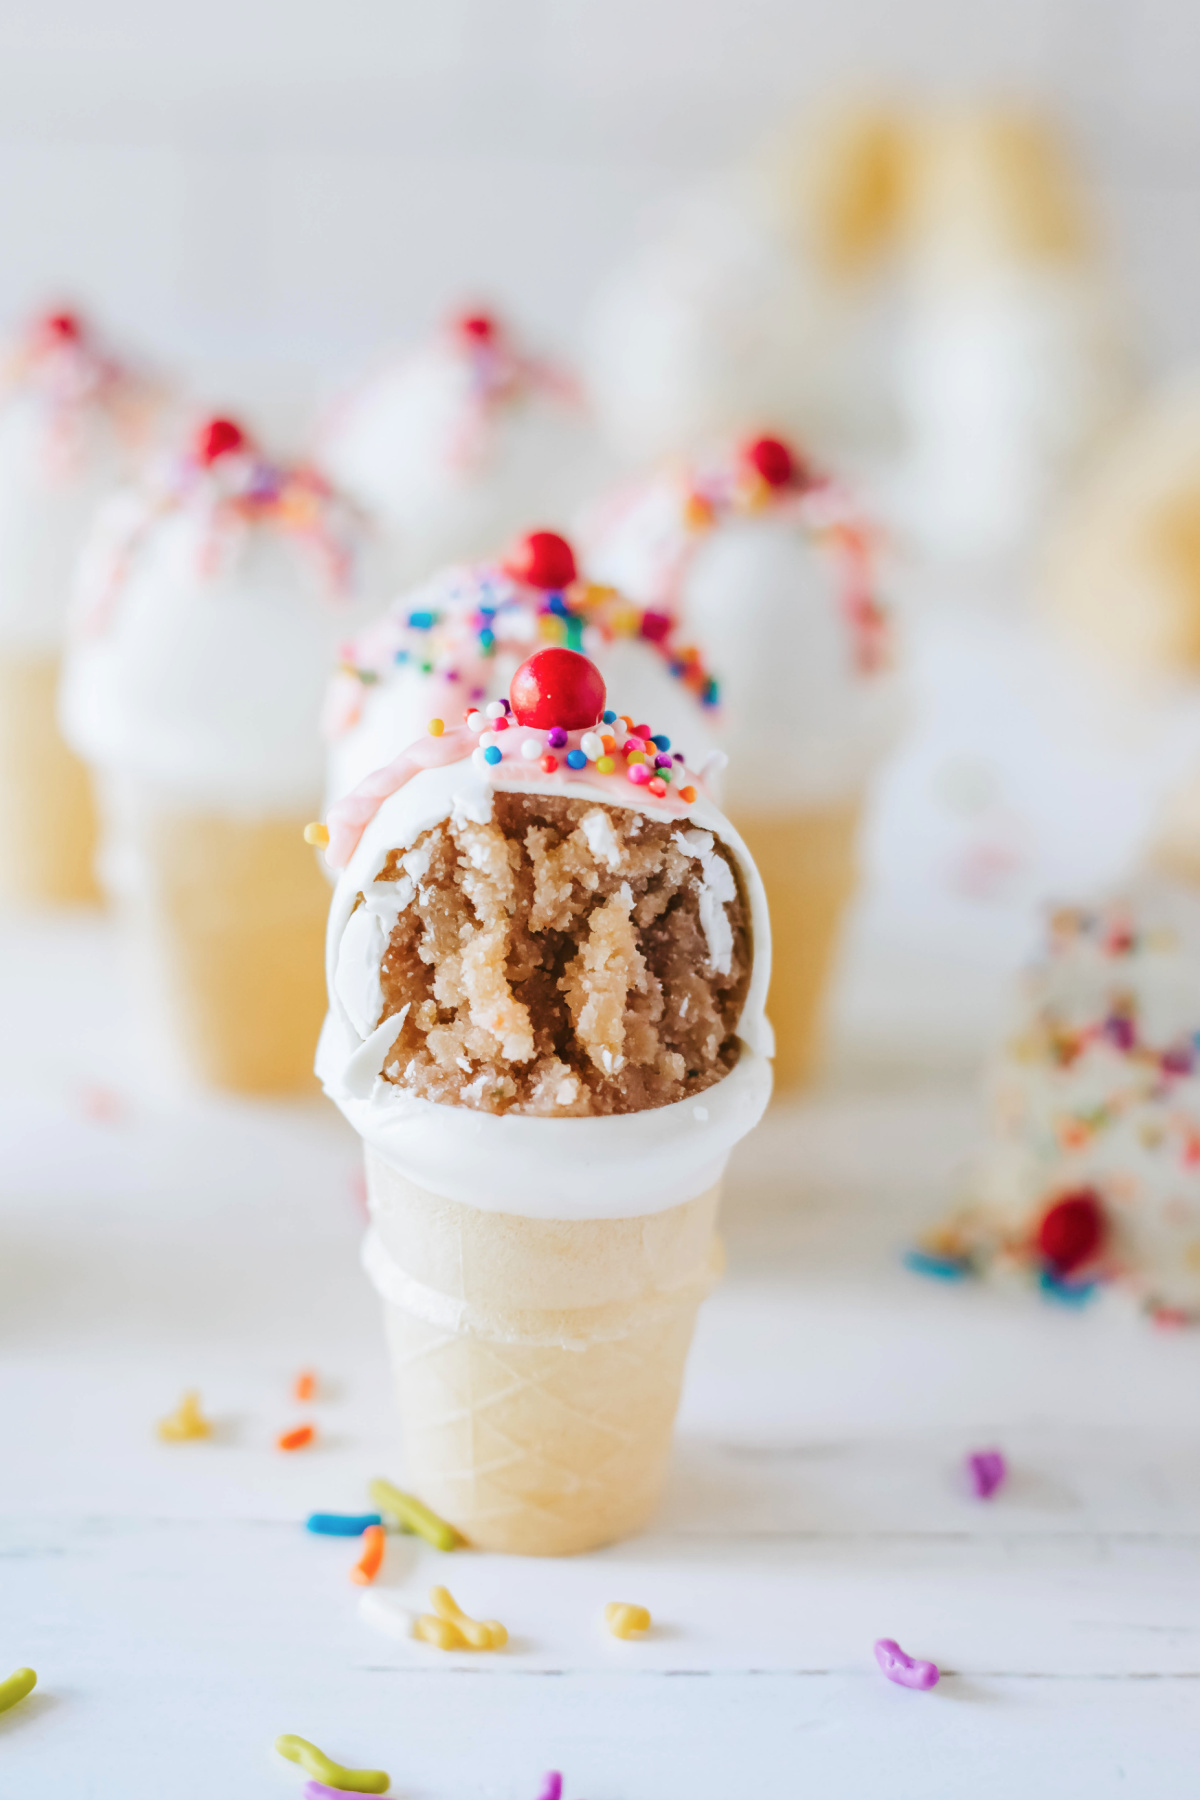
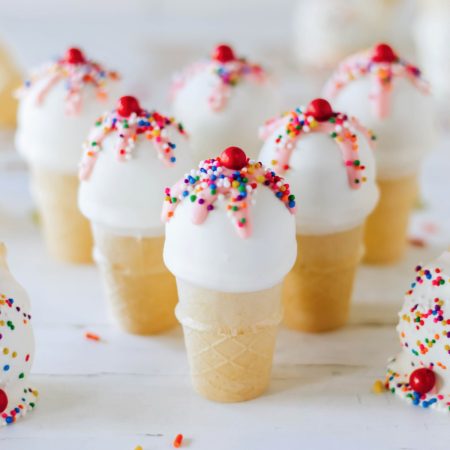
These adorable Ice Cream Cone Cake Pops are a fun and delicious twist on classic cake pops! Complete with a chocolate drizzle, colorful sprinkles, and a cherry on top, they make the ultimate summer treat.
Ice Cream Cone Cake Pops
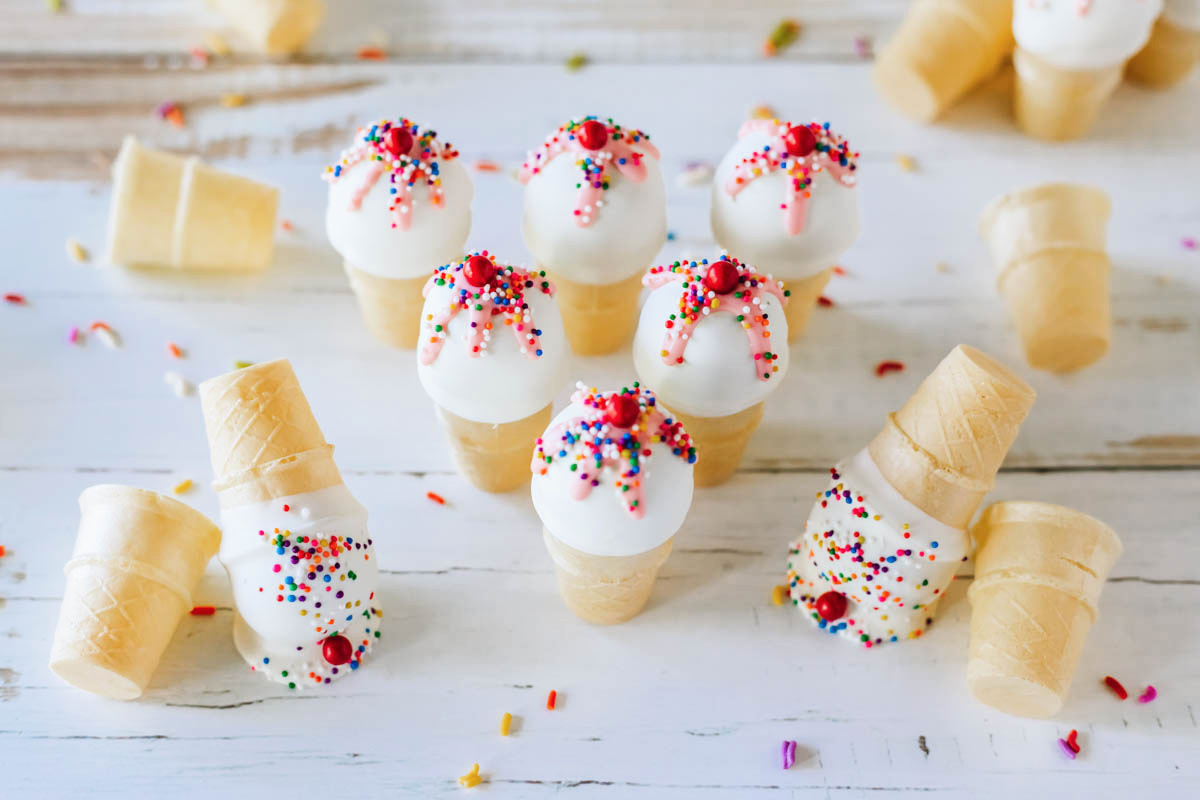
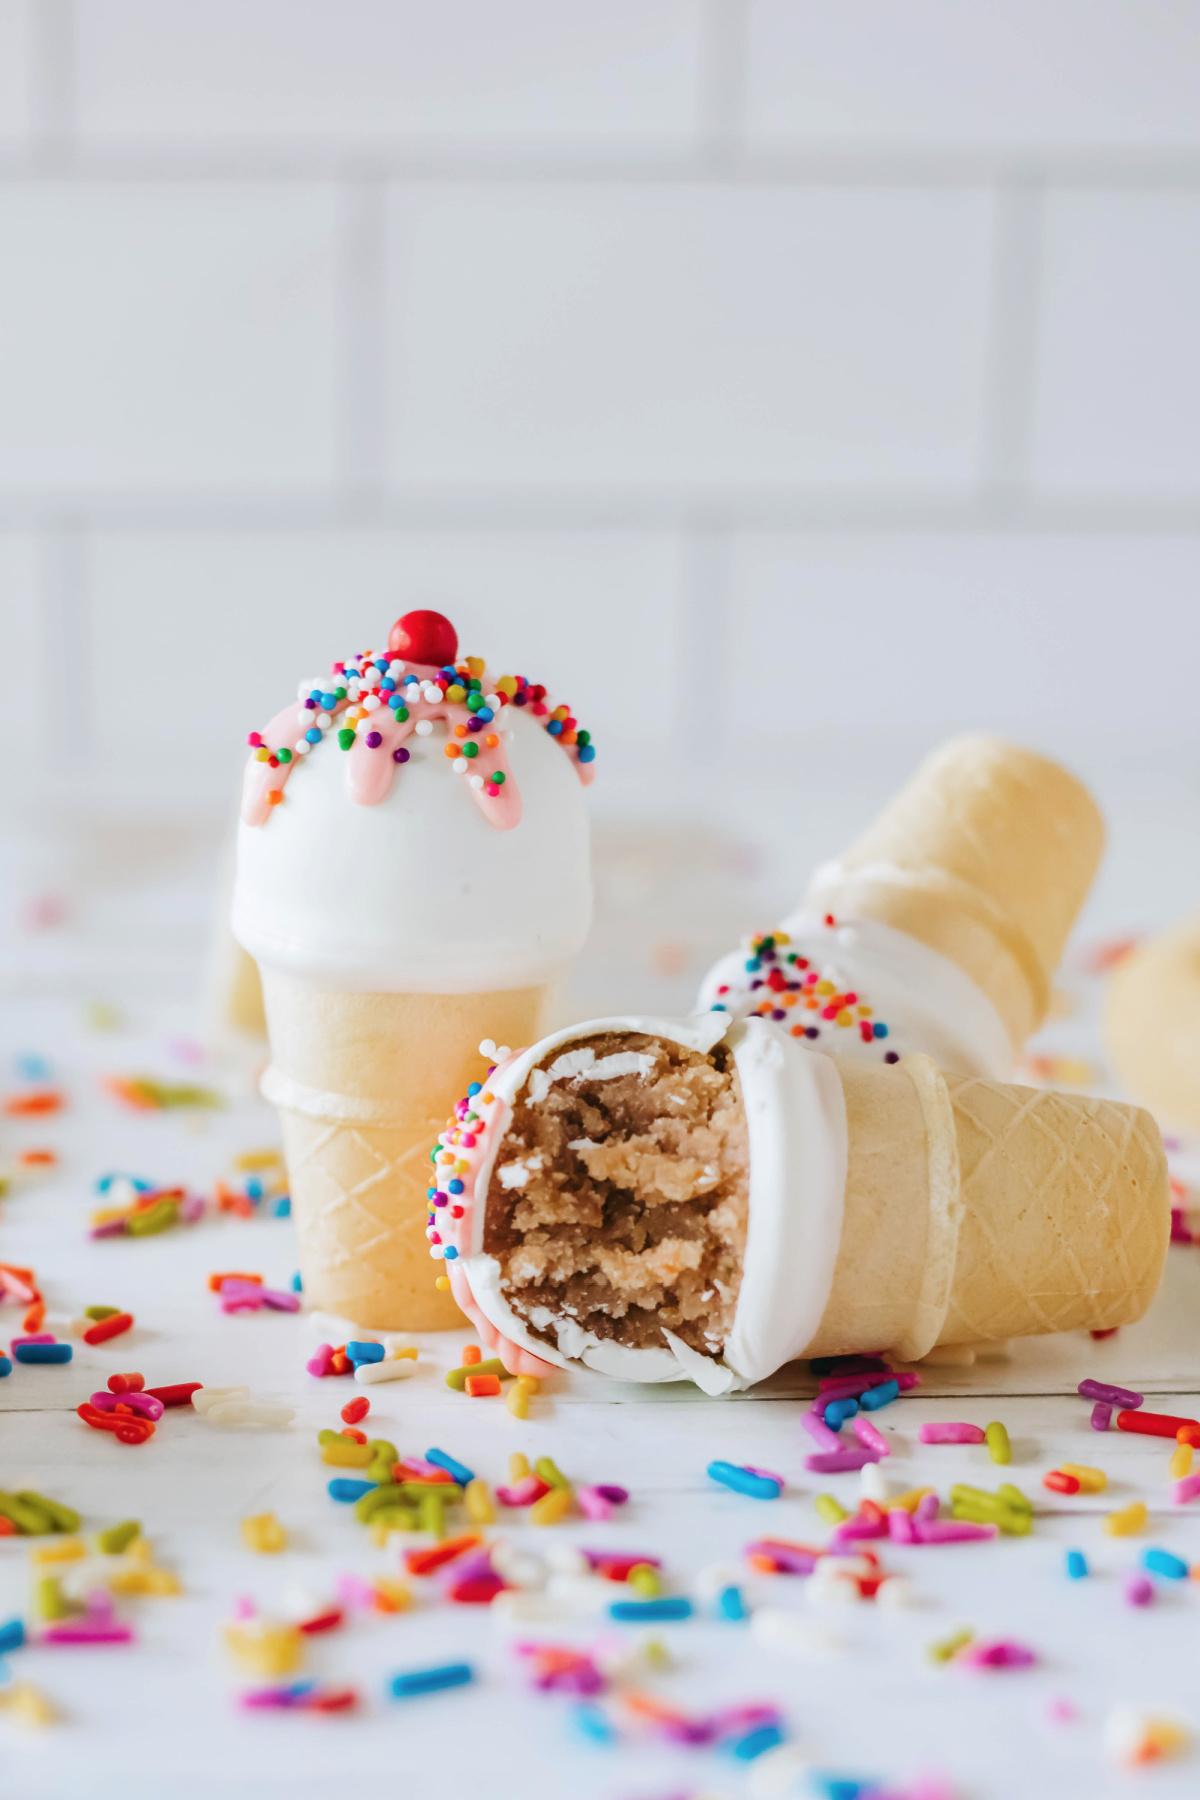
Cake pops have always been one of my favorite party treats, but these ice cream cone cake pops takes the fun to a whole new level. Cake balls are dipped in white chocolate, decorated with a bright pink chocolate drizzle, then topped with colorful sprinkles. Add a cherry-colored pearl and this treat looks just like a scoop of ice cream, complete with cone.
These pretty little treats aren’t just delicious, they’re also a blast to make. My girls jump at the chance to help me bake and these double as a fun activity for kids too.
Just like my Ice Cream Cone Cupcakes, these homemade cake pops are perfect for a birthday celebration or summer party. They make any dessert table look fun and festive but I have to warn you…grab yours quick because they disappear fast!
Why We Love This Recipe
- Fun twist: Served in a crispy cone instead of on a lollipop stick, they’re are a delicious twist on traditional pops.
- Easy to make: Rolling, dipping, and decorating these treats is a fun and simple activity that even the kids will love.
- Versatile: These are perfect for any occasion. Serve them for birthdays, summer gatherings, pool parties, classroom parties and more. I’d even make them for a bake sale!
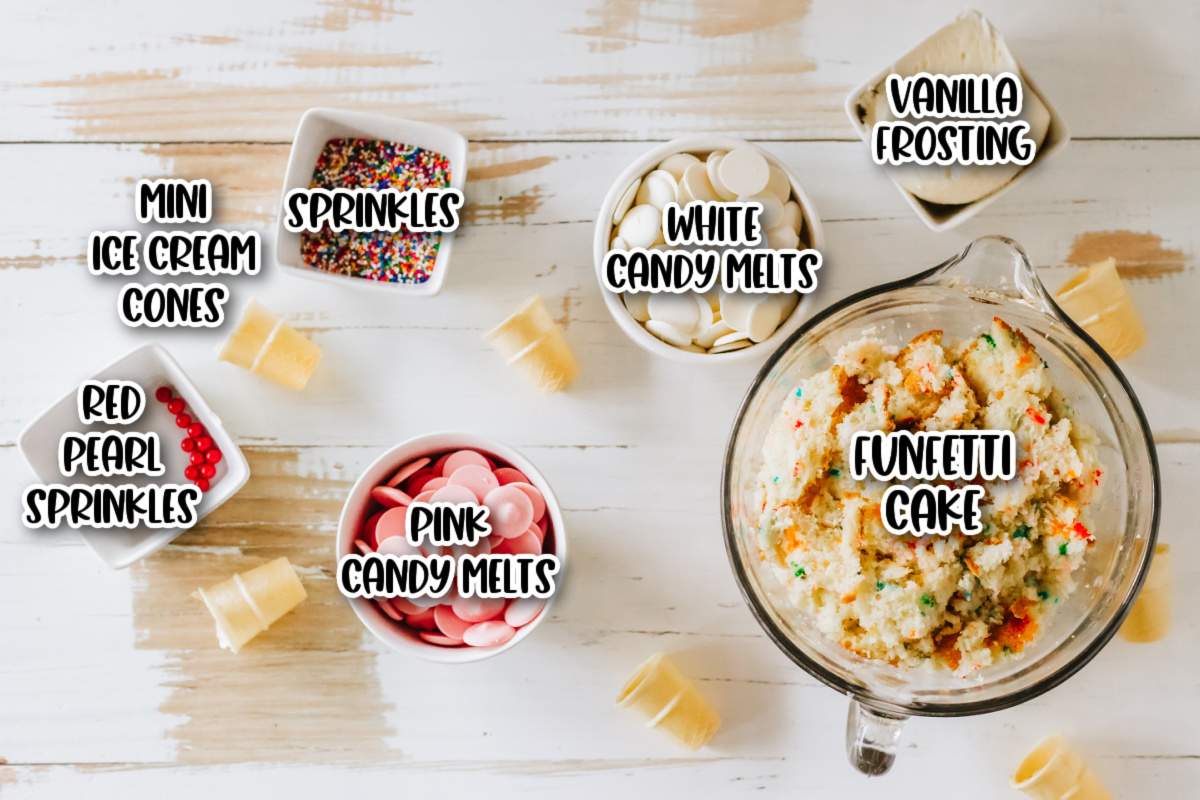
- Freshly Baked Funfetti Cake
- Vanilla Frosting
- Joy Mini Ice Cream Cones
- White Candy Melts
- Pink Candy Melts
- Rainbow Sprinkles
- Large Red Candy Pearls
How to Make Ice Cream Cone Cake Pops
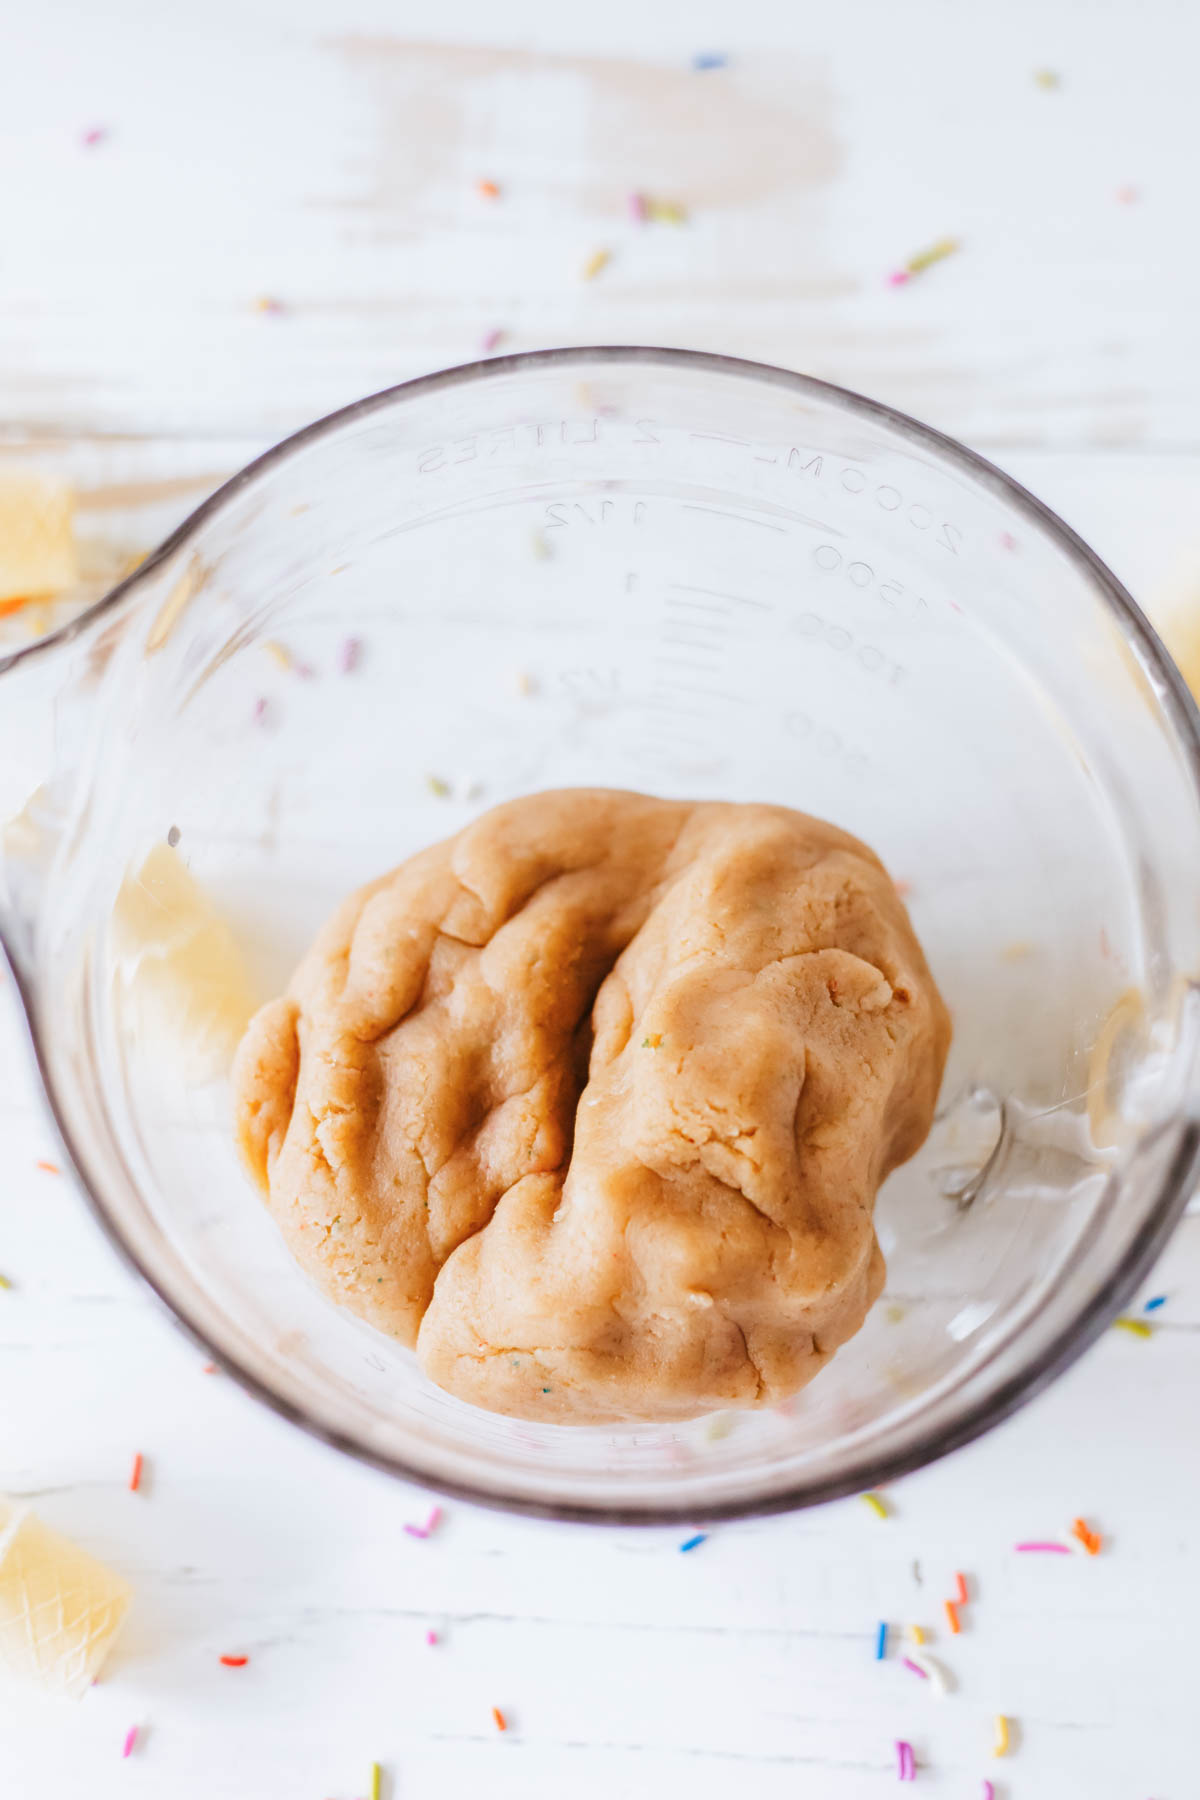
Step 1. Once it has completely cooled, crumble the cake into a stand mixer (or any large mixing bowl). Add the frosting.
Step 2. Mix on high until ingredients are well combined. Knead together until the consistency of play dough.

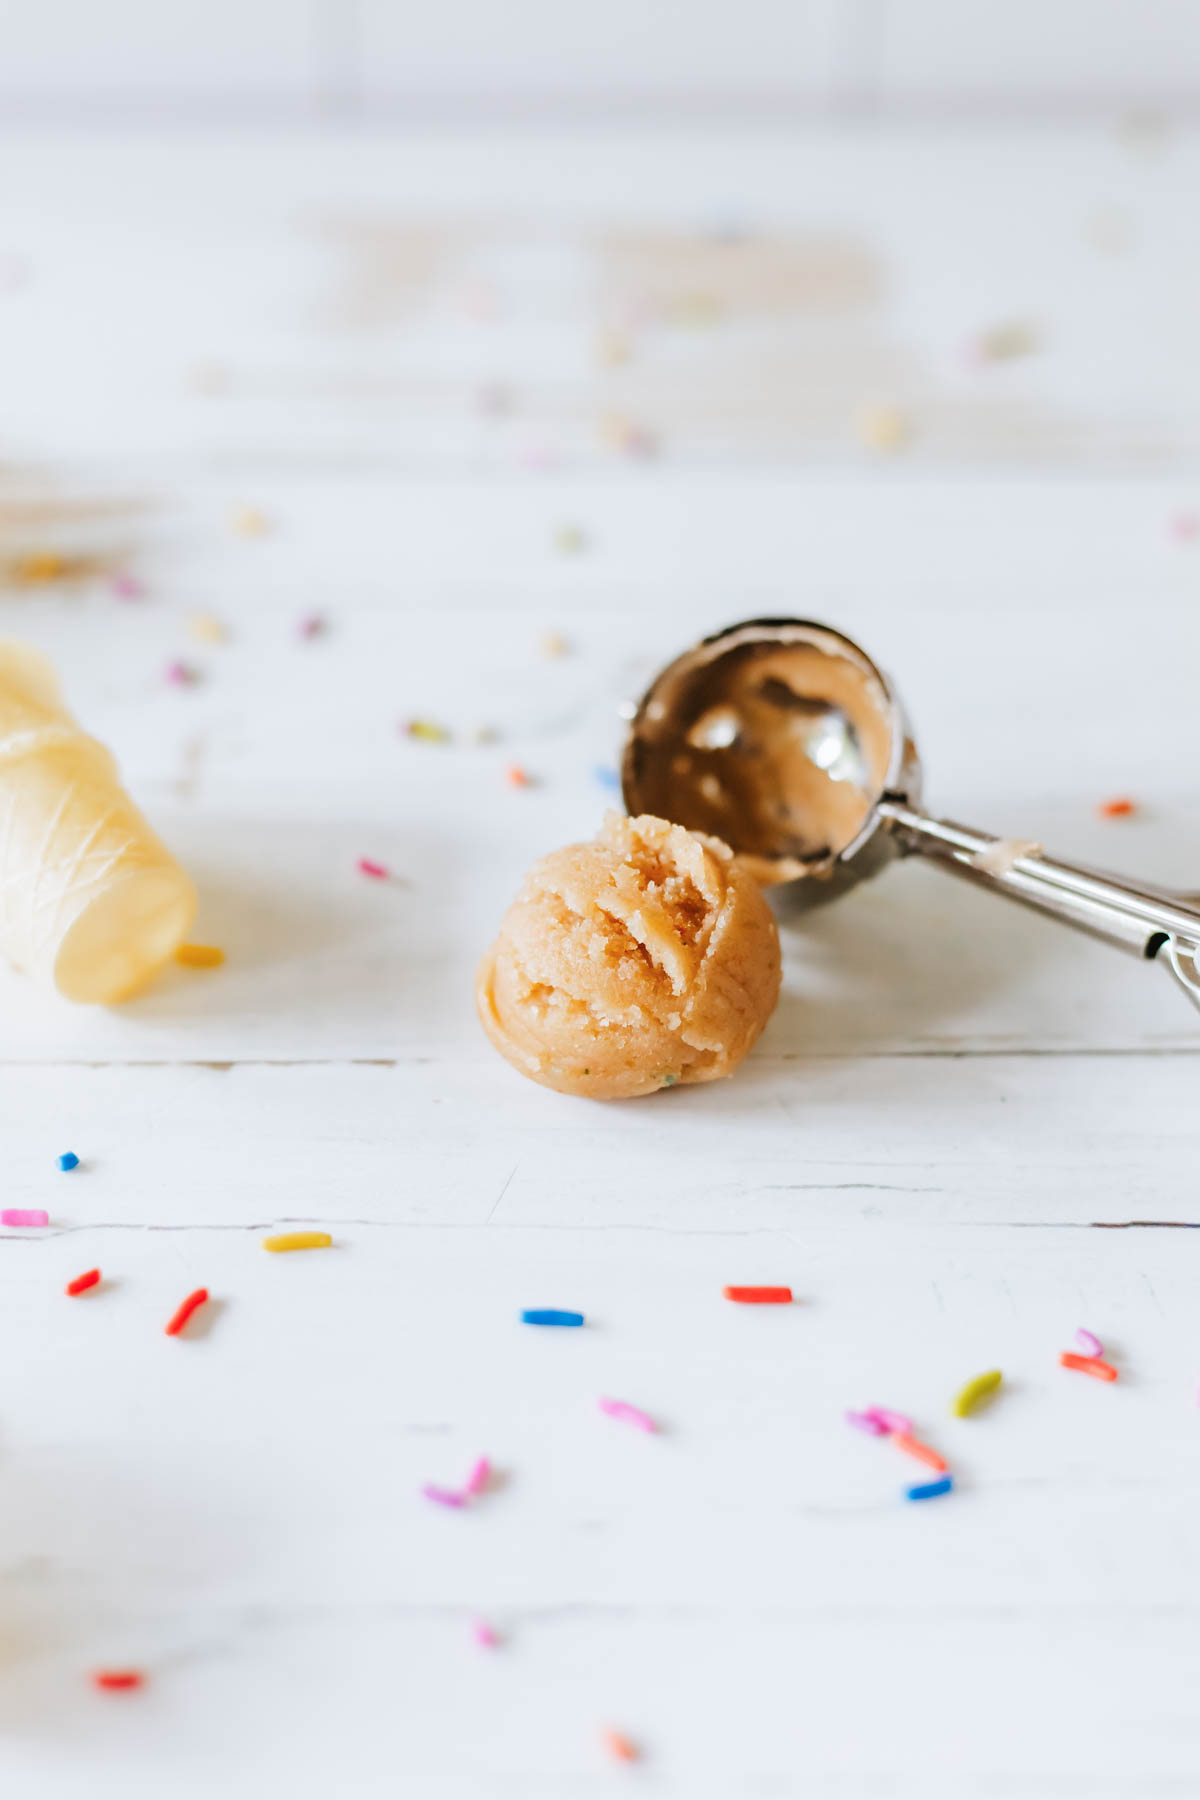
Step 3. Use a small cookie scoop to remove the dough, then roll into a ball. Place it on a cookie sheet and repeat with the remaining dough.
Step 4. Place the cookie sheet in the freezer for one hour. This will firm them up, making them easier to work with.

Step 5. Add white candy melts to a microwave safe bowl and heat in one minute intervals, stirring in between. Continue until chocolate is melted and smooth. You can also melt the candy in a double boiler.
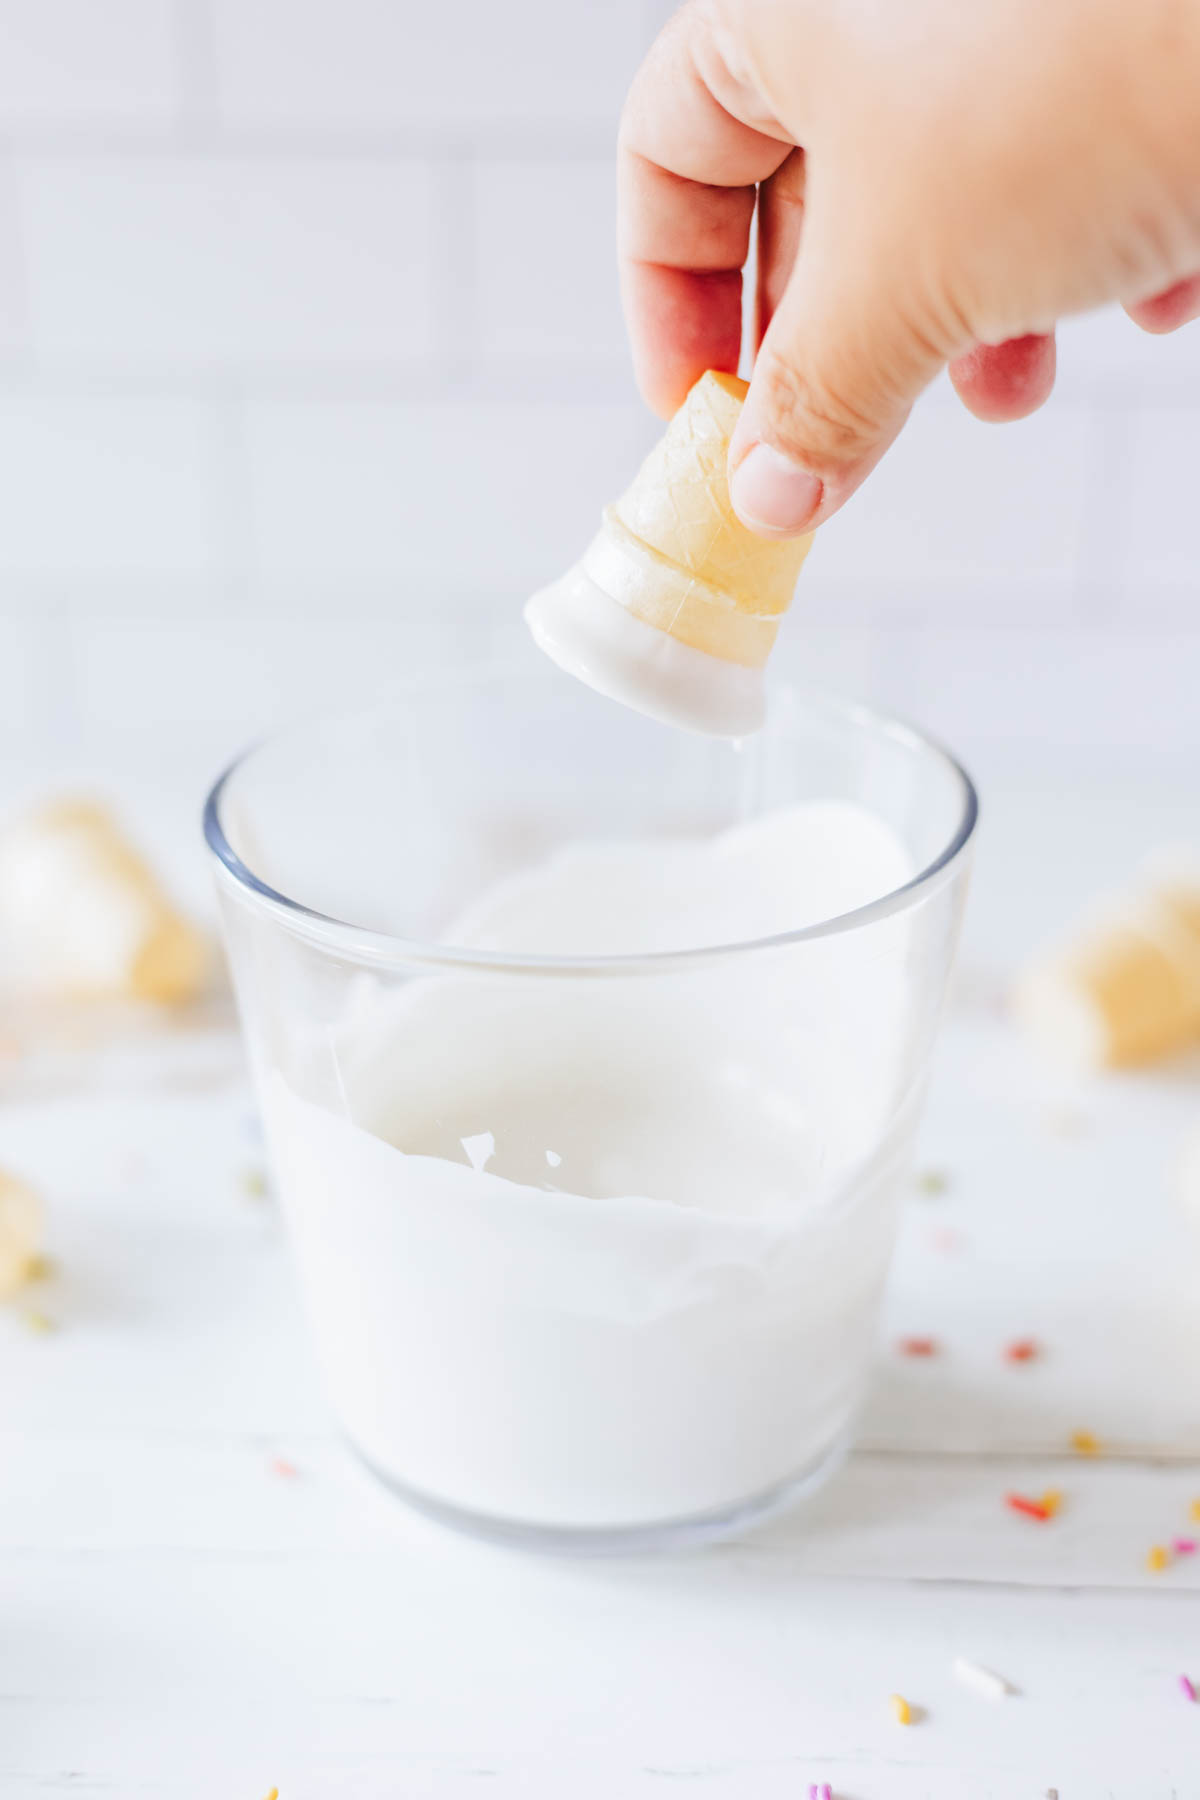
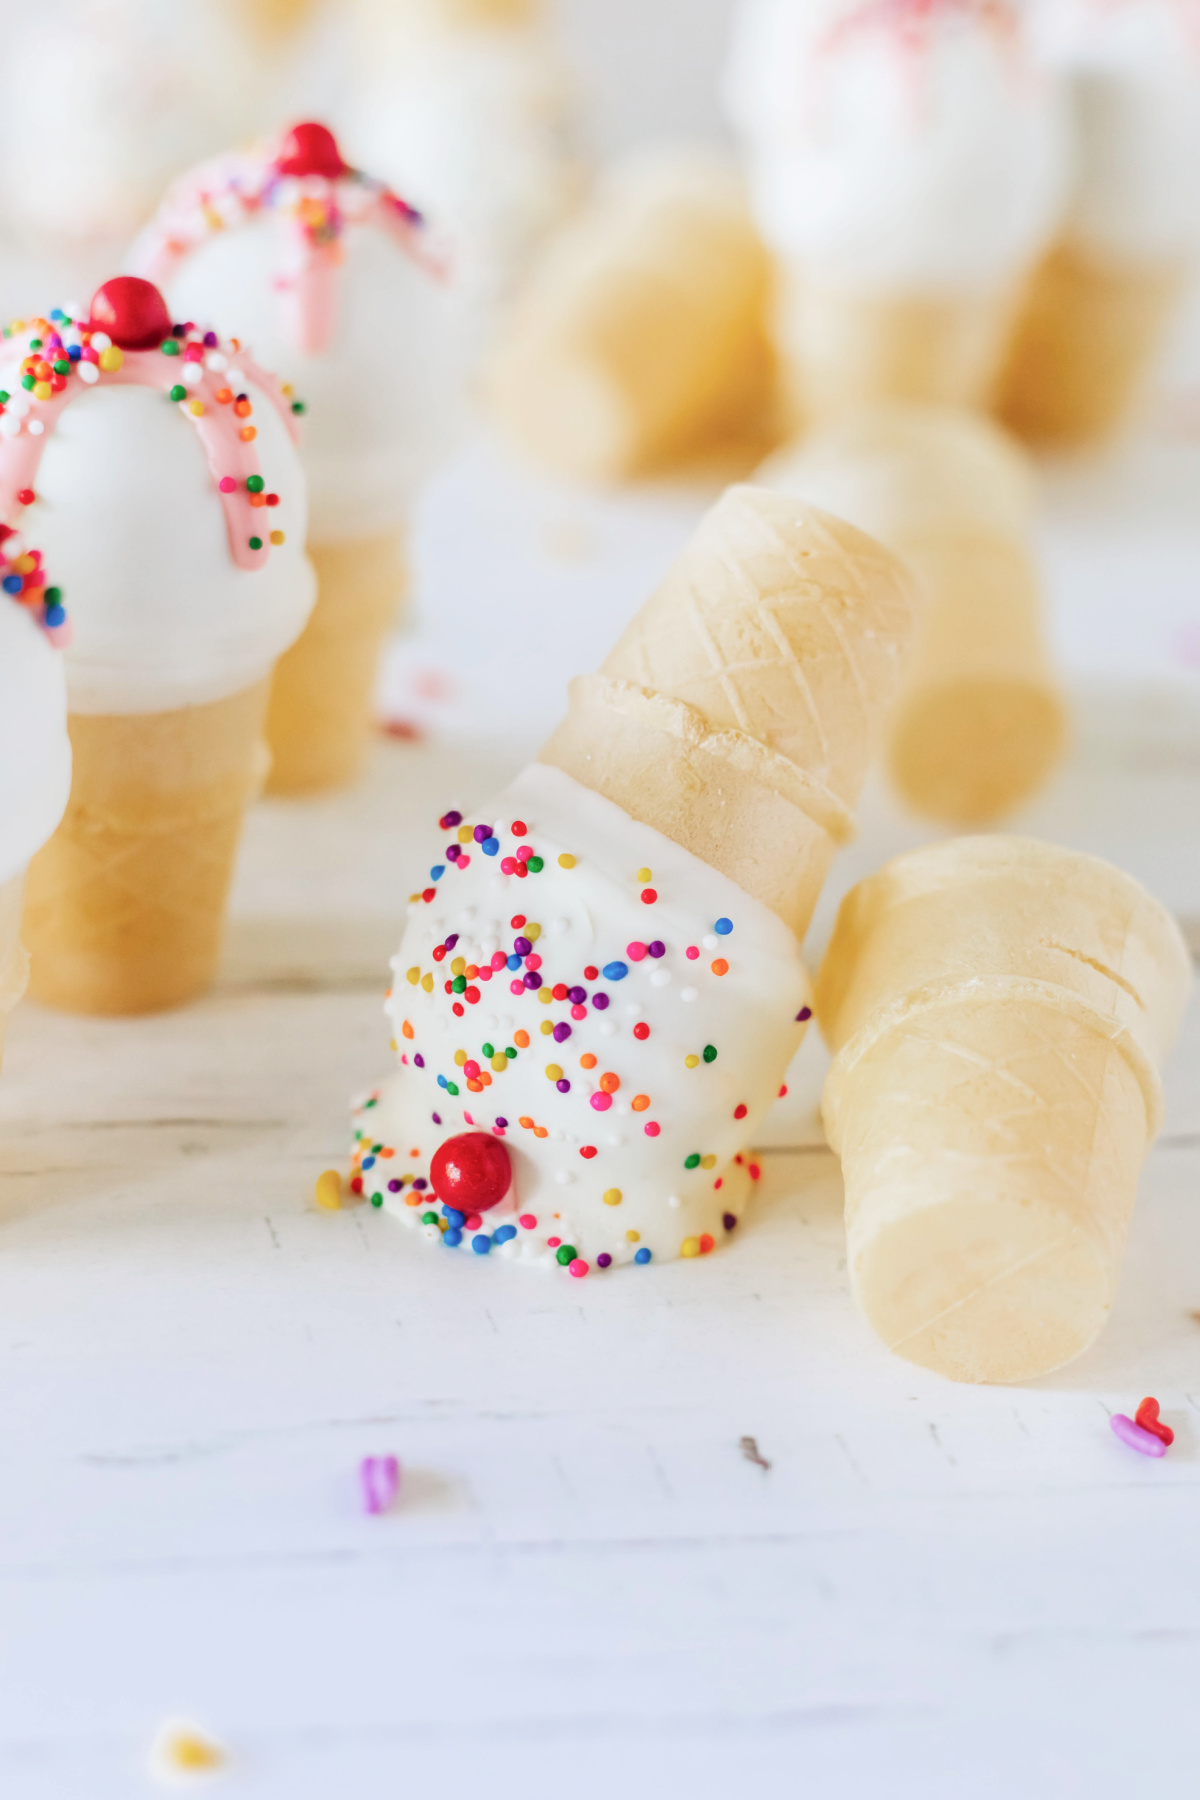
Step 6. Next, dip the end of your cone into the melted candy and place it on top of each ball, as shown. Let the chocolate harden.
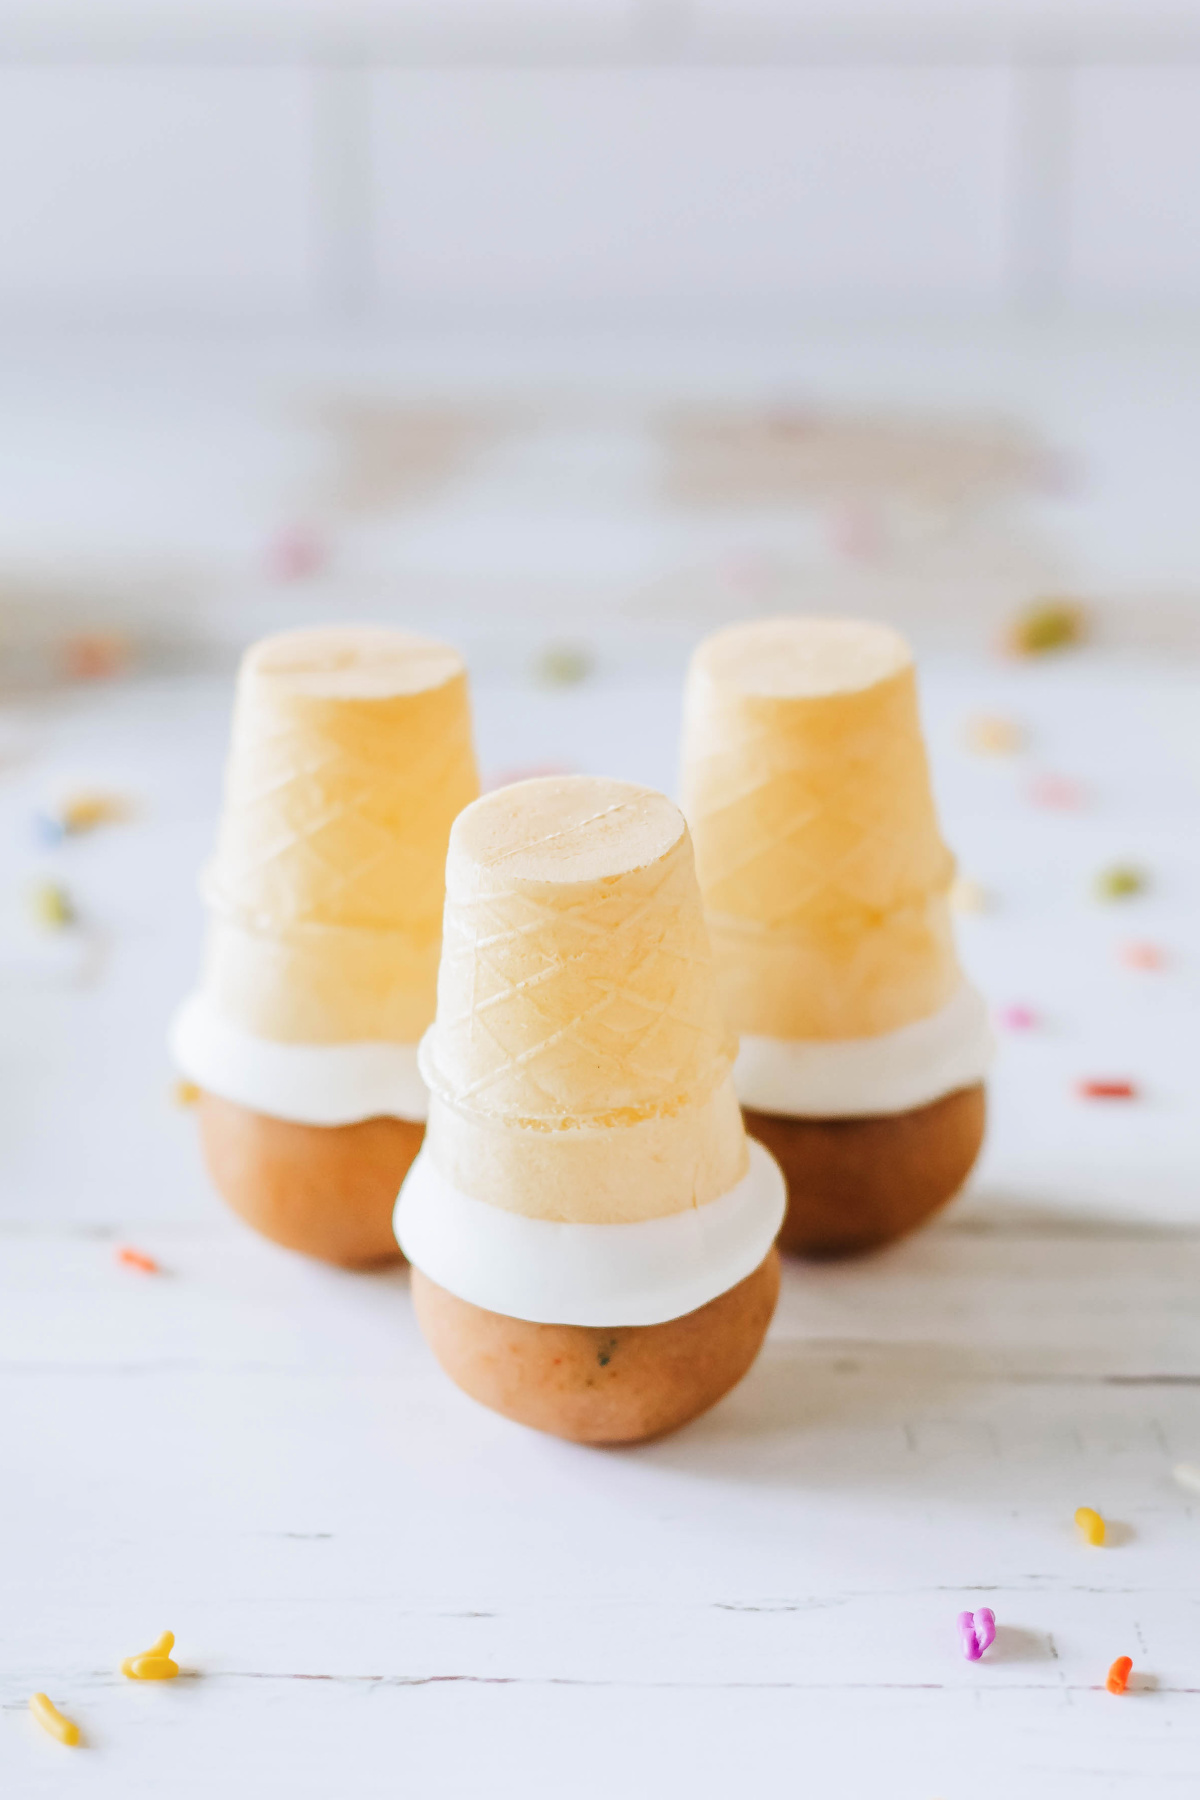
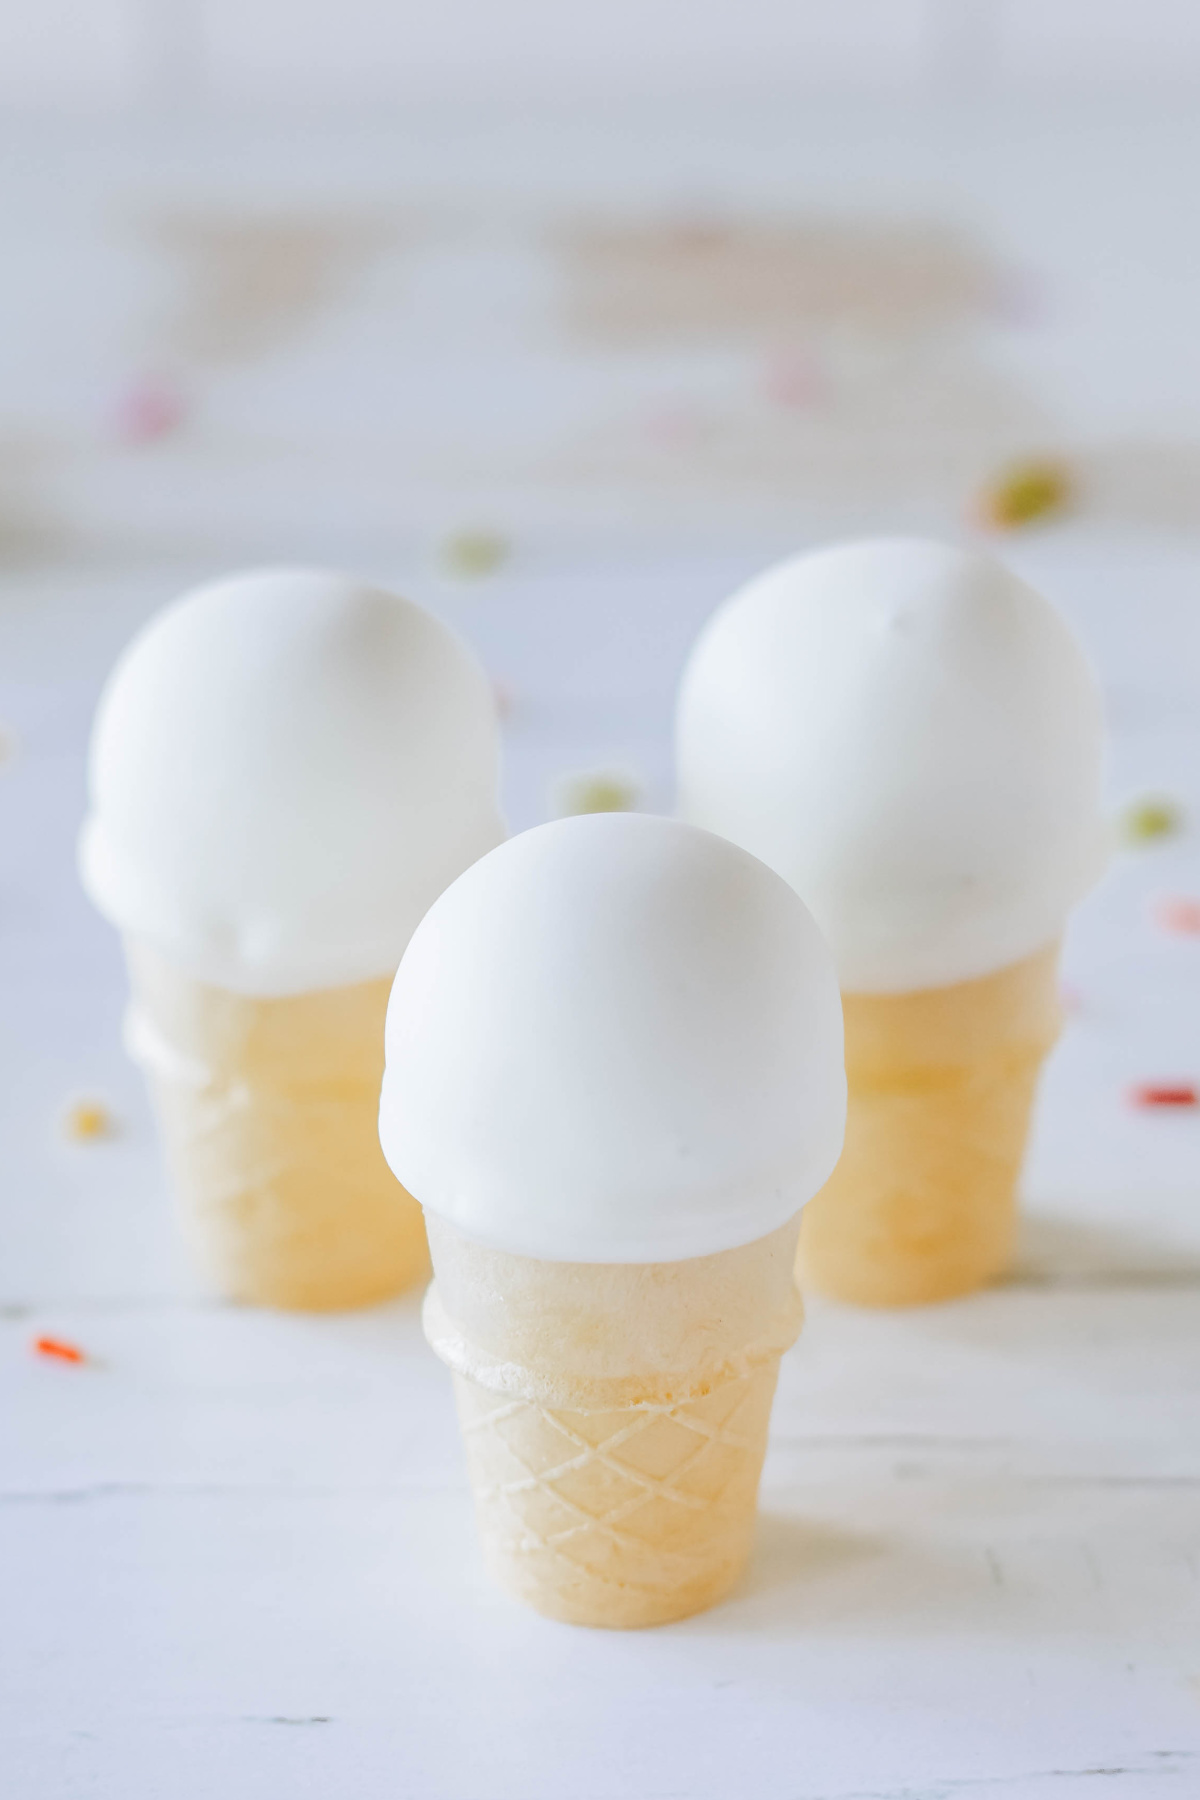
Step 7. Once the cake ball is firmly attached to the cone, dip the entire cake ball in chocolate. Gently shake off any excess and set upright to harden.
Step 8. Melt your pink candy melts and pour into a piping bag. Snip off the point and drizzle pink chocolate on top of your cone. Allow it to drip a little down the side of the white chocolate. You can tap your cone gently on the counter to get rid of any air bubbles.
Step 9. Before the pink chocolate hardens, top rainbow sprinkles and a red candy pearl. Repeat with the remaining cake pops.
Step 10. Let chocolate set and cool completely. Serve and enjoy!
Storage Instructions
Store your cake pops in a covered container at room temperature for up to 2 days. If wrapped in plastic wrapped, they can be refrigerated for up to a week. You’ll want to let them sit out at room temperature for a few minutes before serving.
Variations
- Cake flavor: These can make these with any type of cake mix you prefer. Chocolate cake, red velvet, lemon, or strawberry are all great options.
- Frosting: Customize your cake pops with different types of frosting. Use cream cheese frosting for a tangy twist, chocolate for a rich chocolate flavor or strawberry for a fruity twist.
- Candy coating colors: While I went with pink and white this time, you can use any combination of colors you like. Try blue candy melts with white for a cool theme, pastel rainbow for a cheerful look, or gold and pink for an elegant touch.
- Decorative toppings: Add even more fun with different decorative toppings. Top these with crushed cookies, sprinkle them with nuts or coconut, or use themed sprinkles to celebrate specific holidays.
FAQS
Yes, you can freeze these for later! After they’ve fully set, place them in an airtight container with layers separated by parchment paper. Thaw in the refrigerator before serving. If the cake balls fall out of the cone, you can easily reattach them with a little melted chocolate.
If the chocolate is too thick, add a small amount (about a tablespoon) of vegetable oil or shortening to thin it out. You can also add some Wilton EZ Thin Dipping Aid. If it’s too thin, let it cool slightly before dipping again.
Before dipping the cake pops in chocolate, make sure the cake balls are dipped in a generous amount of the chocolate. You’ll want to give them a few minutes to set before moving on with the rest of the dipping process.
Make sure the cake and frosting mixture is well combined and firm enough before shaping into balls. Also, the difference in temperature between the cold cake and the hot, melted chocolate can cause some cracking. Be sure to let your chocolate cool a little before dipping.
More Fun Summer Treats
Ice Cream Cone Cake Pops
Ingredients
- 1 freshly baked funfetti cake 9×13
- ⅛ cup vanilla frosting
- 12 ounces white candy melts
- Joy Mini Ice Cream Cones
- 6 ounces pink candy melts
- rainbow sprinkles
- 18 large red pearl sprinkles
Instructions
- Be sure your cake has completely cooled, then crumble it into a stand mixer (or any large mixing bowl). Add the frosting.1 freshly baked funfetti cake, ⅛ cup vanilla frosting
- Mix on high until ingredients are well combined. Knead together until it is the consistency of play dough.
- Use a small cookie scoop to remove a scoop of dough, then use your hands to roll it into a ball. Place it on a cookie sheet and repeat with the remaining dough.
- Place the cookie sheet in the freezer for one hour so the dough will be firm enough to work with.
- Add white candy melts to a microwave safe bowl and heat in one minute intervals, stirring in between. Continue until chocolate is melted and smooth. You can also melt the candy in a double boiler.12 ounces white candy melts
- Next, dip the rims of the cones in the melted candy and place them top down on top of each ball. Let the chocolate harden.Joy Mini Ice Cream Cones
- Once the cake ball is firmly attached to the cone, dip the entire ball in chocolate. You'll want to be sure your chocolate isn't too hot or it may crack as it hardens. Gently shake off any excess chocolate and set upright to harden.
- Melt pink candy melts and pour into a piping bag. Snip off the point and drizzle pink chocolate over the top of your cone. Allow it to drip a little down the side of the white chocolate. You can tap your cone gently on the counter to get rid of any air bubbles.6 ounces pink candy melts
- Before the pink chocolate hardens, top your cake pop with a red pearl and rainbow sprinkles. Repeat with the remaining cake pops.rainbow sprinkles, 18 large red pearl sprinkles
- Let chocolate set and cool completely. Serve and enjoy!
Notes
Nutrition
Did You Make This Recipe?
Share it with me on Instagram @funmoneymom and follow on Pinterest @funmoneymom for more!
Let’s be friends!
Did you love this post? Make sure to comment below and let me know your thoughts! And don’t forget to follow on your favorite social network below!

About Lisa O’Driscoll
Lisa O’Driscoll is a lifestyle and parenting expert, cookbook author, and the creative force behind Fun Money Mom, a popular blog she’s run since 2014. She’s the author of the children’s cookbook Roll It, Slice It, Mash It, Dice It, designed to get kids excited about cooking. With multiple TV appearances under her belt, she loves sharing her expertise on family-friendly recipes, creative DIYs, and party planning and is always on a mission to inspire and entertain!