Sally Skellington Pumpkin
This post may contain affiliate links. As an Amazon Associate, I earn from qualifying purchases.
This Sally Skellington pumpkin is the perfect Halloween craft for fans of the movie The Nightmare Before Christmas! It’s an easy to make no carve pumpkin that’s tons of fun for both the kids and the grownups!

What’s your favorite thing about fall? Mind is definitely decorating pumpkins and I might just go a little pumpkin crazy when fall rolls around! This year alone I’ve made a unicorn pumpkin, a Hello Kitty pumpkin and even a Golden Snitch pumpkin.
I wasn’t done though. I’d been planning to make a Jack Skellington pumpkin last year but just ran out of time. When I finally made one last week, I thought he looked a little lonely. He needed a Sally Skellington pumpkin to keep him company!
If you’re a fan of The Nightmare Before Christmas, you’ve got to make this fun pumpkin couple. It’s easy and the best part is that you’re using $1 pumpkins, so it’s cheap too! Here’s what you’ll need:
- A foam pumpkin (I get mine from Dollar Tree)
- Red yarn
- Light blue acrylic paint
- White Acrylic paint
- Red acrylic paint
- A black permanent marker
- Mod Podge or other glue
Sally Skellington Pumpkin
Start by snapping the green stem off the pumpkin. You’ll want the top flat so you can add Sally’s hair later.

Paint the pumpkin with light blue acrylic paint. You’ll need a 2-3 coats.

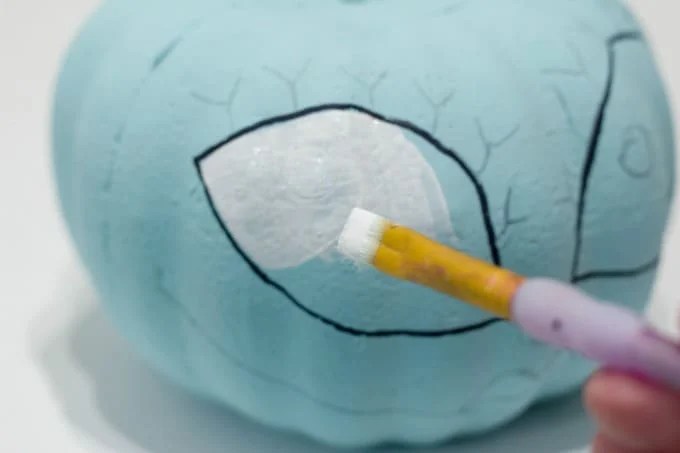
I started by using a pencil to draw the face. I find it tricky to make the eyes symmetrical so this way if I don’t like the way they look, I can paint over them and start over. Another trick is to cut out a piece of paper in the shape of the eyes and trace around it.

Once you’re happy with the way your Sally Skellington pumpkin looks, paint the eyes with white acrylic paint.

Once the eyes are done, paint the lips red.

Now draw in the details. Start with the eyelashes.

Then draw the stitches on the mouth.

Finally, add the hair. I cut strands approximately 12 inches long and glued them from the middle so she’d have a part.

I went almost all the way to the back, then added the hair on the other side. Next I added one piece of yarn down the middle for the part, then glued hair to the back of the head. Once the hair has dried, you have your Sally Skellington pumpkin!

My 10 year old daughter thought it was awesome and a thumbs up from her is worth it’s weight in gold!
Sally and Jack look pretty cute together, don’t you think?

Want more easy pumpkin painting ideas? Get all the tutorials here:
- Baby Yoda Pumpkin
- Harry Potter Pumpkin
- Golden Snitch Pumpkin
- Pumpkin Diorama
- Unicorn Pumpkin
- Jack Skellington Pumpkin
- Sally Skellington Pumpkin
- Hello Kitty Pumpkin
- Frankenstein Pumpkin
- Mummy Pumpkin
- Black Cat Pumpkin
- Emoji Pumpkins
- Bat Pumpkin
- Spider Pumpkin
- Melted Crayon Pumpkin
- Cinderella Inspired Pumpkin
- Teal Pumpkin
- Butterfly Pumpkin
- Bumblebee Pumpkin
- Metallic Polka Dot Pumpkin
- Caramel Apple Pumpkin
- Spiderweb Pumpkin
- Glitter Pumpkin
- Dollar Tree Pumpkin
- Minnie Mouse Pumpkin
- Mickey Mouse Pumpkin
- Spiderman Pumpkin
Looking for more Halloween fun? Check these out…
Let’s be friends!
Did you love this post? Make sure to comment below and let me know your thoughts! And don’t forget to follow on your favorite social network below!


You have a printable recipe for the Jack Skellington pumpkin, but I was unable to find one for Sally Skellington. Is there one available?
I’m sorry but I don’t have one for Sally.