Easy Vampire Pumpkin
This post may contain affiliate links. As an Amazon Associate, I earn from qualifying purchases.
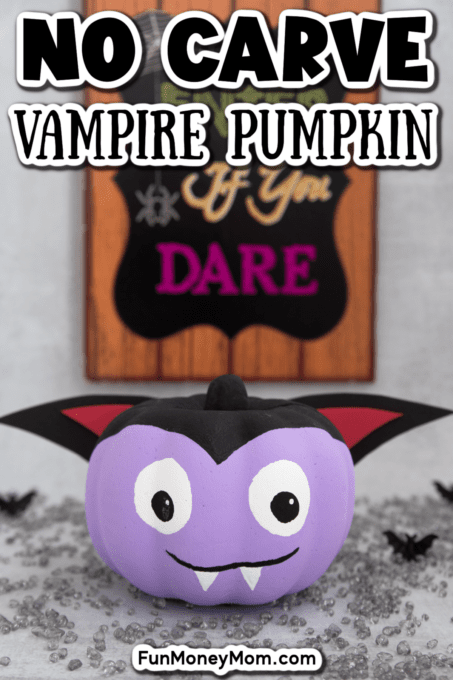
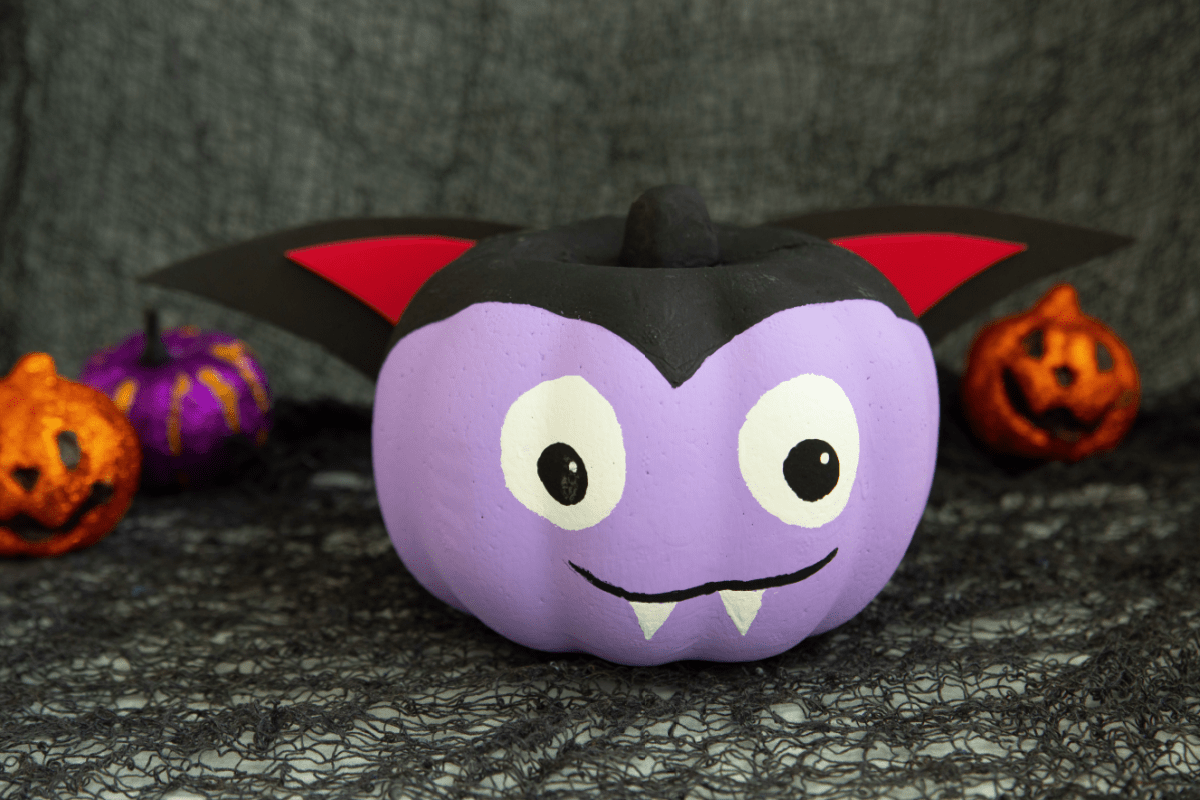
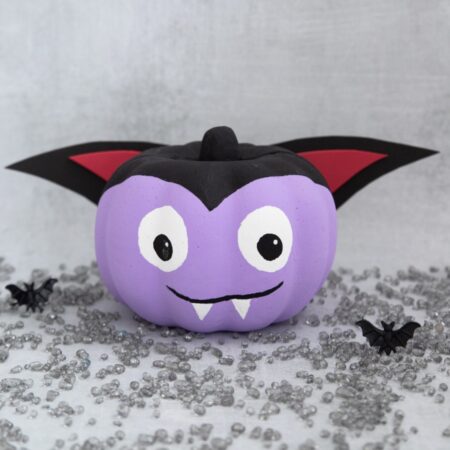
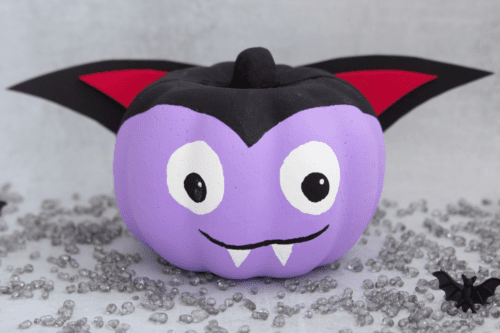
This cute vampire pumpkin painting idea is the perfect way to create some crafty and spooky fun for Halloween. Kids will have a great time turning styrofoam mini pumpkins into purple-faced vampires, each complete with its own cape!
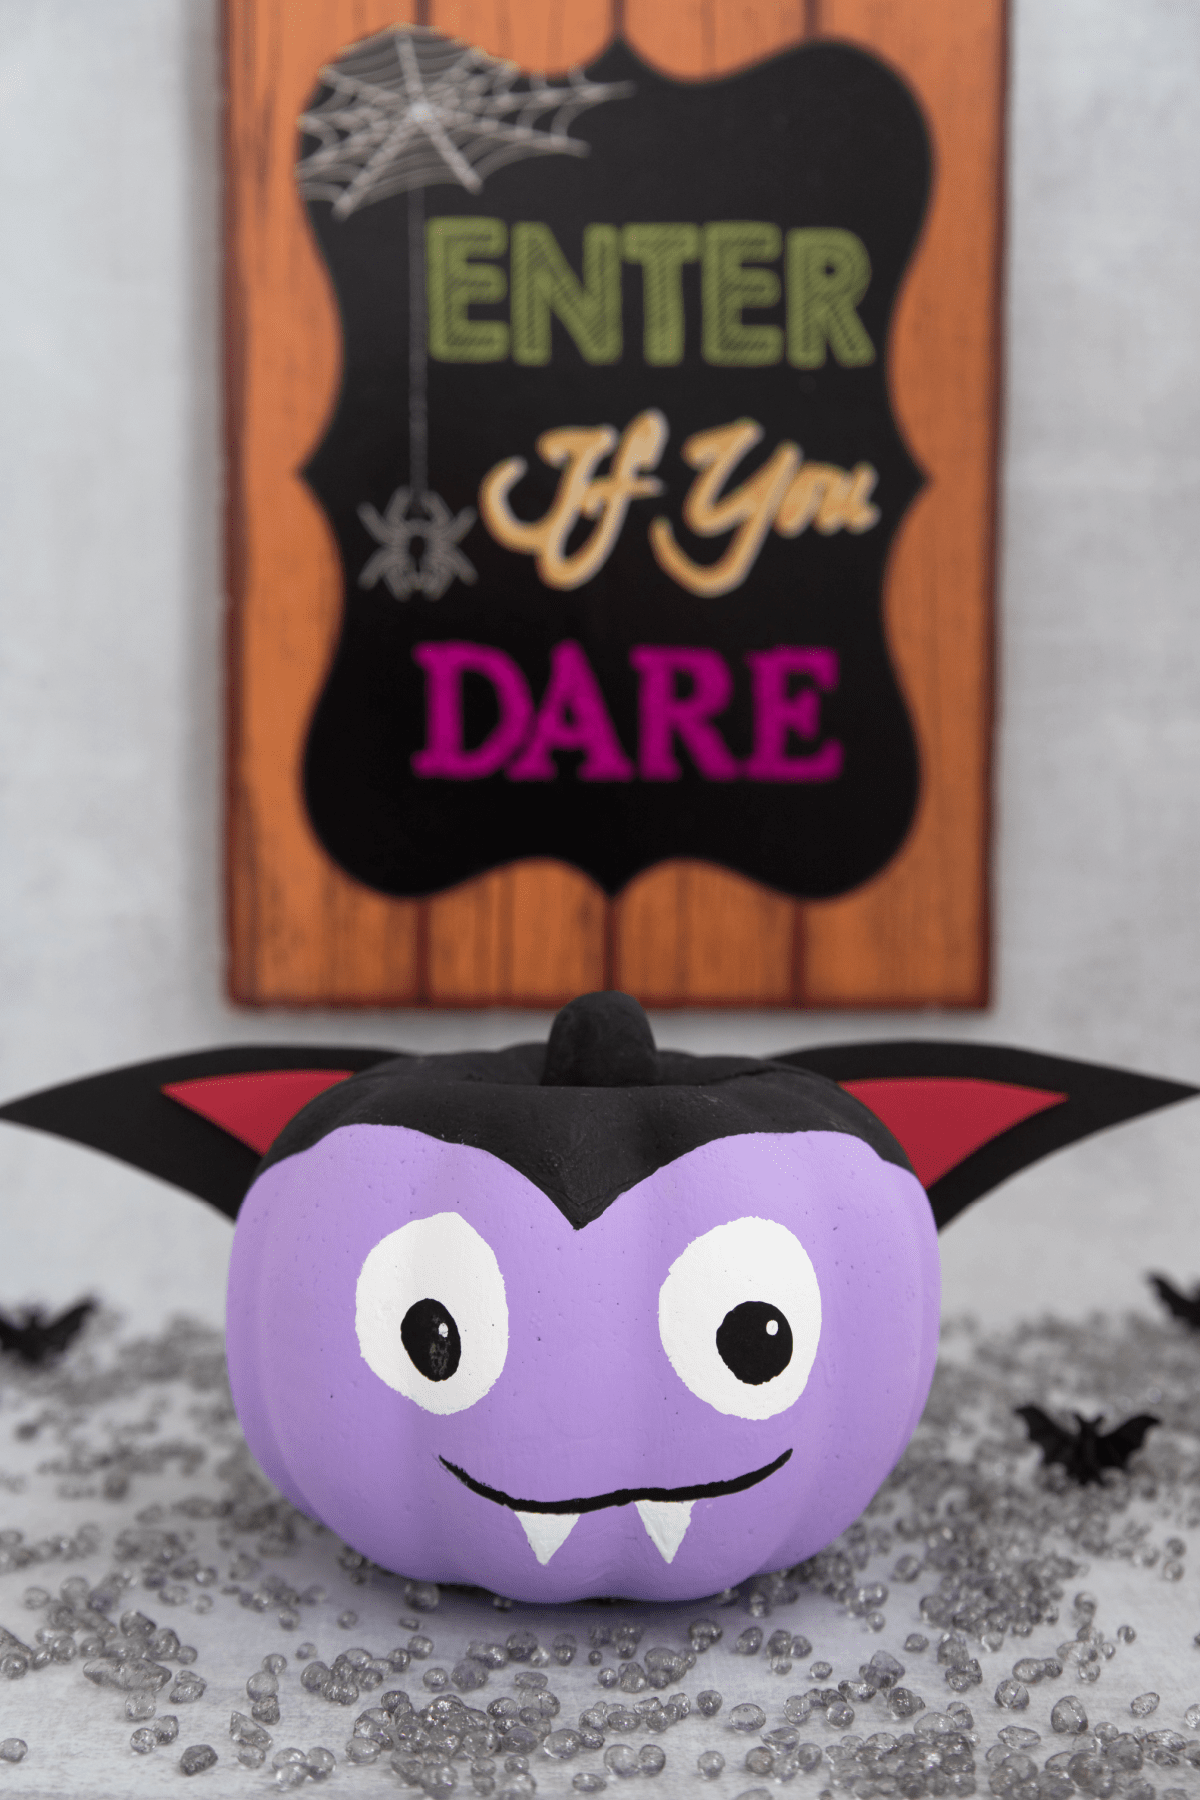
I’m all about the Halloween pumpkins, especially painted ones! It’s such a fun activity and this year I decided it was high time I added some vampire pumpkins to my collection!
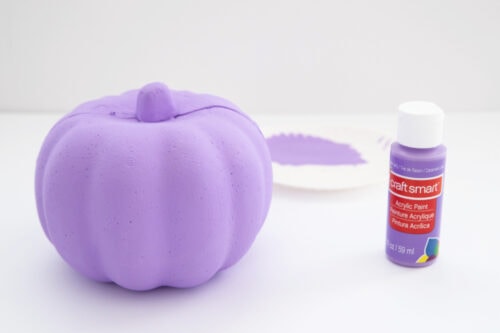
Just a few acrylic paint colors, some craft foam, and a small pumpkin made of styrofoam are all the supplies you need for this fun no-carve project that’s also budget-friendly and perfect for parties. The best part is that it’s safe and mess free, with no pumpkin guts to clean up.
Plus, what more traditional Halloween character is there? You’ll love making this fun project with your kids and and it’s such a great way to get the entire family into the Halloween spirit!
What We Love About This Activity
It’s Safe – No-carve crafts like this make a much more kid-friendly activity than traditional pumpkin carving! That’s because they don’t require any sharp objects but still allow the kids to make their own Halloween pumpkin creation.
It’s Fun – This is the perfect creative and artistic activity for kids’ Halloween parties and events. Anything that will distract them from eating candy for a little while is a win in my book!
It’s Reusable – Since they don’t use real pumpkins, these crafts can become part of your Halloween decorations and you can enjoy them year after year!
It’s Budget-Friendly – I love to stock up on Styrofoam craft pumpkins at the Dollar Tree this time of year. I know I’ll always find more creative ways to use them, and since they’re only a dollar (well $1.25 now), we don’t need to worry about messing one up.
Craft Supplies
- Printable template for cape
- Craft pumpkin
- Purple, white, and black paint
- Red and black craft foam
Tips for Making the Perfect Pumpkin
- Don’t have round sponge brushes? You can use a round object like a coin or button and trace the circles for the eyes.
- No purple paint? Try using different colors of paint instead. You can use green paints or if you start with orange styrofoam pumpkins, just leave them that color to make orange vampires. You can also start with a white pumpkin and make white vampires. You’ll just need to outline the eyes and teeth, so they stand out.
- If making this craft project for a group activity, you may want to paint the entire pumpkin ahead of time. That way, they won’t have to wait for the base color to dry during the activity. That can take a little while if your pumpkin needs a second coat of paint.
- It’s a good idea to trace or draw the outline of the vampire hair and facial features in pencil for the kids before they start, so all they have to do is paint within the lines.
Want More Pumpkin Craft Inspiration?
For more traditional Halloween pumpkin craft ideas, try this cute spider pumpkin, or this fun Frankenstein pumpkin.
If your kids like movie and storybook characters, try this Harry Potter pumpkin or a silly Minion pumpkin!
For even more easy pumpkin painting ideas, check out this huge list of cute pumpkin ideas that the entire family will love.
Vampire Pumpkin
Materials
Instructions
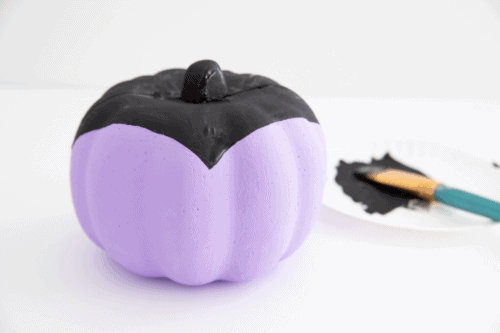
- Paint the whole pumpkin with purple paint. Let dry about 30 minutes.

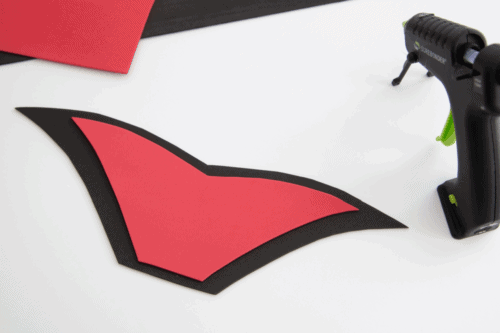
- Use the printable template to trace a large cape shape on black craft foam. Trace the smaller cape shape onto red craft foam.
- Cut the pieces out and use hot glue to glue them together.
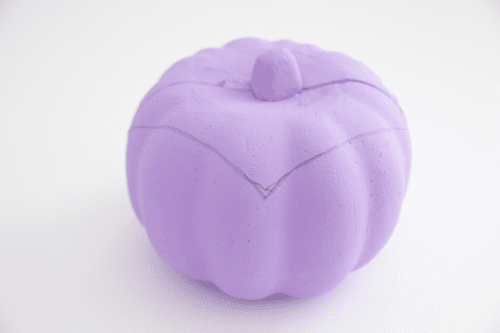
- Use a pencil to draw in the hair on top of the pumpkin, making a point at the front. Using the pencil first is optional, but it makes it easier to know just where the paint will go.
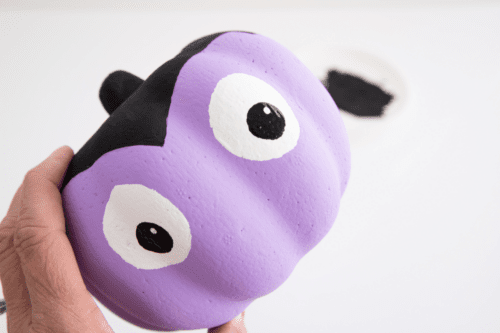
- Paint on your vampire's hair with black paint.
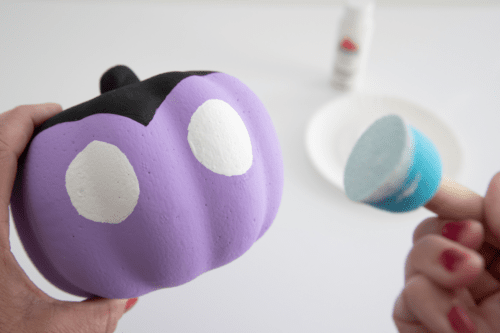
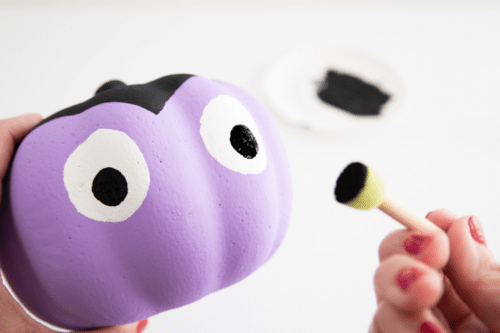
- Dip a large round sponge brush in white paint to make two eyes.
- Use a smaller round sponge brush to make the pupils.
- Add a small white dot to each of the pupils.
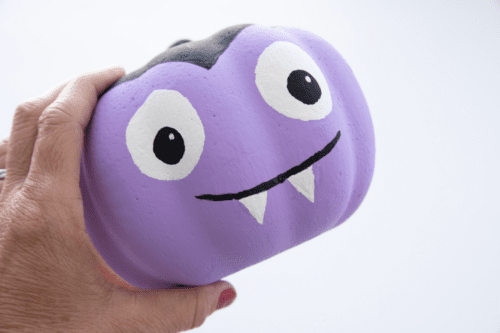
- Make a mouth with black paint, then use white paint to add vampire teeth.
- Glue the cape to the back of your vampire and your Halloween pumpkin is complete.

Notes
- You may want to trace or draw the outline of the vampire hair and facial features in pencil for the kids before they start. That way, all they have to do is paint within the lines.
- If planning this for a party activity, it’s a good idea to paint the purple base ahead of time. That way the kids don’t have to wait for it to dry before finishing their pumpkin.
- The template works best for small craft pumpkins. You may need to adjust it according to the size of your pumpkin (you’ll need a bigger cape for a bigger pumpkin).
Did You Make This Project?
Share it with me on Instagram @funmoneymom and follow on Pinterest @funmoneymom for more!
Let’s be friends!
Did you love this post? Make sure to comment below and let me know your thoughts! And don’t forget to follow on your favorite social network below!

About Lisa O’Driscoll
Lisa O’Driscoll is a lifestyle and parenting expert, cookbook author, and the creative force behind Fun Money Mom, a popular blog she’s run since 2014. She’s the author of the children’s cookbook Roll It, Slice It, Mash It, Dice It, designed to get kids excited about cooking. With multiple TV appearances under her belt, she loves sharing her expertise on family-friendly recipes, creative DIYs, and party planning and is always on a mission to inspire and entertain!