Homemade Blueberry Pie
This post may contain affiliate links. As an Amazon Associate, I earn from qualifying purchases.

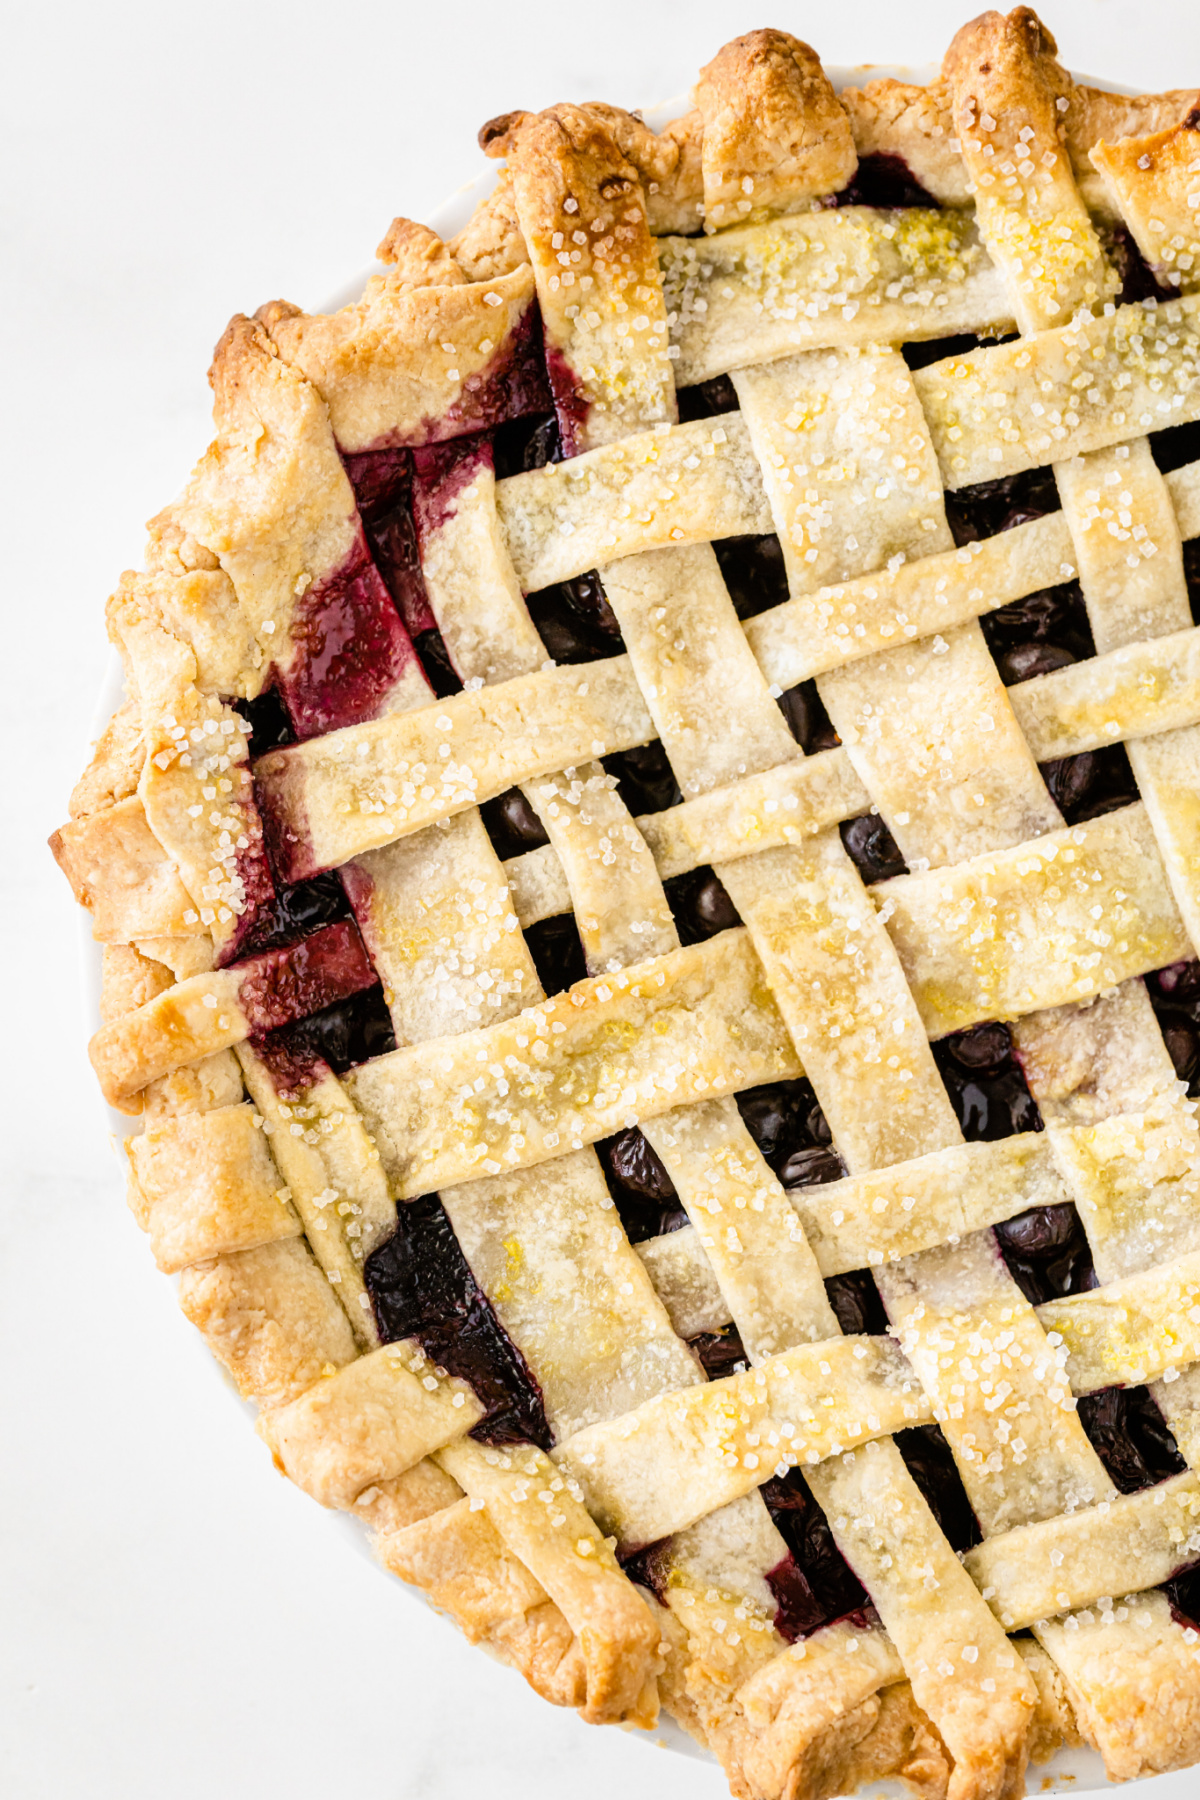
This Homemade Blueberry Pie has a golden, flaky crust and a bubbling blueberry filling that hits the perfect balance of tart and sweet. It’s the kind of dessert that looks impressive but it so much easier to make than you’d think!

Blueberry Pie Recipe
There’s no better dessert for summer than a fruit pie! One of my favorites is this tasty strawberry pie, but lately I’ve been in a blueberry kind of mood. I love baking this blueberry peach galette, adding some to stuffed crescent rolls and making this easy blueberry syrup. However, a real lattice topped blueberry pie was missing from my list, until now.
This pie starts with 6 whole cups of fresh blueberries that bake into a thick, juicy filling. You can use refrigerated pie crusts to keep things easy, or use my homemade pie crust recipe and make the entire pie from scratch. The lattice top is simple once you get the hang of it, and you get all those flaky, sugary strips everyone loves.
Why We Love This Recipe
- Fresh, delicous flavors: Homemade pie flavor that’s bright, sweet, and full of fresh blueberry goodness.
- Lattice crust looks fancy but is simple: Weaving the strips takes a little patience, but there is no special tool or skill required to get that classic bakery look.
- You can serve it for any occasion: You can make this easy blueberry pie recipe for a summer cookout, holidays or just as a special treat for your family. Do you really even need a reason?
Ingredients

- Blueberries: You’ll need 6 cups, so blueberries are definitely the star here.
- Pie crusts: One box containing two crusts gives you enough for the bottom crust and the lattice top. You can also use a homemade double crust pie dough.
- Sugar: Sweetens the berries and helps create those syrupy blueberry juices as the pie bakes.
- Cornstarch: This is what thickens the blueberry pie filling enough to cut into neat slices after cooling.
- Salt: Just a small amount balances the sweetness and brings out the flavor of the berries.
- Lemon zest: Adds fresh citrus flavor without adding extra liquid to the filling.
- Lemon juice: Blueberries and lemon work so well together. The acidity also keeps a very sweet batch of berries from tasting one dimensional.
- Egg: A beaten egg creates the glossy golden finish on the lattice crust.
- Sanding sugar: Adds sparkle and a light crunch to the top of the pie.
How To Make The Best Blueberry Pie
Step 1. To make your blueberry filling, combine blueberries, sugar, corn starch, salt, lemon zest and lemon juice in a large bowl. Toss them gently until they are coated well.
Step 2. Roll out your pie crust to form an circle approximately 12 inches. It’s okay if it’s not an exact circle. You’ll just want it to be big enough to cover your pie dish. This is my homemade pie crust recipe, if you prefer making one from scratch .


Step 3. Roll out the top crust and use a pizza cutter to cut strips of dough for the top crust.
Step 4. Place your bottom crust into a 9-inch pie plate. Vent with a fork and crimp edges.


Step 5. Pour your blueberry filling mixture into the pie dish on top of the bottom crust.
Step 6. Take one strip of pie dough and lay it across the middle of the pie. Arrange more strips of dough a row from the middle.

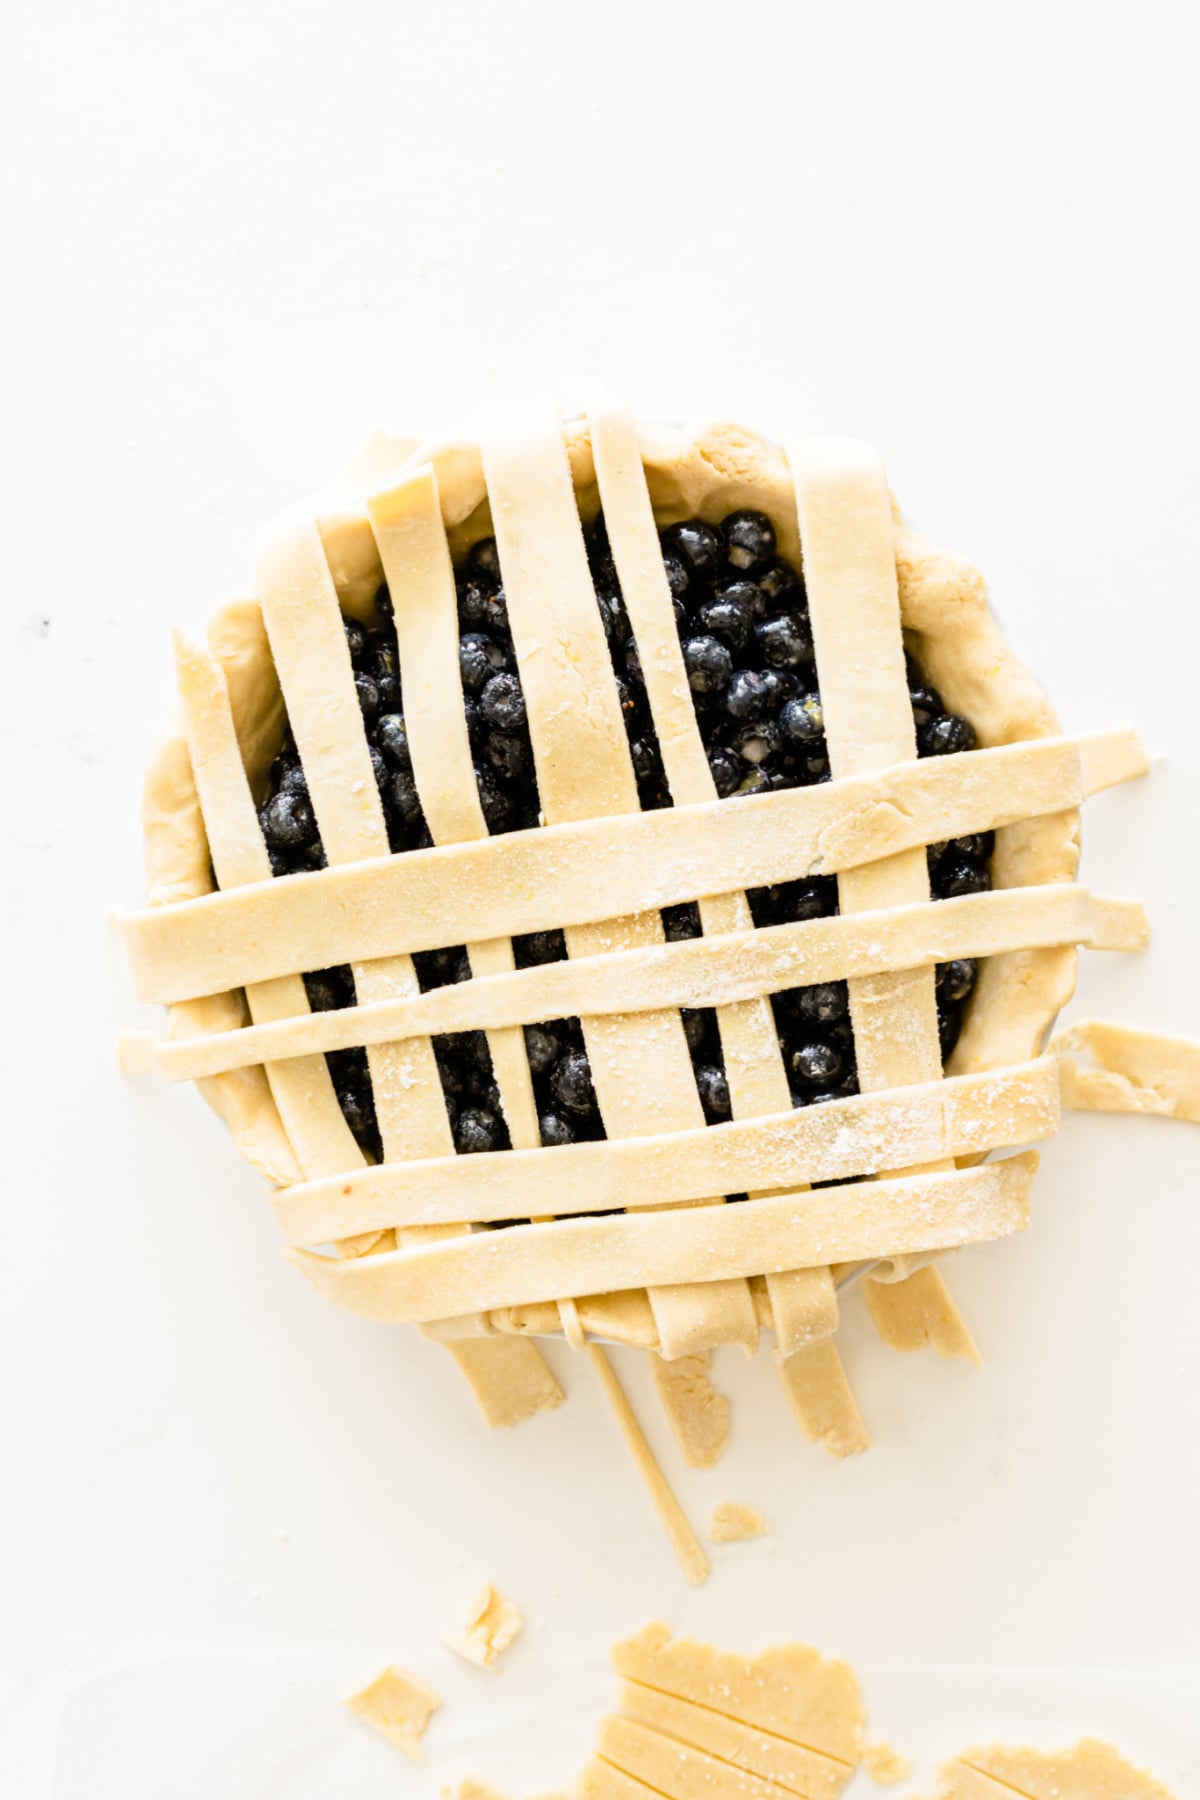
Step 7. Fold strips in half and start weaving strips of the pie crust in the opposite direction. Keep going until the entire pie is covered with a lattice crust.
Step 8. Once you’re finished with the lattice pie crust, use a sharp knife to cut the excess dough, then crimp the strips on the pie to the bottom crust to hold them in place.
Step 9. Use a beaten egg to make an egg wash and brush it over the crust with a pastry brush. This will give it a nice, shiny finish as it bakes. Sprinkle crust with sanding sugar.
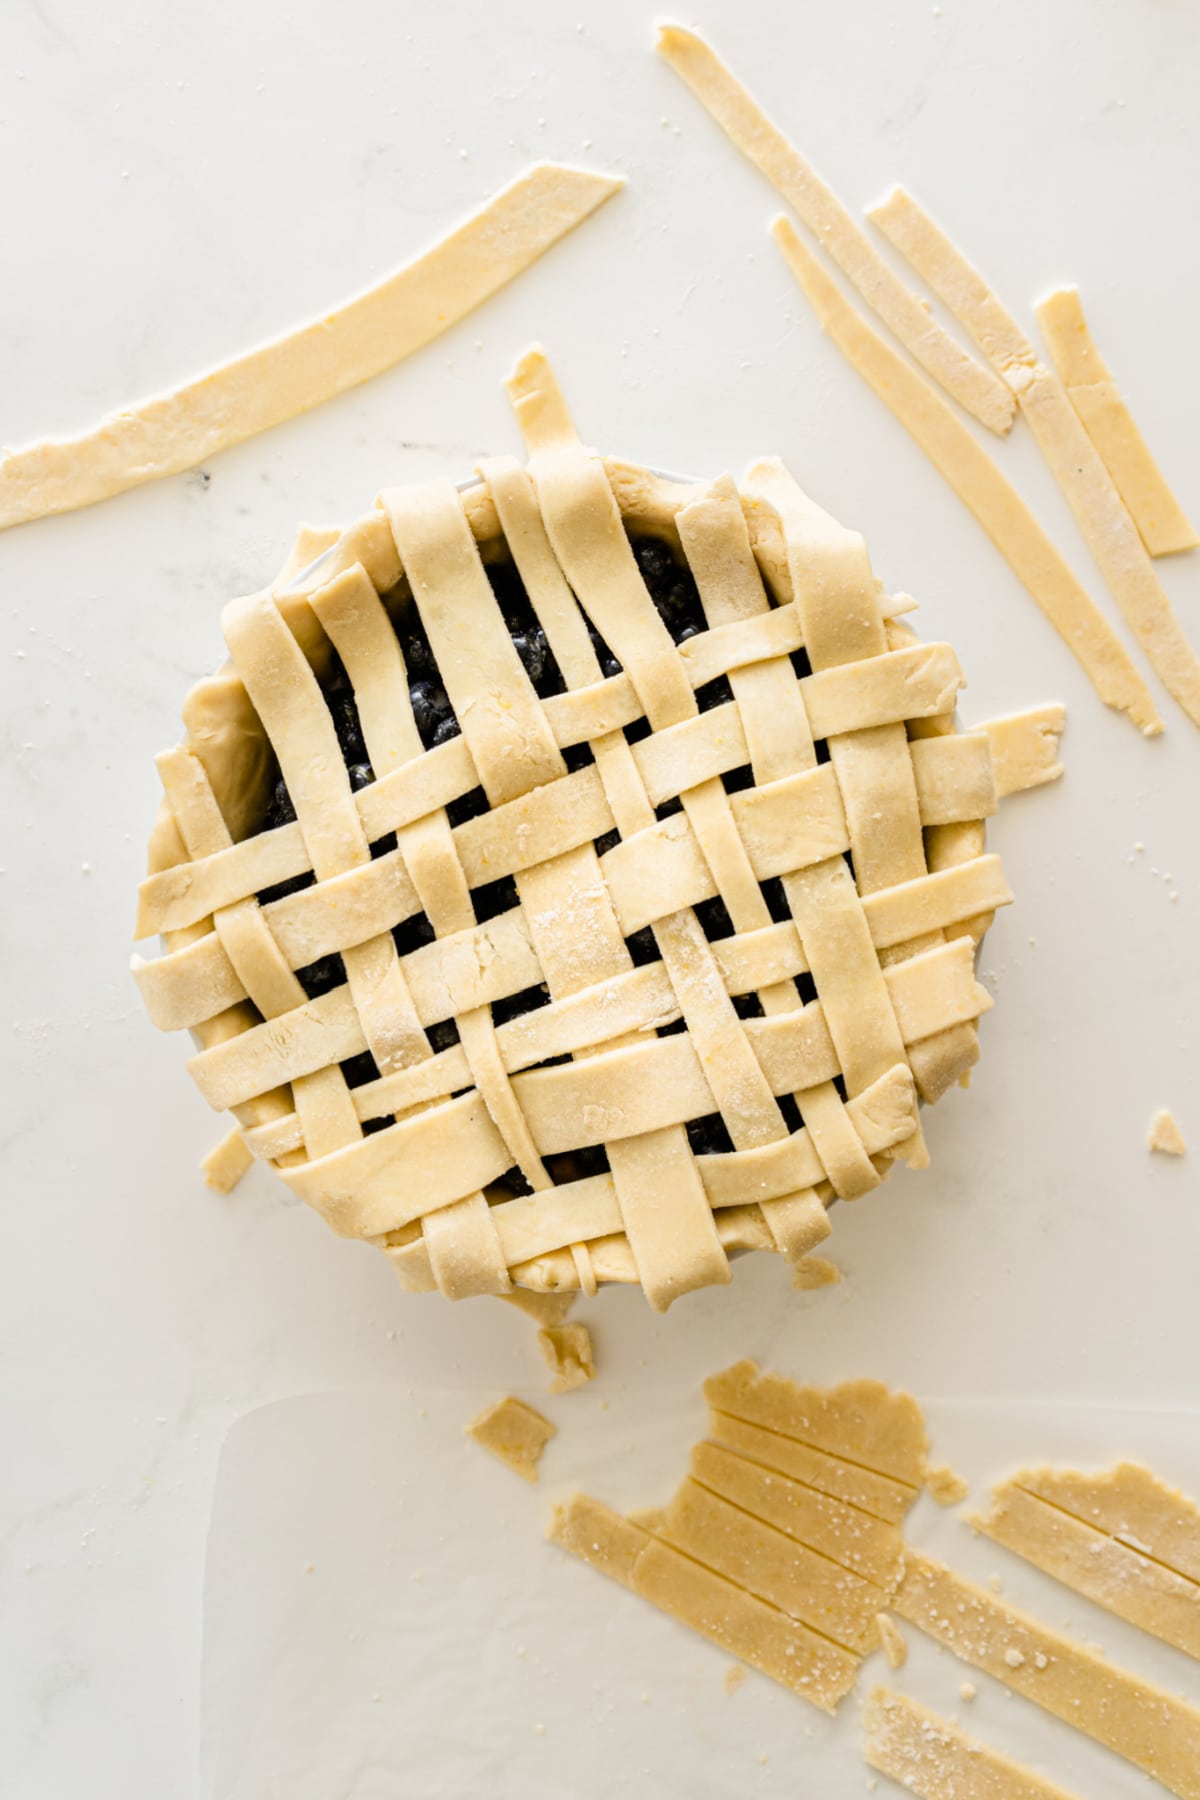
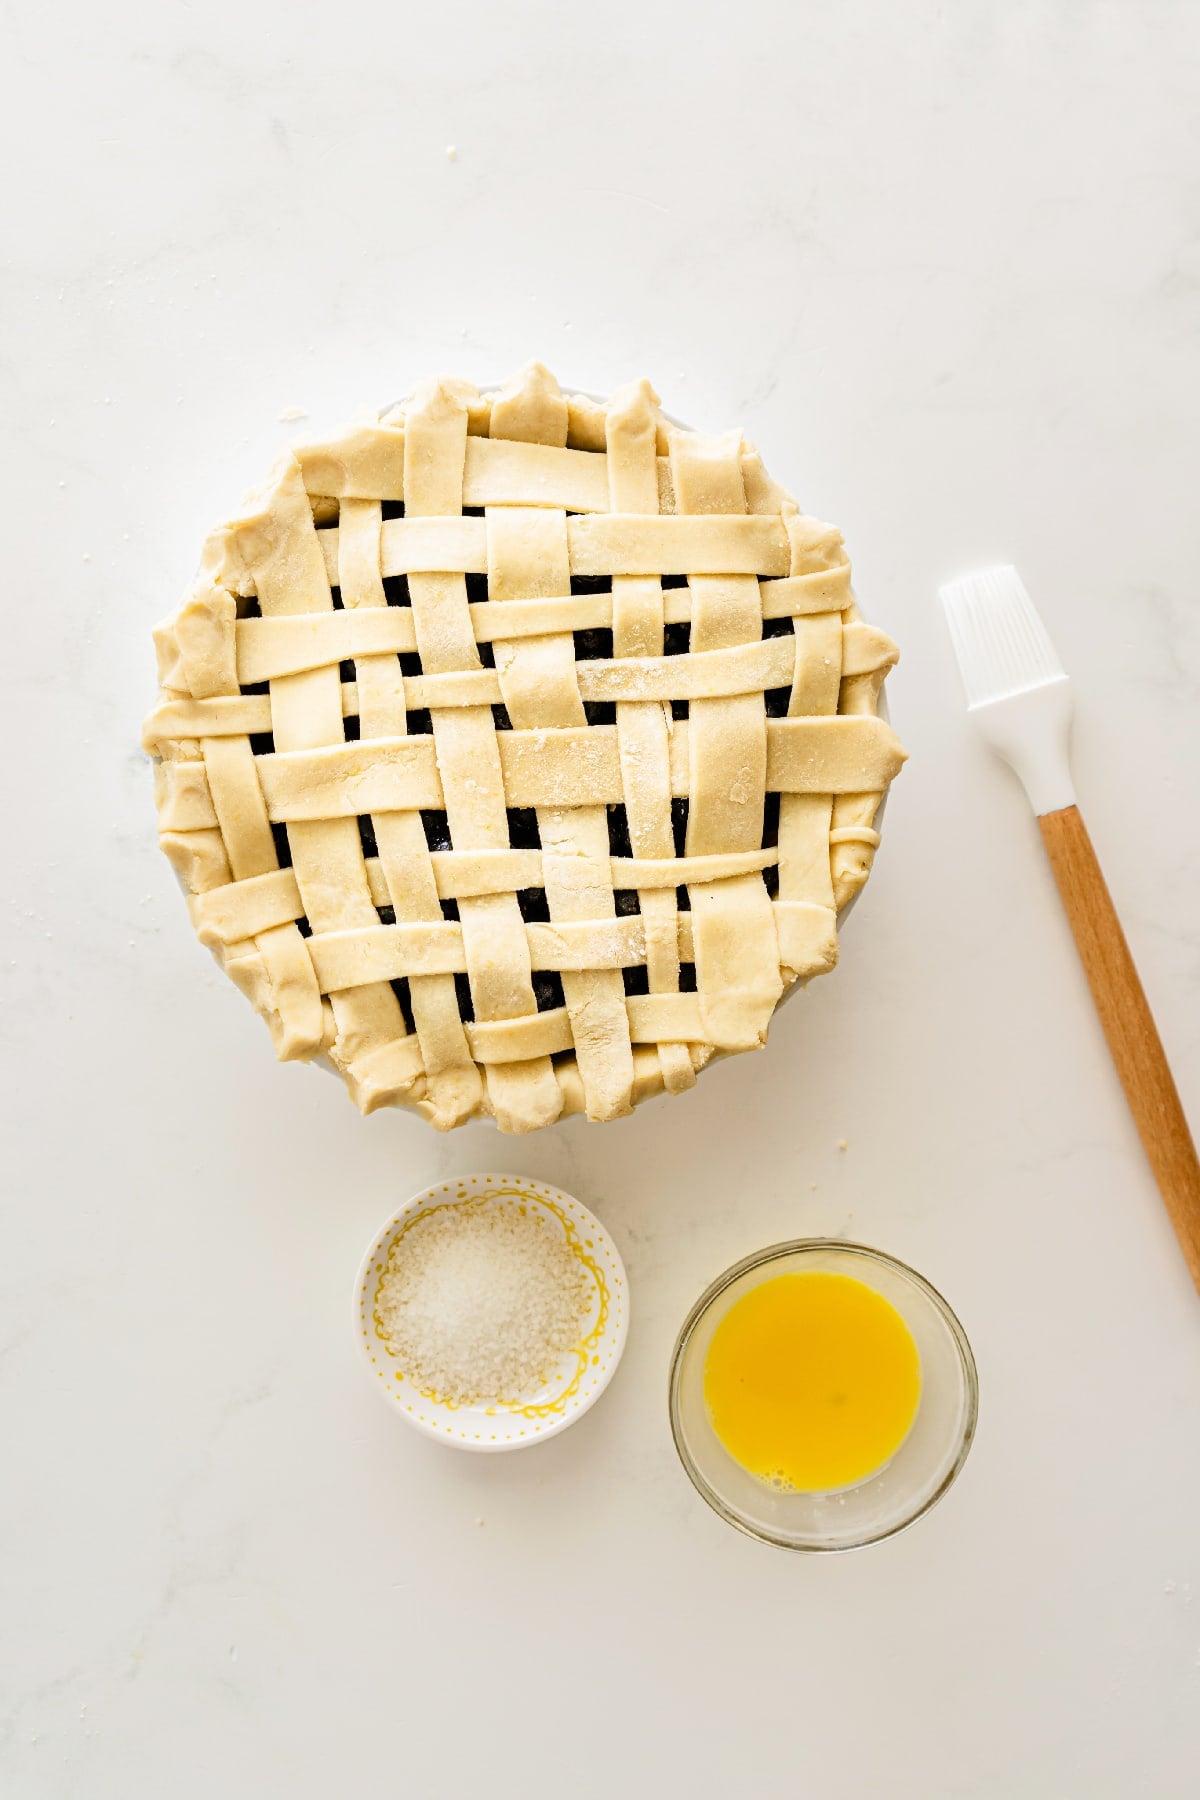
Step 10. Begin by baking the pie at 425° for 15 minutes. After 15 minutes, lower the oven temperature to 375° and continue to bake pie for another 30 minutes. After 30 minutes, check on the pie to make sure the crust isn’t getting too dark. If it is, tent the pie with a piece of aluminum foil to keep the crust from burning.

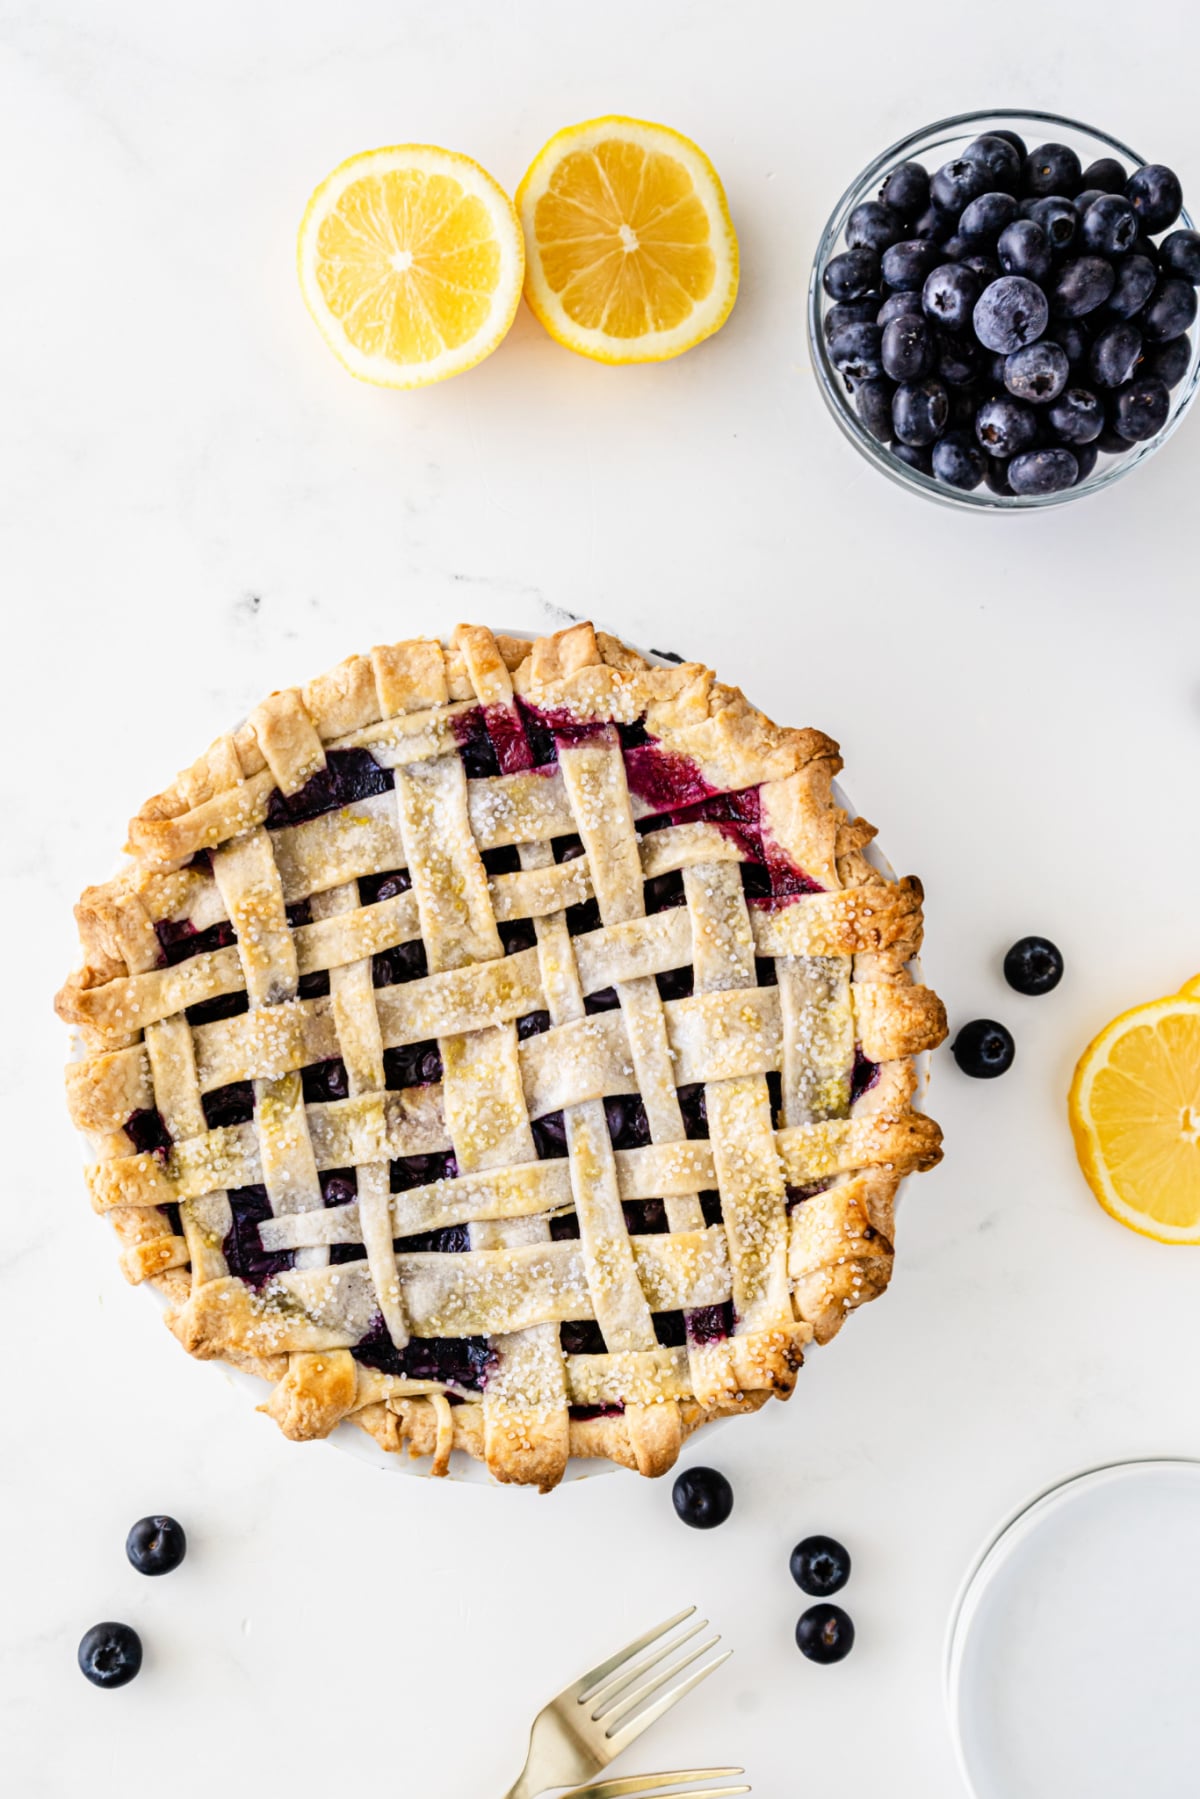
Step 10. This last step is by far the hardest! Once the pie is finished baking, let it cool for at least 2-3 hours. If you cut it too soon it will be too loose. By letting it sit, the corn starch has time to work its magic!
Storage Instructions
- Fridge: Store leftover pie loosely covered in the refrigerator for up to 4 days. Let refrigerated slices sit at room temperature for about 15 minutes before serving so the filling softens back up.
- Freezer: Freeze the whole baked and cooled pie tightly wrapped in plastic wrap and foil for up to 3 months. Thaw frozen pie overnight in the refrigerator, then warm slices in a 300°F oven for about 10 minutes if you want that fresh baked feel again. Individual slices can be wrapped separately and frozen in a freezer safe bag, which makes it easy to thaw just one slice at a time.
Tips And Tricks
A few simple tricks can ensures your pie turns out perfect every time.
- Pat your blueberries with a paper towel before mixing: Extra moisture on the berries can make the filling looser than it needs to be.
- Keep cleanup easy: Place the pie plate on a baking sheet before it goes in the oven. This catches any bubbling juices and keeps your oven clean.
- Watch the bake time: Check the pie around the 30 minute mark in the second bake. Ovens vary, and catching a fast browning crust early makes tenting with foil much easier.
- Resist the urge to slice the pie warm: Even though the smell coming from your kitchen will make it tempting, a warm pie will spill filling everywhere on the plate.
- Patch the stripes if needed: If your lattice strips tear while weaving, just press the dough back together with your fingers. A little imperfection will not show once the pie is baked.

Variations And Add-ins
Want to change it up a little? There are plenty of easy ways to switch the flavors, change the topping, or add a little something extra.
- Add raspberries: Replace 1 to 2 cups of the blueberries with fresh raspberries for a mixed berry pie with a slightly tangier flavor.
- Try blueberries and peaches: Swap 2 cups of blueberries for peeled sliced peaches for a juicy late summer pie.
- Add a little cinnamon: About 1/4 teaspoon gives the filling a subtle warm flavor without covering up the blueberries.
- Use almond extract: Add a very small splash to the filling for a light almond note. A little goes a long way.
- Make a full top crust: Skip the lattice and cover the filling with a solid second crust instead. Cut several vents in the top so steam can escape.
- Cut decorative crust shapes: Stars, flowers, leaves, or simple circles can be cut from the second crust and arranged over the blueberries instead of weaving a lattice.
- Add coarse turbinado sugar: Use it in place of sanding sugar if you want a crunchier, more rustic sugar topping.

FAQs
The blueberry pie filling actually has cornstarch, which acts as a thickener. This thickener gives your filling that perfect texture and keeps it from being too thin. However, it won’t thicken as it should unless you let it sit for awhile first.
Decorator’s sugar and pearl sugar are both excellent substitutes for sanding sugar. If you don’t have any of those, you can use regular sugar instead. It won’t be exactly the same but it works in a pinch.
1. Transform them into small hand pies and fill them with any extra blueberry filling that you might have.
2. Press chopped nuts over the rolled dough and cut them using a cookie cutter. Bake them to get some quick nutty cookies.
3. Roll the dough out into ⅛ inch thickness. Sprinkle with a layer of cinnamon powder, and granulated sugar, then roll the dough into a log. Cut, and bake for some delicious flaky cinnamon rolls!
4. Roll the dough into ⅛ inch thickness, sprinkle with grated Parmigiano-Reggiano and bake for a batch of crackers to snack on.

More Amazing Pie Recipes
- Butterbeer Pie
- Best Blueberry Pie
- No Bake Key Lime Pie
- Pineapple Pie
- Blueberry Hand Pies
- No Bake Peppermint Pie
- Impossible Pie

Homemade Blueberry Pie
Equipment
- Rolling Pin
Ingredients
- 6 cups fresh blueberries
- 1 box pie crusts (containing 2 crusts)
- 1 cup sugar
- 1/4 cup cornstarch
- 1/4 teaspoons salt
- 1 tablespoon lemon zest
- 1 tablespoon lemon juice
- 1 egg
- 1 tablespoon sanding sugar
Instructions
- Roll out your pie crust to form an circle approximately 12 inches (you can get my flaky pie crust recipe here)
- Roll out the top crust and use a pizza cutter to cut strips of dough for the top crust.
- Place your bottom crust into a 9-inch pie plate. Vent with a fork and crimp edges.
- To make your blueberry filling, combine blueberries, sugar, corn starch, salt, lemon zest and lemon juice in a large bowl. Toss to coat, then pour the blueberry mixture into your pie dish.
- Take one strip of pie dough and lay it across the middle of the pie. Arrange more strips of dough a row from the middle.
- Fold strips in half and start weaving strips of the pie crust in the opposite direction. Keep going until the entire pie is covered with a lattice crust.
- Once you’re finished with the lattice pie crust, use a sharp knife to cut the excess dough, then crimp the strips on the pie to the bottom crust to hold them in place.
- Use a beaten egg to make an egg wash and brush it over the crust with a pastry brush. This will give it a nice, shiny finish as it bakes. Sprinkle crust with sanding sugar.
- Start by baking the pie at 425° for 15 minutes. After 15 minutes, lower the oven temperature to 375° and continue to bake pie for another 30 minutes. After 30 minutes, check on the pie to make sure the crust isn’t getting too dark. If it is, tent the pie with a piece of aluminum foil to keep the crust from burning.
- This last step is by far the hardest! Once the pie is finished baking, let it cool for at least 2-3 hours. If you cut it too soon it will be too loose. By letting it sit, the corn starch has time to work its magic!
Nutrition
Did You Make This Recipe?
Share it with me on Instagram @funmoneymom and follow on Pinterest @funmoneymom for more!
Let’s be friends!
Did you love this post? Make sure to comment below and let me know your thoughts! And don’t forget to follow on your favorite social network below!

About Lisa O’Driscoll
Lisa O’Driscoll is a lifestyle and parenting expert, cookbook author, and the creative force behind Fun Money Mom, a popular blog she’s run since 2014. She’s the author of the children’s cookbook Roll It, Slice It, Mash It, Dice It, designed to get kids excited about cooking. With multiple TV appearances under her belt, she loves sharing her expertise on family-friendly recipes, creative DIYs, and party planning and is always on a mission to inspire and entertain!