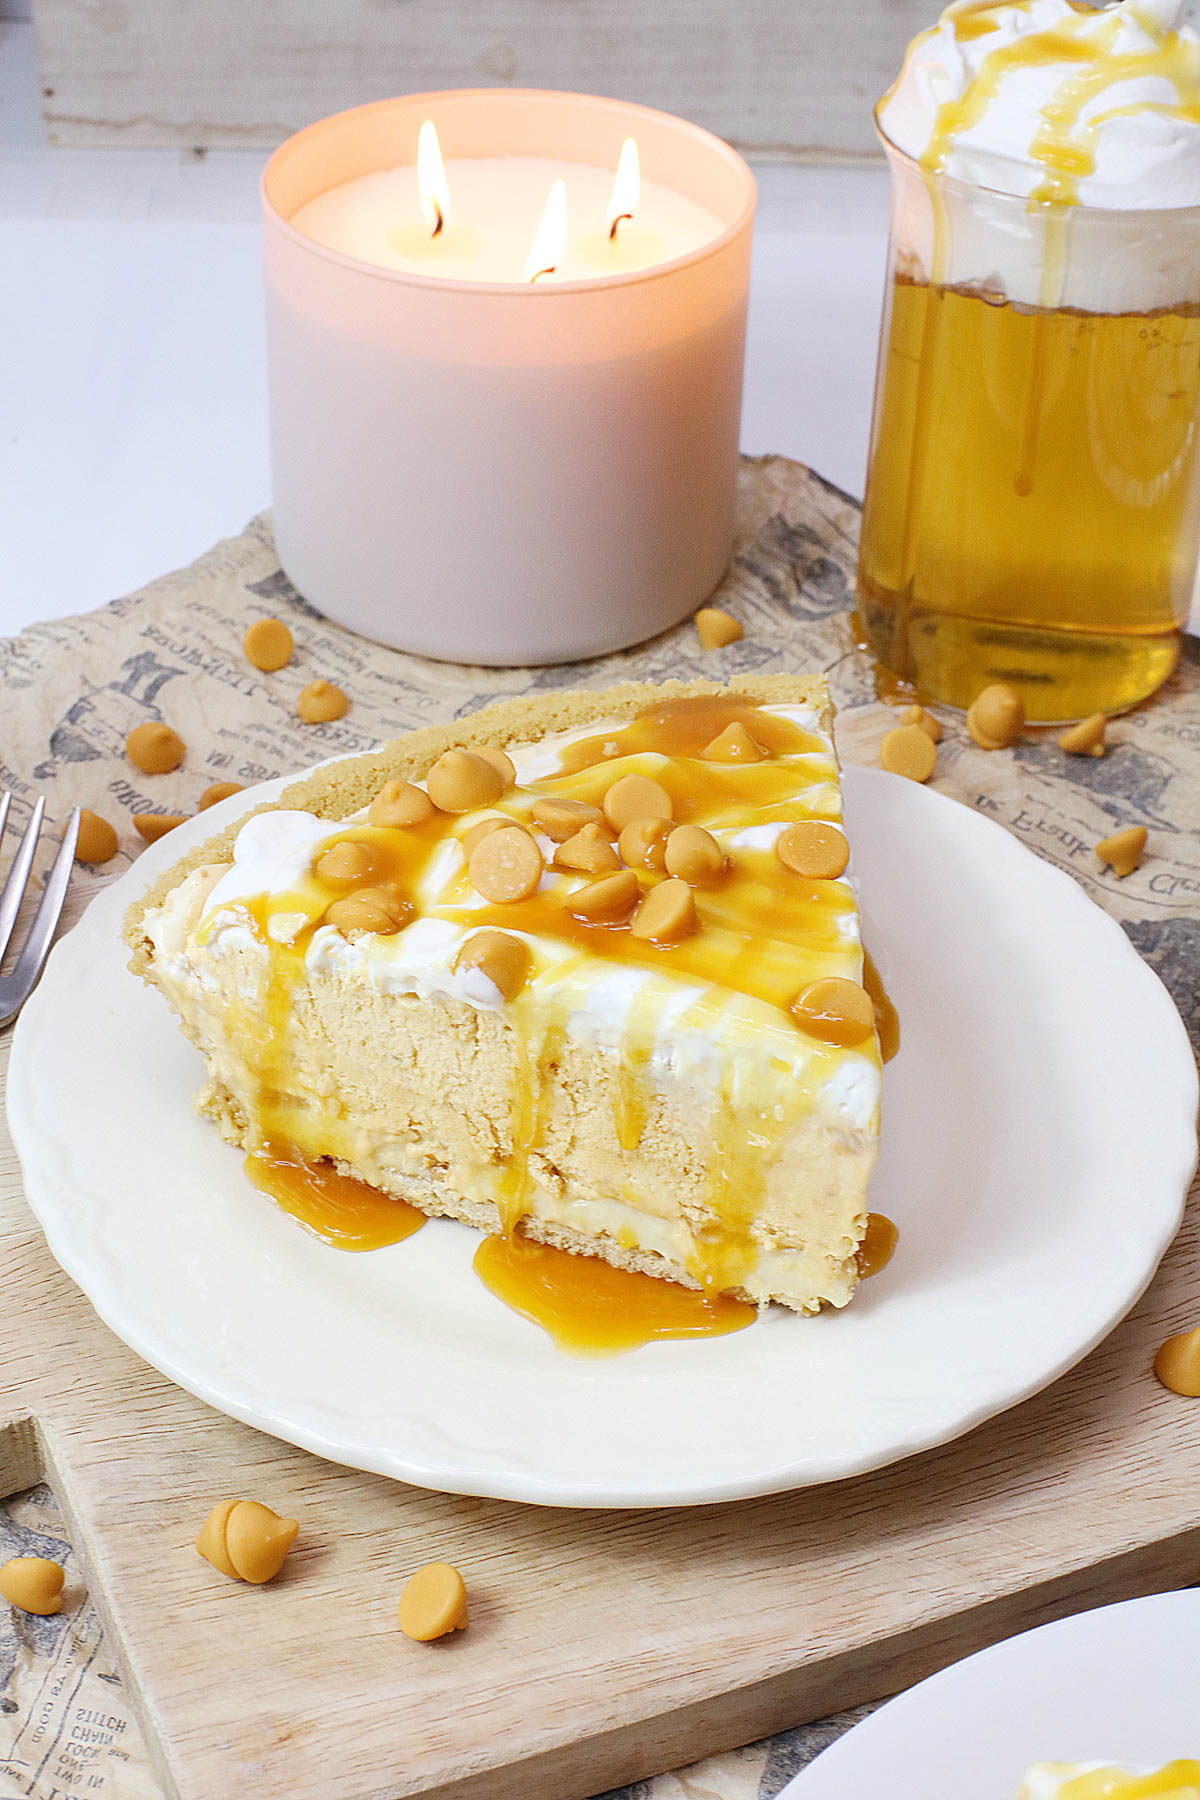
Butterbeer Pie (No Bake Harry Potter Dessert)
This post may contain affiliate links. As an Amazon Associate, I earn from qualifying purchases.
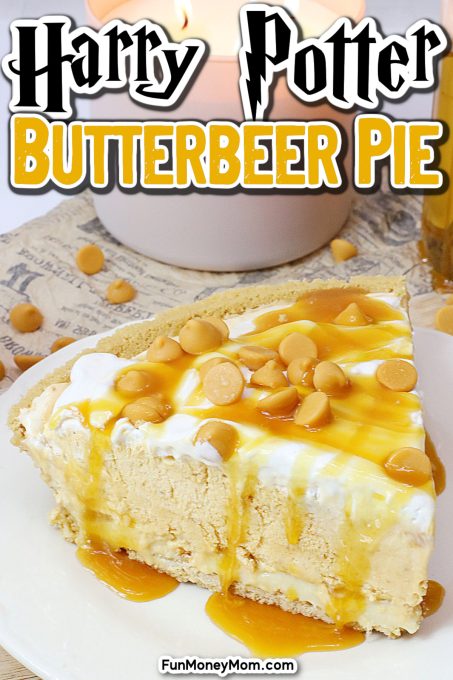
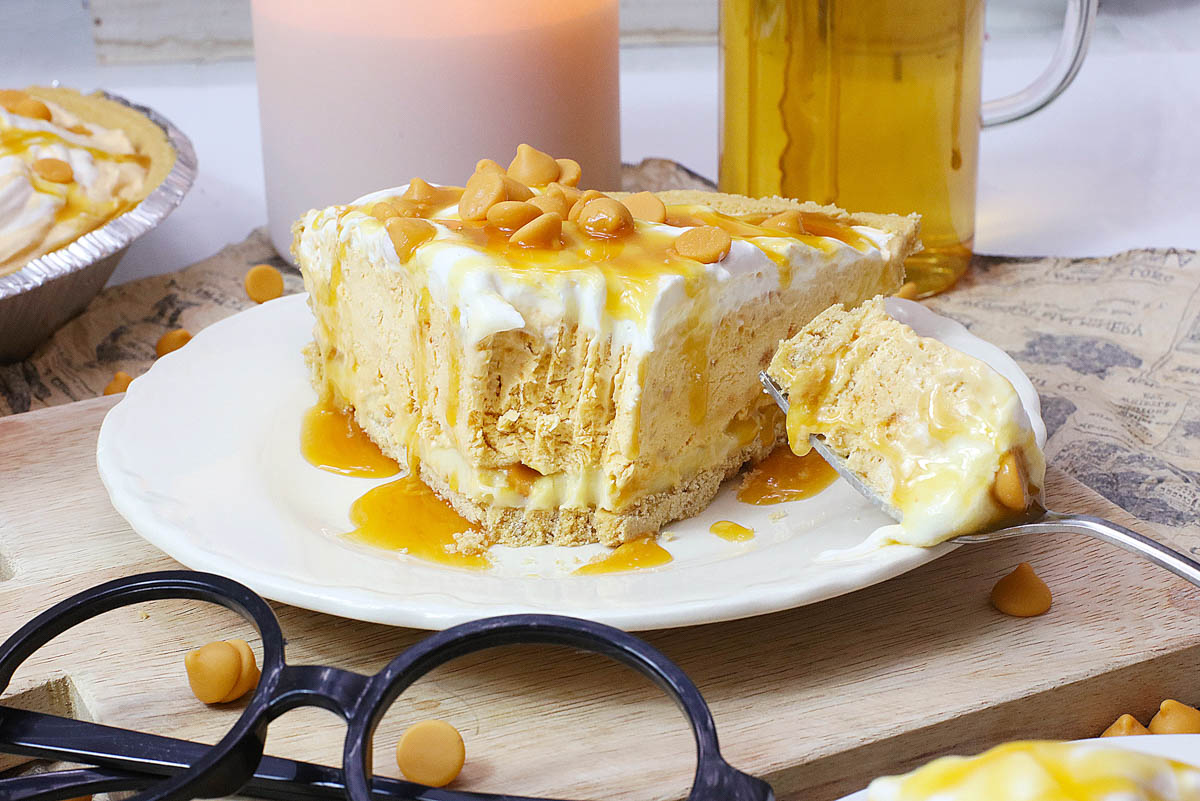
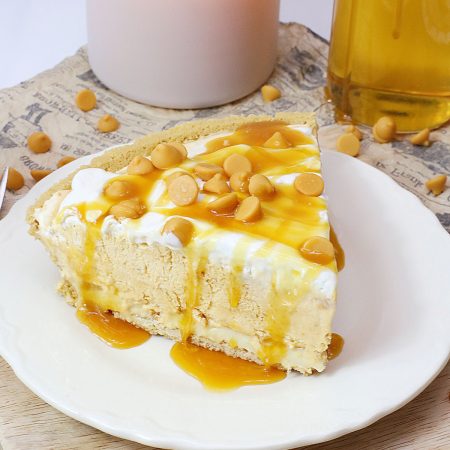
This magical Butterbeer Pie combines rich and creamy layers of butterscotch goodness with a buttery graham cracker crust. It’s the perfect easy dessert for the Harry Potter fans in your life.
Easy Butterbeer Pie Recipe
If you are a regular reader of my blog, you’ll know that we are big Harry Potter fans! From watching the movies to sipping on butterbeer at Universal Studios, we can’t get enough!
We also love making new Harry Potter recipes! Since summer is right around the corner, this no bake butterbeer pie seemed like the perfect treat. Inspired by the famous drink from the books and movie series, it’s our latest must try dessert for Harry Potter fans.
With a deliciously smooth and creamy texture and an irresistible butterscotch flavor, you’ll get a little bit of magic in every delicious bite. The best part? Because it’s a no-bake dessert, you can satisfy those butterbeer cravings all summer without ever having to turn on the oven.
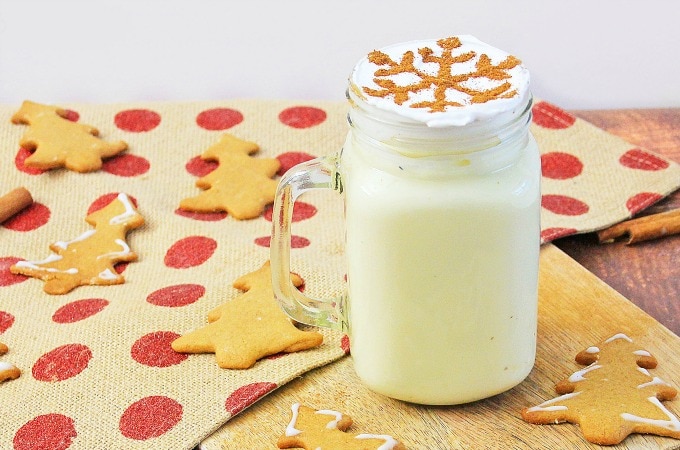
Want more cool recipes for summer? Try this Frozen Butterbeer Drink or our tasty Butterbeer Ice Cream!
Why We Love This Recipe
- Simple and decadent dessert: You can whip up this rich, no-bake treat in a matter of minutes, using just a few simple ingredients.
- Delicious flavor: This dessert is loaded with triple butterscotch flavor from the syrup, chips, and pudding.
- Great for any occasion: It makes a fantastic treat for a Harry Potter party, Halloween or even for a movie marathon.
Ingredients
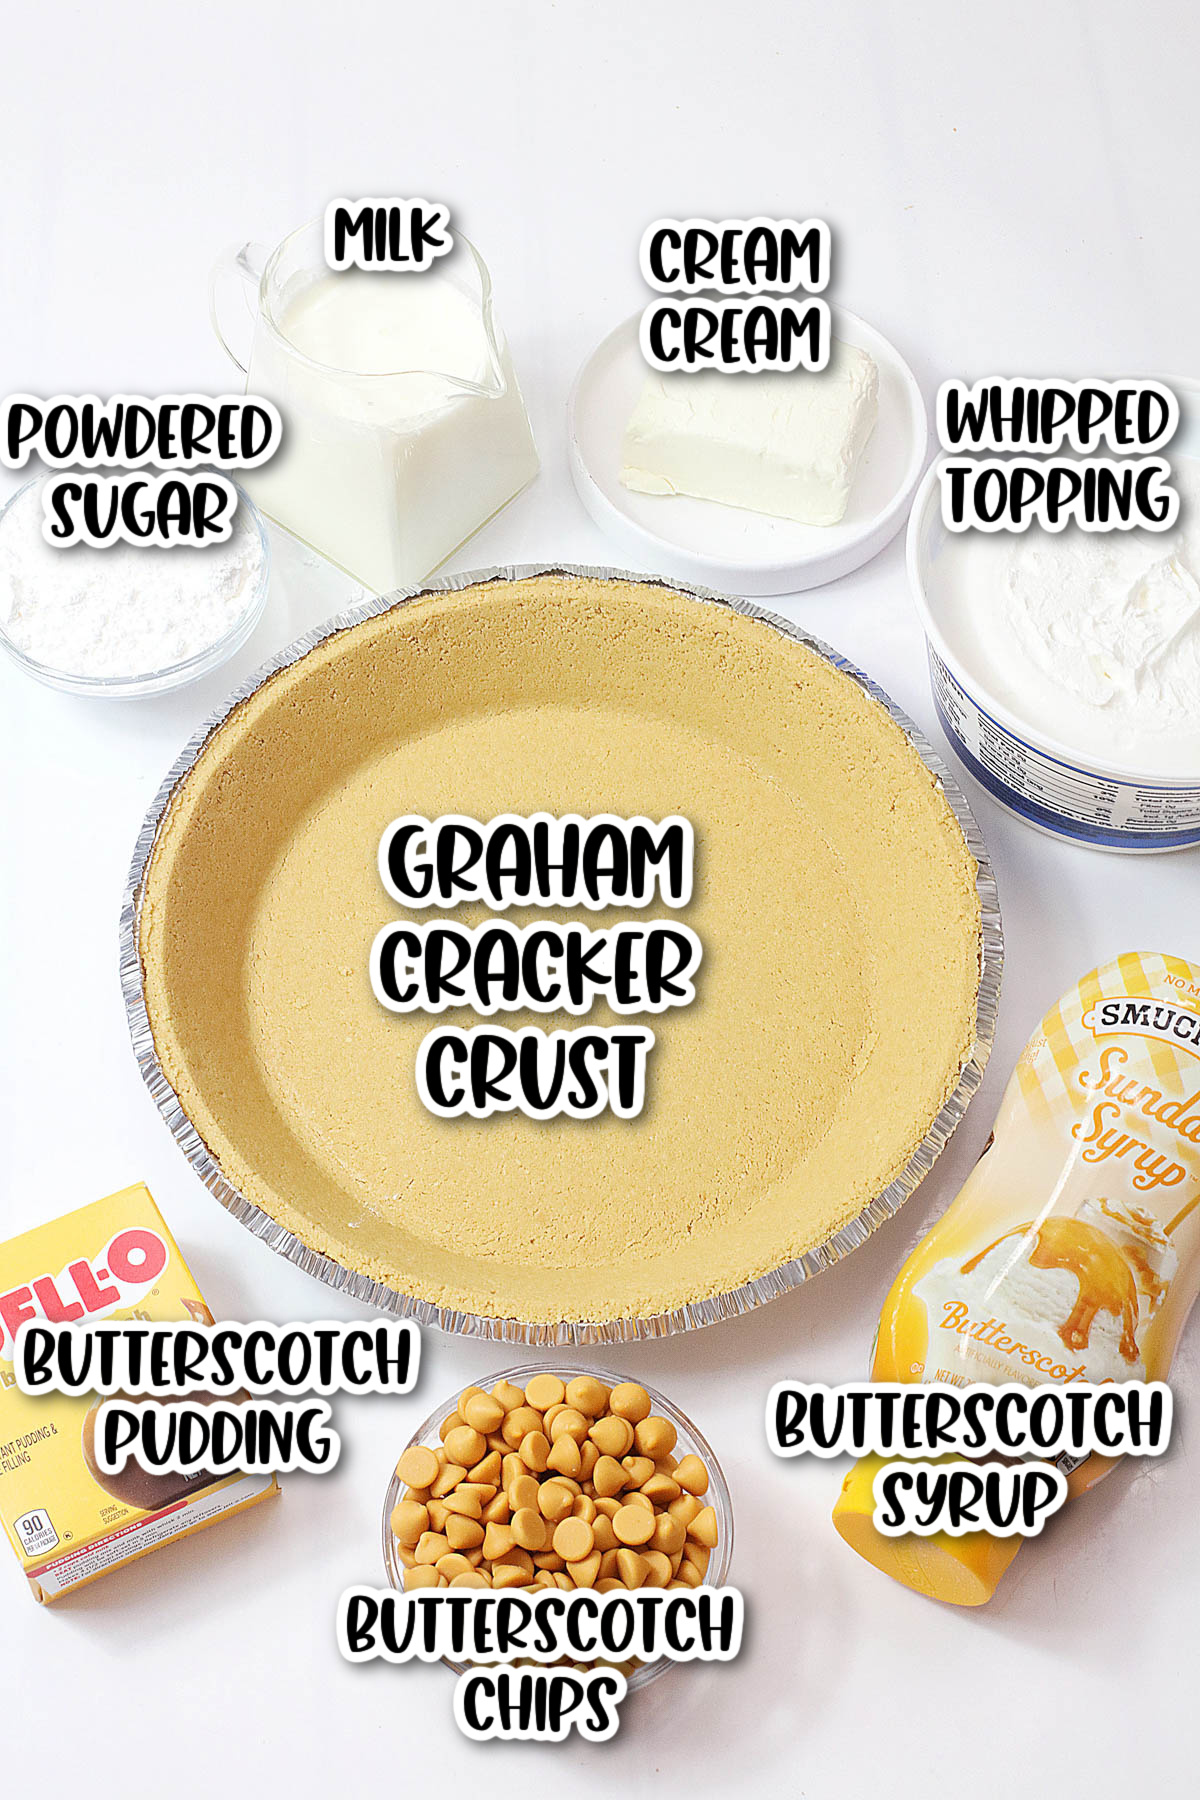
- Graham cracker crust, store-bought crust or you can use my graham cracker crust recipe
- Cream cheese, softened
- Powdered sugar
- Butterscotch syrup
- Butterscotch chips
- Butterscotch instant pudding mix
- Cold milk
- Whipped topping (Cool Whip), thawed
- Butter extract
How To Make No-Bake Butterbeer Pie
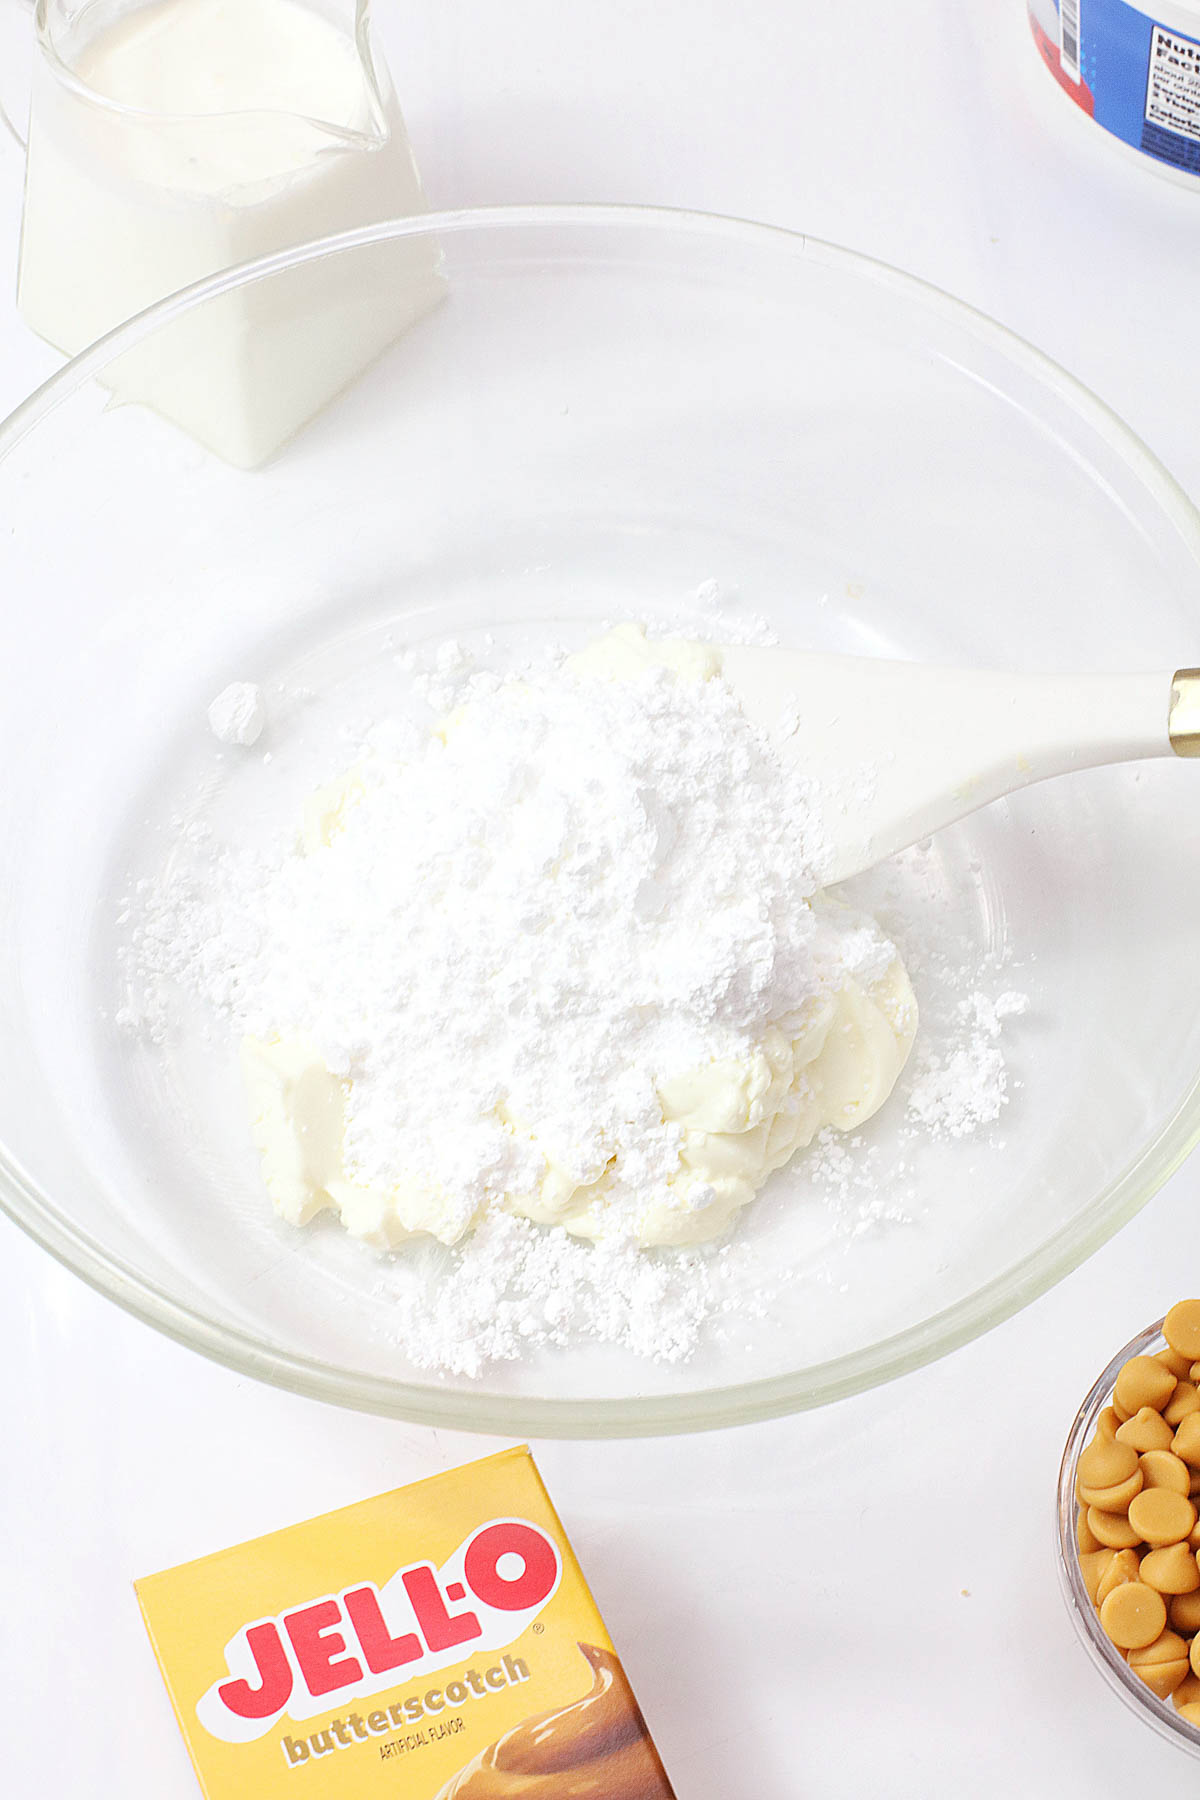
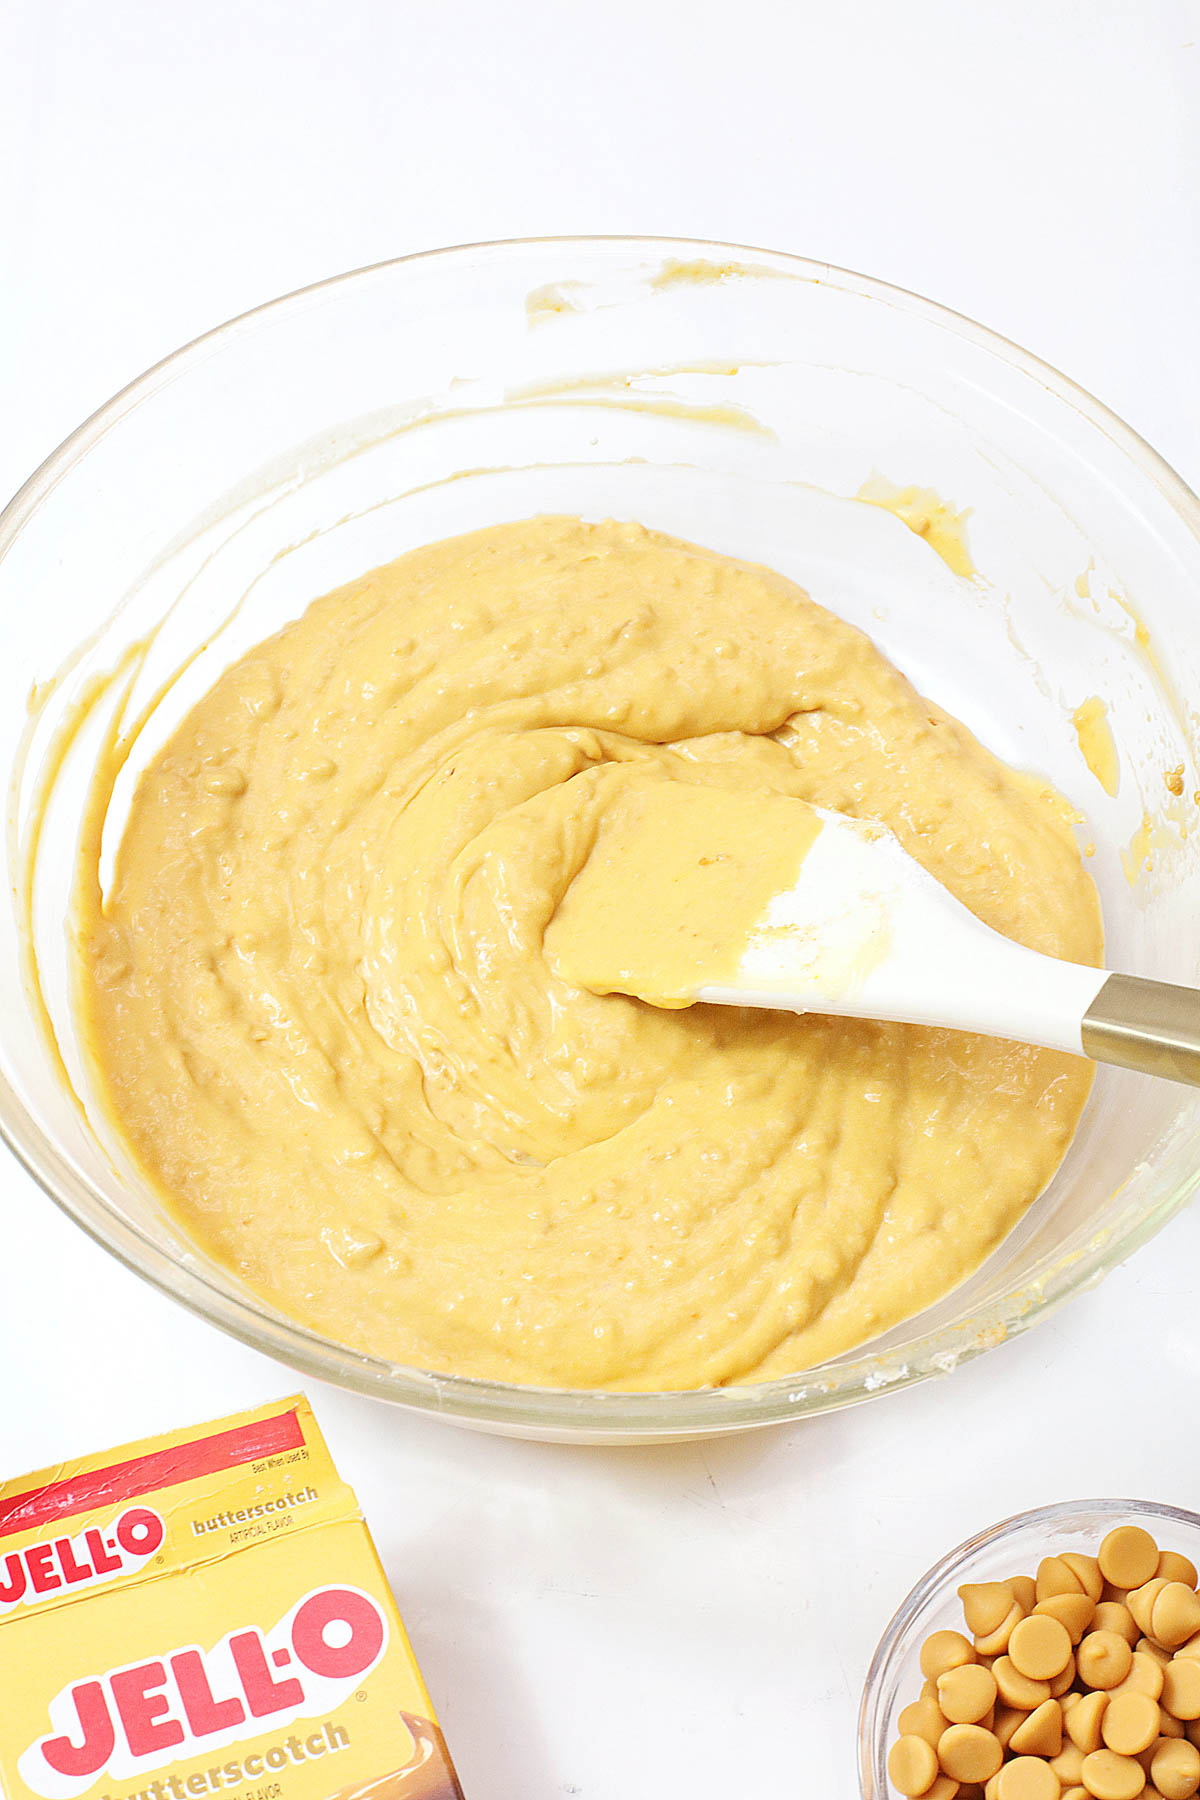
Step 1. In a large mixing bowl, beat the softened cream cheese and powdered sugar until smooth and creamy.
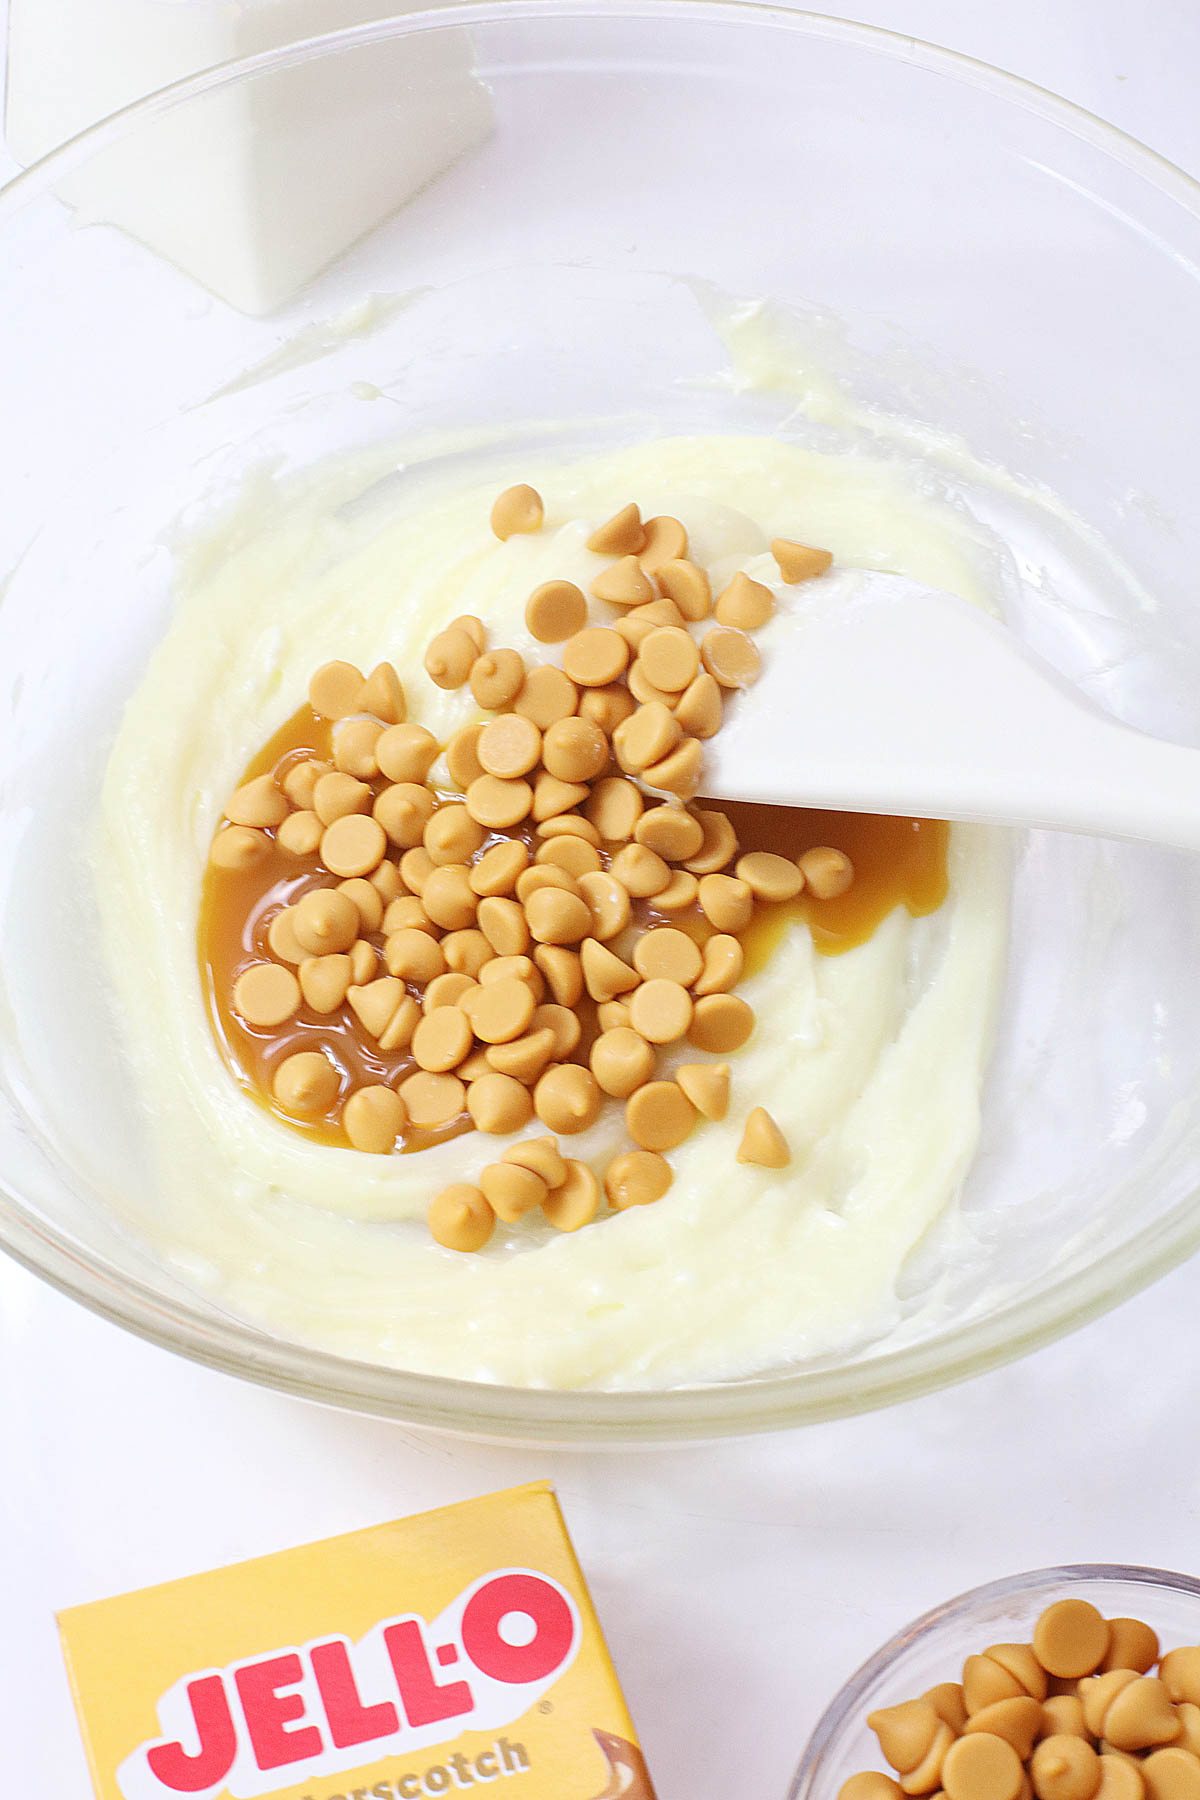
Step 2. Add the chips and half of the syrup. Mix until well combined.
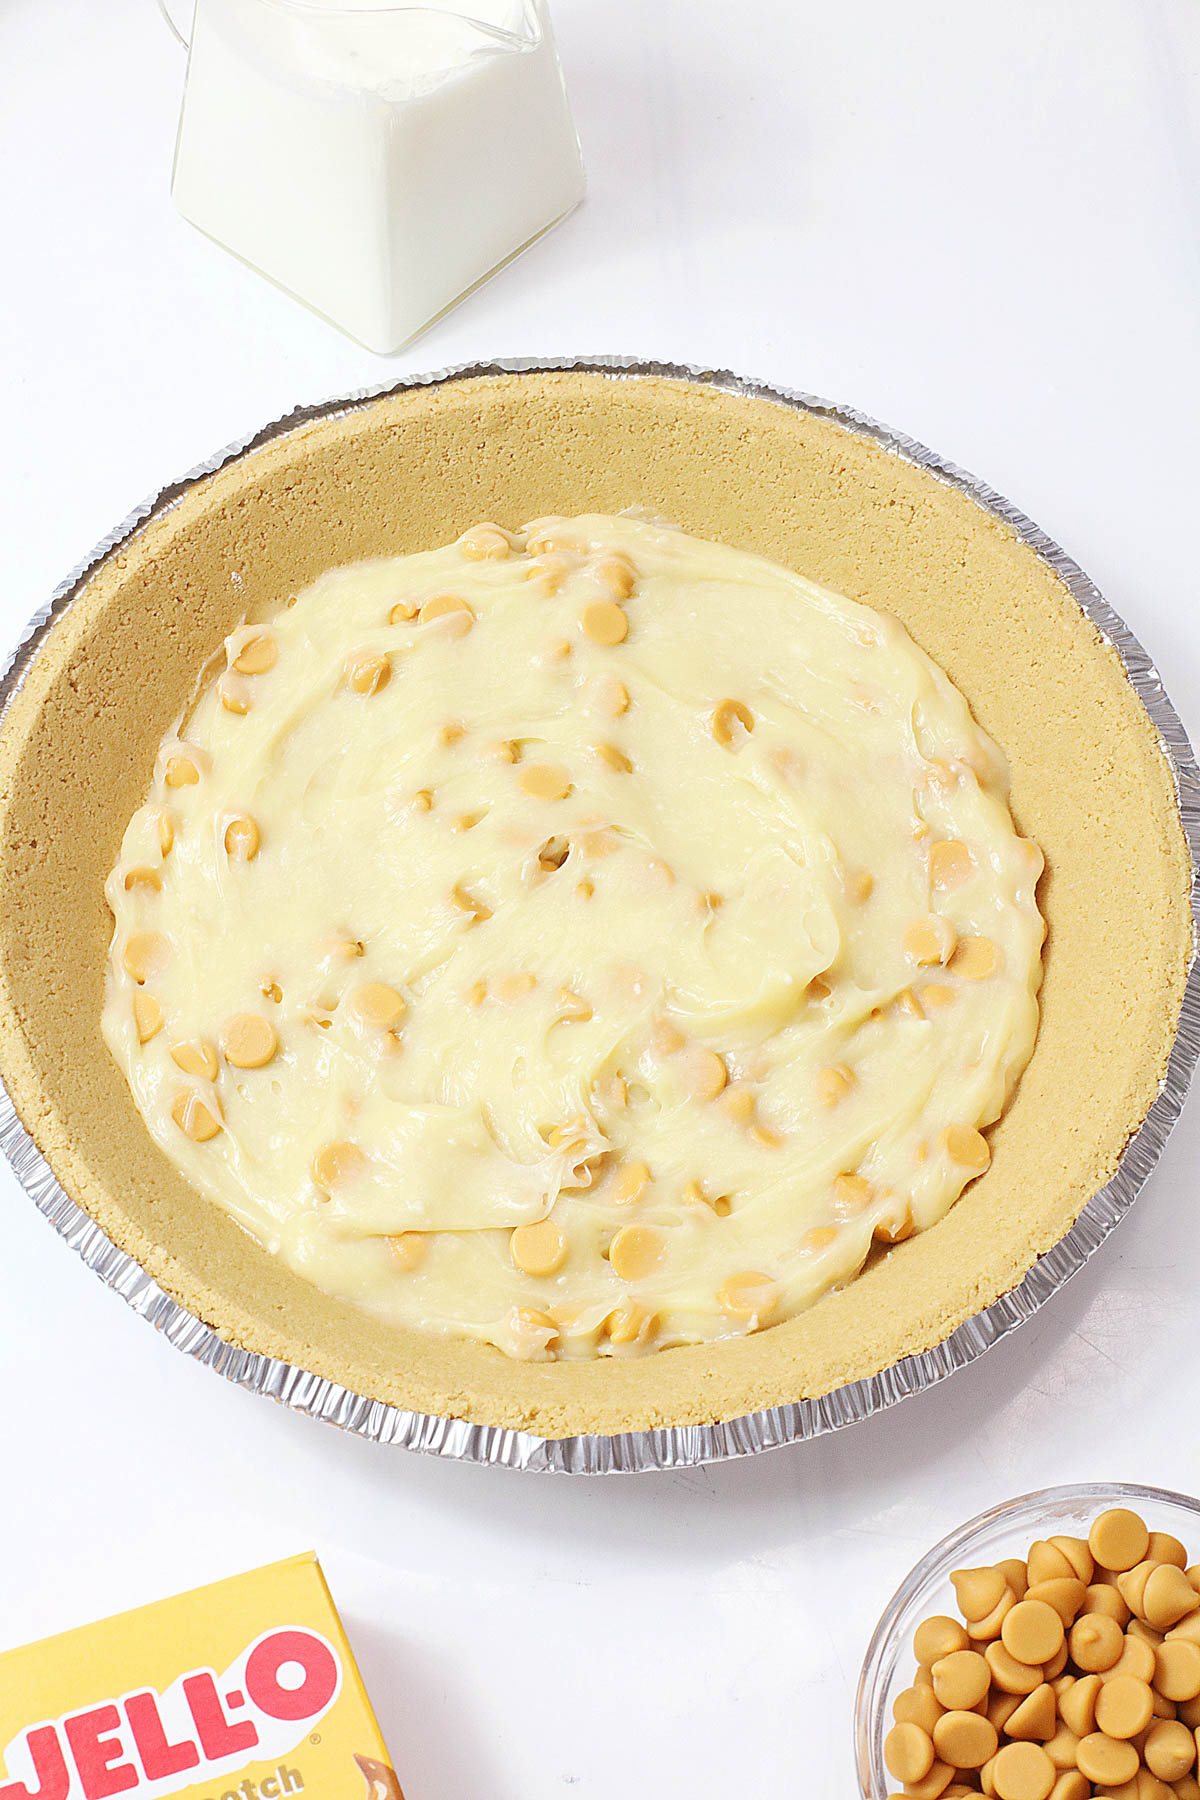
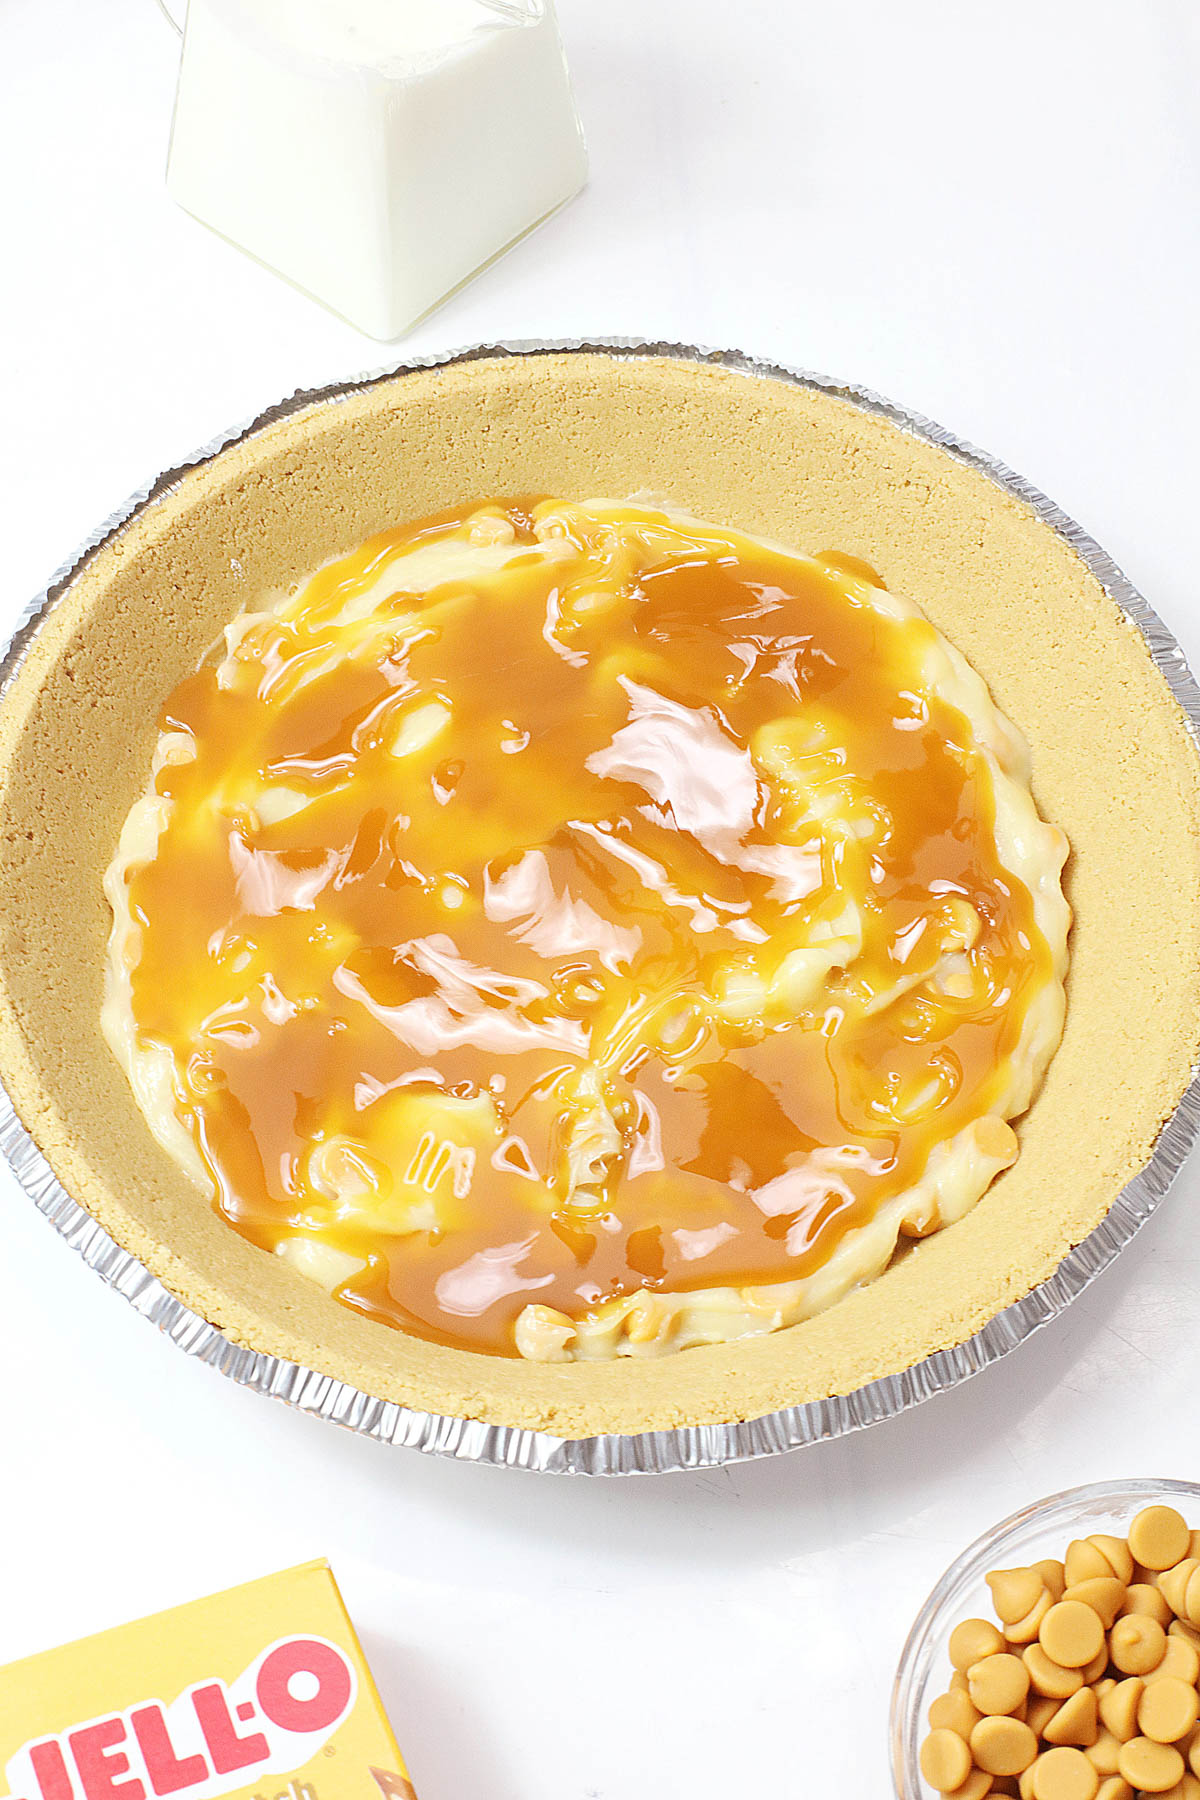
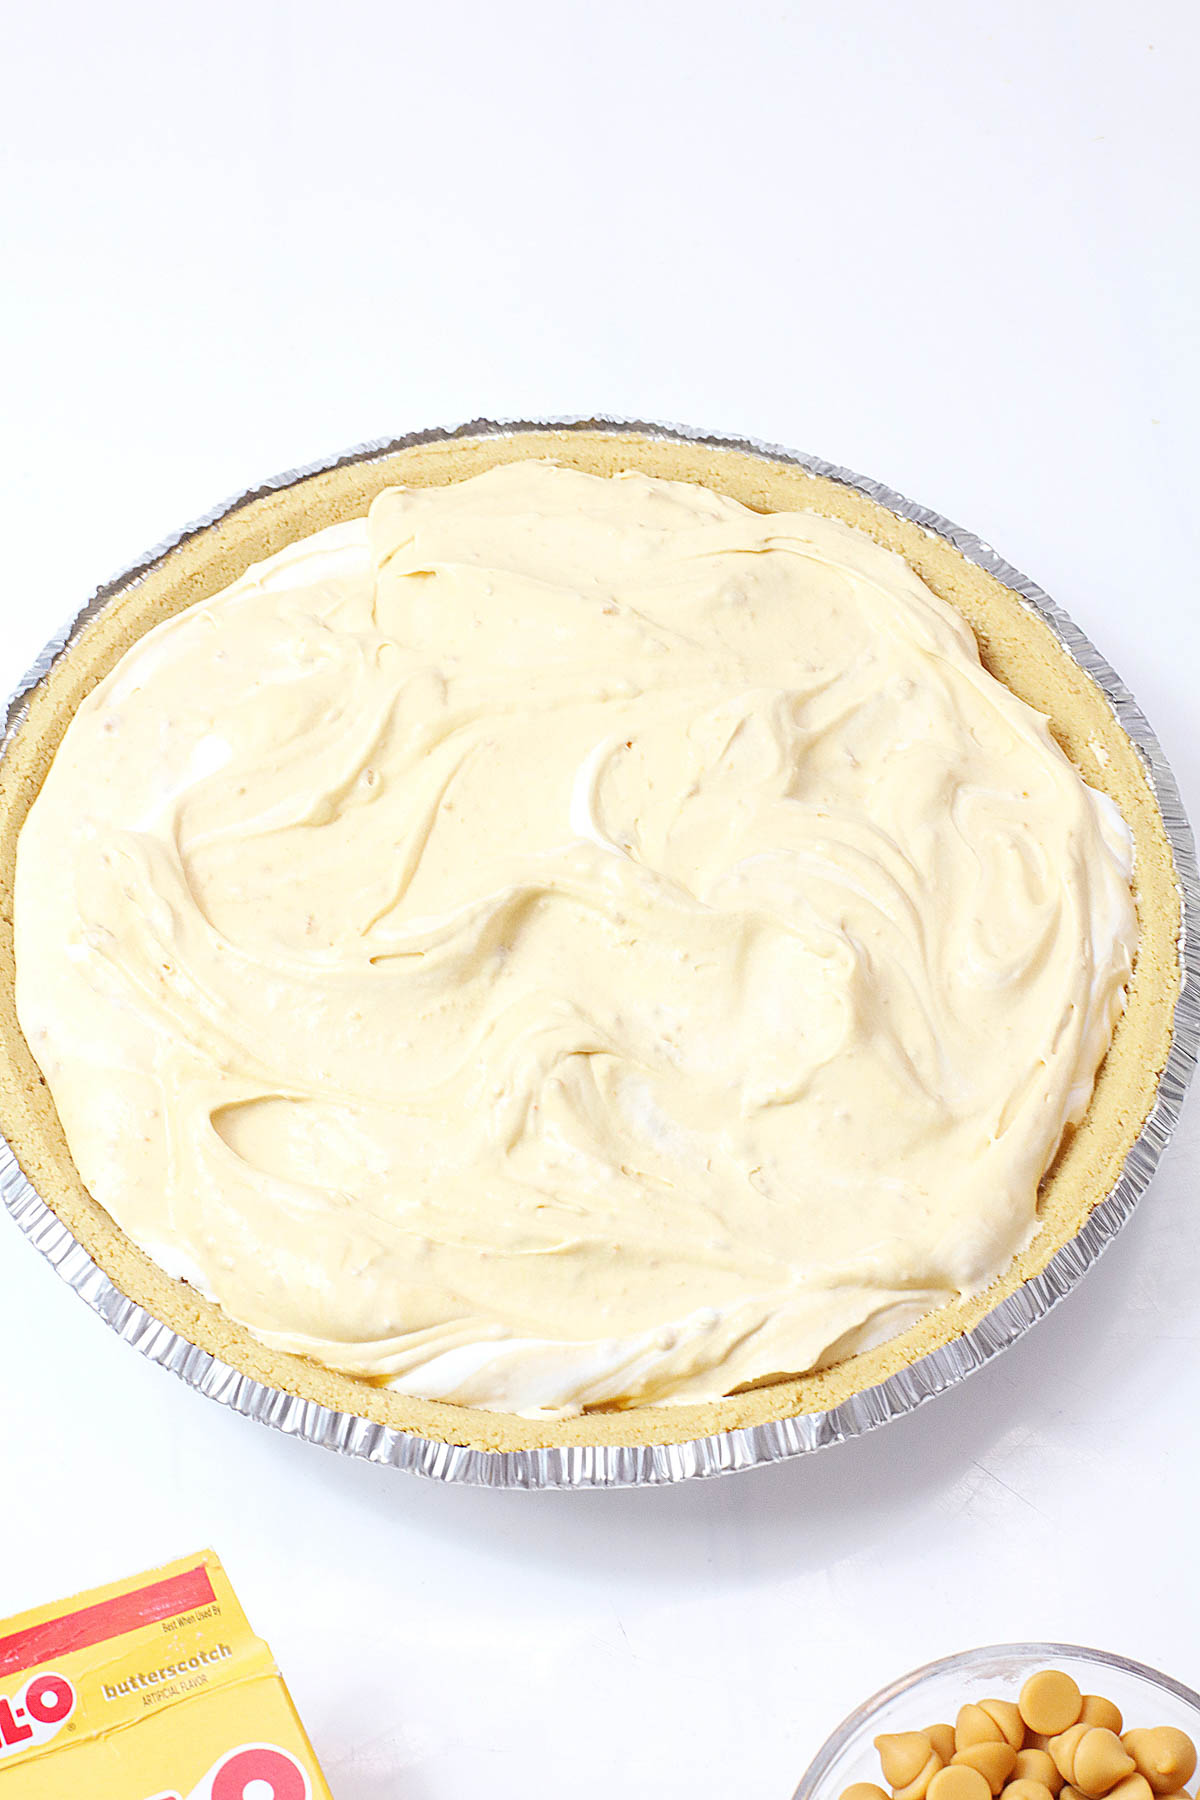
Step 3. Pour the cream cheese mixture into the prepared pie crust and smooth the top with
a spatula. Cover with the remaining syrup.
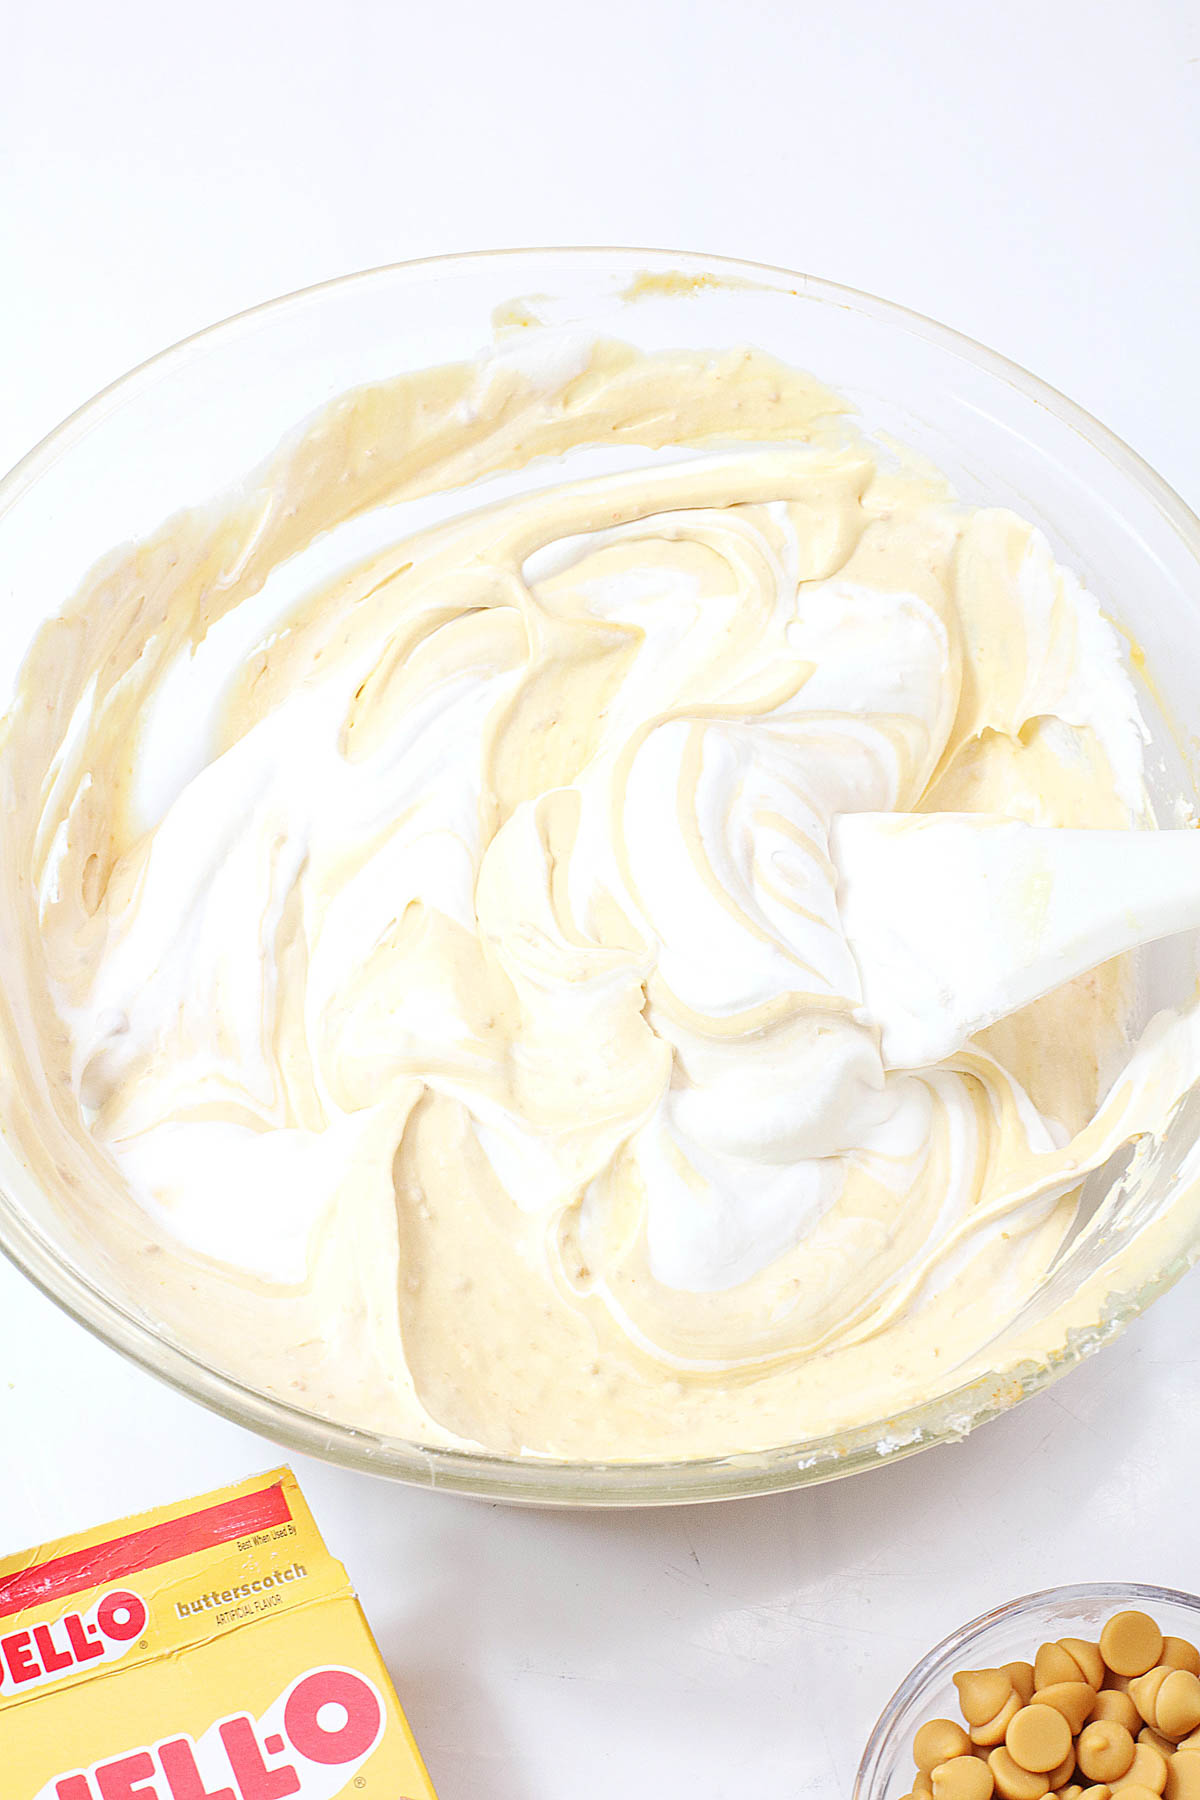
Step 4. Whisk the pudding mix and milk together in a medium bowl until smooth and thickened. Add a teaspoon of butter extract.
Step 5. Fold in the whipped cream (Cool Whip) until fully combined and fluffy.
Step 6. Spread the pudding mixture evenly over the cream cheese layer.
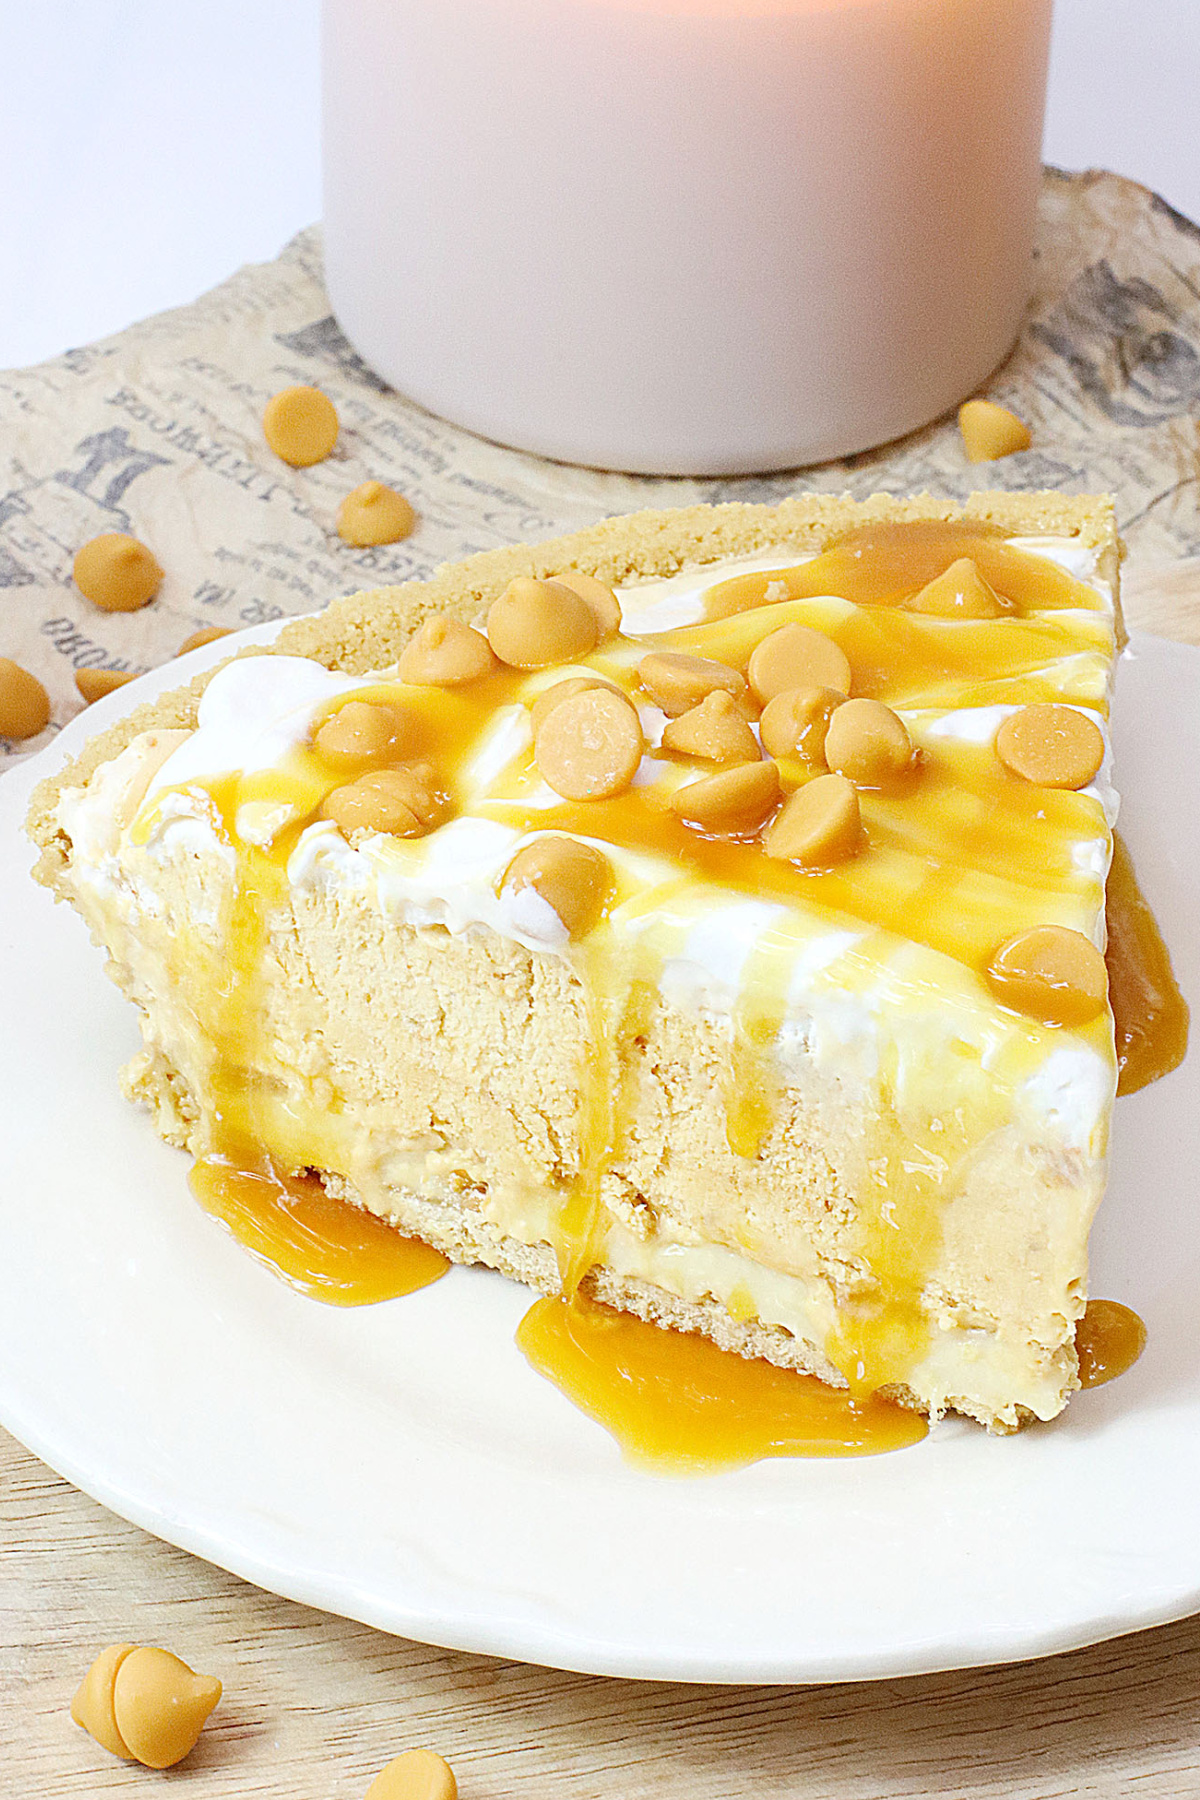
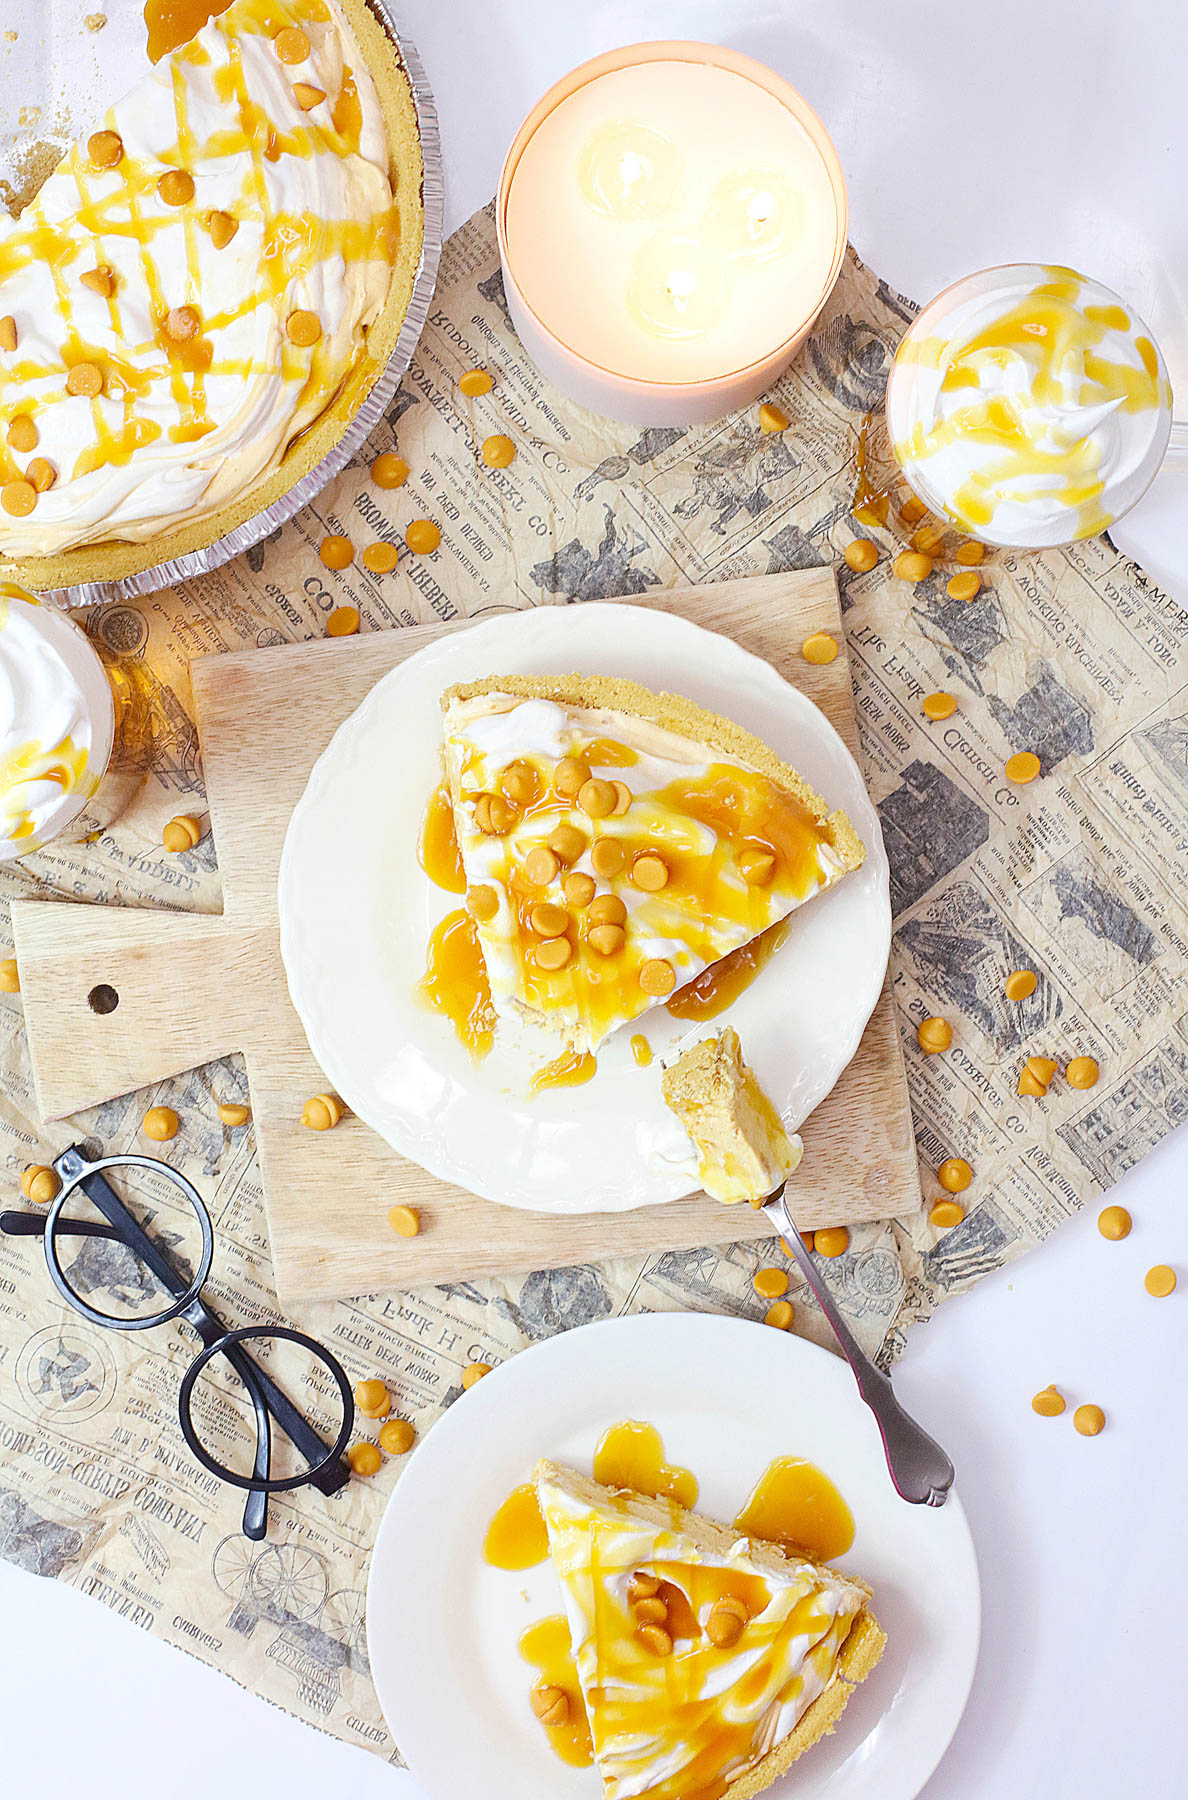
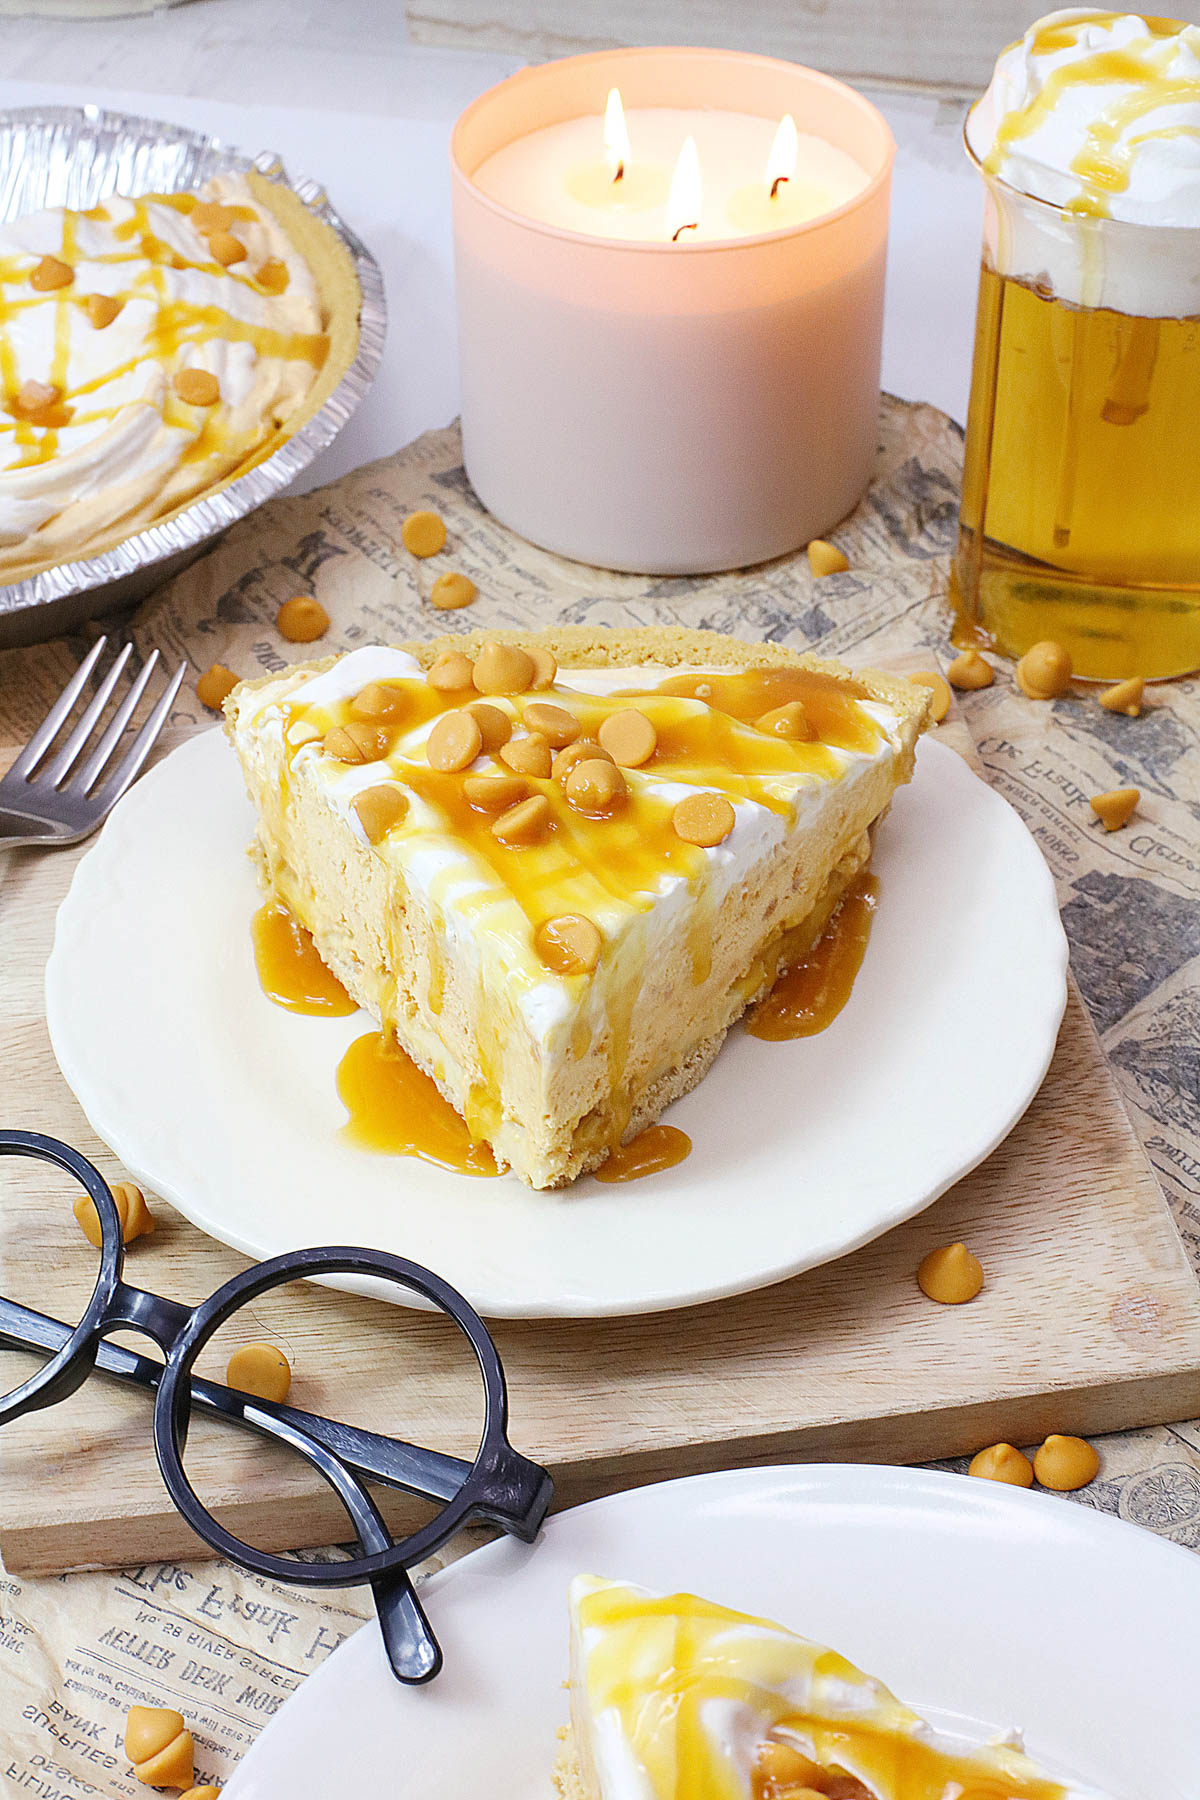
Step 7. Sprinkle the top of the pie with more chips and an extra drizzle of syrup.
Step 9. Refrigerate for at least 2 hours, or until the filling is set and the pie is chilled. Once set, slice into individual servings and serve.
Storage Instructions
- Fridge: Place the pie in an airtight container or cover it tightly with plastic wrap. Store it in the refrigerator for up to 3–4 days.
- Freezer: If you want to store it for a longer period, wrap it securely in plastic wrap and then in a layer of foil to prevent freezer burn. Store it in the freezer for up to 1–2 months. Before serving, thaw overnight in the refrigerator.
Variations and Add-ins
- Chocolate Swirl: Swirl melted chocolate into the cheesecake batter before chilling for a delicious chocolatey twist.
- Chocolate crust: You can use a chocolate pie crust instead of a graham cracker one for a different flavor and texture.
- Nuts: Add chopped nuts like pecans or walnuts to the filling for little bites of crunchiness.
- Caramel syrup: If you can’t find butterscotch syrup, you can always use caramel syrup instead.
- Marshmallow Creme: Add a little marshmallow creme to the Cool Whip mixture for extra sweetness.
- Whipped cream: Top the cheesecake with a dollop of stabilized whipped cream and extra Graham cracker crumbs.
- More Fun Garnish: If you’re making this for a party, feel free to add a few gold sprinkles. You can also pick up some yellow fondant and cut out a lightning bolt shape to top the pie.

FAQs
Absolutely! You can make this pie several days in advance and store it in the fridge.
Sure! Simply divide the crust and filling mixture among individual Graham cracker pie crusts and chill.
Not exactly but close. The drink is usually made with cream soda and a little less butterscotch flavor. It’s equally delicious, though.
More Butterbeer Recipes
- Butterbeer Pancakes
- Butterbeer Cookies
- Butterbeer Fudge
- Butterbeer Cupcakes
- Butterbeer Poke Cake
- Butterbeer Ice Cream
- Butterbeer Shots
- Butterbeer Poke Cake
- Butterbeer Jello Shots
Butterbeer Pie
Ingredients
- 4 ounces cream cheese softened
- 1/2 cup powdered sugar
- 1/4 cup butterscotch syrup separated
- 1/2 cup butterscotch chips
- 1 graham cracker crust
- 3.4 ounces butterscotch instant pudding mix 1 box
- 1 1/2 cups cold milk
- 1 tsp butter extract
- 8 ounces Cool Whip thawed
- Extra butterscotch chips and syrup for garnish
Instructions
- In a large mixing bowl, beat the softened cream cheese and powdered sugar until smooth and creamy.4 ounces cream cheese, 1/2 cup powdered sugar
- Add the butterscotch chips and half of the butterscotch syrup and mix until well combined.1/4 cup butterscotch syrup, 1/2 cup butterscotch chips
- Pour the cream cheese mixture into the graham cracker crust and smooth the top with a spatula. Cover with the remaining butterscotch syrup.1 graham cracker crust, 1/4 cup butterscotch syrup
- Whisk the pudding mix and cold milk together in a medium bowl until smooth and thickened.3.4 ounces butterscotch instant pudding mix, 1 1/2 cups cold milk
- Add a teaspoon of butter extract and mix well.1 tsp butter extract
- Fold in the whipped cream (Cool Whip) until fully combined and fluffy.8 ounces Cool Whip
- Spread the pudding mixture evenly over the cream cheese layer.
- Sprinkle the top of the pie with more butterscotch chips and an extra drizzle of syrup.
- Refrigerate for at least 2 hours, or until the filling is set and the pie is chilled. Once set, slice into individual servings and serve.
Notes
Nutrition
Did You Make This Recipe?
Share it with me on Instagram @funmoneymom and follow on Pinterest @funmoneymom for more!
Let’s be friends!
Did you love this post? Make sure to comment below and let me know your thoughts! And don’t forget to follow on your favorite social network below!

About Lisa O’Driscoll
Lisa O’Driscoll is a lifestyle and parenting expert, cookbook author, and the creative force behind Fun Money Mom, a popular blog she’s run since 2014. She’s the author of the children’s cookbook Roll It, Slice It, Mash It, Dice It, designed to get kids excited about cooking. With multiple TV appearances under her belt, she loves sharing her expertise on family-friendly recipes, creative DIYs, and party planning and is always on a mission to inspire and entertain!