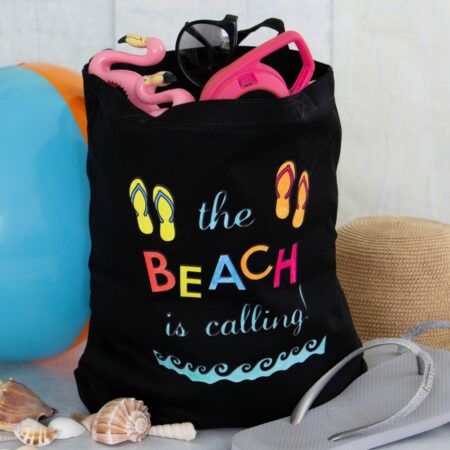
DIY Beach Bag With Heat Transfer Vinyl
This post may contain affiliate links. As an Amazon Associate, I earn from qualifying purchases.
Planning to hit the beach this summer? You’ll want to bring along this super cute DIY Beach Bag. Just turn on your Silhouette Cameo and grab some heat transfer vinyl and you’re ready to roll!
I received a Silhouette Cutting Machine and Artesprix Sublimation markers in exchange for sharing how I use their products to get creative. As always, all opinions are 100% my own.
I’ve wanted a Silhouette Cameo for the longest time! My friends have been using them to make the coolest stuff and the more I saw, the more I knew I had to have one! I’ve always had loved crafting and have made everything from DIY coasters to coastal themed trays. However, I knew a Cameo would take my crafting up a few notches and I was ready!
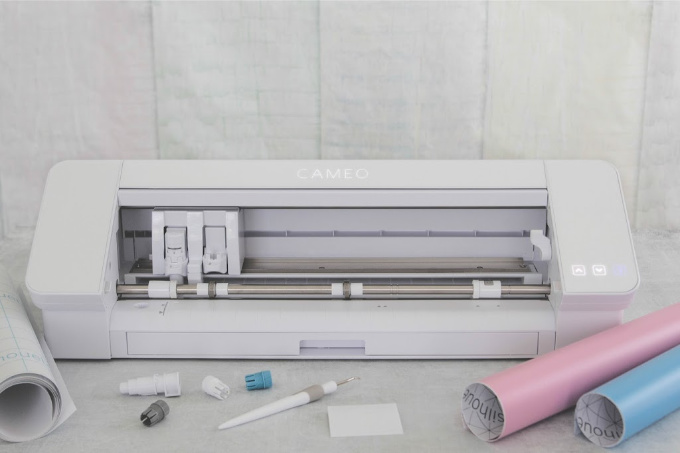
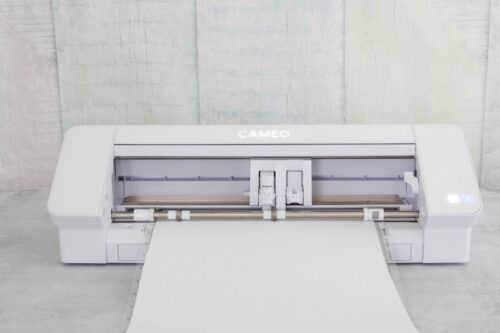
I was beyond excited when my Silhouette Cameo 4 arrived! Setup was easy and I love that it works via bluetooth too. That lets me place it where ever I want without having to worry about cords getting in the way.
Another thing I really like about the Cameo 4 is that I can use my own markers. Other brands make you use their markers but Silhouette has a pen adapter that can be used with almost any pen or marker you want. I’ve been doing a lot with Artesprix sublimation markers lately and I love being able to use them with my Cameo.
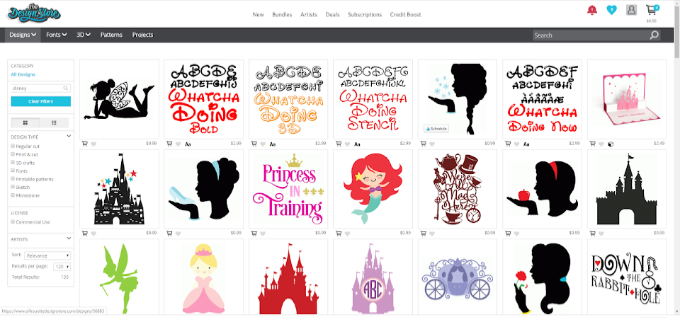
The Silhouette Store is pretty awesome too. There are so many great designs that sometimes I have trouble narrowing it down! The store is filled with images, fonts, patterns and even 3D designs, many as inexpensive as 99¢. There are even free ones available (my favorite price!). Because I’m such a big Disney fan, I had to check out their Disney related products first!
The real beauty of having a Silhouette Cameo is that I can use it to create so many different kinds of crafts! There’s a bit of a learning curve but it’s gotten a lot easier as I go. I started off with simple projects like a makeup bag and a grilling apron but can’t wait to make more.

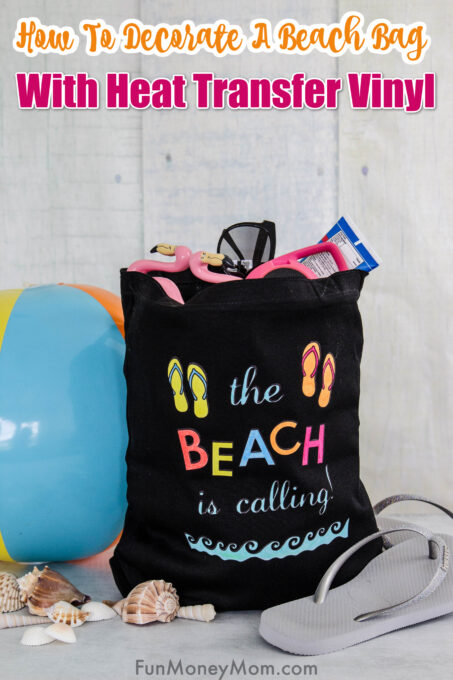
Since my family and I have been daydreaming about going back to the beaches when they reopen, I’ve had beach gear on the brain, specifically beach bags. I already have a big bag but by the time I squeeze all our gigantic beach towels in, there’s not much room for anything else.
DIY Beach Bag
That’s why I wanted to make smaller individual beach bags for my girls. They’d be able to fill them with their favorite snacks, drinks and beach toys. Even better, it lightens the load for me! These bags may be smaller, but this tutorial works just as well for large beach bags too. When we visited Crystal River, Florida, these bags would have definitely come in handy. If you have never been, check out this article on the 10 Best Things to Do in Crystal River.
Just grab some heat transfer vinyl, Artesprix Sublimation Markers and a few other supplies to make a cute beach bag of your own!
DIY Beach Bag
Equipment
- Artisprix Sublimation Markers
- Silhouette Cameo 4
- Heat press, dry iron or home iron
- Weeding tools
- Silhouette pen adapter
Materials
Instructions
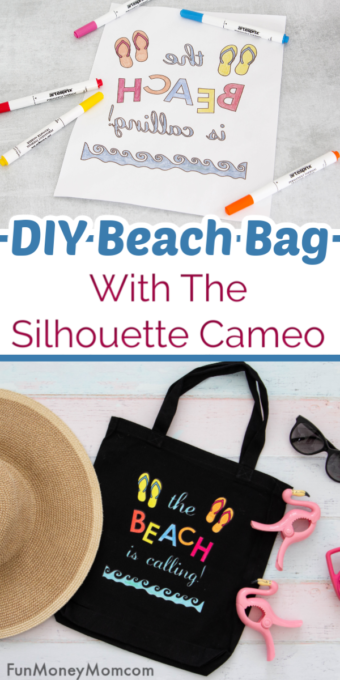
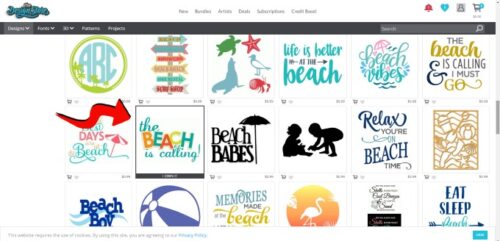
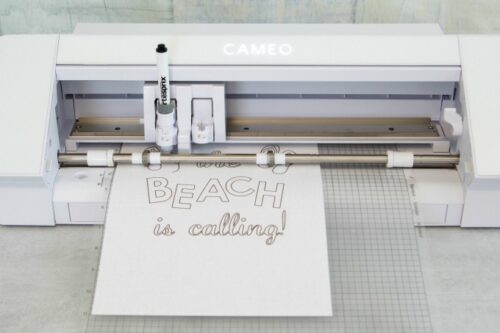
- Start by finding a design that you like in the Silhouette store. I chose this one.

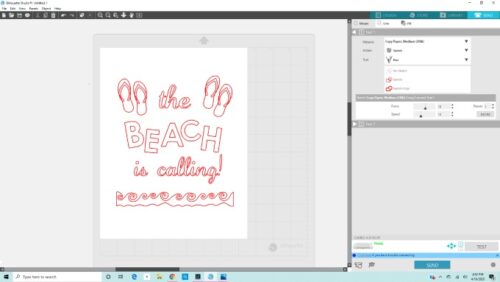
- I also added some extras like flip flops and waves. Once you’ve got the designs you want, arrange them in the Silhouette Studio.

- Insert the heat transfer vinyl into your Cameo and cut your design. This image doesn’t need to be mirrored.

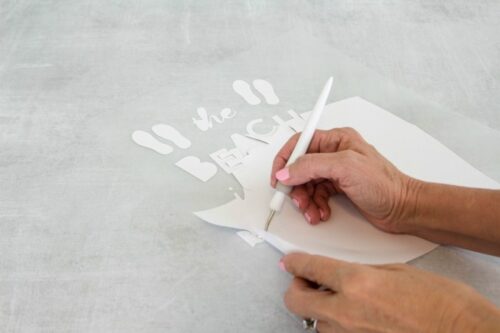
- Use your weeding hook to peel away the extra vinyl (your actual design should remain attached to the plastic backing).
If you are creating a design that can be peeled in one piece, you can skip this next step and just peel and place your vinyl on the bag. - Lay your design on a hard surface and place a transfer mask over the top. Use your scraper to apply firm pressure over the top of the mask.
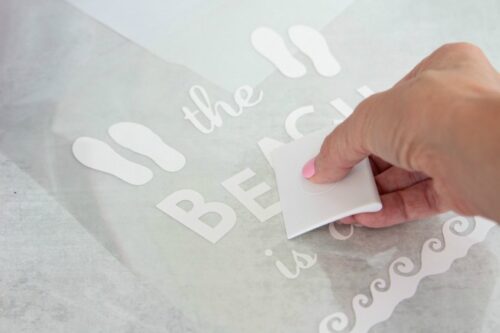
- Once the design is firmly attached to the mask, slowly peel it away and set aside.
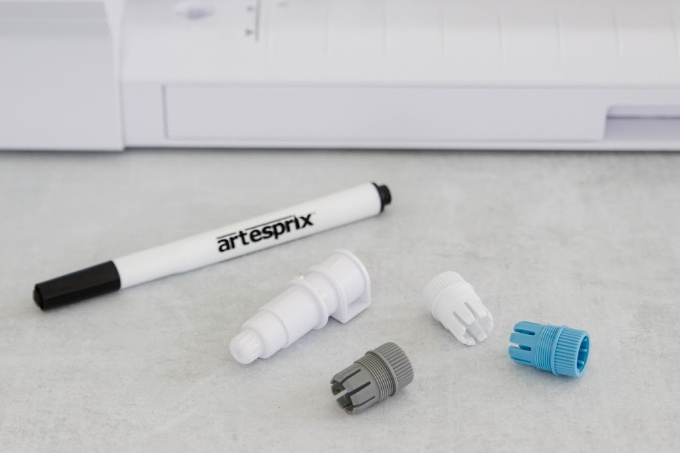
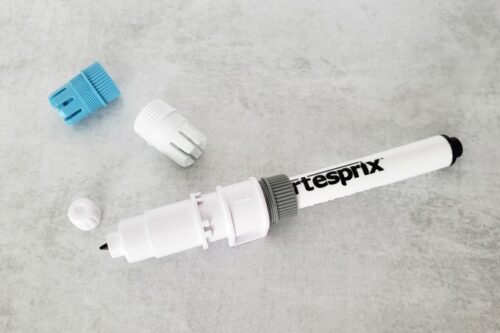
NOTE: If you are using Easy Subli vinyl, you will have use the Siser easy mask. The Easy Subli design won’t stick to other masks. - Next, remove the cap from a black Artisprix marker (fine point works best) and insert the pen into the gray adapter. Slide the gray adapter into the larger white piece and twist firmly into place. Take the small white cap off the end to expose the tip.
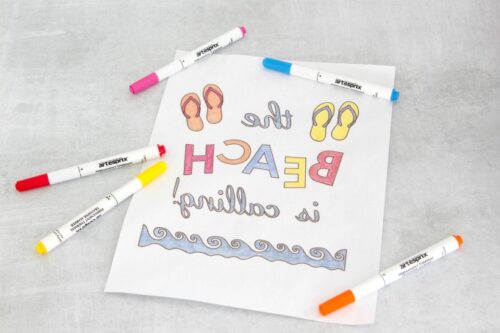
- Remove the cutting tool from the Cameo and insert the pen. Be sure to mirror your image first, then draw.
- Now comes the best part…coloring! If you think coloring is just for kids, you obviously haven’t done it for awhile. It’s really fun for grown-ups too! I used some of the colors from the Artisprix original 10 pack but also pulled the Seafoam marker from the pastel set.
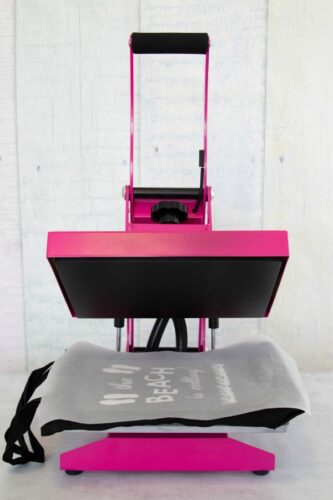
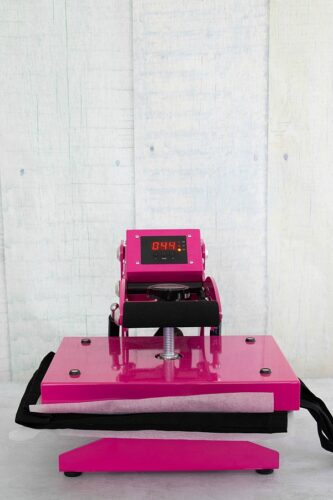
Don’t worry if the colors look a little dull. Because these are sublimation markers, the colors will really stand out after you apply the heat. - Set your heat press to 310°. Once it’s hot, place the tote bag in the heat press for 30 seconds on each side to wick out any moisture.
- Now add your design, with mask, to the tote bag (the mask is heat resistant).

- Place a sheet of protective paper on the heat press, the tote bag on top and another protective sheet on top of that. Basically you’re creating a sublimation sandwich, with the protective paper being the bread and the tote bag being the cheese.
- Heat for 15 seconds. Remove from heat and peel the mask while it’s still warm.
- Raise the temperature of the heat press to 400°
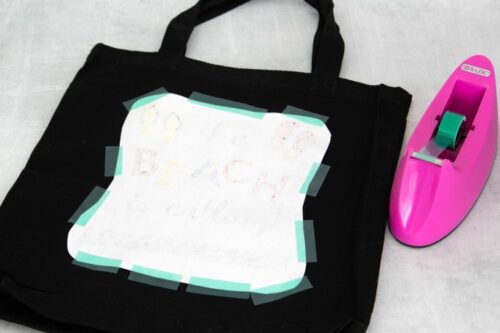
- Trim the colored design and very carefully line it up with the vinyl (colored side will be down). Tape firmly in place with heat tape.
- Place the tote bag in between two sheets of protective paper (you can reuse the same ones) and heat at 400° for 60 seconds.
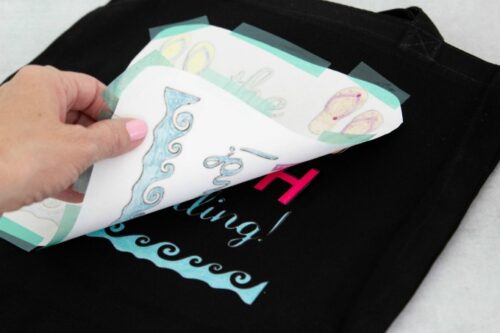
- Remove from heat and let cool for a few seconds. Pull the paper back to reveal the design underneath.

Did You Make This Project?
Share it with me on Instagram @funmoneymom and follow on Pinterest @funmoneymom for more!
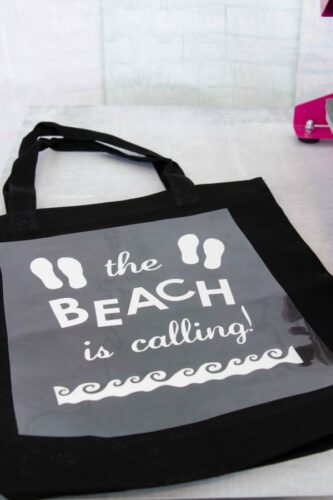
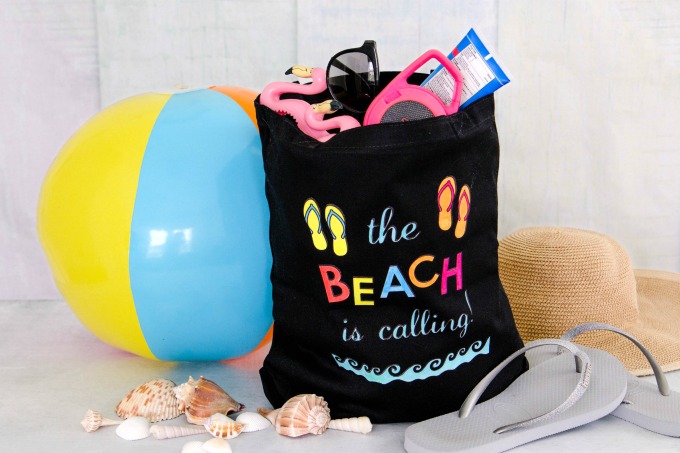
I love this bag so much that now I kind of want to keep it for myself! Is that bad? I may just have to make an extra one!

You can change up the design to fit whatever theme you want. Now all that’s let is filling it full of Best Snacks for Summer and some other beach essentials and you’re ready to go.
You can also use these bags for travel! Add passports and airplanes to create a travel bag or even fruits and veggies to make a reusable grocery bag. There are so many options, and you can get really creative with it!
Do you have a Silhouette Cameo? What are some fun things that you’ve made with it?
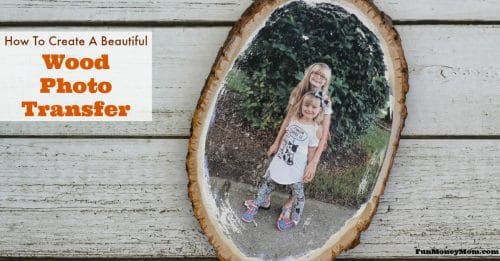
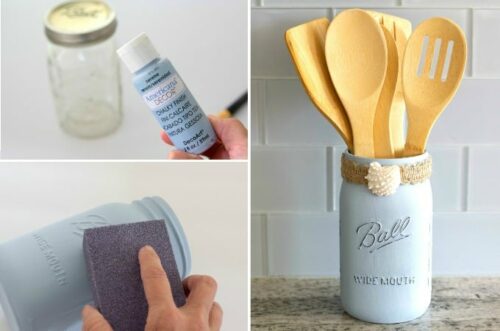
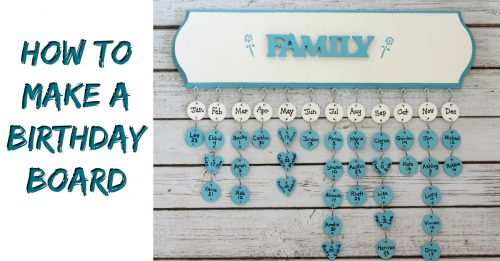
If you love getting crafty, you may want to check out these fun ideas too…
Let’s be friends!
Did you love this post? Make sure to comment below and let me know your thoughts! And don’t forget to follow on your favorite social network below!

About Lisa O’Driscoll
Lisa O’Driscoll is a lifestyle and parenting expert, cookbook author, and the creative force behind Fun Money Mom, a popular blog she’s run since 2014. She’s the author of the children’s cookbook Roll It, Slice It, Mash It, Dice It, designed to get kids excited about cooking. With multiple TV appearances under her belt, she loves sharing her expertise on family-friendly recipes, creative DIYs, and party planning and is always on a mission to inspire and entertain!