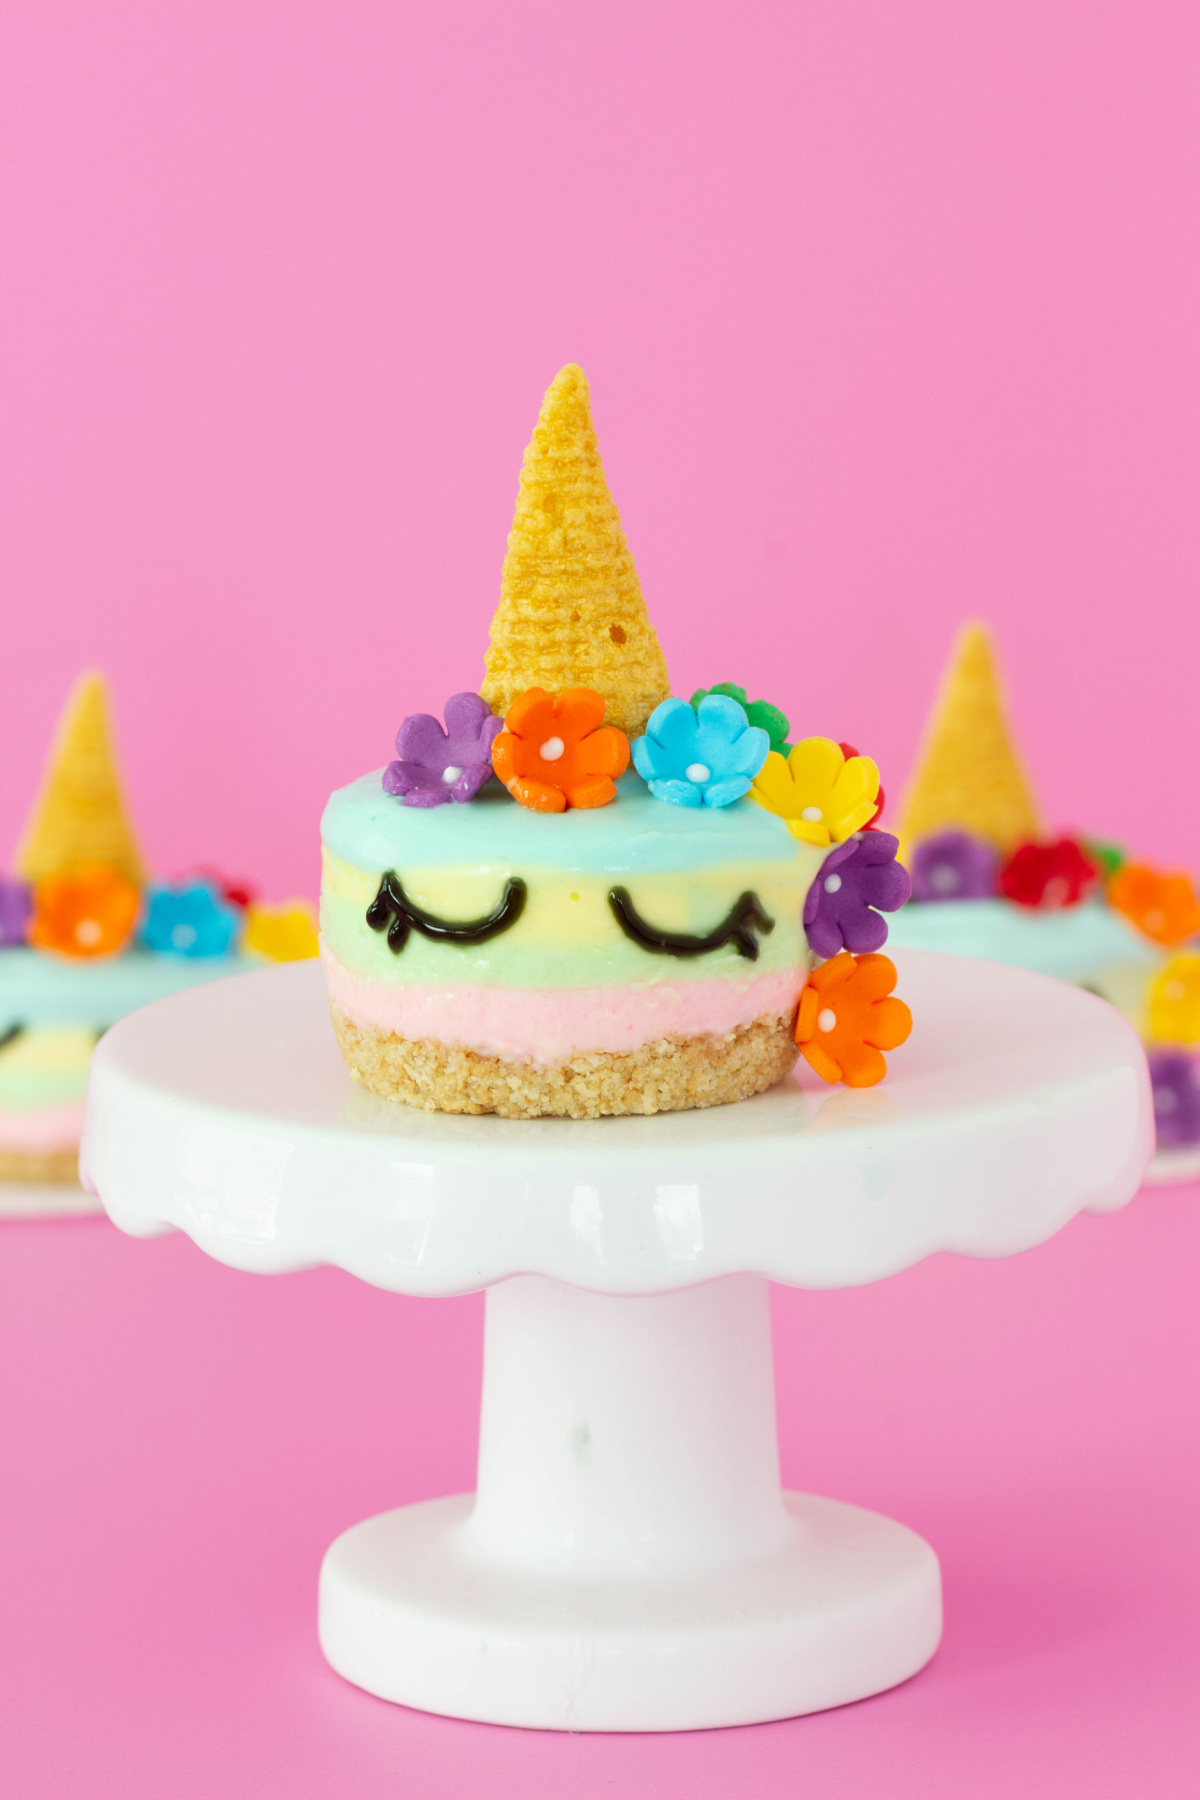
Bite Size Unicorn Cheesecakes
This post may contain affiliate links. As an Amazon Associate, I earn from qualifying purchases.
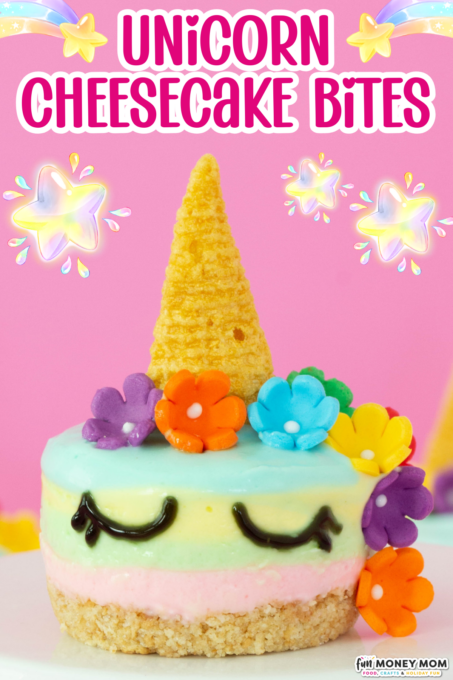
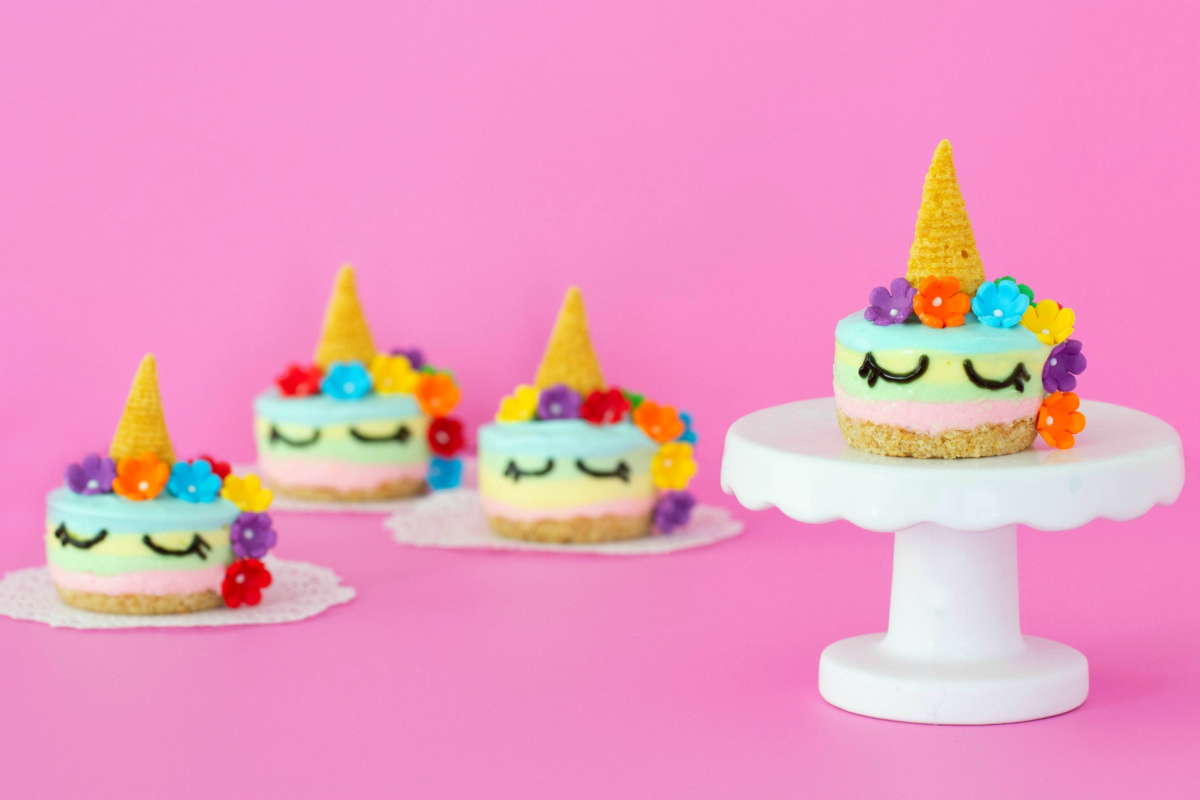
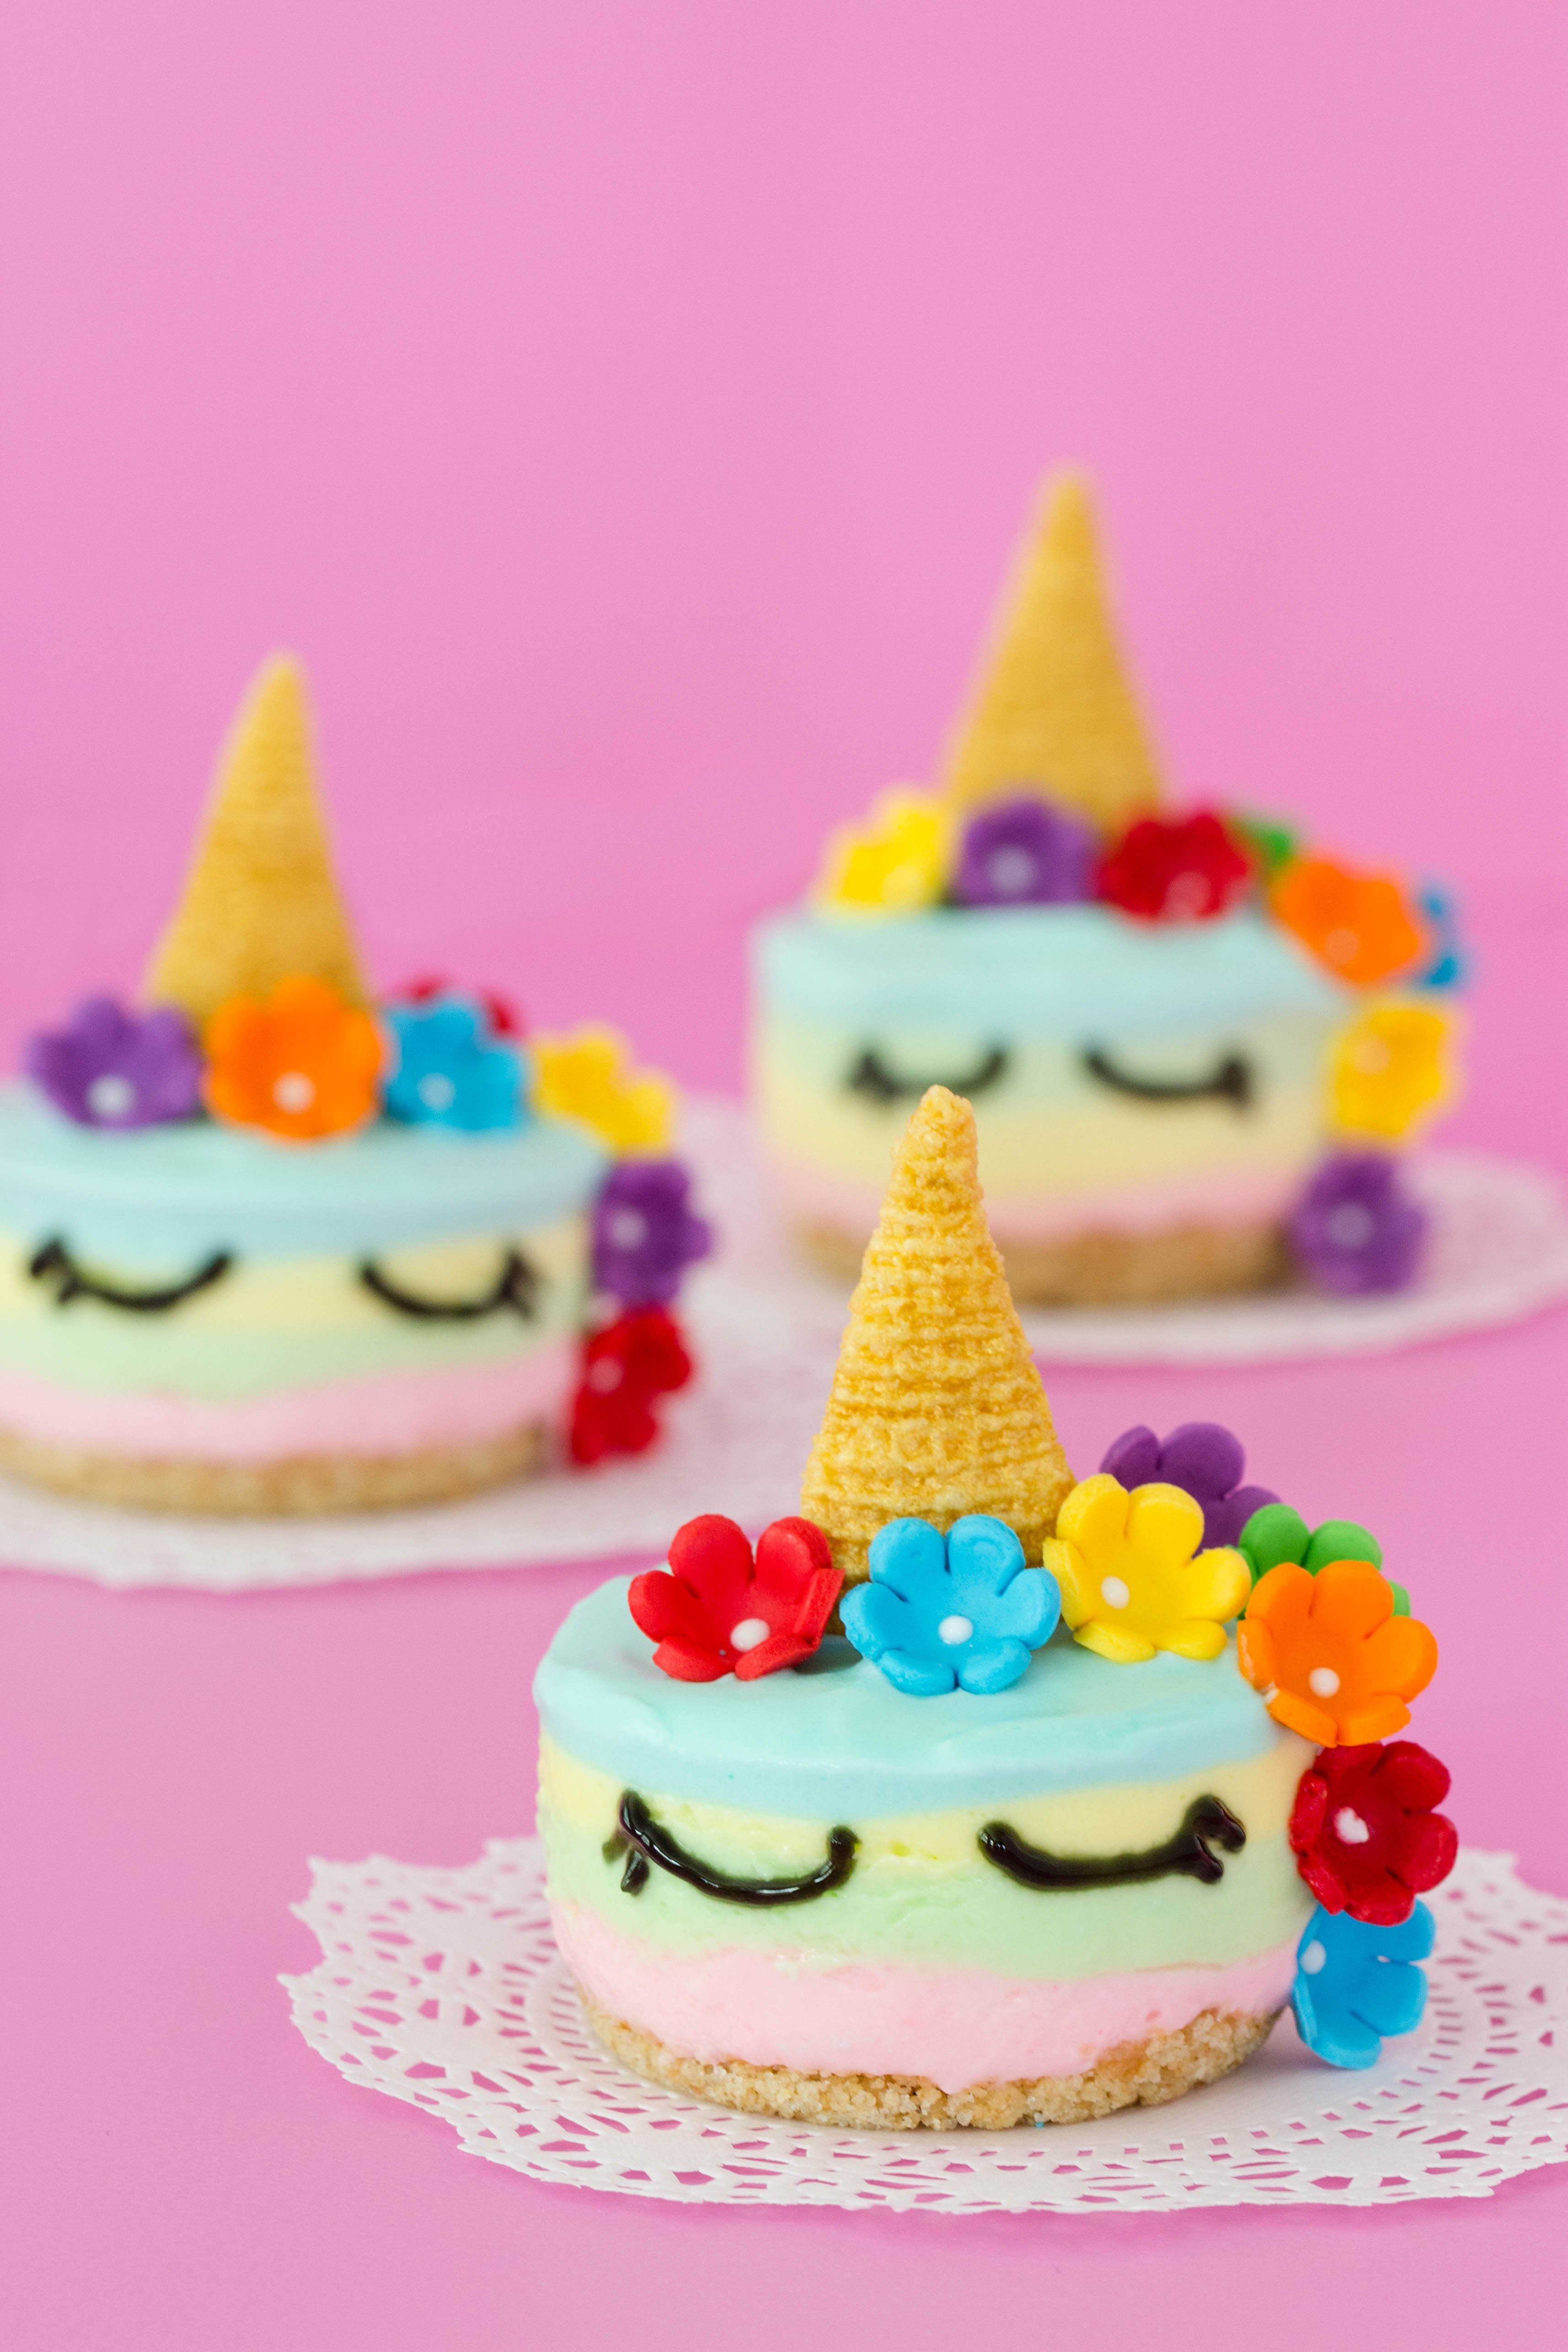
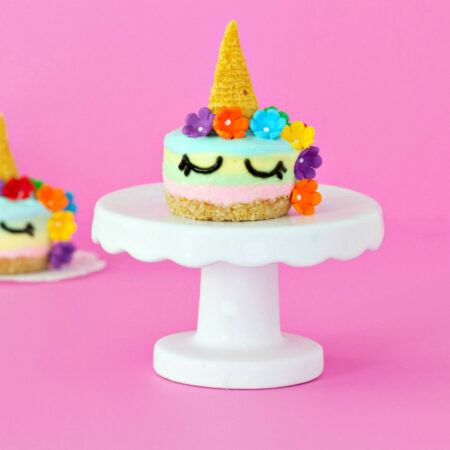
These little unicorn cheesecakes might be the cutest treats to ever hit your dessert table. With pastel‑swirled layers of no‑bake cheesecake, they’re every bit as fun to make as they are to eat.
Originally published April 2020 – Updated February 2026
Mini Unicorn Cheesecake Recipe
I’m all about bite size desserts, especially when cheesecake is involved. From no bake cheesecake bites to Oreo cheesecake, I can never get enough. Little treats like these fit every occasion, whether you’re planning party food or just making something fun with the kids.
This batch started as simple no bake cheesecakes with a rainbow theme, but I got a little carried away. Once those pastel layers came together, they were practically begging to become Mini Unicorn Cheesecakes. I’ve made plenty of unicorn inspired crafts over the years, like unicorn Easter eggs and an adorable unicorn pumpkin, but this was my first time turning that magic into something edible.
Want more recipes like this one? Check out my children’s cookbook, Roll It, Slice It, Mash It, Dice It. You’ll find this cute recipe and lots more!
Why We Love This Recipe
- Easy to serve: These Mini cheesecake bites are easy to serve and keep portions neat.
- Adorable treats: Pretty pastel colors and unicorn decor make them perfect for parties.
- Simple to make: The no-bake recipe uses basic ingredients and comes together quickly.
Ingredients
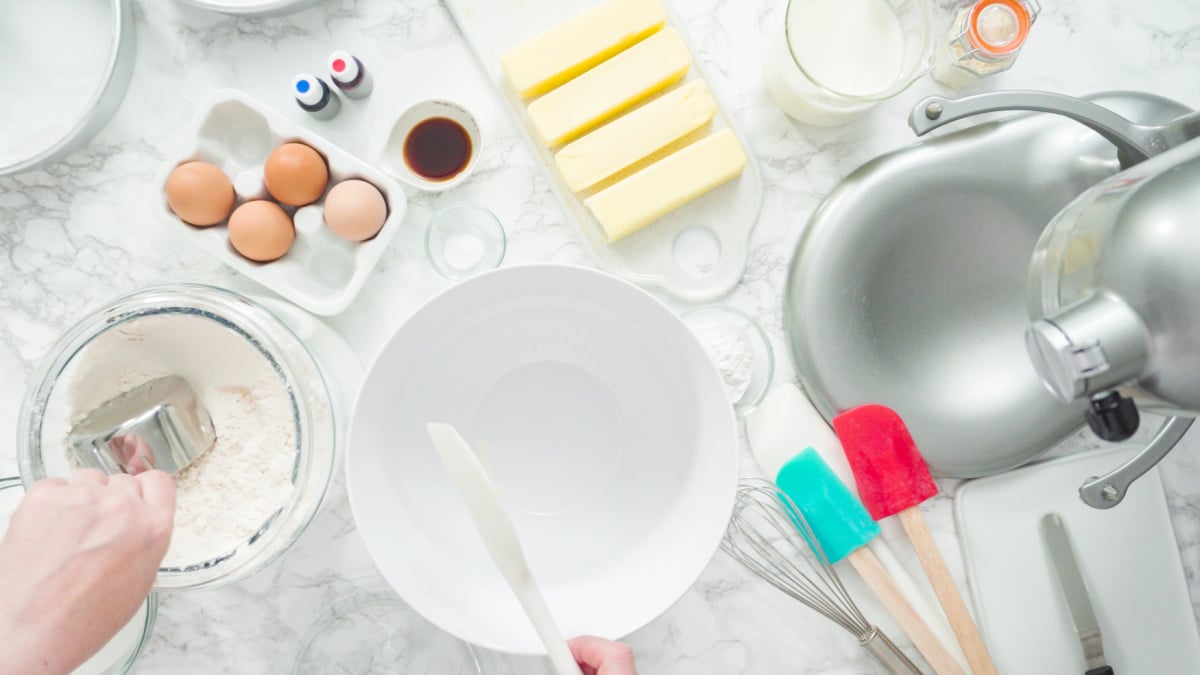
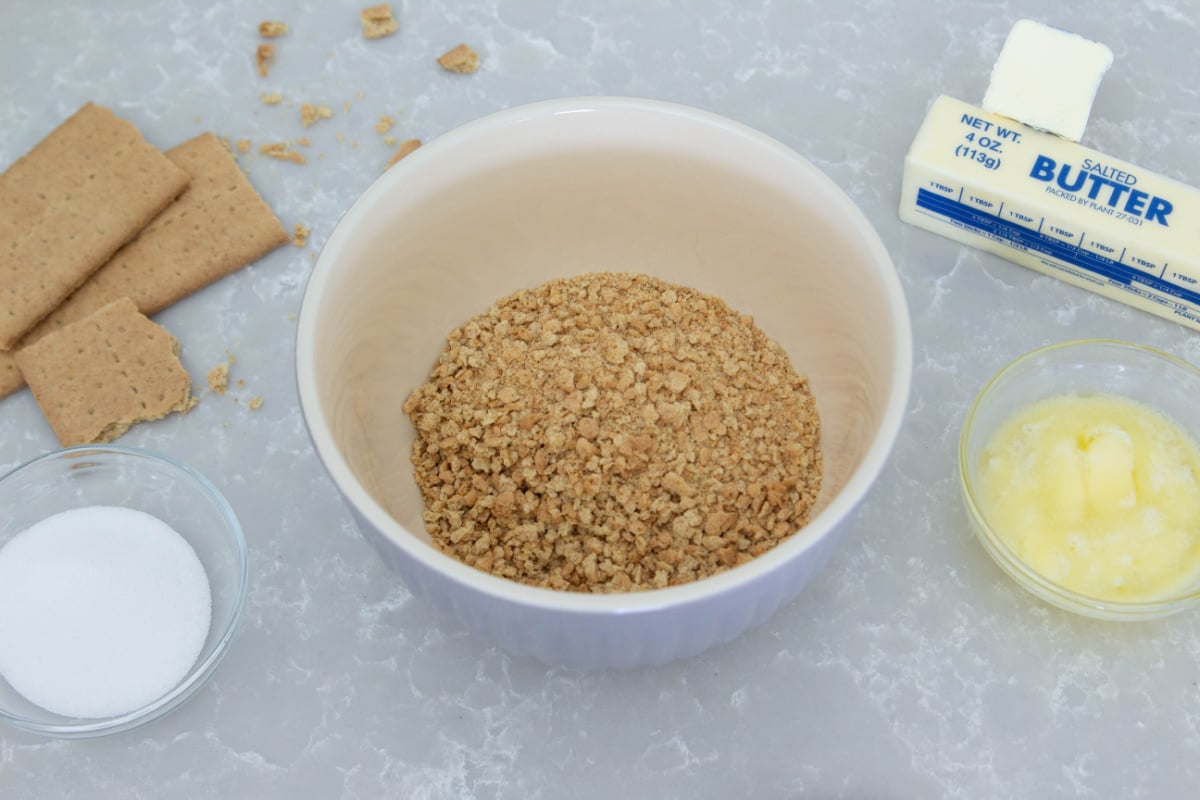
For The Crust
- Graham cracker crumbs: Forms a classic graham cracker crust that holds together well.
- Sugar: Adds a touch of sweetness to balance the crust.
- Butter: Helps bind the crust mixture so it firms up nicely when chilled.
For The Cheesecake
- Cream cheese: The base of the creamy filling, softened for easy mixing.
- Sugar: Sweetens the vanilla cheesecake without overpowering it.
- Vanilla extract: Adds warmth and depth to the cheesecake flavor.
- Heavy whipping cream: Whipped until peaks form to lighten the cheesecake mixture.
- Food coloring: Creates the signature unicorn swirl and bright colors.
For The Unicorn Decor
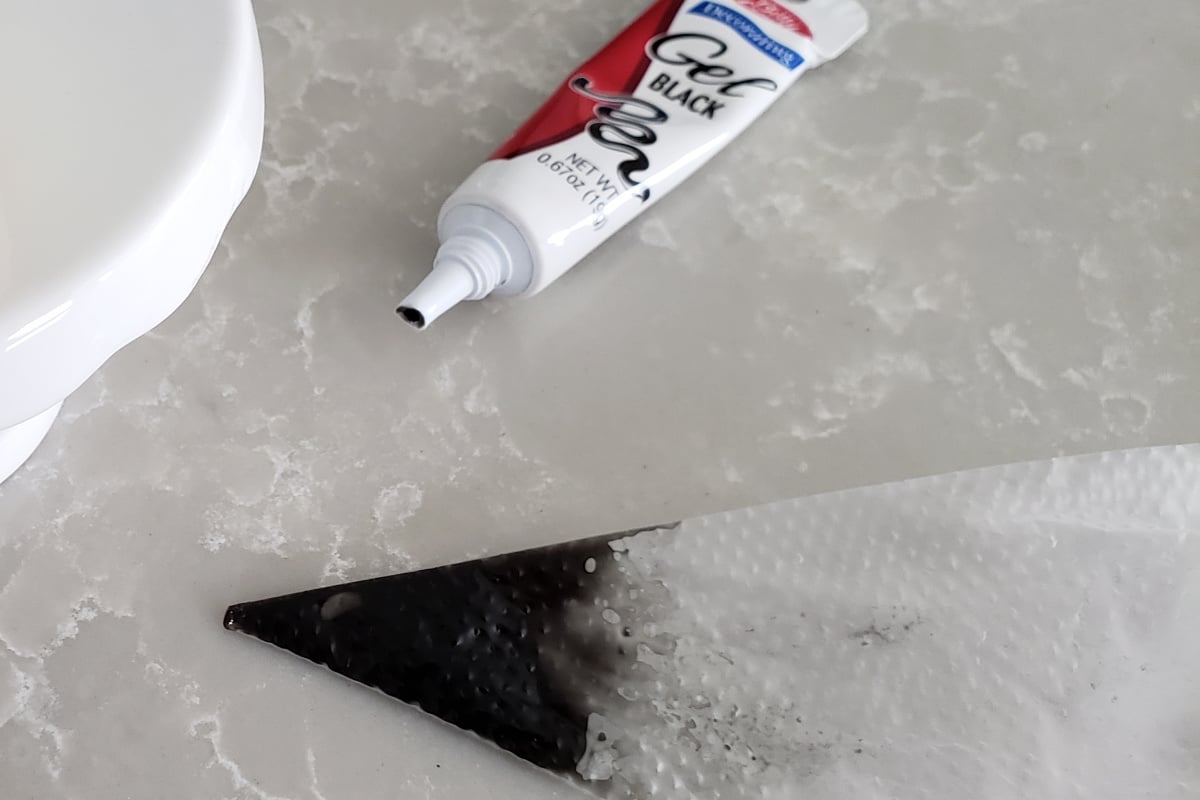
- Black decorating gel: Used to draw simple unicorn eyes.
- Candy flowers: Add color and texture along the sides of the mini cheesecake.
- Bugles: These make the perfect unicorn horns with almost no effort.
How to Make Unicorn Mini Cheesecakes
Make The Cheesecakes
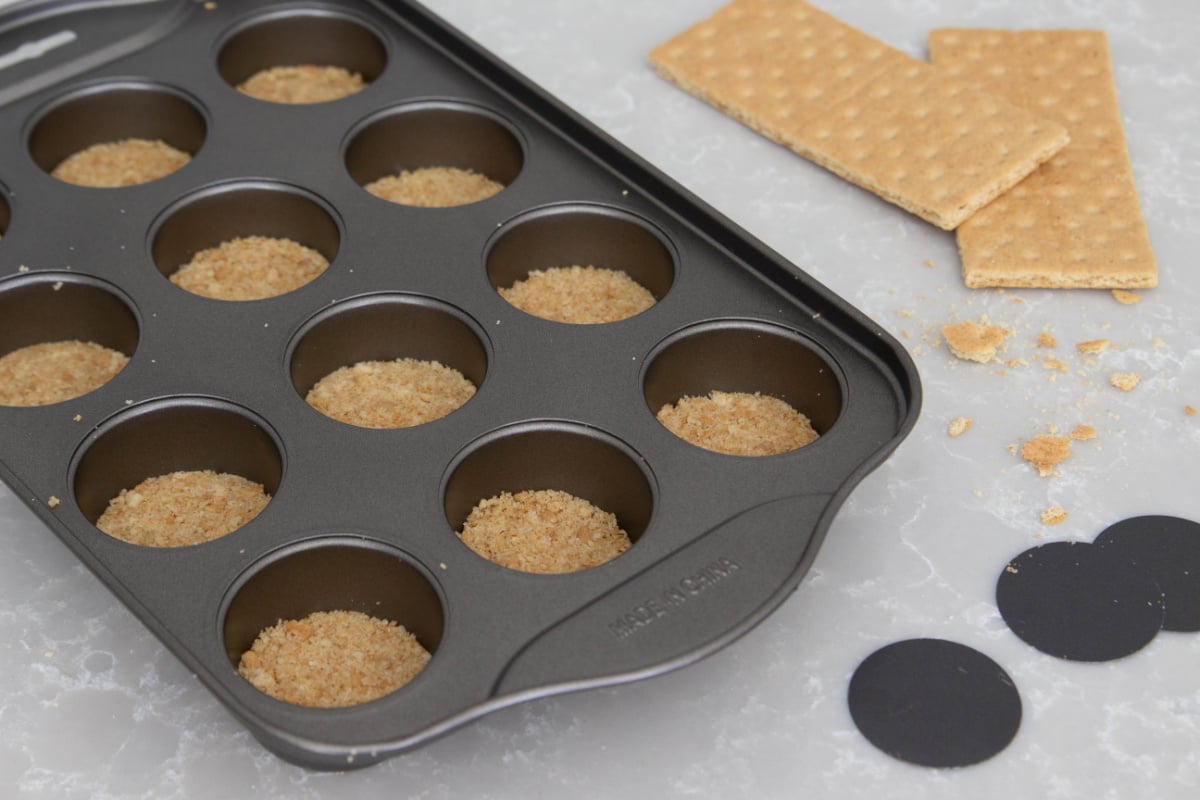
Step 1. Start by making the graham cracker crust. You’ll only need three ingredients, graham cracker crumbs, sugar and butter.
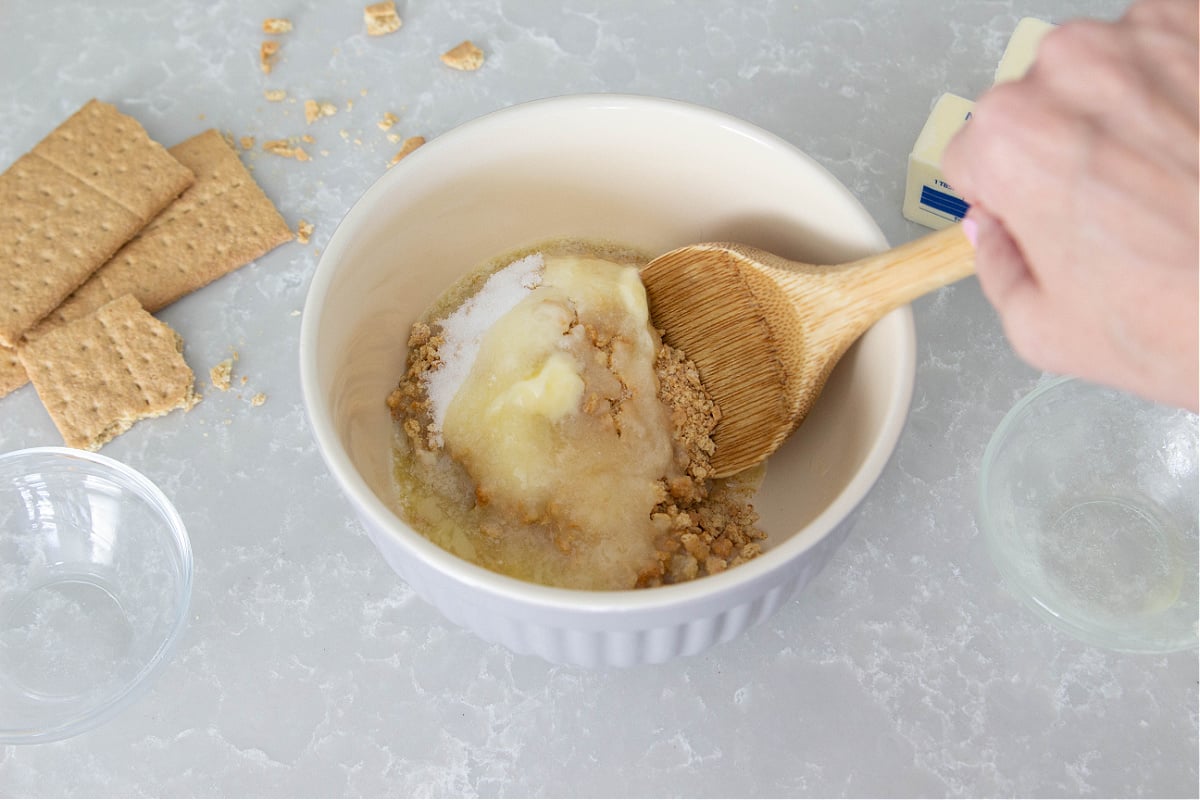
Step 2. Mix the graham cracker crumbs, sugar and butter well.
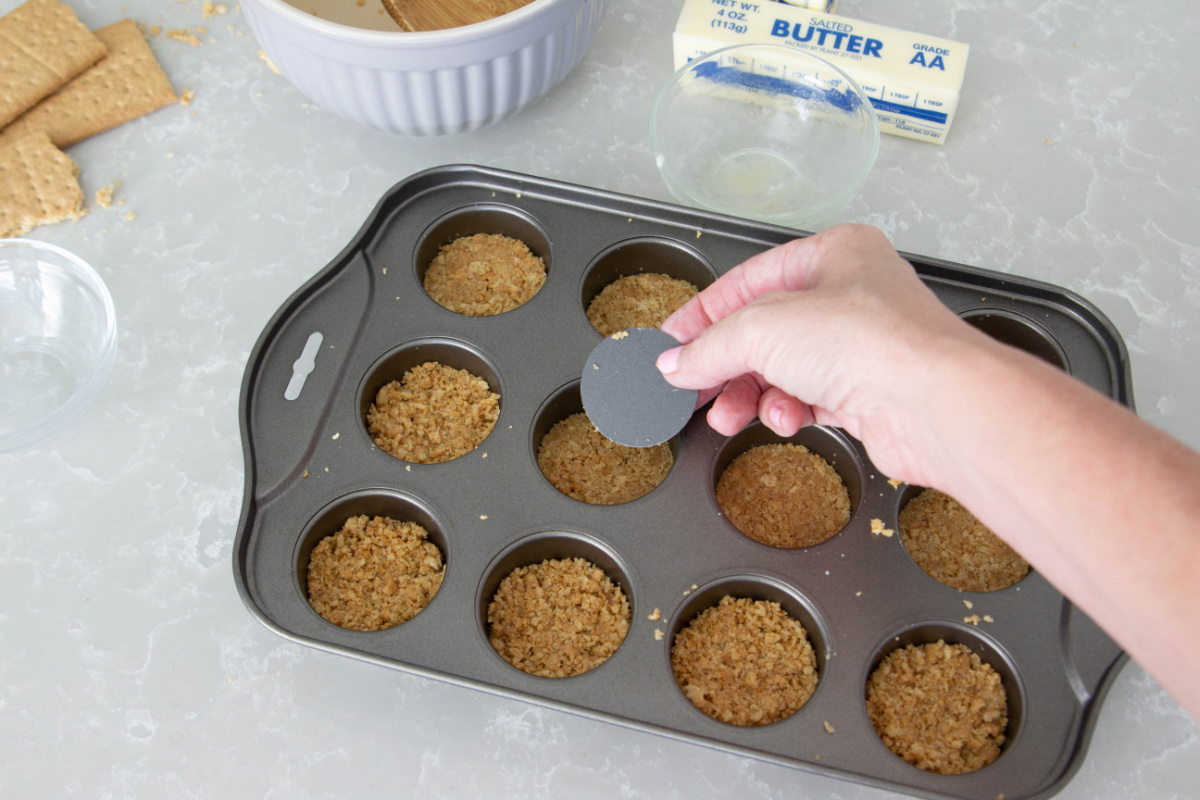
Step 3. Spoon crust into each of the cheesecake compartments and press until firm. I used one of the removable bottoms from cheesecake pan but you can also use the bottom of a shot glass or even your fingers.
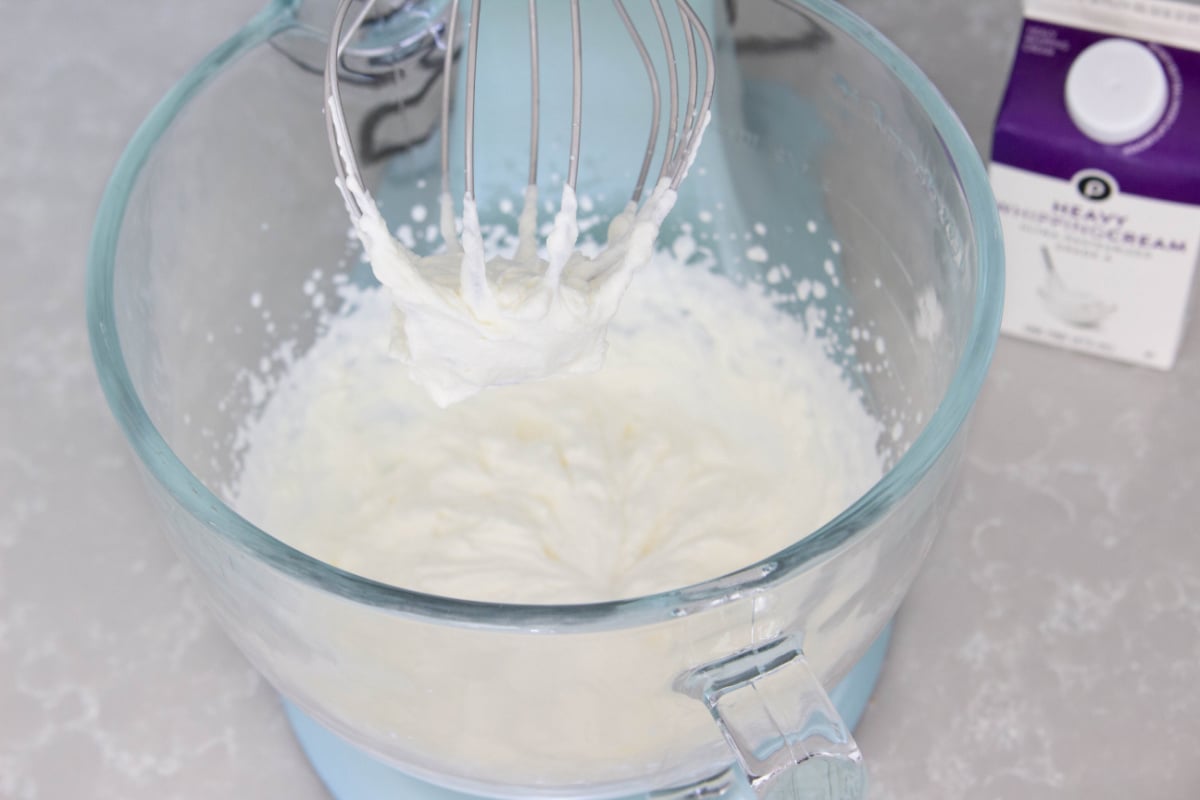
Step 4. In a large mixing bowl, combine cream cheese, sugar and vanilla and mix well with a stand or hand mixer. Set aside.
Step 5. In a separate bowl, whip heavy whipping cream until stiff peaks form. Fold into cream cheese mixture.

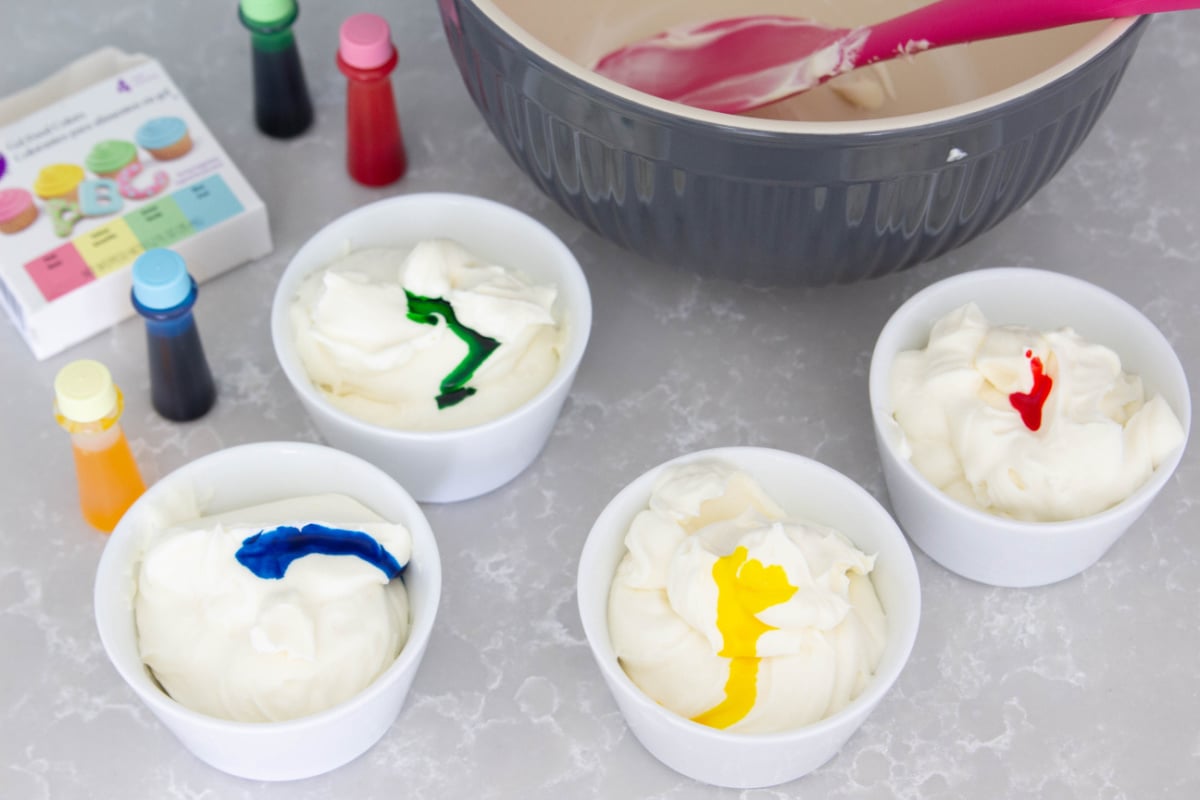
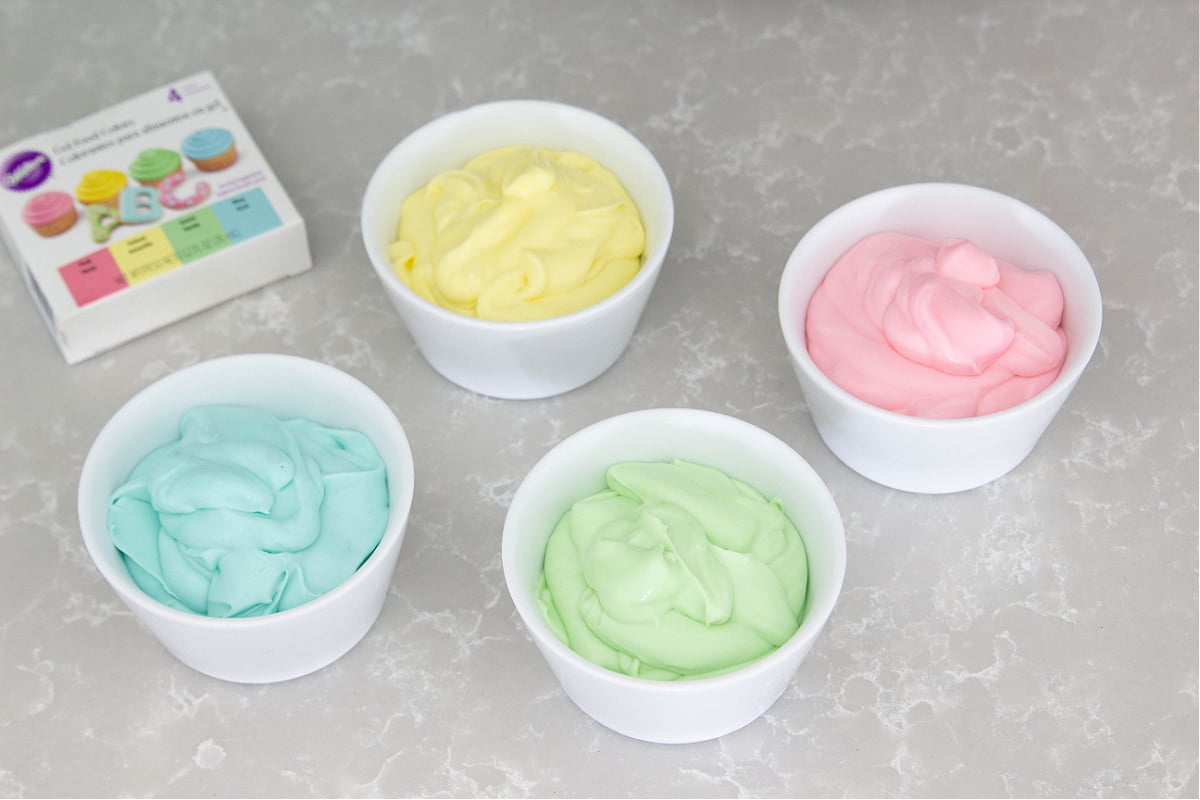
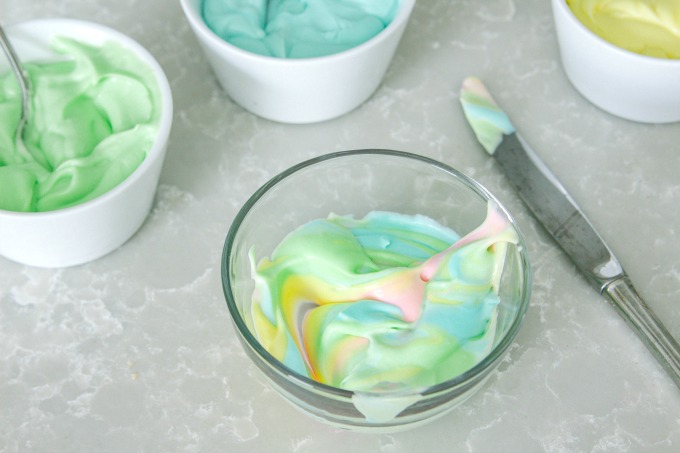
Step 6. Separate the batter mixture equally into four bowls and add the food coloring into each.
Step 7. Mix until you get the colors just how you want them. I had to add to the yellow a couple times to get a brighter shade.
Step 8. Add the cheesecake to separate icing bags. Starting with pink (or your color of choice) add a layer of cheesecake to the mold. Then, one at a time, add the remaining colors.
Step 9. When the layers are finished, place the cheesecake pan in the freezer for about an hour, or until the cheesecake is frozen. I’ve found that doing this makes it much easier to remove the cheesecake from the pans.
Another alternative is to swirl the colors instead. Just be sure not to “overswirl” (if that’s even a real word) because if the colors blend together too much, they’ll start to look a little brown. If you’re making these with younger kids, this way may be easier for them.
Decorate Your Unicorn Cakes
Step 1. After removing the cheesecakes, use black decorating gel to make the unicorn eyes. You can make them using the tube, or for thinner lines, put some of the gel in a sandwich bag and cut off a small corner.
Step 2. I found it helpful to practice one or two eyes before applying the gel to the cheesecake because it took me a couple tries to get it just right. I started with the tube but found I liked the thinner lines from the icing bag better.
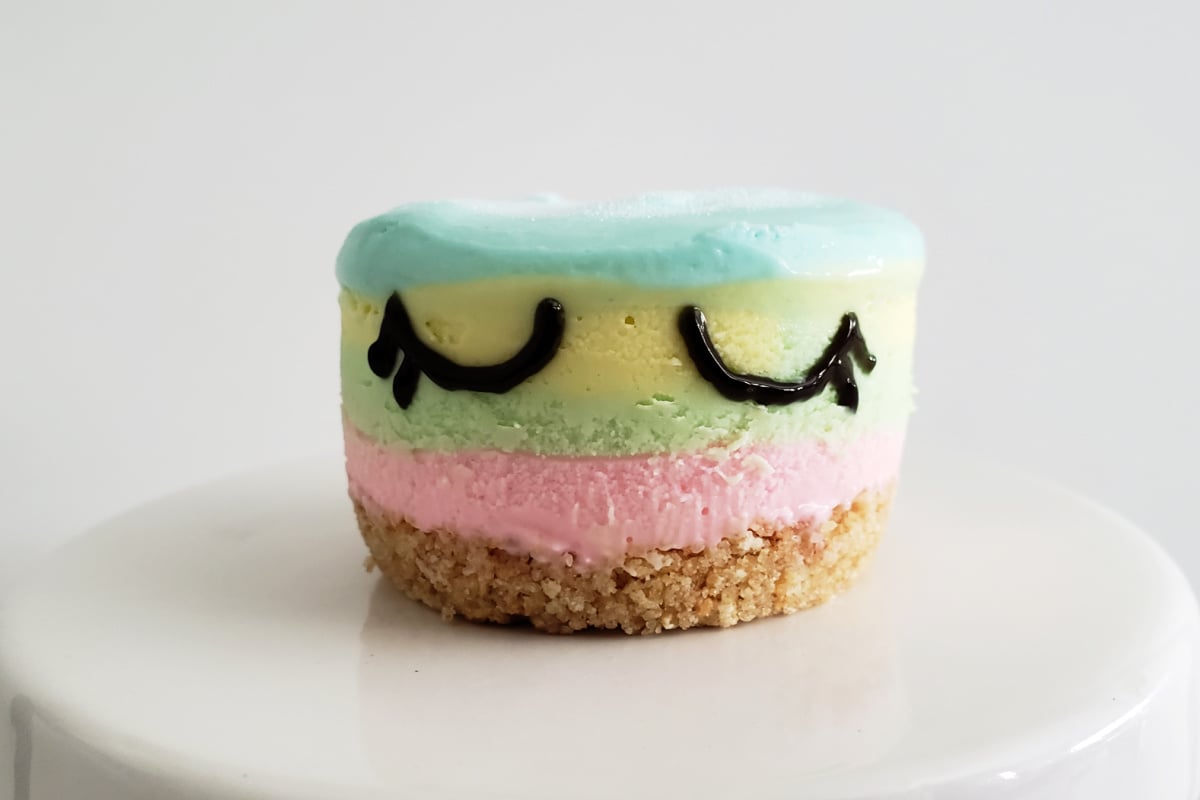
Step 3. After making the unicorn eyes, place a Bugle in the center of each cheesecake. Finally, add 6-8 candy flowers, starting at the top and cascading down the side. That’s all there is to it!
Storage Instructions
- Fridge: Store mini unicorn cheesecakes covered in an airtight container for up to four days.
- Freezer: Freeze without decorations for up to one month, wrapped tightly in plastic wrap. Thaw in the fridge before serving.
Top Tips
- Press the crust firmly or it will crumble: Use the bottom of a shot glass so each mini cheesecake holds together when released.
- Stop mixing once the filling is smooth: Overmixing breaks down the structure and leads to soft cheesecake bites that do not set cleanly.
- Pipe for cleaner layers: Pipe the cheesecake mixture using a piping bag for cleaner layers.
- Freeze just until the tops are set: Too long in the freezer can cause condensation when decorating.
- Decorate right before serving if possible: Candy stays brighter and firmer than when stored overnight.
Variations And Add-ins
- Crust: Swap graham crackers for crushed Oreo cookies or vanilla wafers for the crust.
- Crunch: Sprinkle crushed cookies or sprinkles into each layer for a little crunchy texture.
- Pan: Use cupcake liners and a cupcake tin if you do not have a mini cheesecake pan.
- Swirls: Create a swirl effect by using a toothpick to gently swirl the colors together.
- Sparkles: Add edible glitter or extra sprinkles for a more colorful unicorn dessert.
- Rosettes: Top with whipped cream rosettes instead of candy flowers for a softer finish.
FAQs
Your whipped cream may not have reached stiff peaks or the cheesecakes may need more chilling time.
Yes, these unicorn cheesecake bites can be made a day in advance and stored in the fridge.
They are fine for about 30 minutes, but should be kept chilled as much as possible.
More Unicorn Desserts
- Unicorn Birthday Cake
- Unicorn Cupcakes
- Unicorn Charcuterie Board
- Unicorn Dessert Dip
- Unicorn Milkshake
Unicorn Cheesecakes
Ingredients
For The Crust
- 1 cup graham cracker crumbs approx. 6 crackers
- 2 1/2 tablespoons sugar
- 3 tablespoons butter melted
For The Cheesecake
- 8 ounces cream cheese
- 1/2 cup sugar
- 1 1/2 tablespoons vanilla
- 3/4 cup heavy whipping cream
- Food coloring I used pink, green, blue and yellow
For The Unicorn Decor
- Black decorating gel
- 12 Bugles
- 96 candy flowers approximately
Instructions
- Mix graham cracker crumbs, sugar and butter.1 cup graham cracker crumbs, 2 1/2 tablespoons sugar, 3 tablespoons butter
- Take a mini cheesecake pan and fill each compartment equally with the graham cracker mixture. Pack the graham crackers until firm with the bottom of a shot glass or other circular object. Set aside.
- Mix cream cheese, sugar and vanilla with a stand or hand mixer.8 ounces cream cheese, 1/2 cup sugar, 1 1/2 tablespoons vanilla
- In a separate bowl, whip heavy whipping cream until stiff peaks form.3/4 cup heavy whipping cream
- Fold whipped cream into cheesecake mixture.
- Separate cheesecake equally into four bowls. Add food coloring to each until you have the desired colors.Food coloring
- Layer colored cheesecake into cheesecake pan, one color at a time. If cheesecake is too thick to layer, you can stir it a little to soften it.
- Place cheesecake pan in the freezer for about 1/2 an hour. This makes it easier to add the eyes.
- Use black decorating gel to add the eyes. You can squeeze the gel straight from the tube but I prefer thinner lines. To do this, I squeezed some of the gel into a plastic sandwich bag and cut a very small piece off the corner. You may want to practice first to see how you like it.Black decorating gel
- Place a Bugle in the center of each cheesecake.12 Bugles
- Add 6-8 candy flowers, starting from around the bugle and cascading down the side of the mini cheesecake. Enjoy!96 candy flowers
Notes
- Fridge: Store mini unicorn cheesecakes covered in an airtight container for up to four days.
- Freezer: Freeze without decorations for up to one month, wrapped tightly in plastic wrap. Thaw in the fridge before serving.
- Press the crust firmly or it will crumble: Use the bottom of a shot glass so each mini cheesecake holds together when released.
- Stop mixing once the filling is smooth: Overmixing breaks down the structure and leads to soft cheesecake bites that do not set cleanly.
- Pipe for cleaner layers: Pipe the cheesecake mixture using a piping bag for cleaner layers.
- Freeze just until the tops are set: Too long in the freezer can cause condensation when decorating.
- Decorate right before serving if possible: Candy stays brighter and firmer than when stored overnight.
Nutrition
Did You Make This Recipe?
Share it with me on Instagram @funmoneymom and follow on Pinterest @funmoneymom for more!
Let’s be friends!
Did you love this post? Make sure to comment below and let me know your thoughts! And don’t forget to follow on your favorite social network below!

About Lisa O’Driscoll
Lisa O’Driscoll is a lifestyle and parenting expert, cookbook author, and the creative force behind Fun Money Mom, a popular blog she’s run since 2014. She’s the author of the children’s cookbook Roll It, Slice It, Mash It, Dice It, designed to get kids excited about cooking. With multiple TV appearances under her belt, she loves sharing her expertise on family-friendly recipes, creative DIYs, and party planning and is always on a mission to inspire and entertain!