Jalapeno Cheese Ball
This post may contain affiliate links. As an Amazon Associate, I earn from qualifying purchases.
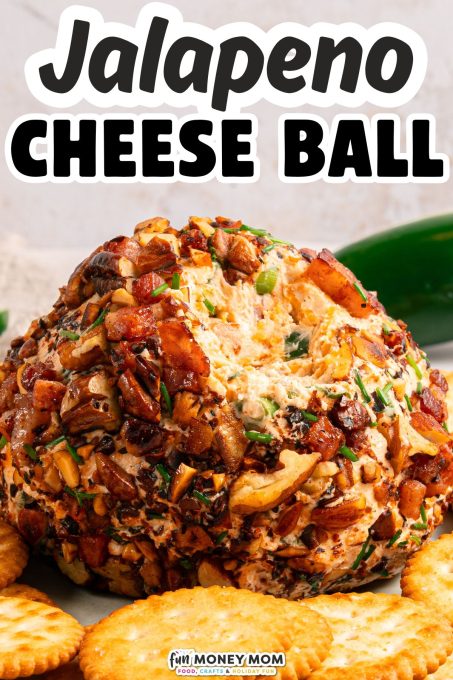
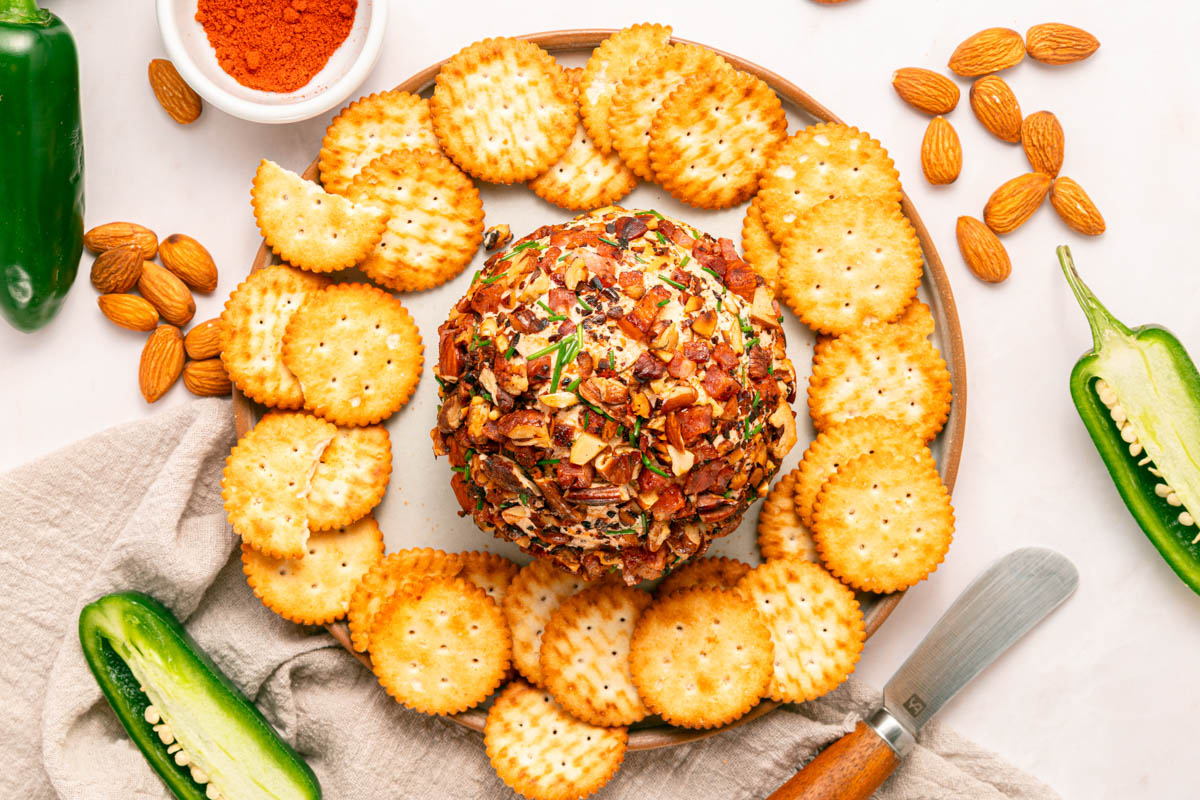
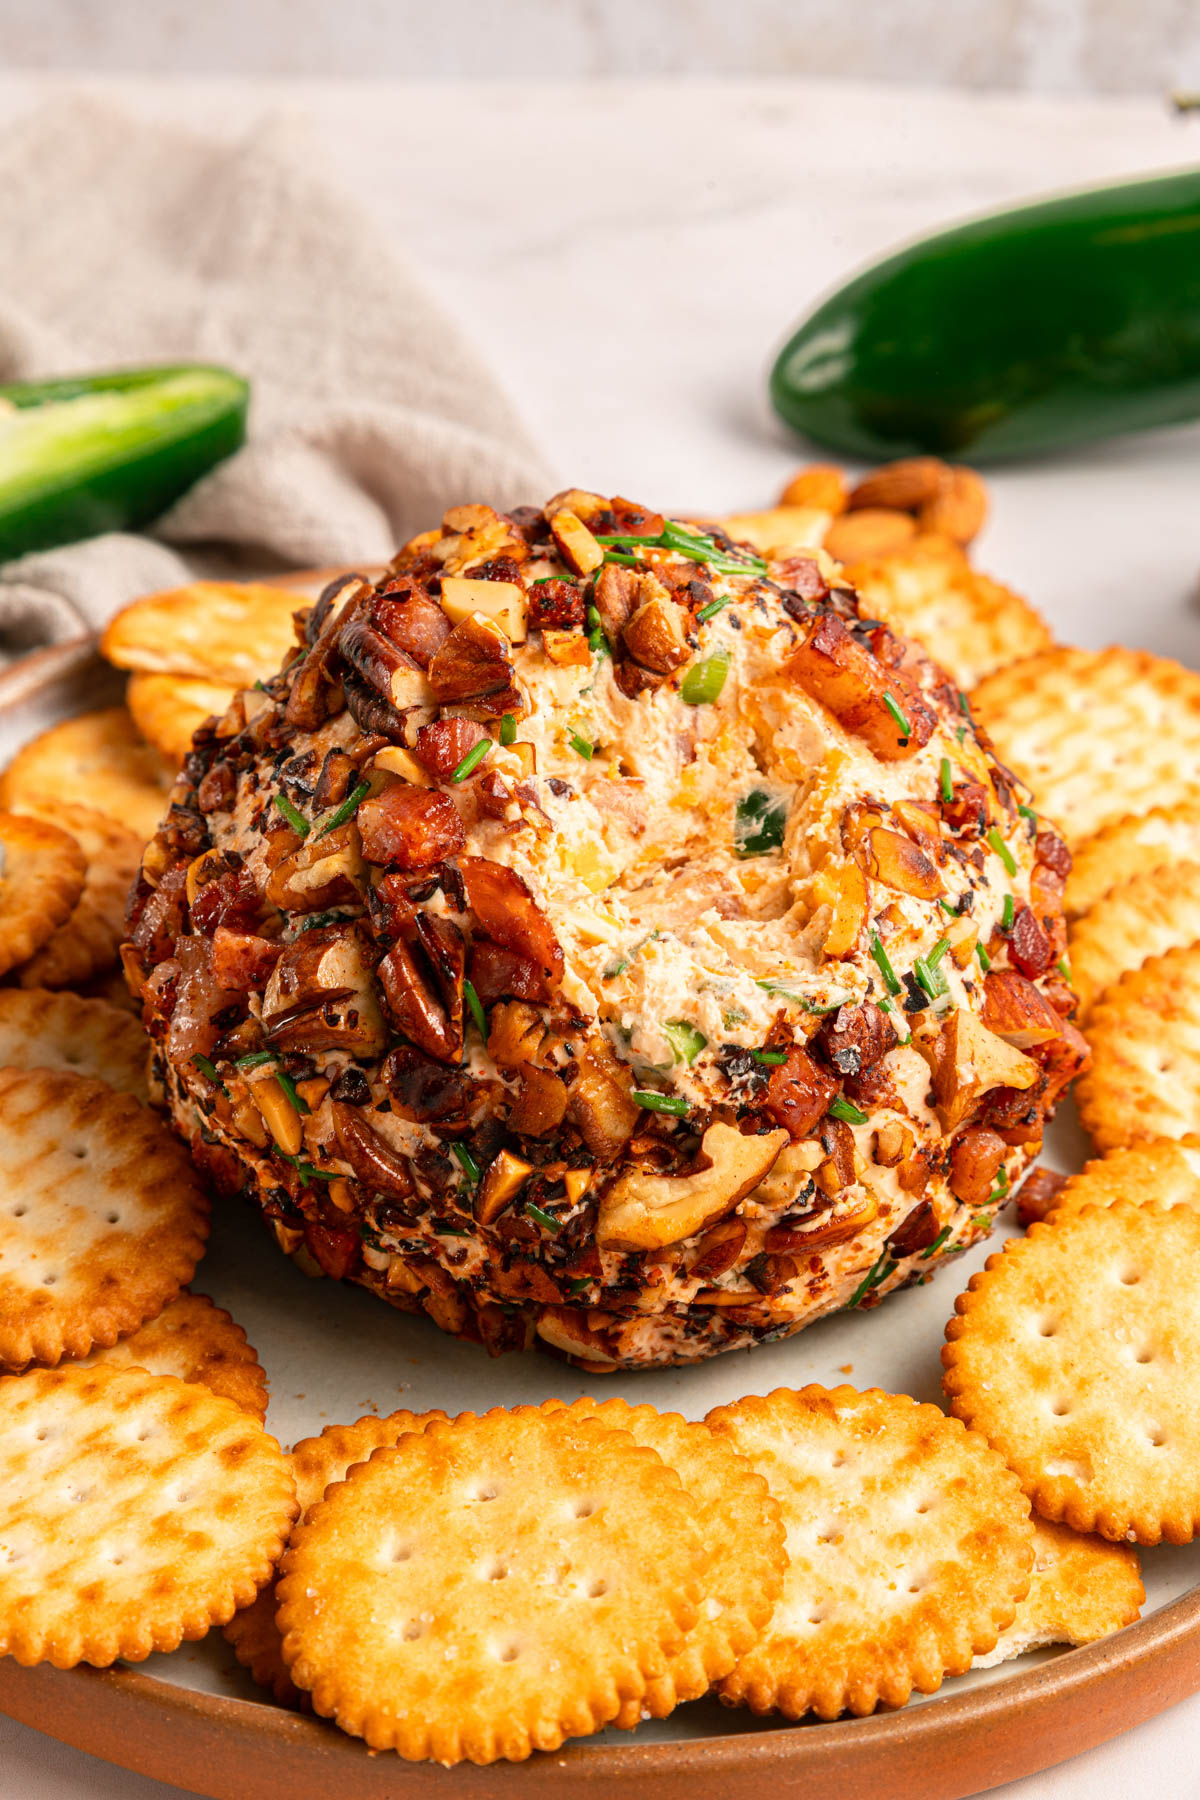
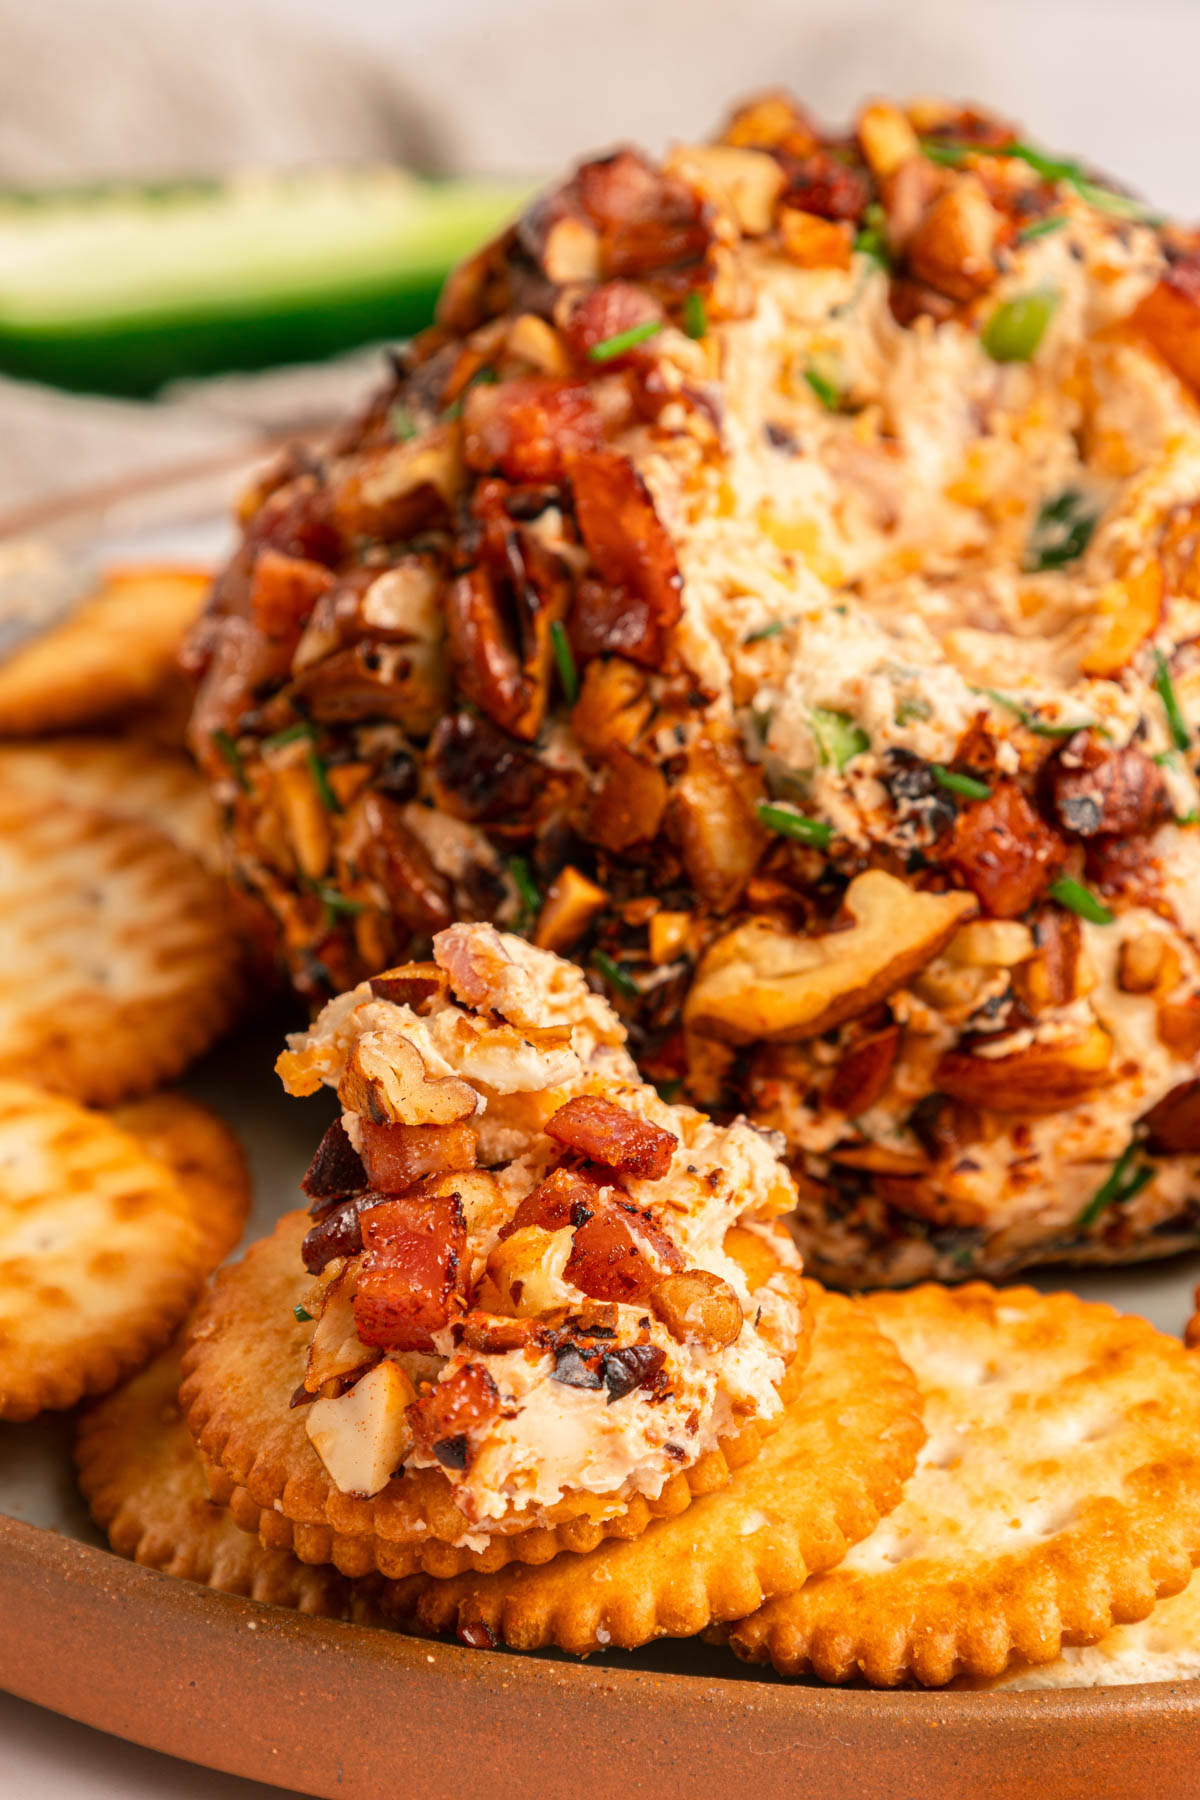
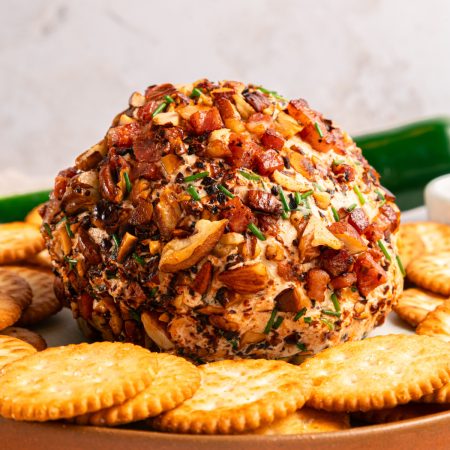
This Jalapeño Cheese Ball takes everything you love about jalapeño poppers and rolls them into one irresistible appetizer. Creamy, zesty, and loaded with bacon, it’s simple to prep ahead and always a hit on game days or holiday tables.

Jalapeno Cheese Ball Recipe
Jalapeño poppers are always a hit, but I don’t always have time for the stuffing, wrapping, and cooking they need. So, I turned those same craveable flavors into a cheese ball that comes together in minutes. Cream cheese, sharp cheddar, diced jalapeños, and bacon blend into a smooth, zesty mix that’s easy to shape and chill.
After rolling it in the nutty coating, the cheese ball is ready to set out with your favorite crackers or fresh vegetables. You can even make it days ahead, so when guests arrive, you already have a delicious appetizer ready to serve.
If you love an easy cheese ball and want another simple appetizer to set out, take a look at my Mini Cheese Balls Recipe. They are fun to make and even more fun to eat.
Why We Love This Recipe
- Perfect texture: The cream cheese mixture chills firm enough to hold its shape, but it still scoops easily with crackers, chips, or vegetables.
- Classic jalapeño popper flavors: I use the same flavors you expect from traditional jalapeño poppers.
- Great make-ahead appetizer: This cheese ball keeps well in the refrigerator for a few days, which makes it easy to serve the moment guests arrive.
Ingredients
For the Cheese Ball
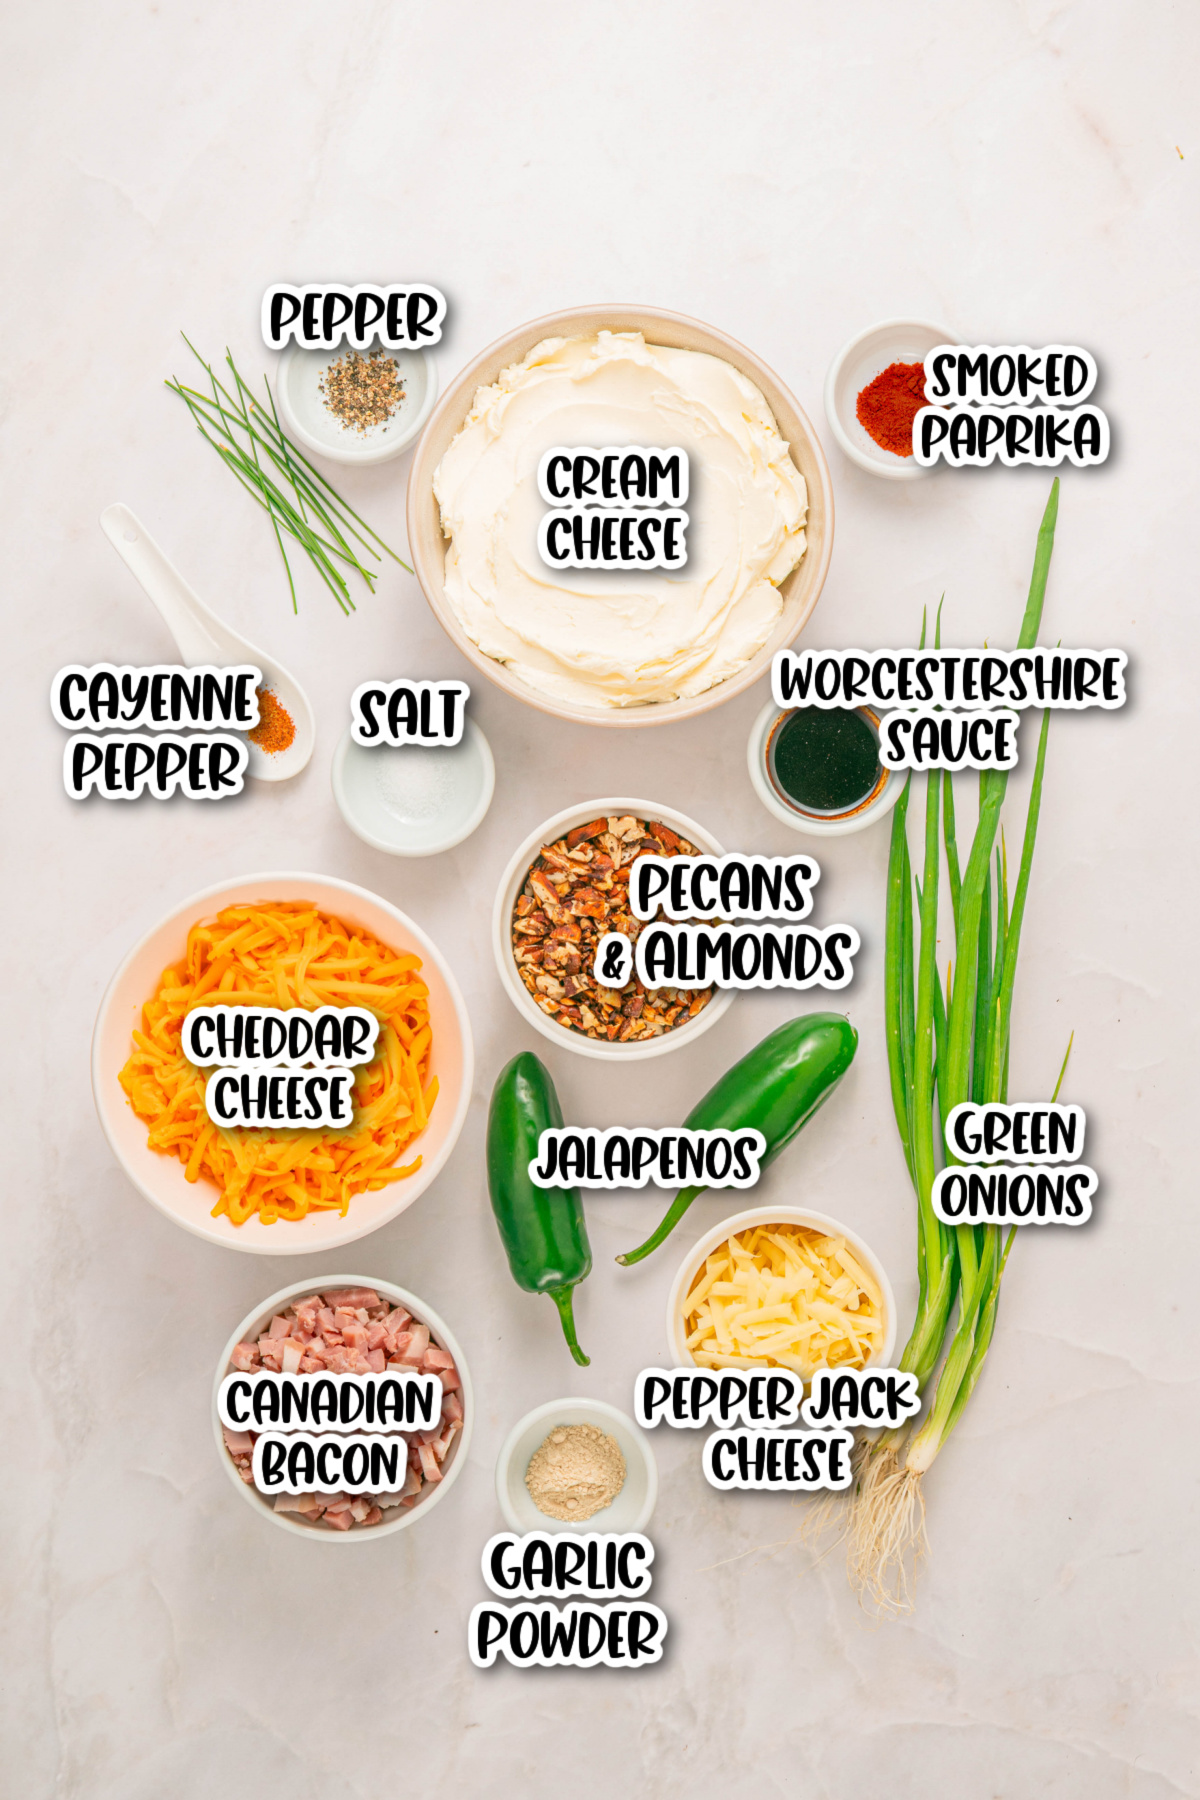
- Cream cheese: Creates the creamy base that holds the cheese ball together.
- Shredded cheddar cheese: Adds rich savory flavor to this cheese ball recipe.
- Shredded pepper jack cheese: Adds extra spice that matches the jalapeño popper flavor.
- Fresh jalapeños, diced: Bring bright heat to the cheese mixture.
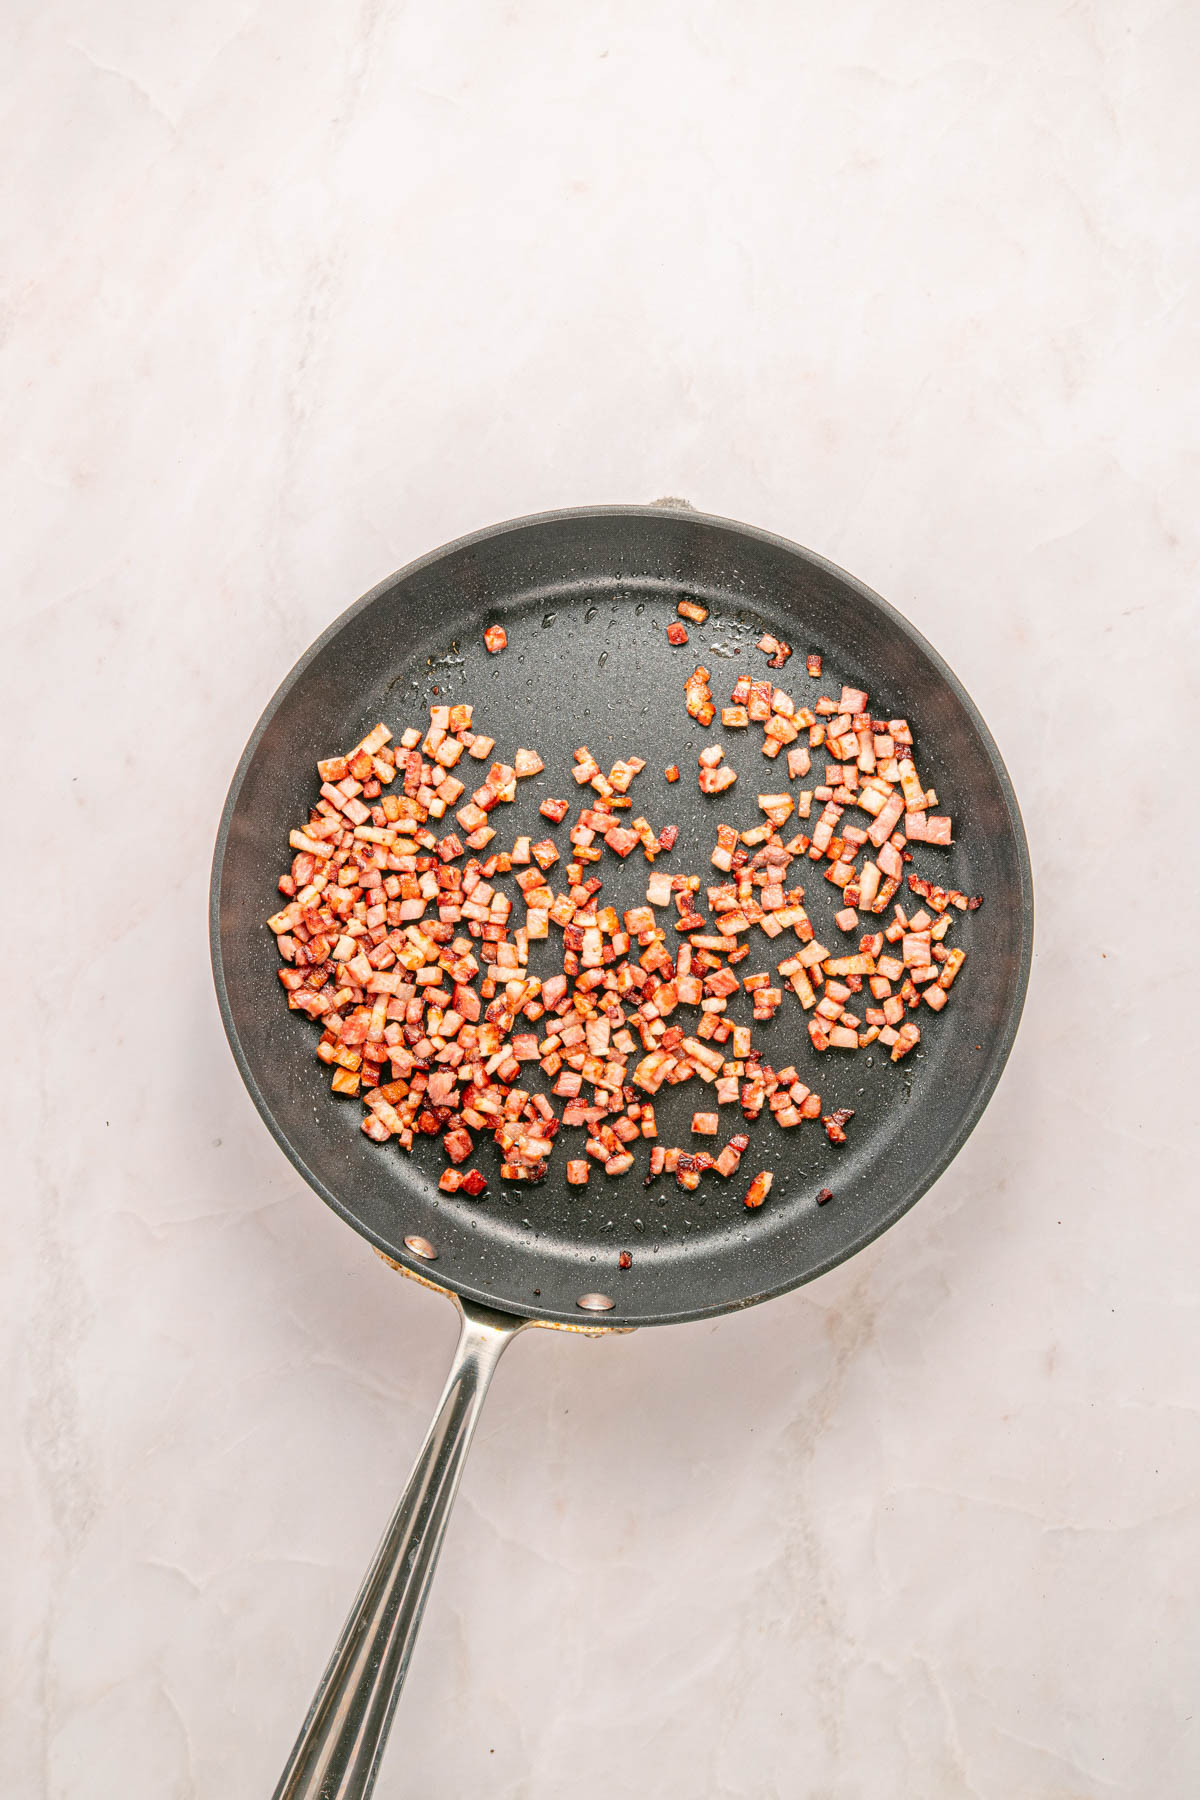
- Cooked Canadian bacon (or regular bacon), chopped: Adds smoky and crispy flavor.
- Green onions, thinly sliced: Adds a pop of fresh flavor.
- Worcestershire sauce: Adds savory depth without overpowering.
- Garlic powder: Everything is better with garlic.
- Smoked paprika: Adds smoky flavor and color.
- Cayenne pepper: Optional but adds another layer of spice.
- Salt and black pepper: Brings out the flavor of the jalapeño and cheddar.
For the Coating
- Finely chopped toasted pecans and almonds: Add crunch and nutty flavor.
- Shredded cheddar cheese: Adds bright color and extra sharp cheddar flavor.
- Chopped chives or green onion: Gives freshness to the outside of the cheese ball.
- Cooked bacon, chopped: I used Canadian bacon but you can use regular bacon.
- Pinch of smoked paprika: Gives a little color and smoky flavor.
Find the full printable recipe with measurements and directions in the recipe card below.
How To Make A Jalapeño Popper Cheese Ball
Step 1. Cook the bacon until crispy, then crumble it and set aside.
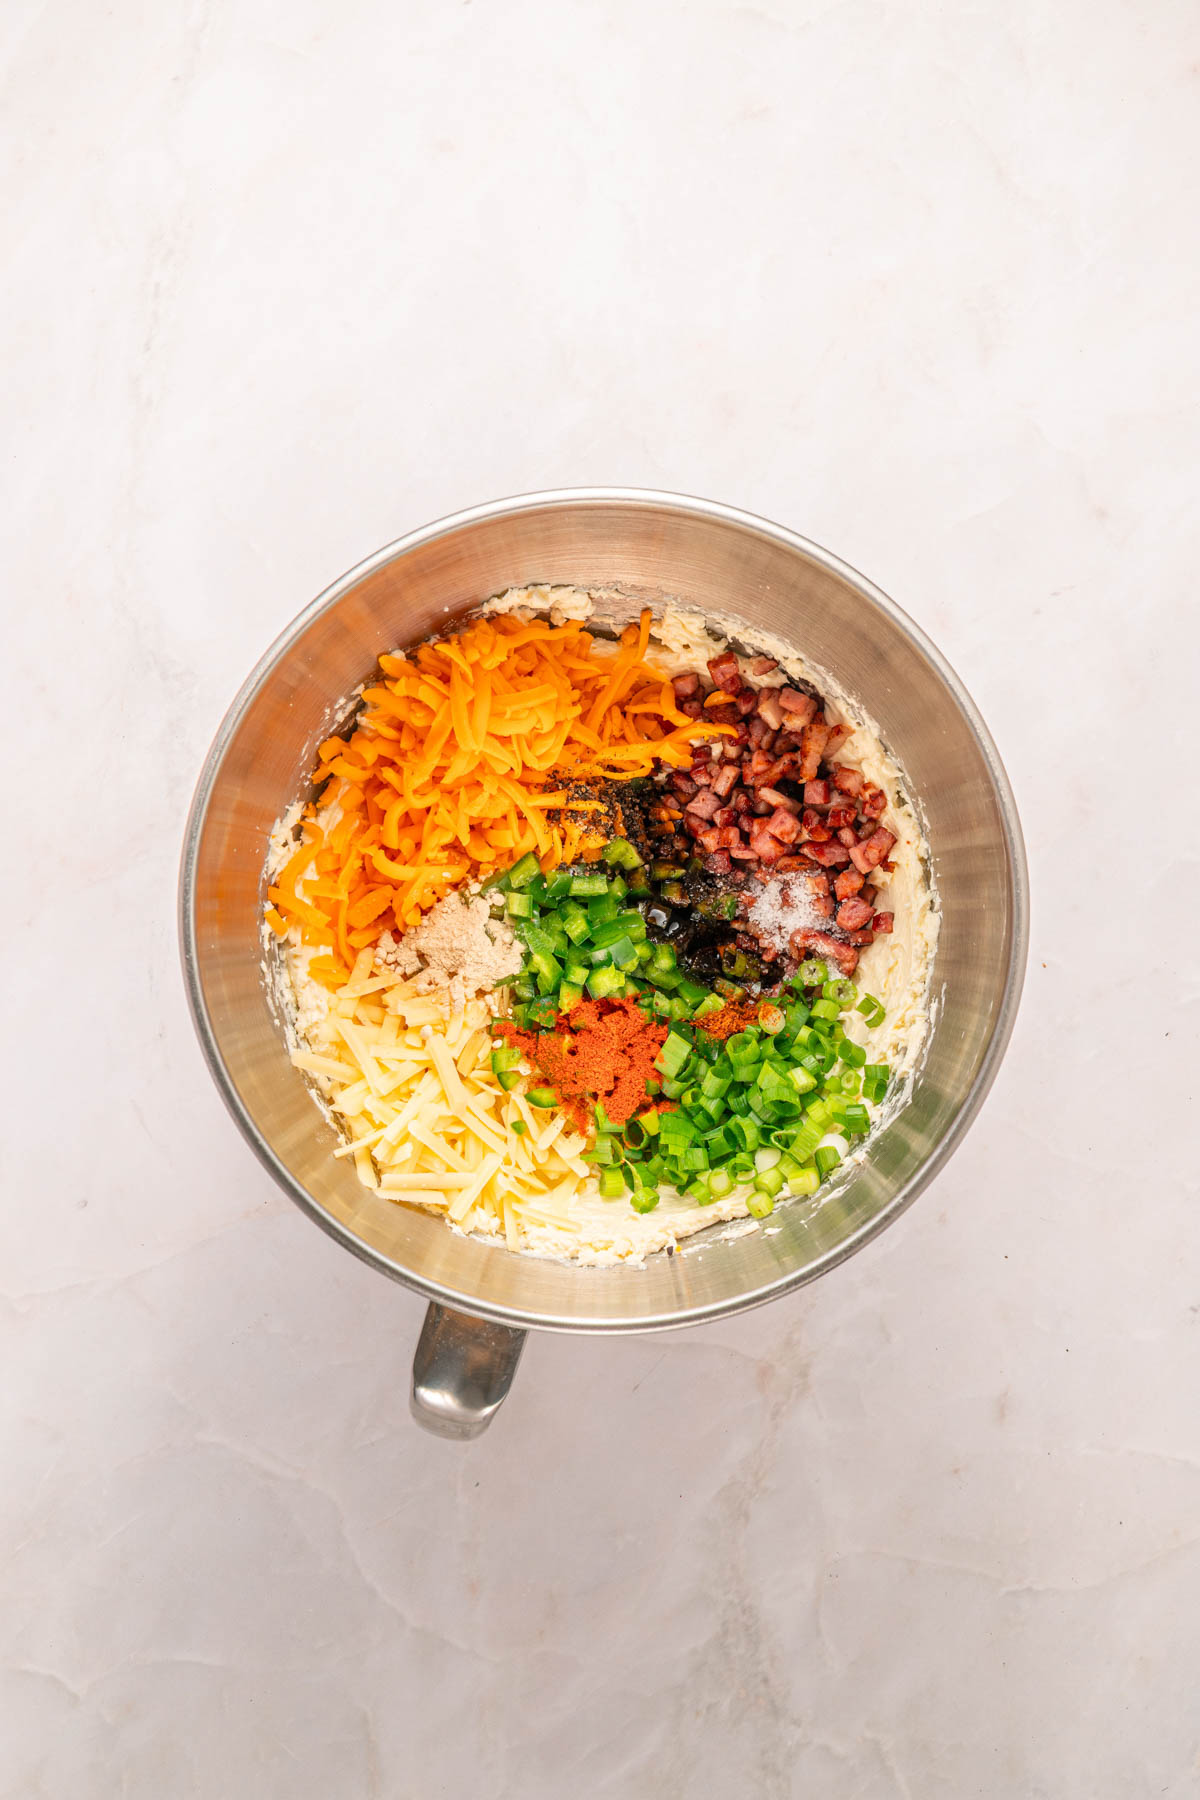
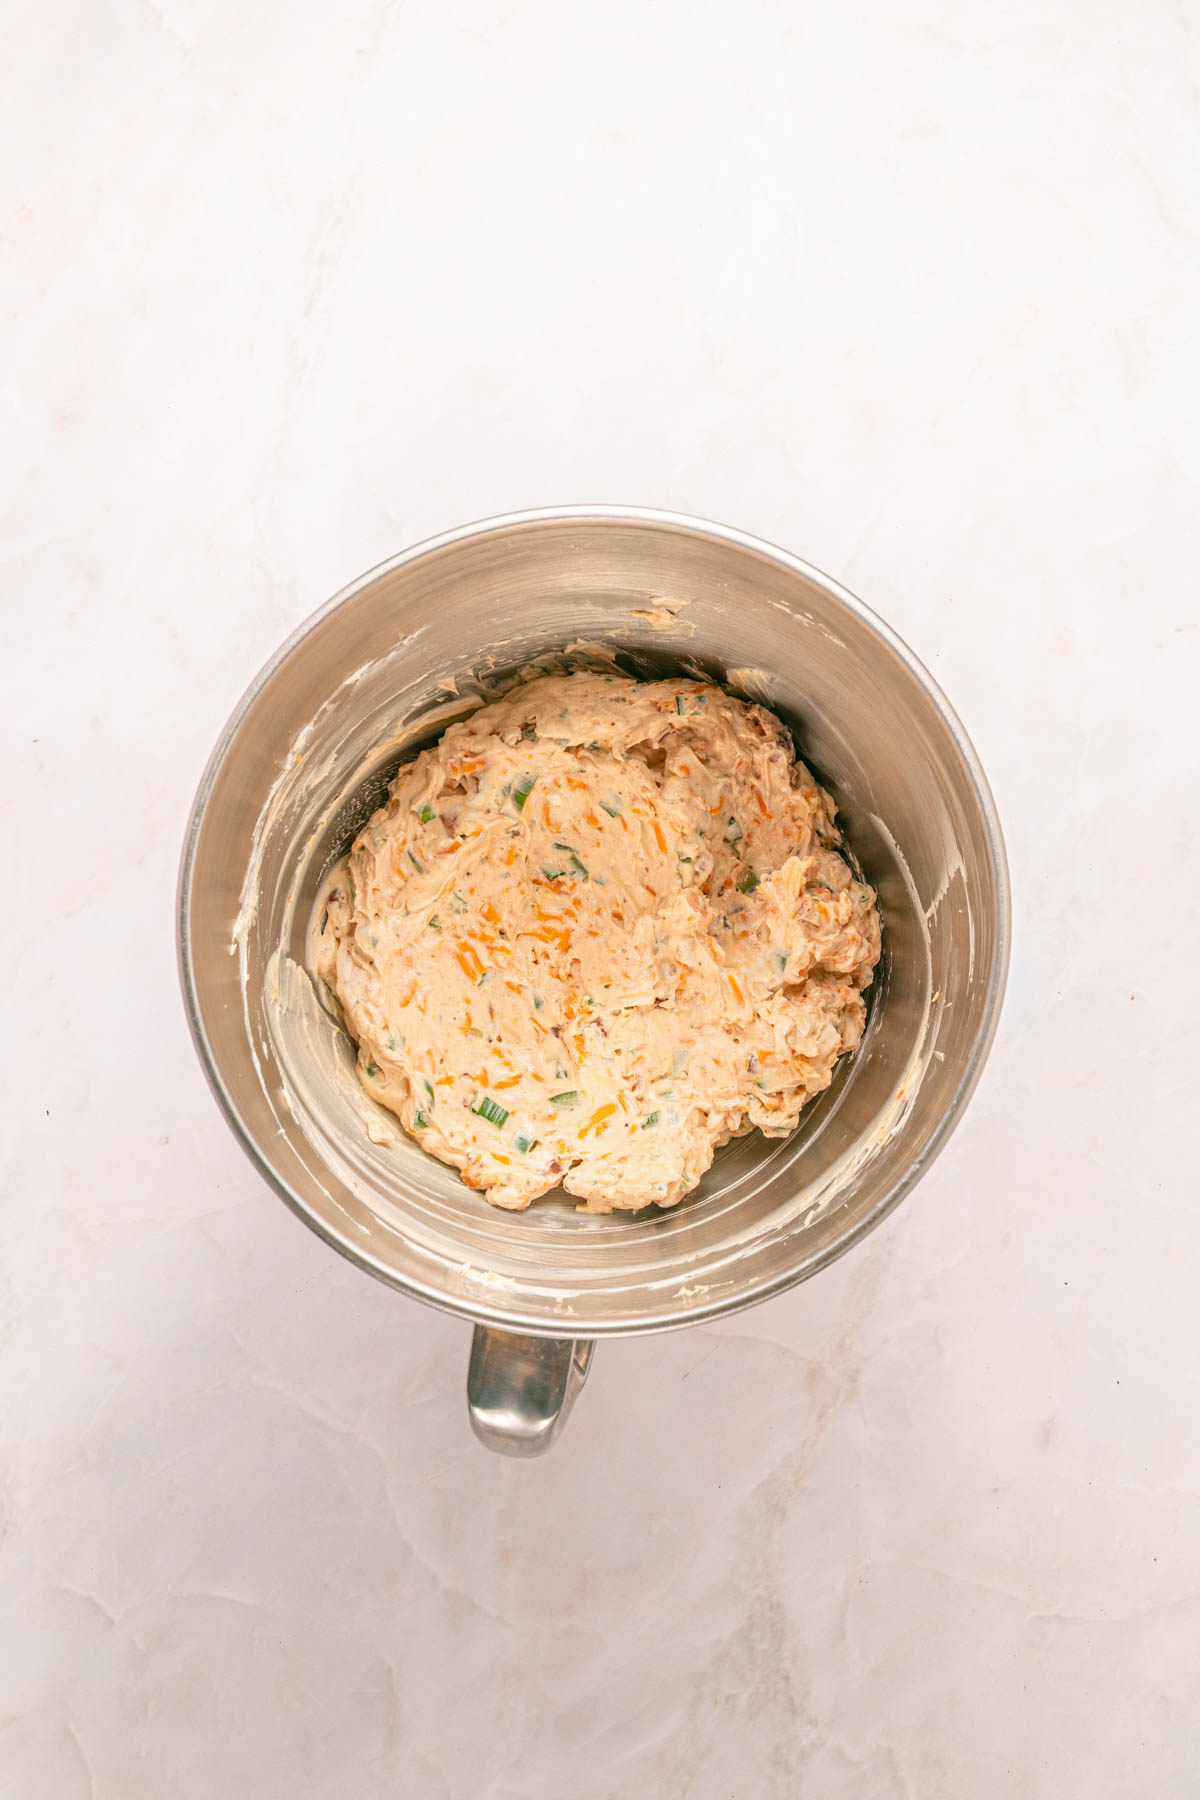
Step 2. In a large bowl, beat the cream cheese until smooth. Add cheddar, pepper jack, jalapeños, half of the chopped bacon, green onions, Worcestershire, garlic powder, paprika, cayenne, salt, and pepper.
Step 3. Mix until the ingredients are evenly combined.
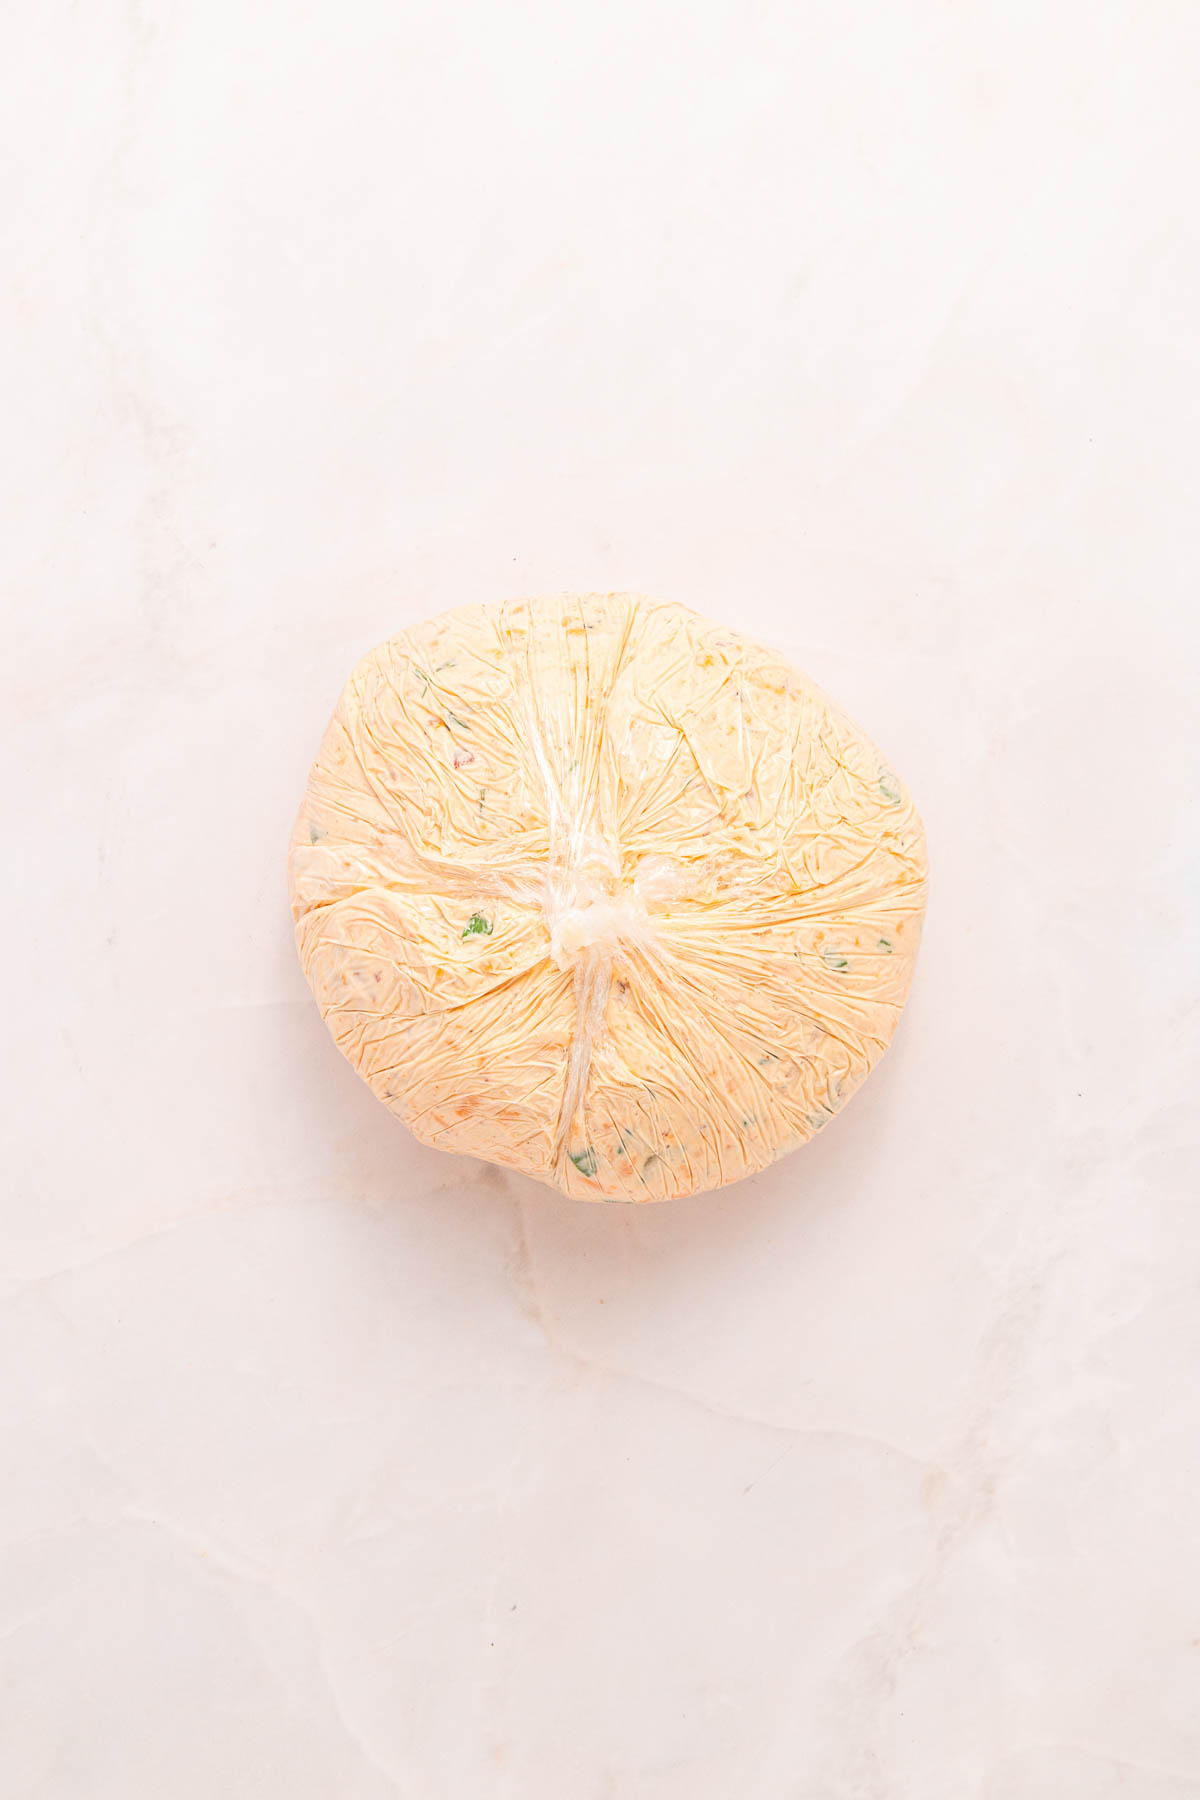
Step 4. Place a large piece of plastic wrap on a countertop and scoop the cheese mixture into the center. Next, pull the sides of the plastic wrap around the mixture to form a ball.
Step 5. Refrigerate the wrapped ball for at least one to two hours so the cheese ball chills and firms.
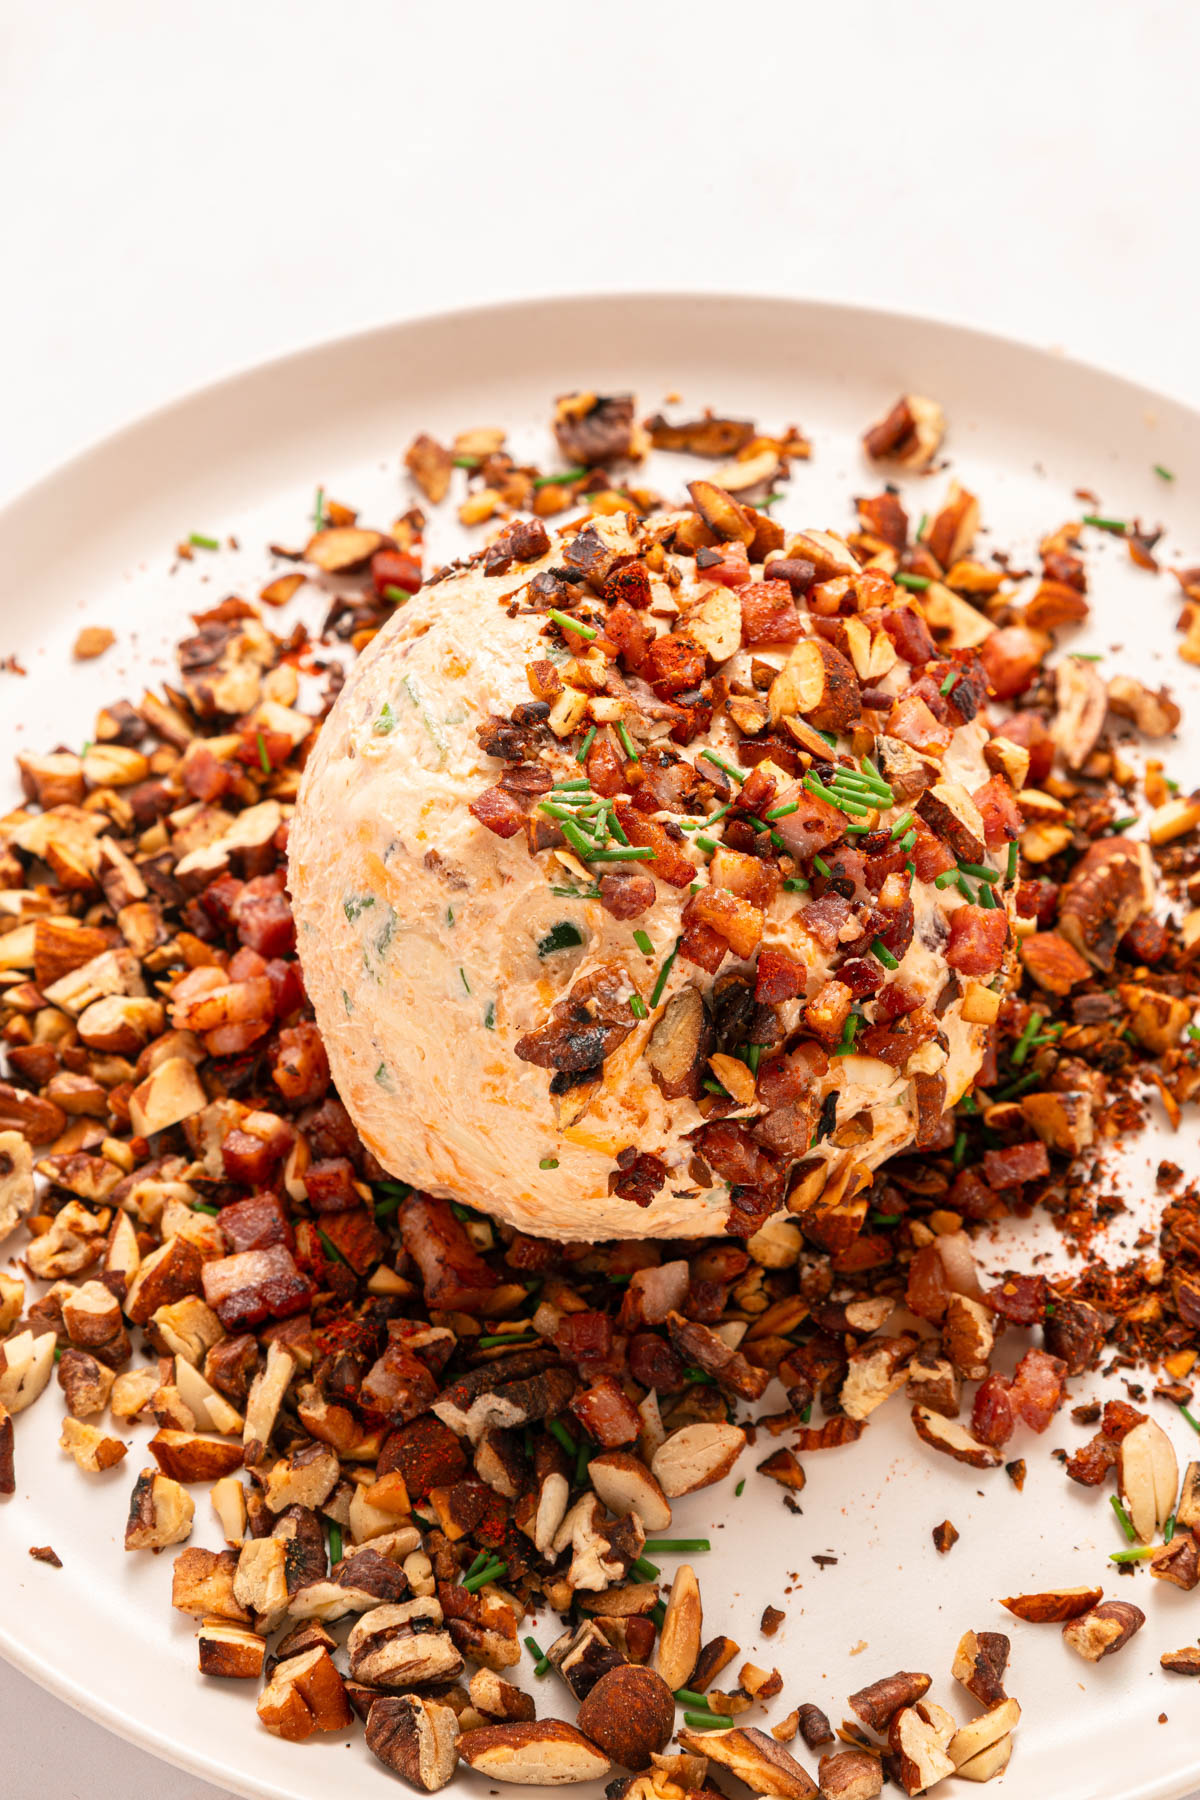
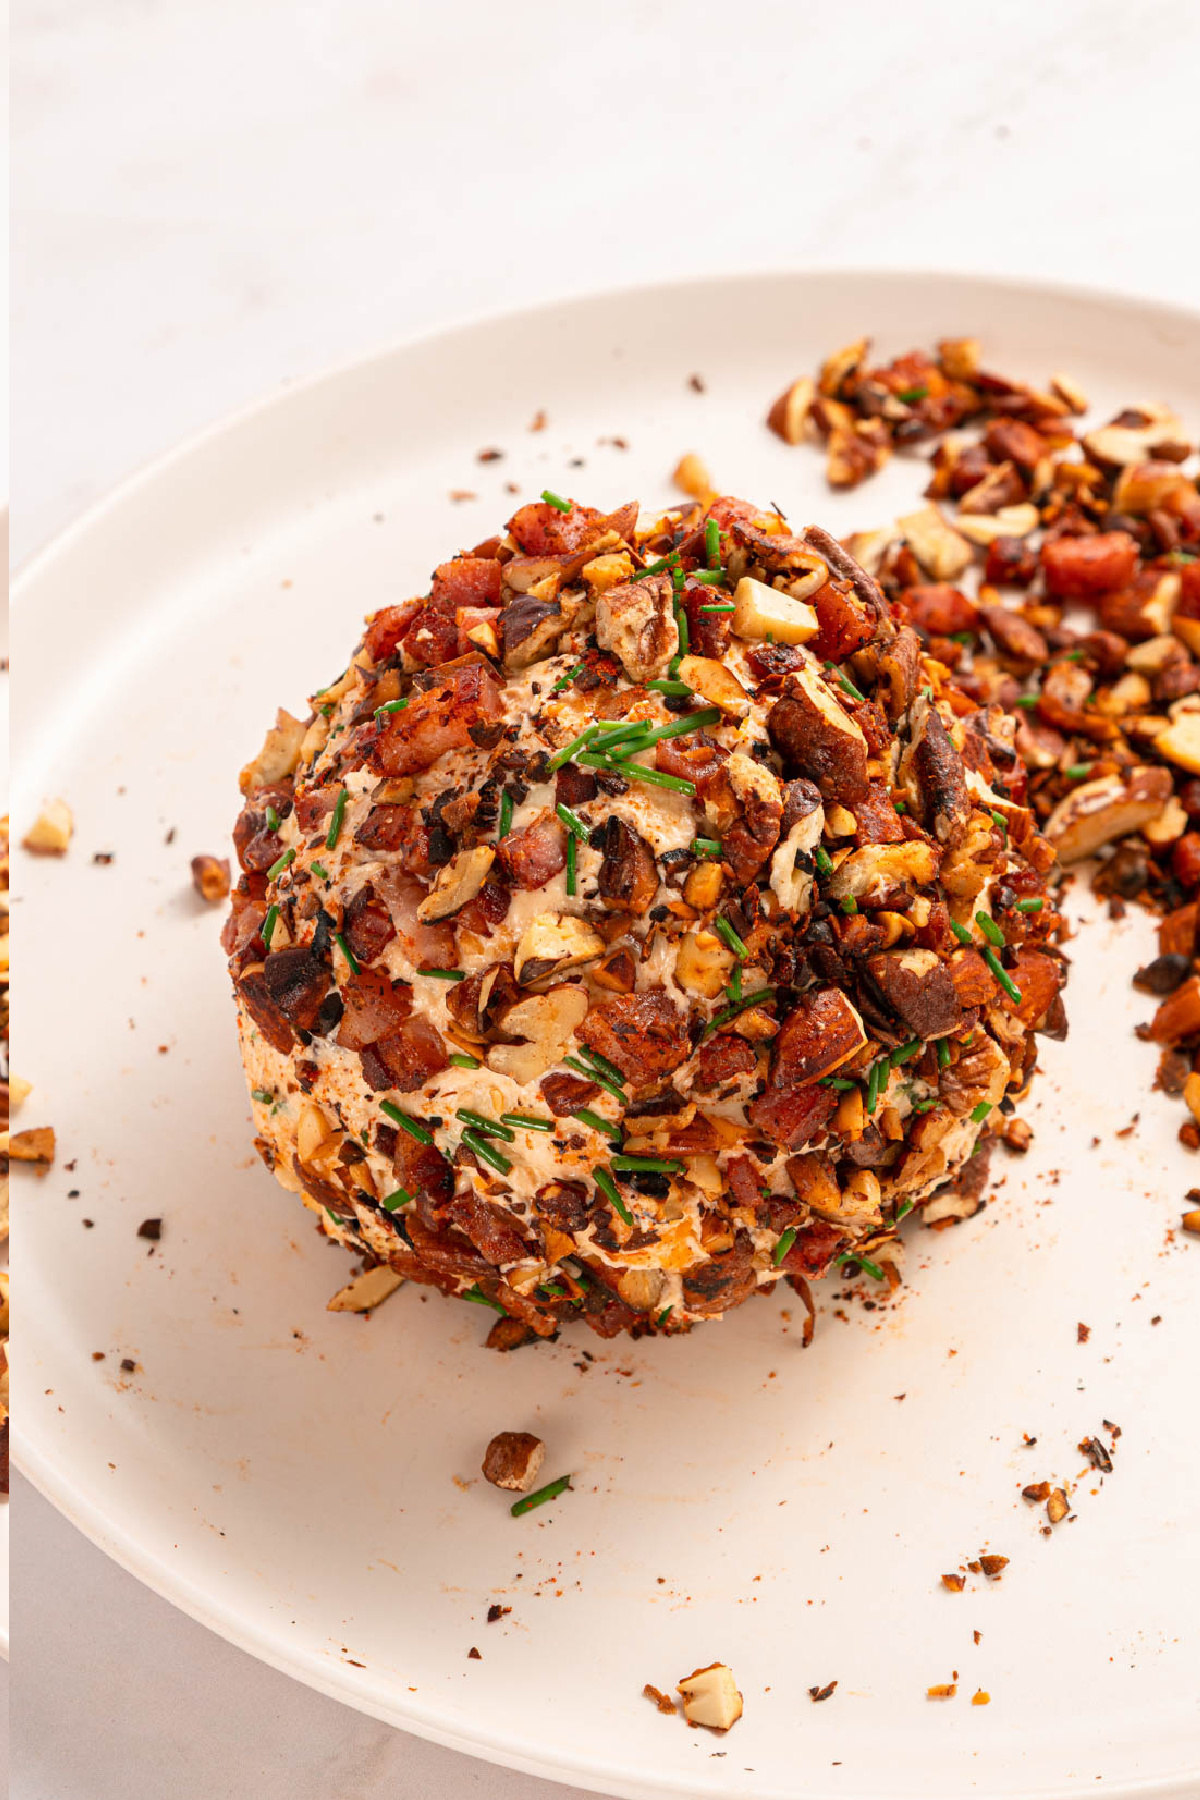
Step 6. Combine chopped toasted nuts, chives, bacon, and a pinch of paprika in a shallow dish. Remove the cheese ball from the plastic wrap and roll the cheese ball in the coating until fully covered.
Step 7. Place the coated cheese ball back into the refrigerator for about half an hour to an hour before serving.
Storage Instructions
Refrigerator: Wrap the cheese ball in plastic wrap and store it in the refrigerator for up to three days. The flavors stay fresh during this time, and the texture stays smooth and easy to scoop.
Freezer: You can freeze the cheese ball for up to one month if needed. Wrap it tightly in plastic wrap and place it in a freezer safe bag. Thaw it in the refrigerator before serving. Keep in mind that the fresh jalapeños may soften a bit after thawing.

Tips And Tricks
You really can’t go wrong with my easy recipe, but here are a few tips I found useful in making it perfect every time.
- Bring the cream cheese close to room temperature before mixing. It blends smoother and prevents little chunks from forming.
- I prefer to mix in the cheddar in last. It keeps the shreds from clumping and gives the cheese ball a more even texture.
- If the mixture feels too soft after stirring, chill it for a few minutes before shaping. This gives the cheeses time to firm up naturally.
- If the nut mixture doesn’t want to stick, just use your hand to gently press it into the surface of the cheese ball.
- Set the cheese ball out for a few minutes before serving. Slightly softening it ahead of time makes it easier to scoop with crackers or vegetables.
Variations And Add-ins
The great thing about cheese balls is that you can change up the ingredients however you like. Here are some of my favorite ideas.
- Seasoning: Add a pinch of onion powder for added flavor.
- Cheeses: You can use Colby Jack, Monterey Jack, or extra sharp cheddar if you want to change the flavor slightly.
- Nuts: Use toasted cashews or pistachios in the coating if you want a different texture than the classic pecans or almonds.
- Dip: Add a few tablespoons of sour cream if you want it looser, dip-style appetizer.
- Jalapeños: If you prefer a tangier flavor, use pickled jalapeños in place of some or all of the fresh ones.
- Peppers: Add finely diced red bell pepper for extra color without increasing the heat.
- Tomatoes: Stir in a small amount of chopped sun dried tomatoes for added flavors that pair well with cream cheese.
FAQs
Yes, just use shredded cheese, bacon, and green onion instead.
That depends on how many jalapeño seeds you include. Remove all the seeds if you prefer a milder flavor.
Yes, but freshly shredded cheese blends more smoothly into the mixture.
Crackers, tortilla chips, pretzels, or crisp vegetables work well with the creamy texture.
More Delicious Party Appetizers
- 7 Layer Dip Cups
- Fried Goat Cheese
- Sausage Dip
- Hot Corn Dip
- Black Bean & Corn Salsa
- Easy Brie & Prosciutto Appetizer
- Sausage Stuffed Mushrooms
- Creamy Pickle Dip
Jalapeno Cheese Ball
Ingredients
For the Cheese Ball
- 16 ounces cream cheese softened
- 1 ½ cups shredded cheddar cheese
- ½ cup shredded pepper jack cheese
- 2 fresh jalapeños finely diced (remove seeds for less heat)
- 3 slices bacon cooked and finely chopped
- 2 green onions finely sliced
- 1 ½ teaspoon Worcestershire sauce
- 1 teaspoon garlic powder
- ½ teaspoon smoked paprika
- ¼ teaspoon cayenne pepper optional, for extra heat
- Salt and black pepper to taste
For the Coating (mix and match or use them all)
- ¾ cup finely chopped toasted pecans and almonds
- ⅓ cup shredded cheddar cheese
- 2 tablespoon chopped chives or green onion
- 1 slice Canadian or regular bacon cooked and finely chopped
- pinch smoked paprika
Instructions
- In a large bowl, beat the cream cheese until smooth. Add cheddar, pepper jack, jalapeños, bacon, green onions, Worcestershire, garlic powder, paprika, cayenne, salt, and pepper.16 ounces cream cheese, 1 ½ cups shredded cheddar cheese, ½ cup shredded pepper jack cheese, 2 fresh jalapeños, 3 slices bacon, 2 green onions, 1 ½ teaspoon Worcestershire sauce, 1 teaspoon garlic powder, ½ teaspoon smoked paprika, ¼ teaspoon cayenne pepper, Salt and black pepper
- Mix well until all the ingredients are combined well.
- Place a large piece of plastic wrap on a countertop and scoop the cheese mixture into the center. Next, pull the sides of the plastic wrap around the mixture to form a ball.
- Refrigerate the wrapped ball for at least one to two hours so the cheese ball chills and firms.
- Place the coating ingredients on a large plate. Remove the cheese ball from the plastic wrap and roll the cheese ball in the coating until fully covered.¾ cup finely chopped toasted pecans and almonds, ⅓ cup shredded cheddar cheese, 2 tablespoon chopped chives or green onion, 1 slice Canadian or regular bacon, pinch smoked paprika
- Place the coated cheese ball back into the refrigerator for about half and hour to an hour before serving.
Notes
- This will form one large ball or two smaller ones.
- Bring the cream cheese close to room temperature before mixing. It blends smoother and prevents little chunks from forming.
- I prefer to mix in the cheddar in last. It keeps the shreds from clumping and gives the cheese ball a more even texture.
- If the mixture feels too soft after stirring, chill it for a few minutes before shaping. This gives the cheeses time to firm up naturally.
- Set the cheese ball out for a few minutes before serving. A slight soften makes it easier to scoop with crackers or vegetables.
- Wrap the cheese ball in plastic wrap and store it in the refrigerator for up to three days. The flavors stay fresh during this time, and the texture stays smooth and easy to scoop.
- You can freeze the cheese ball for up to one month if needed. Wrap it tightly in plastic wrap and place it in a freezer safe bag. Thaw it in the refrigerator before serving. Keep in mind that the fresh jalapeños may soften a bit after thawing.
Nutrition
Did You Make This Recipe?
Share it with me on Instagram @funmoneymom and follow on Pinterest @funmoneymom for more!
Let’s be friends!
Did you love this post? Make sure to comment below and let me know your thoughts! And don’t forget to follow on your favorite social network below!

About Lisa O’Driscoll
Lisa O’Driscoll is a lifestyle and parenting expert, cookbook author, and the creative force behind Fun Money Mom, a popular blog she’s run since 2014. She’s the author of the children’s cookbook Roll It, Slice It, Mash It, Dice It, designed to get kids excited about cooking. With multiple TV appearances under her belt, she loves sharing her expertise on family-friendly recipes, creative DIYs, and party planning and is always on a mission to inspire and entertain!