Easy DIY Gnome Pumpkin
This post may contain affiliate links. As an Amazon Associate, I earn from qualifying purchases.

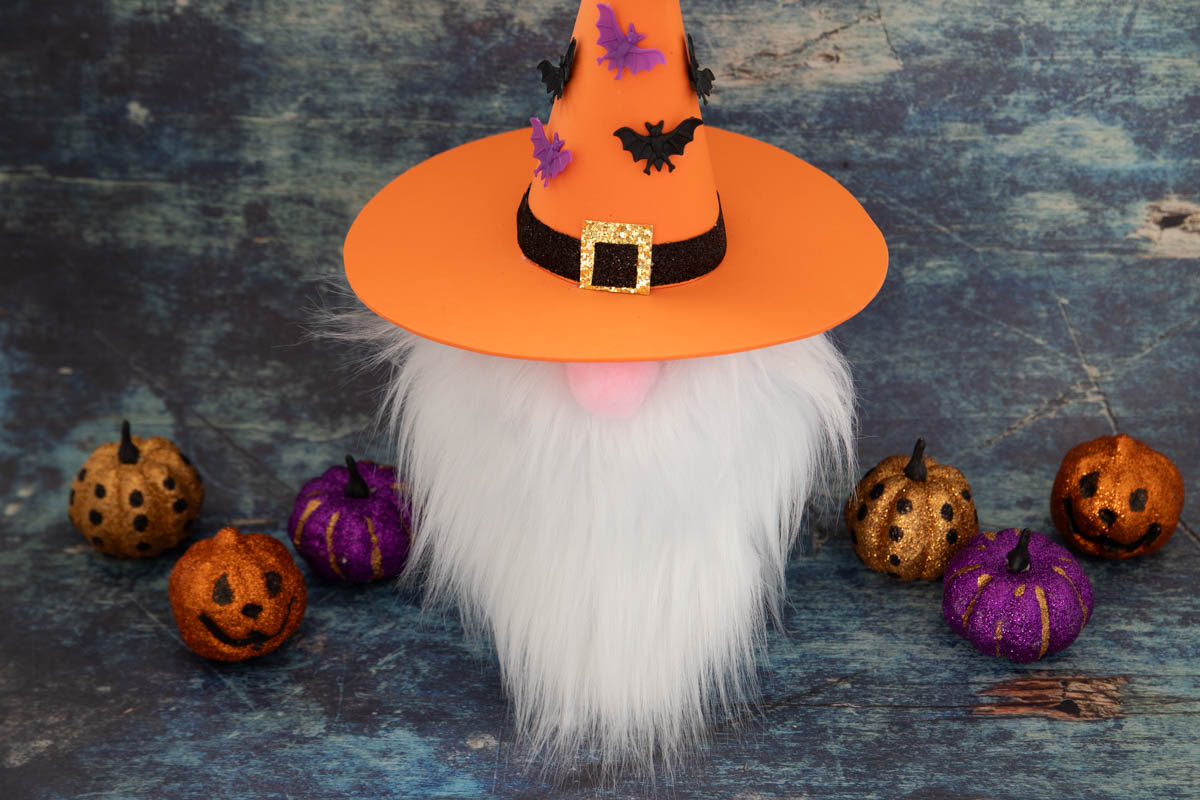
This adorable fall Gnome Pumpkin is easy, mess-free and so much fun for the little ones. All you need are a few simple craft supplies and you’ve got the perfect Halloween craft for spooky season!
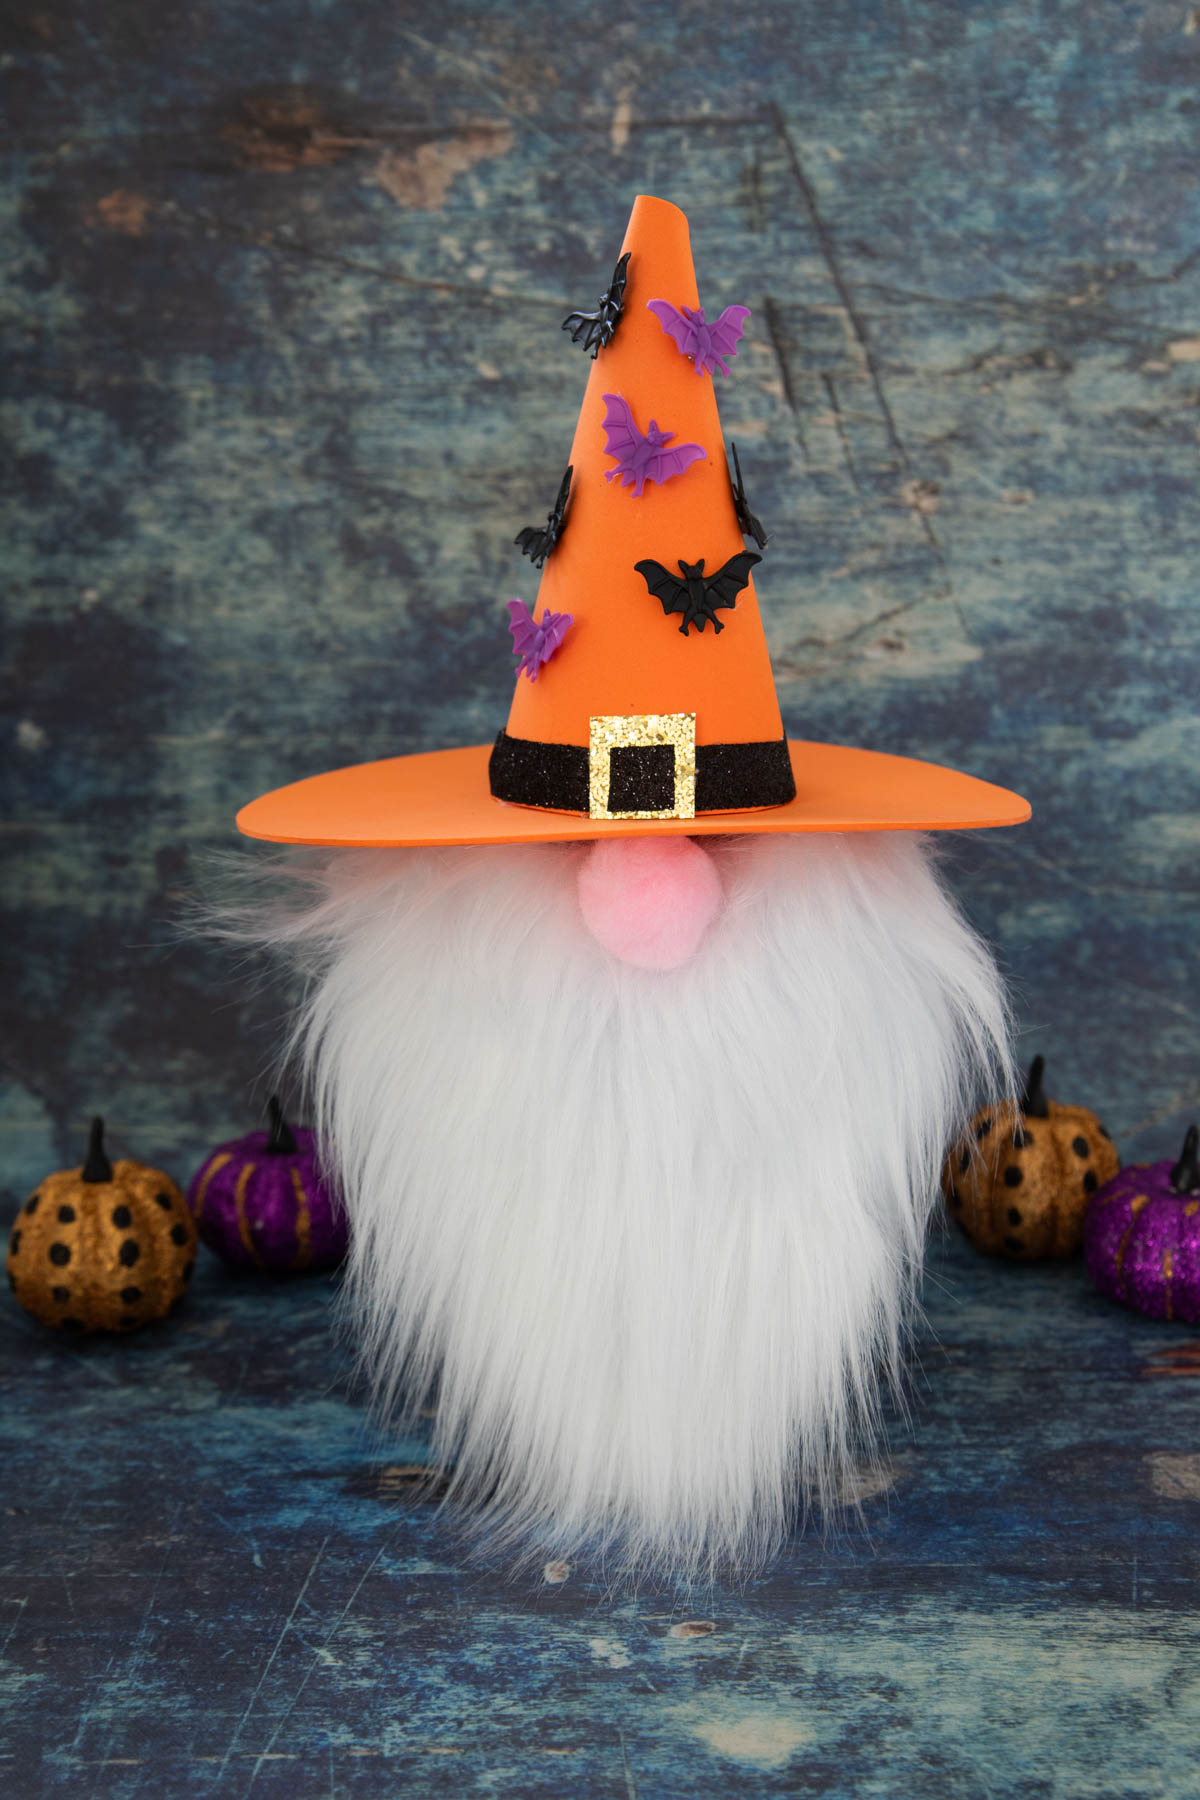
Easy Halloween Pumpkin Gnome
I’m all about the pumpkins this time of year! They’re always so much fun and get such a kick out of coming up with new cute pumpkin decorating ideas each year!
I’ve learned over the years that you can pretty much turn a pumpkin into anything! This year’s batch includes a Grinch pumpkin, a Pikachu pumpkin and even a sparkly Taylor Swift pumpkin! Since they are all the rage these days, I thought I’d make an easy pumpkin gnome to add to my collection!
You can never go wrong with a gnome craft and I had so much fun sharing this one, along with the others, on ABC7’s Suncoast View morning show! Feel free to check it out and if you have any suggestions for next year, I’m all ears!
Why We Love This Craft
Easy & Mess Free – Because this fall craft tutorial is so simple, it’s perfect for the whole family. As a mom I love it even more than everyone else because there’s no squishy pumpkin mess to clean up afterwards!
Budget-friendly – Most of these supplies can be found at Dollar Tree or Walmart, so this craft is super easy on the wallet. I did have to go to Michael’s for the faux fur to make the gnome’s beard, but even that wasn’t too pricey.
Versatile – The fun thing about this craft is that it’s so versatile. You can paint your pumpkin any color you’d like, try making different colored gnome hats and even change up the way the hat is decorated. There’s no right way or wrong way so feel free to make it your own!
Supplies Needed
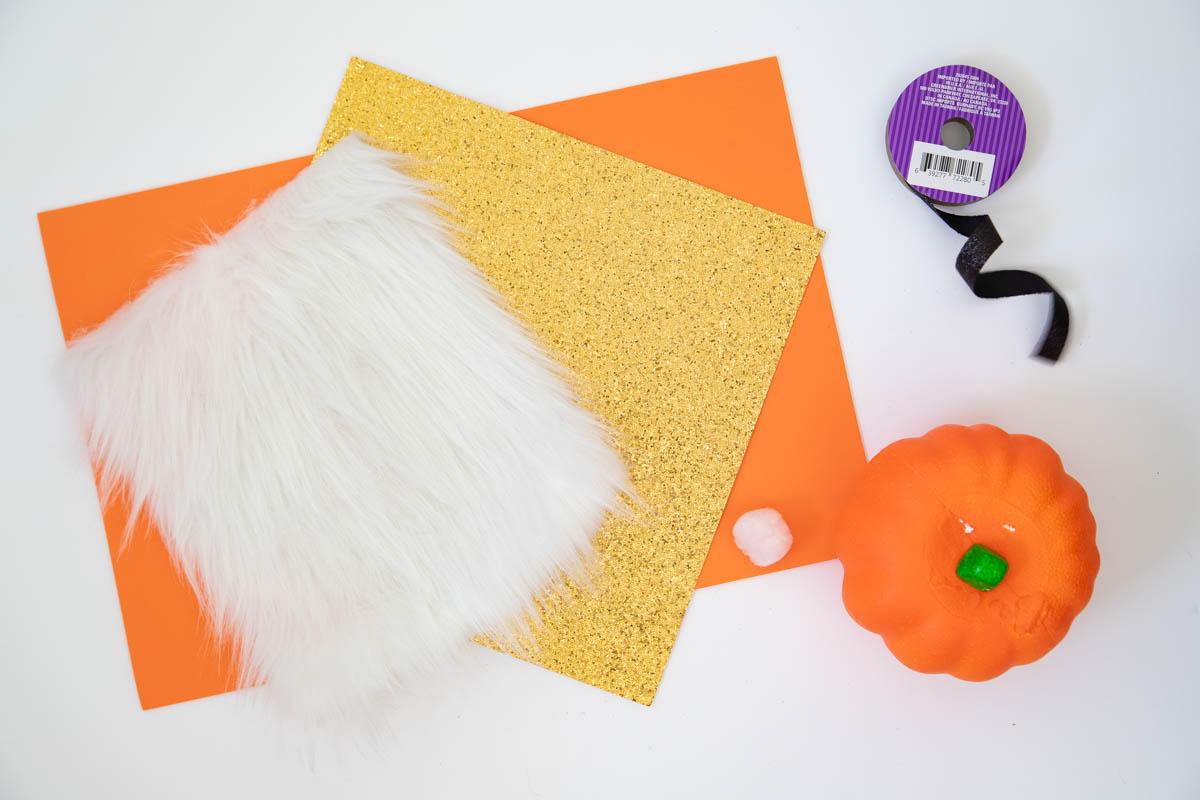
- Styrofoam pumpkin (Dollar Tree)
- Orange craft foam
- Gold glitter cardstock
- Black ribbon
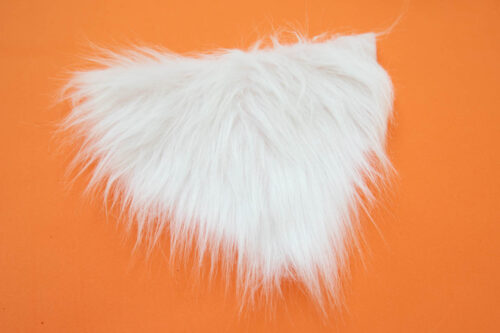
- White craft fur
- Large pink pom pom
- Plastic bat rings (optional)
- Paint (optional))
- Free gnome hat pattern
Equipment
- Hot glue gun
- Hot glue sticks
- Scissors
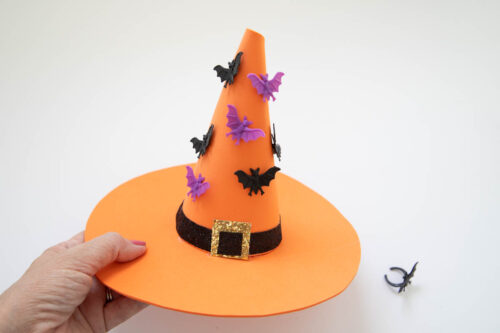
I often just use whatever I have on hand when making my crafts. I happened to have a bag of plastic bat rings laying around and decided to cut off the back and use them to decorate the hat.
Feel free to get creative. You can make a black hat and wrap spiderwebs around it (with plastic spiders too). Other options could be to add stickers, paint or anything else you have on hand.
More Fun Halloween Pumpkin Ideas

Gnome Pumpkin
Materials
- Craft pumpkin
- Halloween colored craft paint optional
- 2 pieces 9×12 orange craft foam
- 1 piece Gold glitter cardstock
- Black ribbon
- Plastic bat rings optional
- 1 piece White craft fur 10×10
- 1 Pink pom pom
Instructions
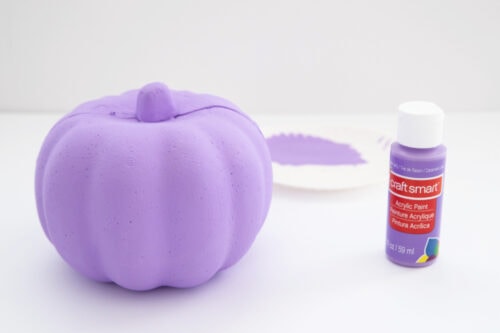
- If you choose to paint your pumpkin, do this step first. That way you can work while the pumpkin dries.

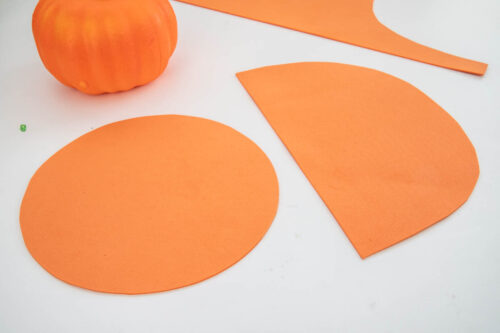
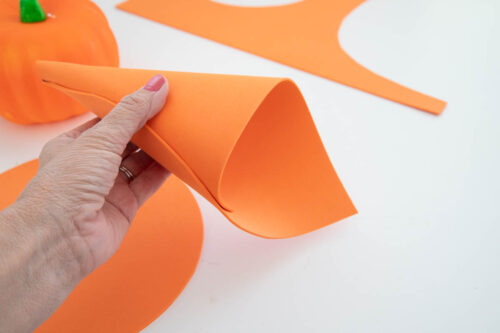
- Print the template for the hat and cut out the pieces. Trace onto orange craft foam and cut out.
- Roll the half circle into a cone shape. The bottom will not be perfectly round.
- Trim the bottom of the cone so that it's even all the way around.
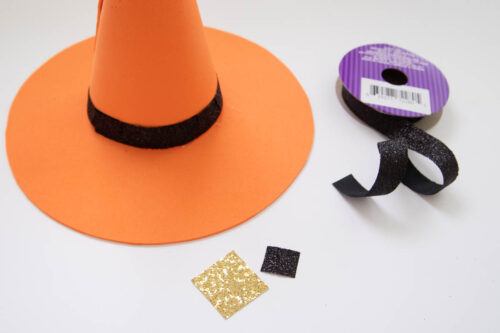
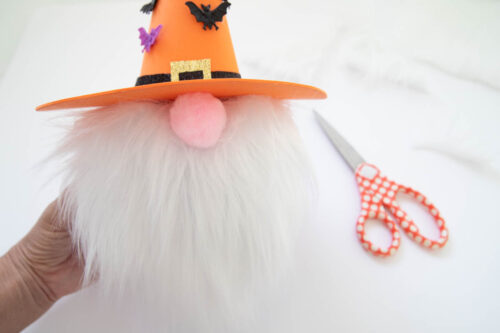
- Glue the cone piece to the top of the circular piece to create a witches hat. Wrap a piece of black ribbon around the base and secure with hot glue.
- Cut out a small square from the glitter cardstock and a smaller piece of black ribbon to fit in the middle.
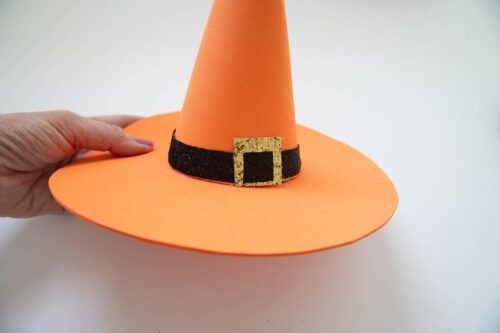
- Glue the glittery "buckle" to the black ribbon. Glue the smaller ribbon on top, making sure it's even with the rest of the black ribbon.
- Decorate however you like. We cut the back off of plastic rings and added bats but you can add stickers, wrap spiderwebs around it or anything else you think would be a fun addition.
- Cut your craft fur into a beard shape. It will look a little like a wide triangle. As you're cutting, cut under the fur as much as you can so that the fur hangs over the sides a little.
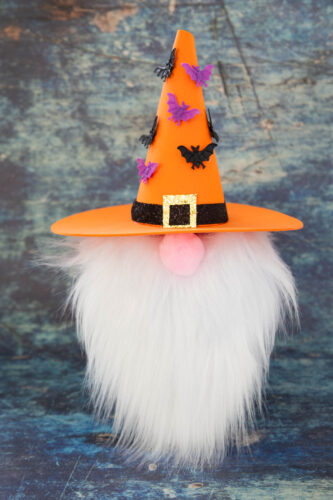
- Use a craft knife or box cutter to cut a small "x" in the bottom of the hat (parents should do this for younger children). Slide the hat over the stem of the pumpkin and glue into place. Glue the beard to the pumpkin just under the hat, then add the pom pom for a nose.
- Now you have a cute pumpkin gnome that's ready to display!


Notes
Did You Make This Project?
Share it with me on Instagram @funmoneymom and follow on Pinterest @funmoneymom for more!
Let’s be friends!
Did you love this post? Make sure to comment below and let me know your thoughts! And don’t forget to follow on your favorite social network below!

About Lisa O’Driscoll
Lisa O’Driscoll is a lifestyle and parenting expert, cookbook author, and the creative force behind Fun Money Mom, a popular blog she’s run since 2014. She’s the author of the children’s cookbook Roll It, Slice It, Mash It, Dice It, designed to get kids excited about cooking. With multiple TV appearances under her belt, she loves sharing her expertise on family-friendly recipes, creative DIYs, and party planning and is always on a mission to inspire and entertain!