Halloween Dirt Pudding Recipe
This post may contain affiliate links. As an Amazon Associate, I earn from qualifying purchases.
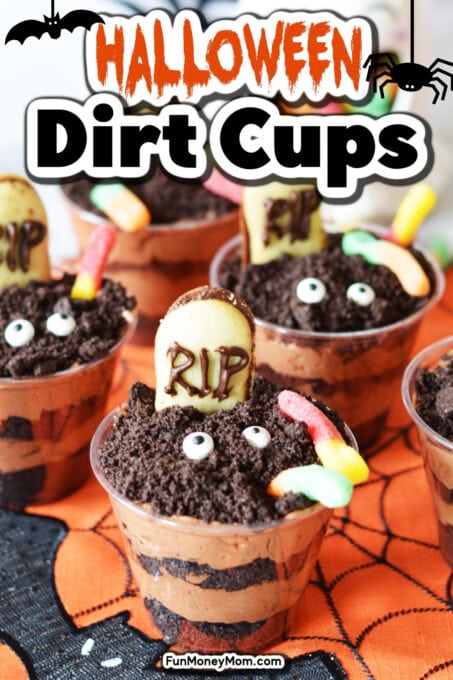
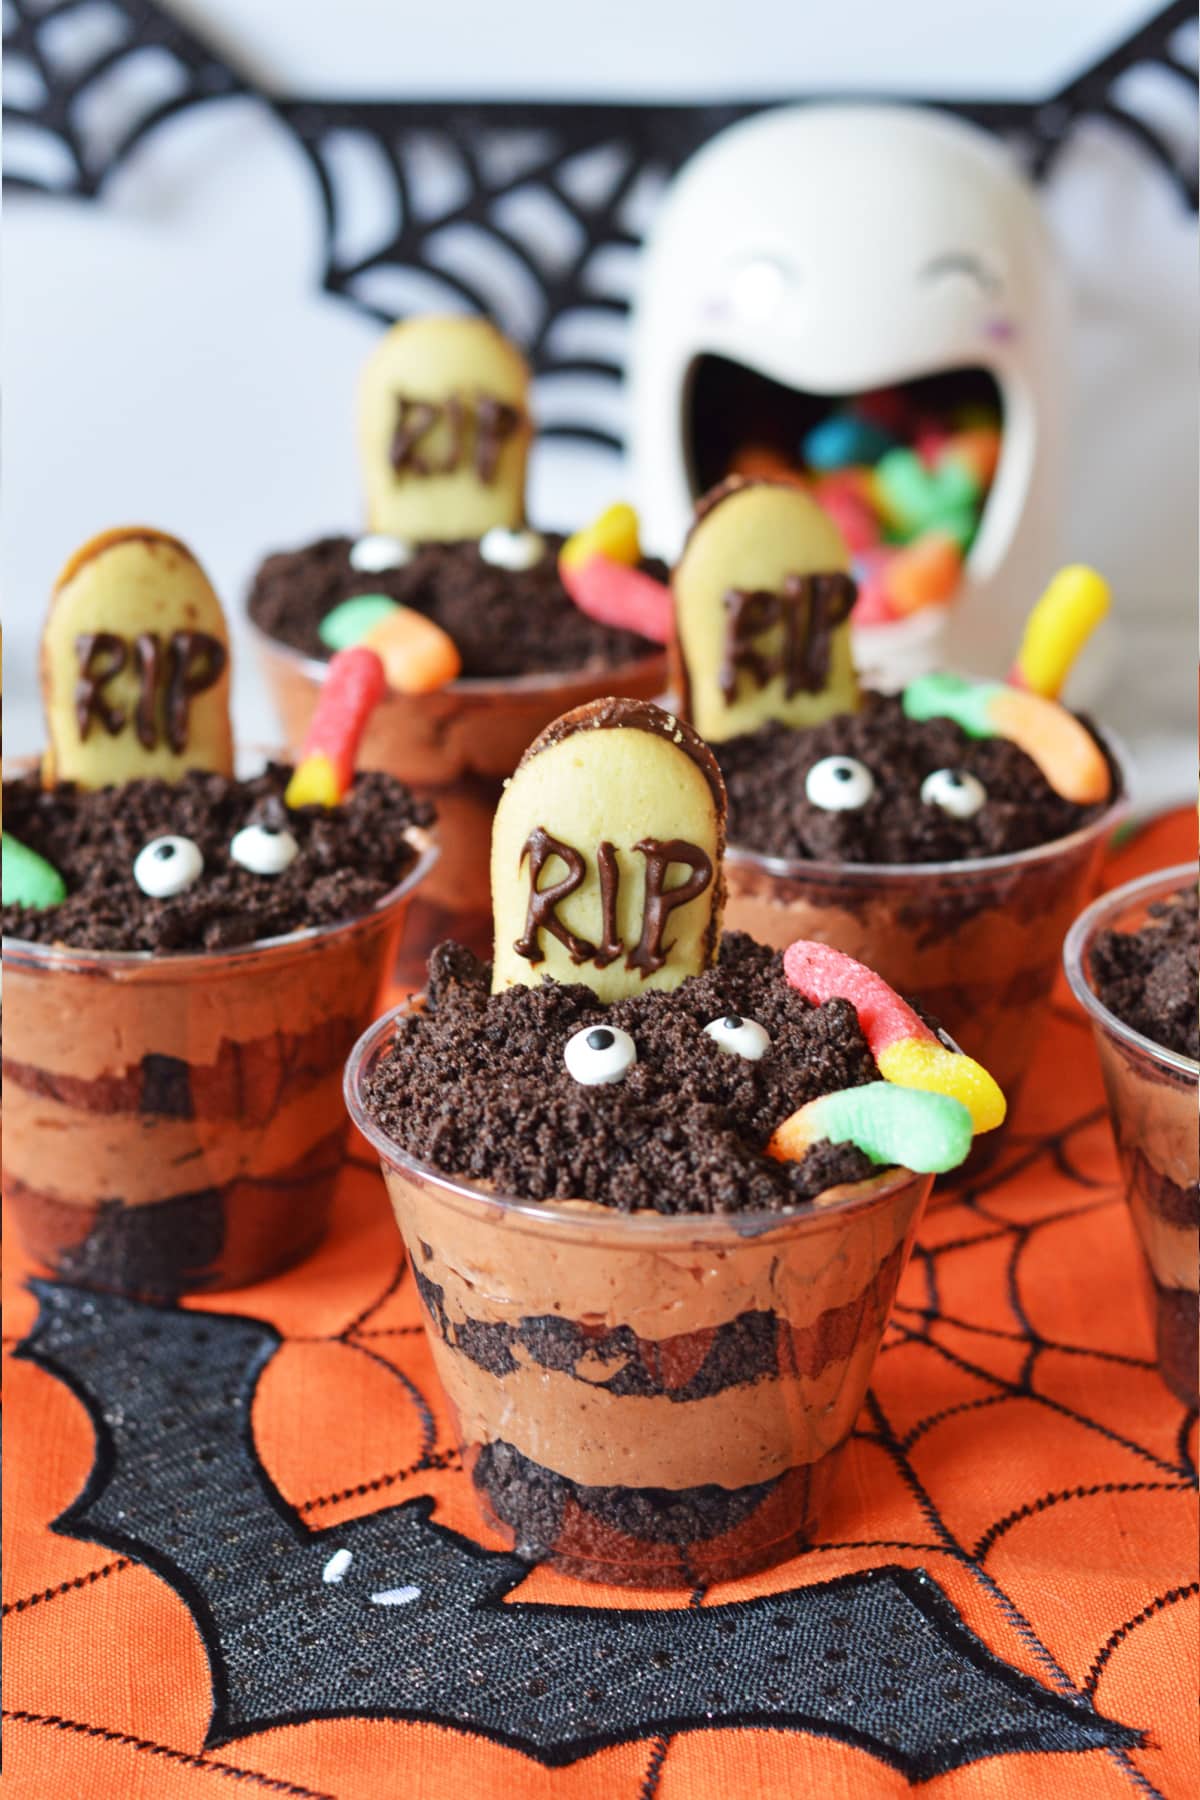
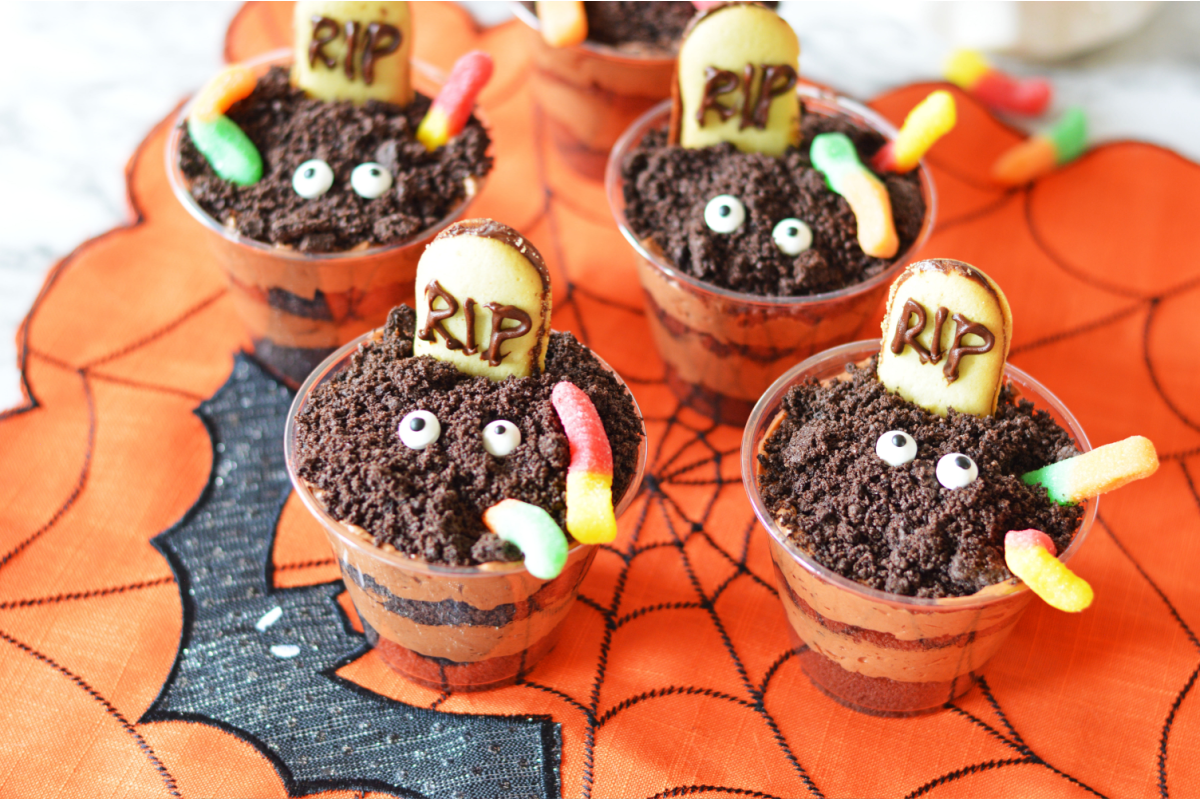
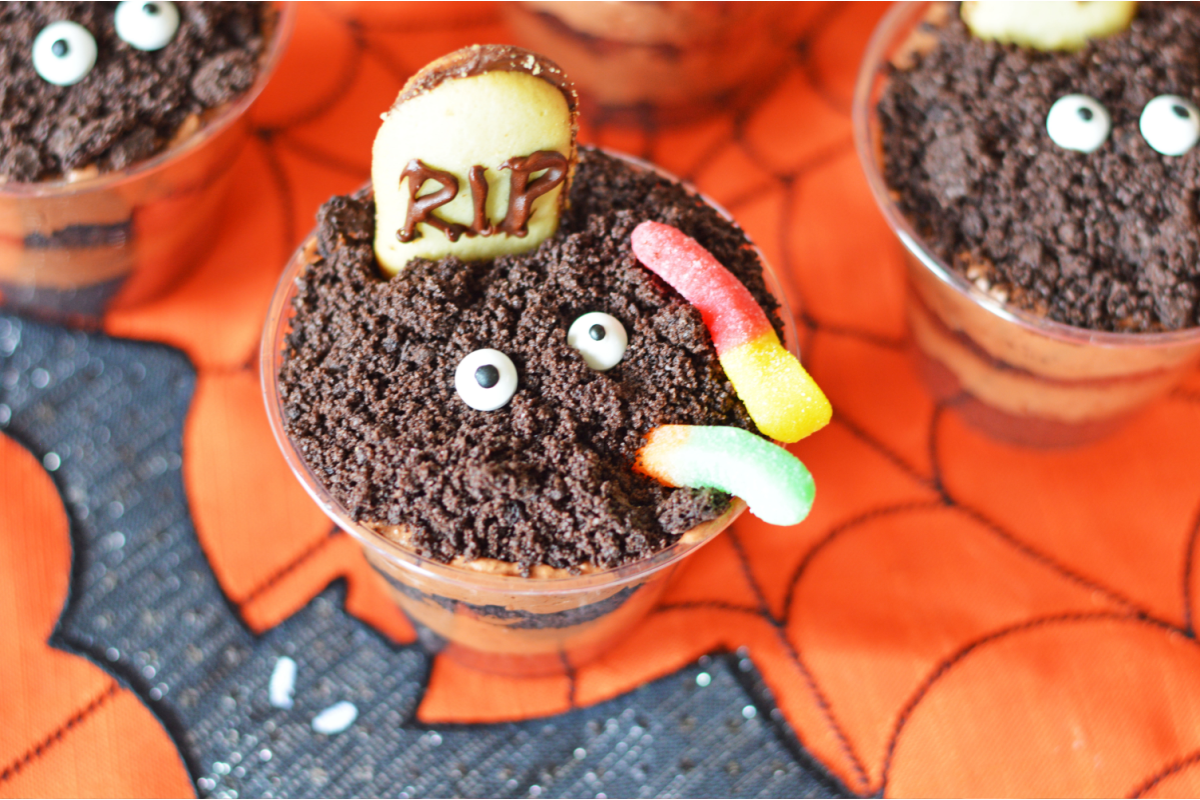
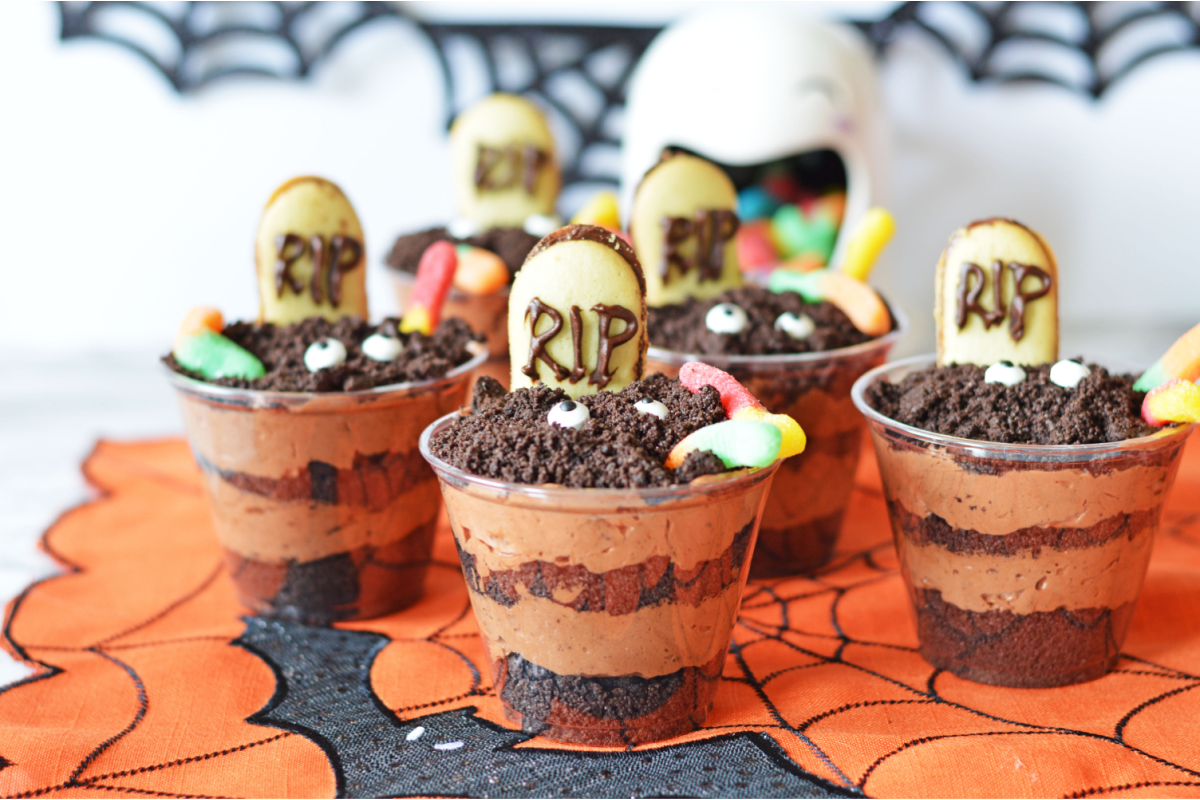
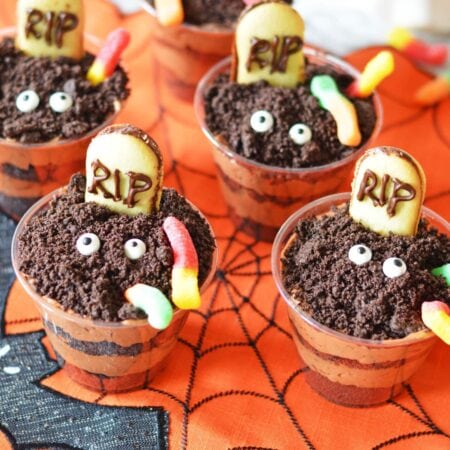
This easy and delicious Halloween Dirt Pudding Recipe will get rave reviews from all your little ghosts and goblins. Individual cups are filled with chocolate cookie dirt, rich and creamy chocolate pudding and adorned with worms, spooky little tombstones and googly eyes staring right at you!
👻 Fun Halloween Dirt Cups
Halloween is right around the corner, and we could not be more excited. We just love all the family fun that comes with it! From a Halloween Scavenger Hunt and Pumpkin Decorating to making the cutest DIY Halloween Costumes, we can’t get enough!
But sweet and delicious treats are truly the best part of Halloween, which is why you are going to love this creepy no-bake dessert. These Oreo graveyard dirt cups make an easy and fun treat to serve at school parties, Halloween gatherings or just for an extra special dessert to serve after a spooky dinner, like these Mummy Pizzas, on Halloween night.
Your kids will absolutely love all the chocolatey layers of goodness as they dig down through the crushed cookie dirt into the pudding. Because this dessert doesn’t require baking or any special equipment the kids will have as just as much fun making them as they will eating them, especially when it comes time to adding all the fun toppings!
💖 Why We Love This Recipe
- A super cute Halloween dessert that’s so much fun for the kids to help make.
- These Oreo dirt cups are the ultimate festive treat for any Halloween party.
- They only take a few minutes to put together using a few simple pantry staples and some Halloween themed candies.
🥄 Recommended Tools
- Plastic cups (9 ounce size)
- Mixing bowl
- Whisk
- Piping bag (or ziploc bag)
- Small round decorating tip
- Measuring cup
🛒 What’s Needed to Make Graveyard Pudding Cups
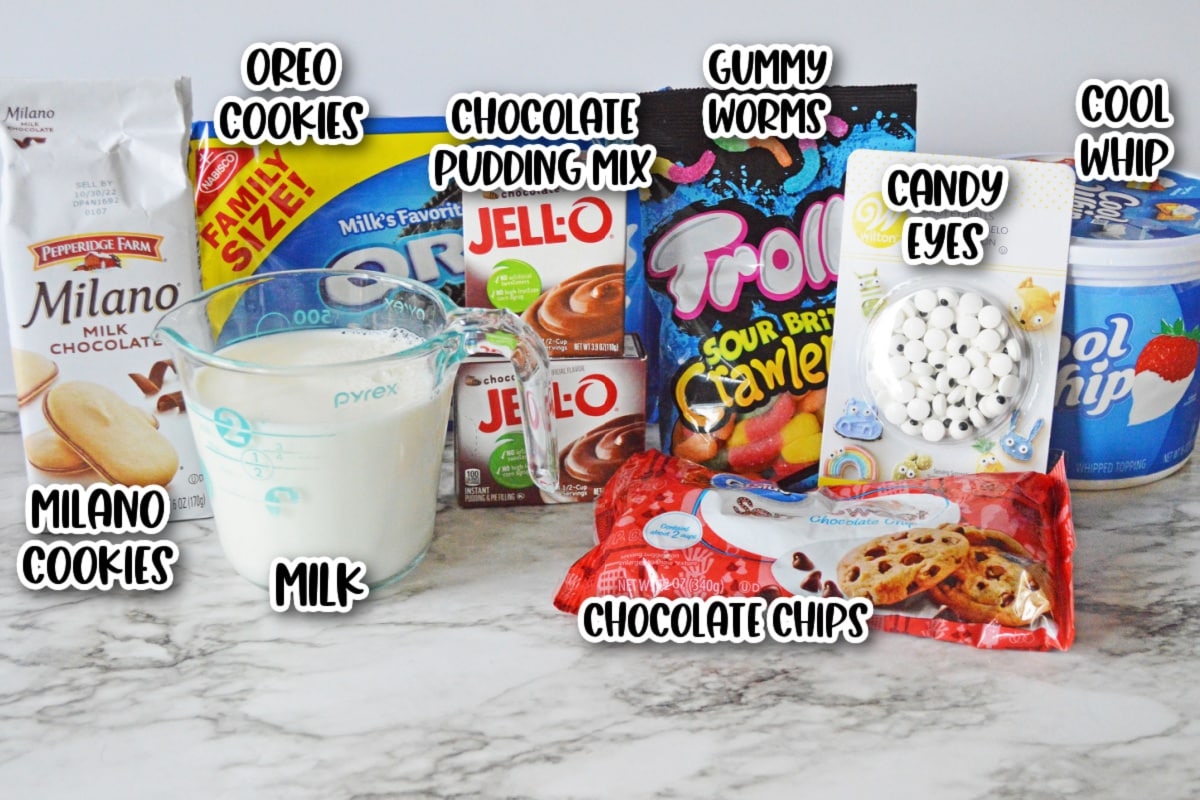
- Instant chocolate pudding mix 3 ounce size
- Whole milk
- Cool Whip
- Oreo cookies (or other chocolate sandwich cookies)
- Candy eyeballs
- Gummy worms
- Milano cookies
- Chocolate chips
How to Make Halloween Graveyard Dirt Cups
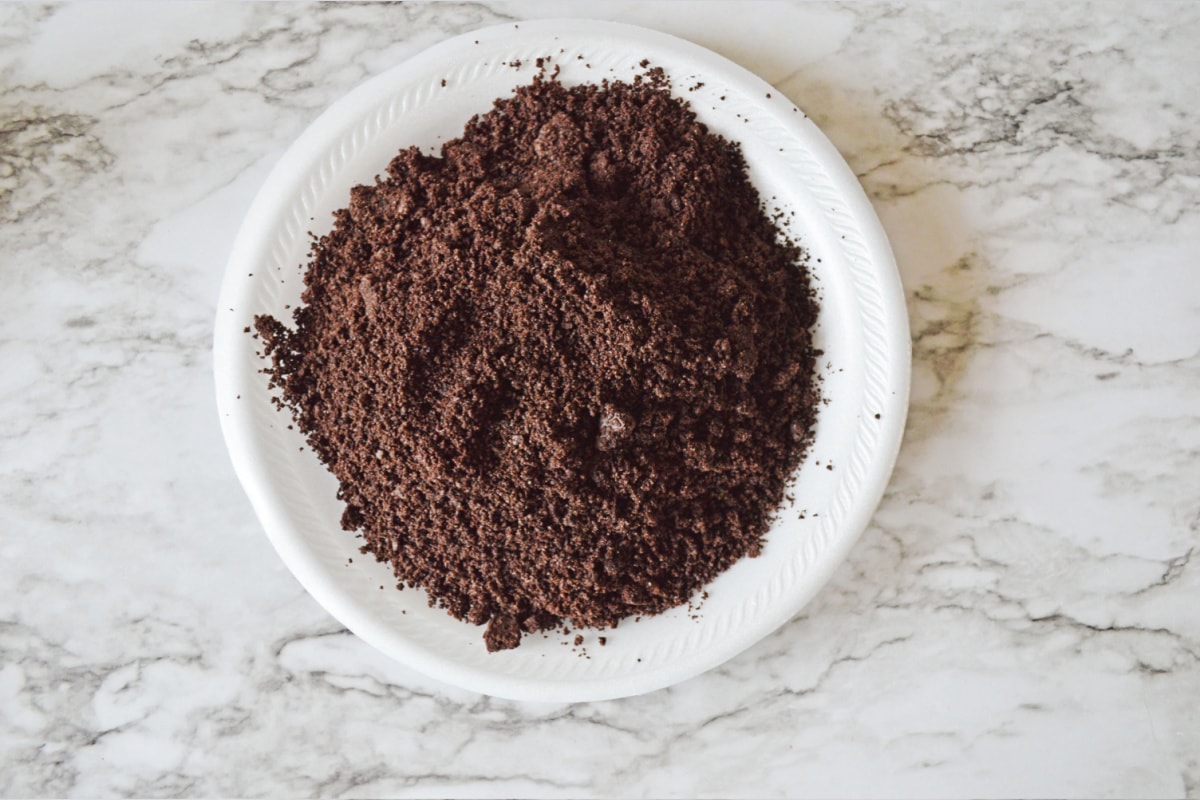
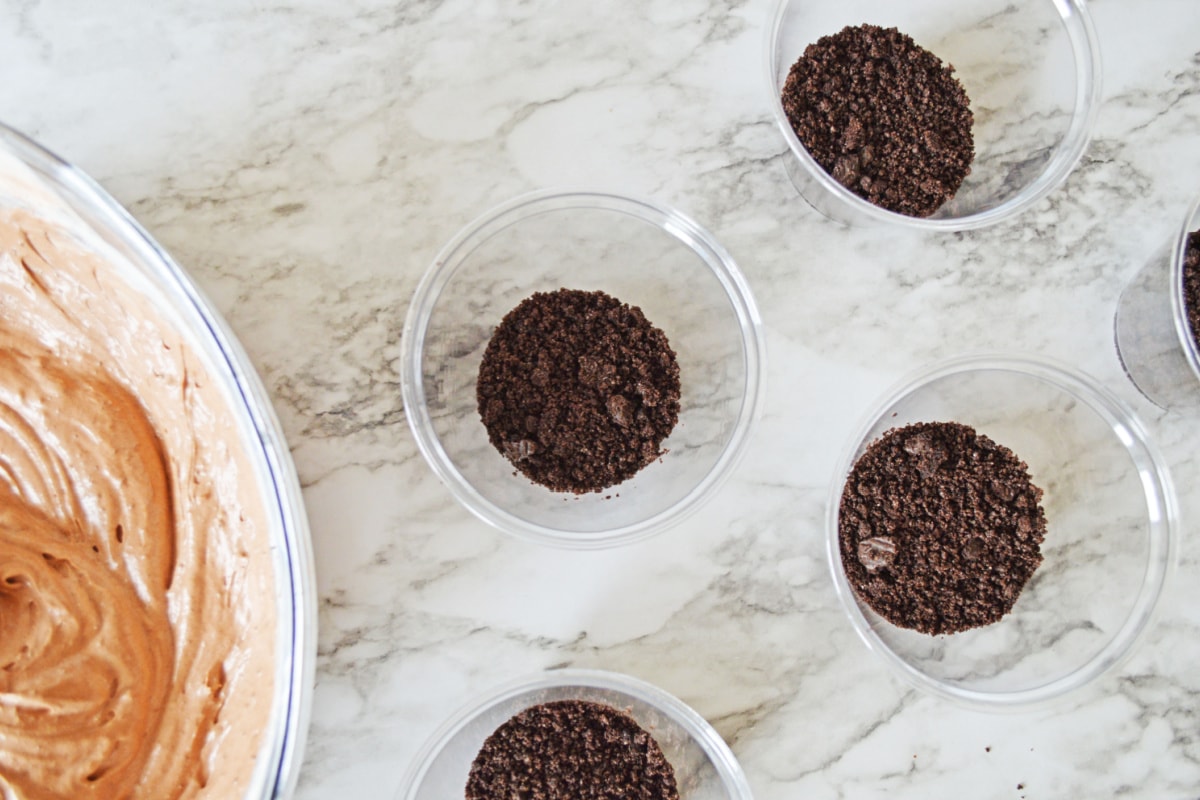
Step 1. In your food processor, blitz the chocolate cookies into crumbs. Place into a spare bowl or plate and set aside.
Tip: If you don’t have a food processor, you can put the cookies in a large Ziploc bag and beat them with a rolling pin until they are fine crumbs.
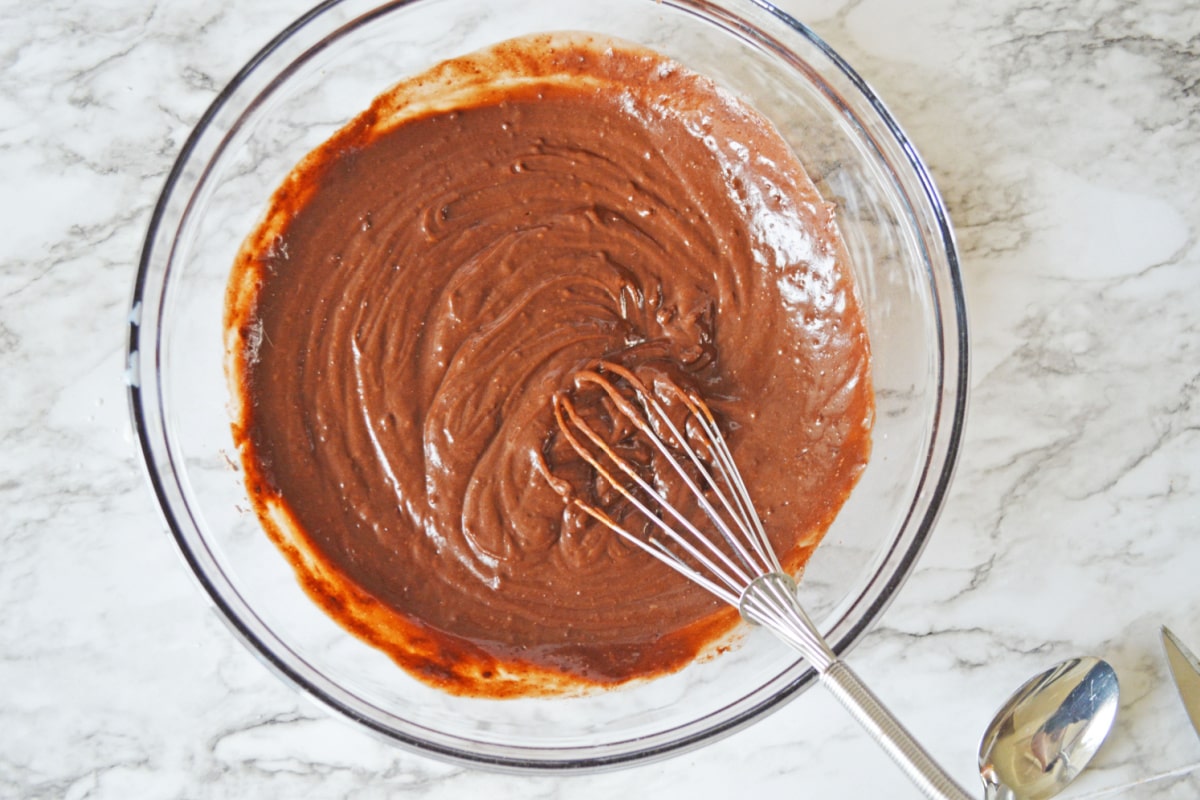
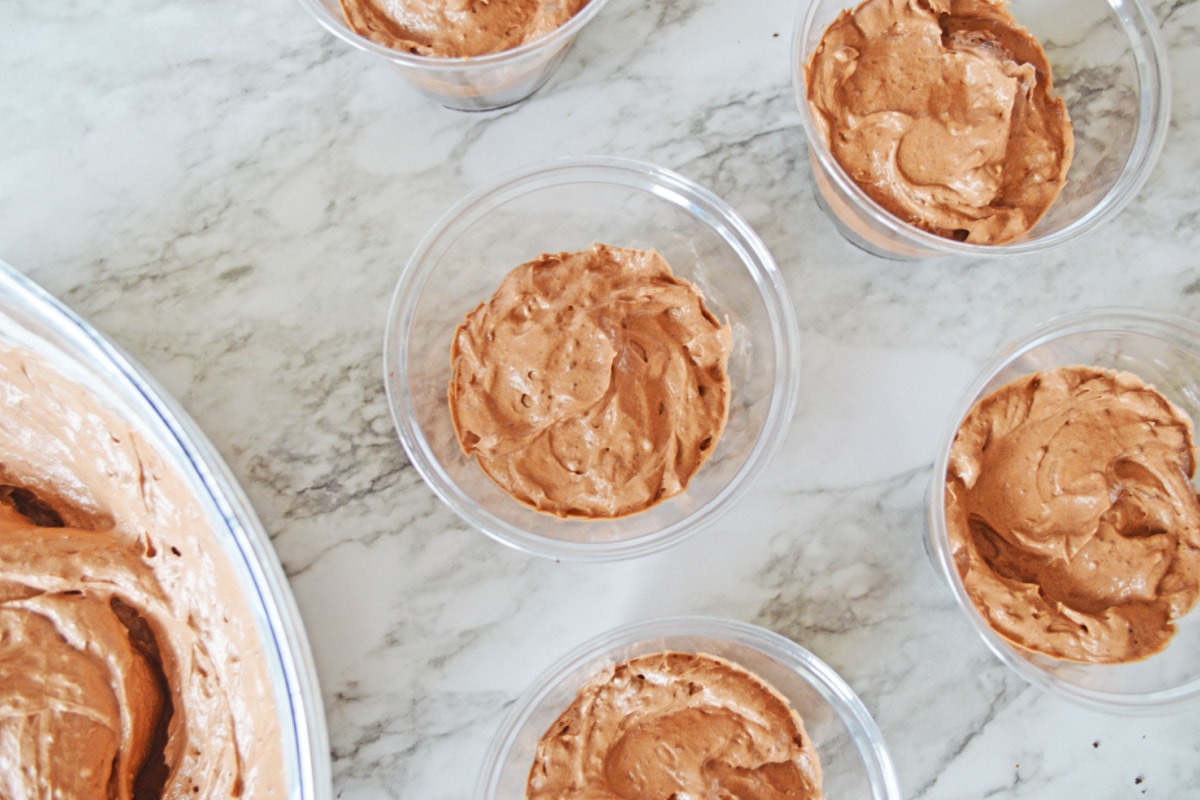
Step 2. In a large mixing bowl, whisk together 2 packages of instant pudding mix and 2 cups of milk, until combined.
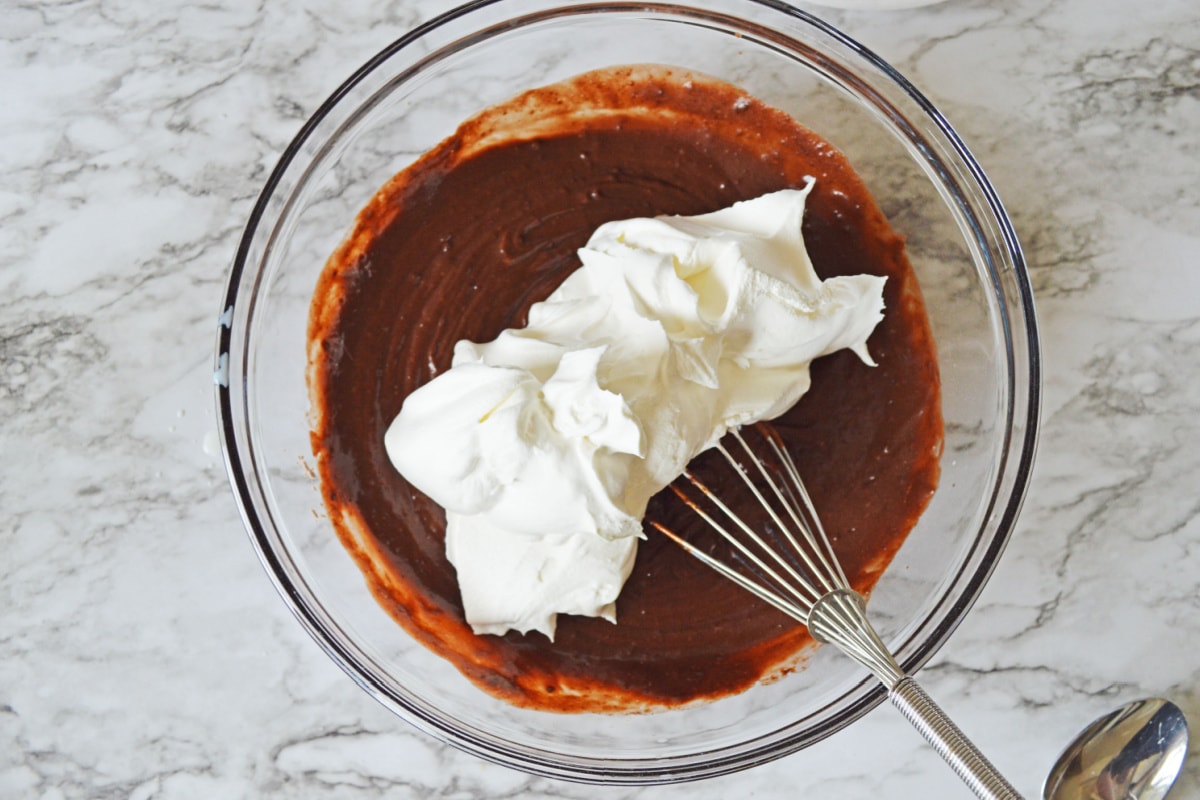
Step 3. Whisk in 8 oz. whipped cream.
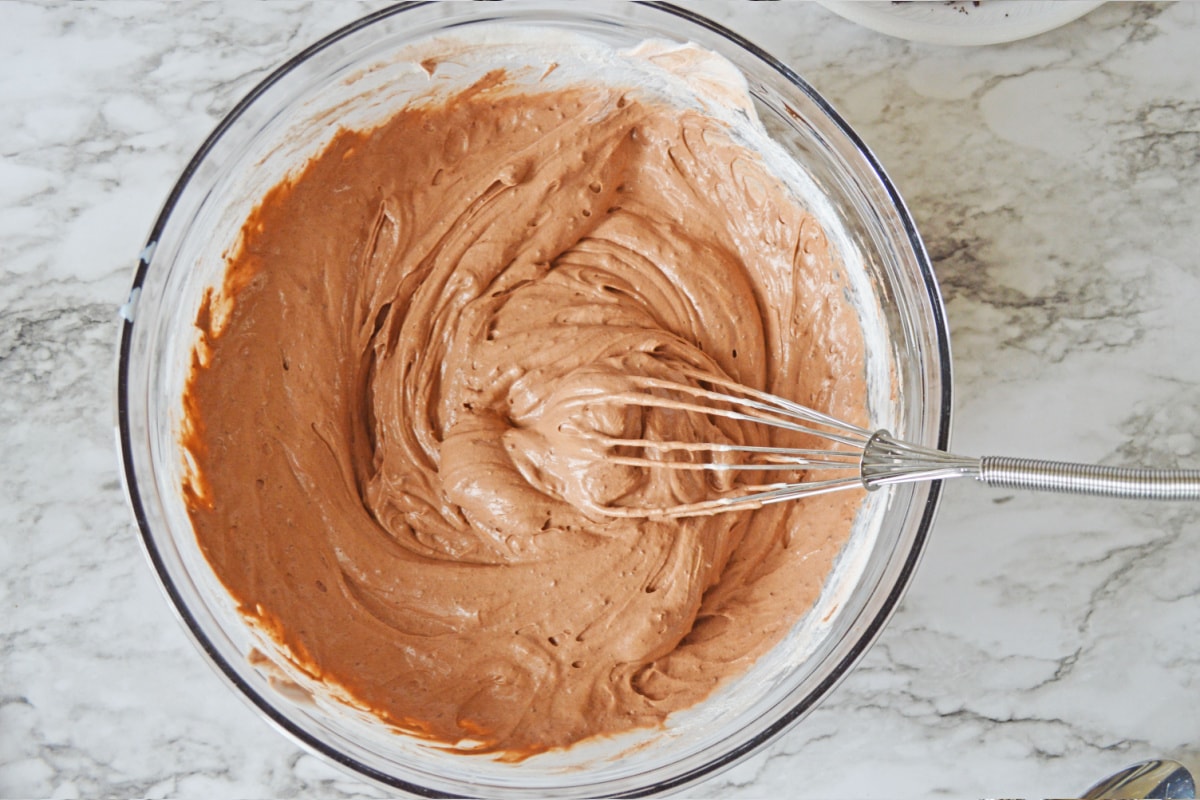
Step 4. Whisk the pudding and whipped topping until well combined.
Step 5. Start layering your pudding cups by adding a few spoonfuls of Oreo cookie crumbs to the bottom of each cup.
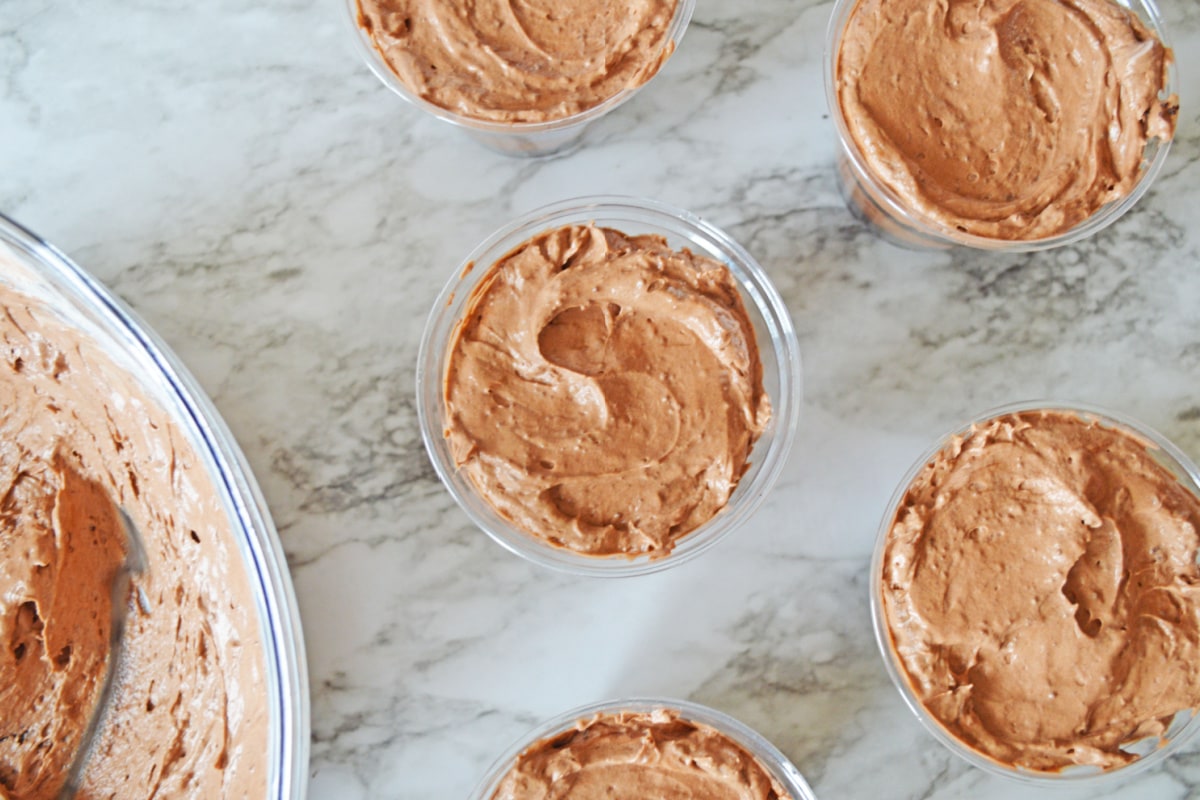
Step 6. Follow that up with a layer of pudding.
Step 7. Add another layer of oreo crumbs.
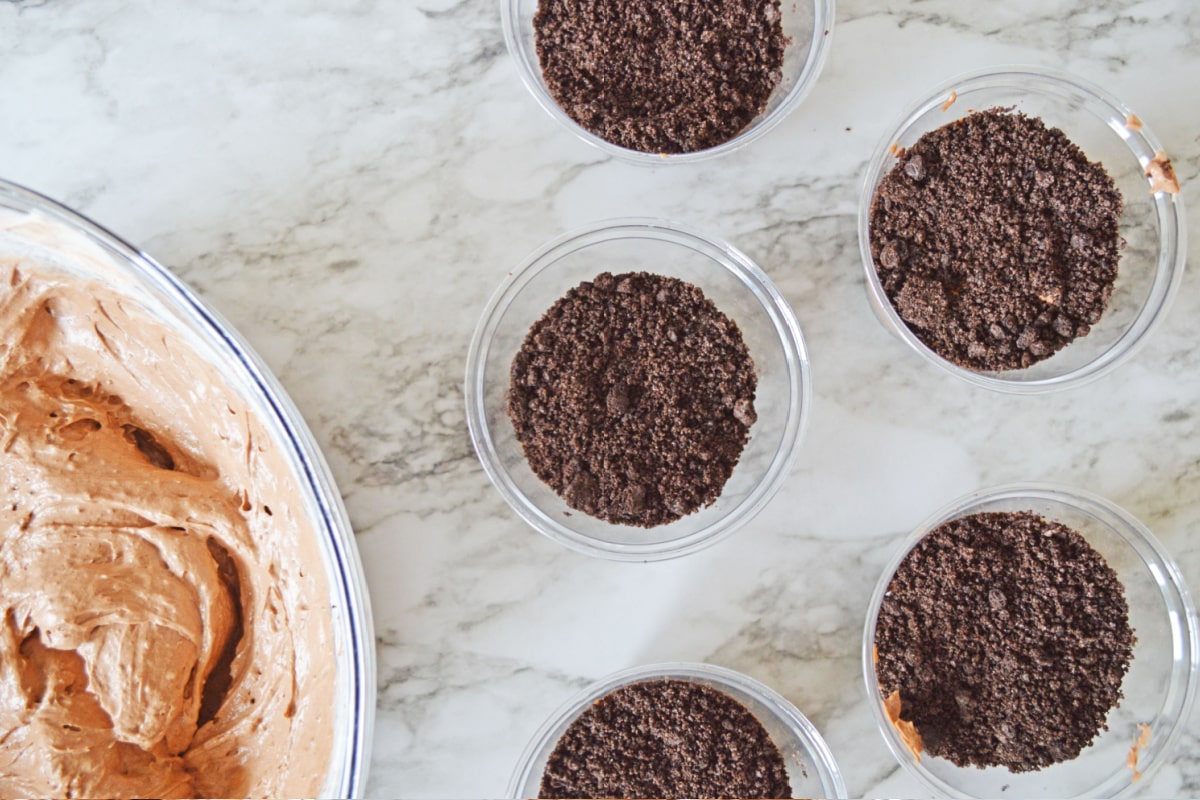
Step 8. Add 2nd layer of pudding mixture, and a 3rd layer of Oreo crumbs.
Step 9. Place the individual cups into the refrigerator.
Step 10: Meanwhile, place your Milano cookies onto a plate and set aside. Melt chocolate chips in a microwave safe bowl, on 20 second increments, stirring well in between.
Step 11. Add the chocolate to a piping bag with a small round decorating tip (or a plastic sandwich sized storage bag). Snip a very small hole in the very tip off of the bag and use the melted chocolate to write “RIP” on your Milano cookies.
Step 12. Before serving, decorate each cup of dirt with one of the tombstone cookies and gummy worms and a pair of candy eyeballs.
Serve and enjoy!
Can I Make This a Full-Size Oreo Dirt Dessert?
If you’re feeding a crowd and don’t have room for a lot of individual cups on your dessert table, you could easily make this a larger dessert by adding the layers of pudding and cookies in a glass trifle dish or large bowl.
Then just add the toppings to the top of the dessert with several RIP cookies and candies to make a large graveyard! This is a really great idea if you need to double the recipe.
You’ll want to use a deep glass or clear bowl so you can see all the layers. You could even use a large glass salad bowl if you have one. You may even want to stack some clear plastic cups beside it for people to scoop servings of the dessert into.
Halloween Dirt Pudding Cups Variations:
- Decorations: You can use any Halloween themed candy toppings to decorate your graveyard dessert cups. Candy pumpkins, gummy skulls and bones or little candy funny bones are all fun ideas. For a really cute idea, you could use marshmallow Ghost Peeps instead of the cookies for the tombstones.
- Cookies: If you can’t find Milano cookies you can use Nutter Butter peanut butter cookies. If you want to give them more of a tombstone looks, you dip them into some melted white chocolate and let them dry before piping on the “RIP.”
- Pudding: If your kids prefer vanilla pudding mixes you can certainly use it instead of chocolate. The fine crumb topping you make with the chocolate cookies will cover the surface anyway.
- Boozy Dirt Pudding Cups: Who says Halloween is just for kids? Turn this recipe in an adults-only version by adding a little butterscotch schnapps or creme de cacao to the pudding while you’re mixing it up. For the amount of alcohol you add, just subtract an equal amount of milk.

Want More Halloween Recipes?
If you liked this Halloween dirt pudding, you may want to check out these recipes too:
- Witch Hat Cookies
- 25 Halloween Cocktails
- Halloween Candy Corn Bark
- Halloween Rice Krispie Treats
- Candy Corn Fudge
- Harry Potter Pumpkin Pasties
- Candy Corn Inspired Halloween Cookies
- No Bake Pumpkin Lasagna
- Candy Corn Cookie Bars
- Pumpkin Whoopie Pies
Halloween Dirt Cup Recipe
Equipment
- mixing bowl
- whisk
Ingredients
- 2 boxes instant chocolate pudding mix 3 ounce size
- 2 cups milk
- 8 ounces Cool Whip
- 32 Oreo cookies
- 10 candy eyeballs
- 10 gummy worms
- 5 Milano cookies
- 1/2 cup chocolate chips
Instructions
- In your food processor, blitz the chocolate cookies into crumbs. Place into a spare bowl or plate and set aside.32 Oreo cookies
- In a large mixing bowl, whisk together 2 packages of instant pudding mix and 2 cups of milk, until combined.2 boxes instant chocolate pudding mix, 2 cups milk
- Add 8 oz. whipped topping and whisk together with the pudding until well combined.8 ounces Cool Whip
- Start layering your pudding cups by adding a few spoonfuls of Oreo cookie crumbs to the bottom of each cup.
- Follow that up with a layer of pudding.
- Add another layer of oreo crumbs and a 2nd layer of pudding mixture.
- Finally, top with a 3rd layer of Oreo crumbs.
- Place the individual cups into the refrigerator.
- Meanwhile, place your Milano cookies onto a plate and set aside. Melt chocolate chips in a microwave safe bowl, on 20 second increments, stirring well in between.5 Milano cookies, 1/2 cup chocolate chips
- Add chocolate to a piping bag with a small round decorating tip (or a plastic sandwich sized storage bag) and snip a very small hole in the very tip off of the bag. Use the melted chocolate to write “RIP” onto your Milano cookies.
- Before serving, decorate each cup of dirt with one of the tombstone cookies and gummy worms and a pair of candy eyeballs. Enjoy!10 candy eyeballs, 10 gummy worms
Notes
- If you don’t have a food processor, you can put the cookies in a large Ziploc bag and beat them with a rolling pin until they are fine crumbs.
- If you can’t find Milano cookies you can substitute Nutter Butter peanut butter cookies. To get more of a tombstone look, dip them into melted white chocolate and let them dry before piping on the “RIP.”
Nutrition
Did You Make This Recipe?
Share it with me on Instagram @funmoneymom and follow on Pinterest @funmoneymom for more!
Let’s be friends!
Did you love this post? Make sure to comment below and let me know your thoughts! And don’t forget to follow on your favorite social network below!

About Lisa O’Driscoll
Lisa O’Driscoll is a lifestyle and parenting expert, cookbook author, and the creative force behind Fun Money Mom, a popular blog she’s run since 2014. She’s the author of the children’s cookbook Roll It, Slice It, Mash It, Dice It, designed to get kids excited about cooking. With multiple TV appearances under her belt, she loves sharing her expertise on family-friendly recipes, creative DIYs, and party planning and is always on a mission to inspire and entertain!