
Black Cat Pumpkin
This post may contain affiliate links. As an Amazon Associate, I earn from qualifying purchases.


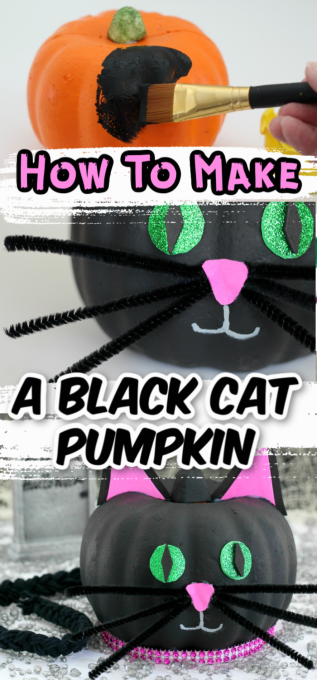

This cute black cat pumpkin is way more sweet than spooky. It’s easy, fun, and the purr-fect way to add a little Halloween magic to your décor.
I love a good no-carve pumpkin project, and this black cat pumpkin is one of the cutest ways to add a little Halloween charm without ever picking up a carving knife. It’s simple, budget-friendly, and perfect for cat lovers (or anyone who wants something a more “boo-tiful” than scary).
Just like my other painted pumpkins, this one starts with a foam pumpkin from Dollar Tree. It’s easy to paint, mess-free, and reusable year after year. With a little black paint, some sparkly cardstock for the eyes, and a few more supplies for the whiskers and ears, you’ll have an adorable cat that fits right in with your Halloween décor.
Love this painted pumpkin idea? Check out my witch pumpkin, vampire pumpkin and Frankenstein pumpkin. Or scroll to the end to see all 37 of my cute pumpkin ideas from classics to fun pop culture pumpkins!
Black Cat Pumpkin Supplies
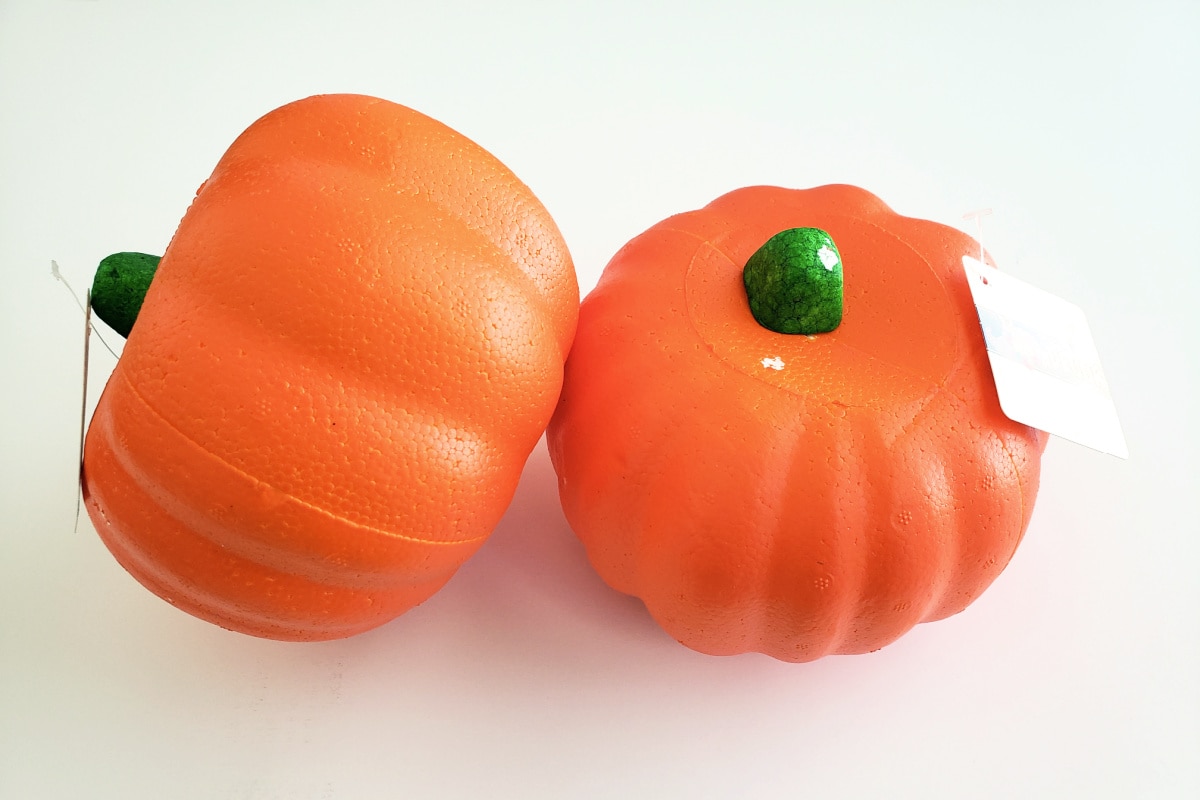
- Foam craft pumpkin (I get mine from Dollar Tree but you can also find them on Amazon)
- Black acrylic paint
- White acrylic paint
- Foam sheets: black, pink and sparkly green
- Black yarn
- Black chenille (a.k.a. pipe cleaners)
- Ribbon for collar (3/8″)
*Check the tutorial card below for quick Amazon links to all the supplies.
Tips & Tricks
- Use acrylic craft paint for best results. Since you’ll probably need two coats, be sure to include drying time.
- Want to add some personality? Give your cat a winking eye, a spooky glare, or even some glittery whiskers for fun variations.
- You could use real pumpkins but foam pumpkins mean you can keep your black cat to use as decor for many Halloweens to come.

Black Cat Pumpkin
Equipment
- Craft hole punch optional
Materials
- Foam craft pumpkin
- Black acrylic craft paint
- White acrylic craft paint
- Black craft foam
- Pink craft foam
- Green sparkly craft foam
- Black chenille also known as pipe cleaners
- Black yarn
- 3/8" rhinestone ribbon I found mine at Michaels but this is similar
Instructions
- Painting the pumpkin with black acrylic paint. You may need two coats.

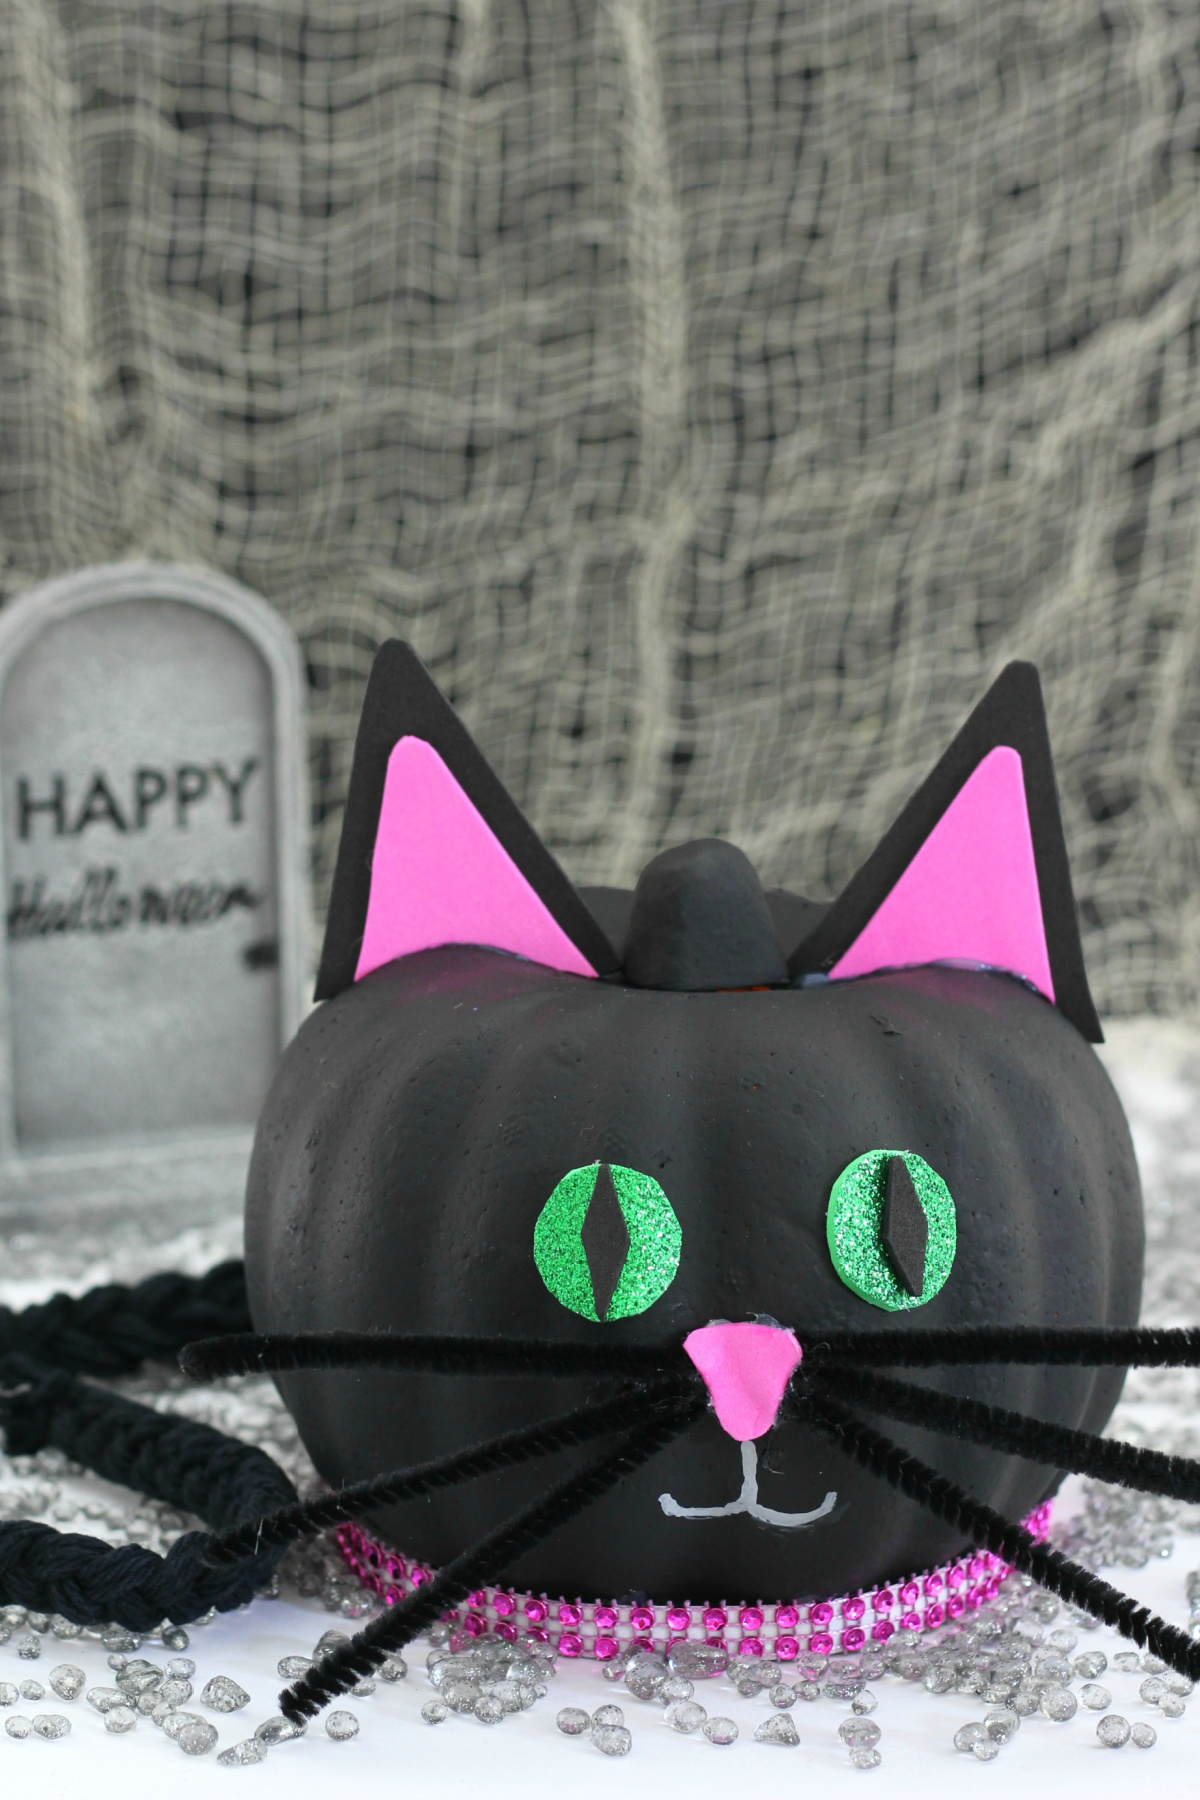
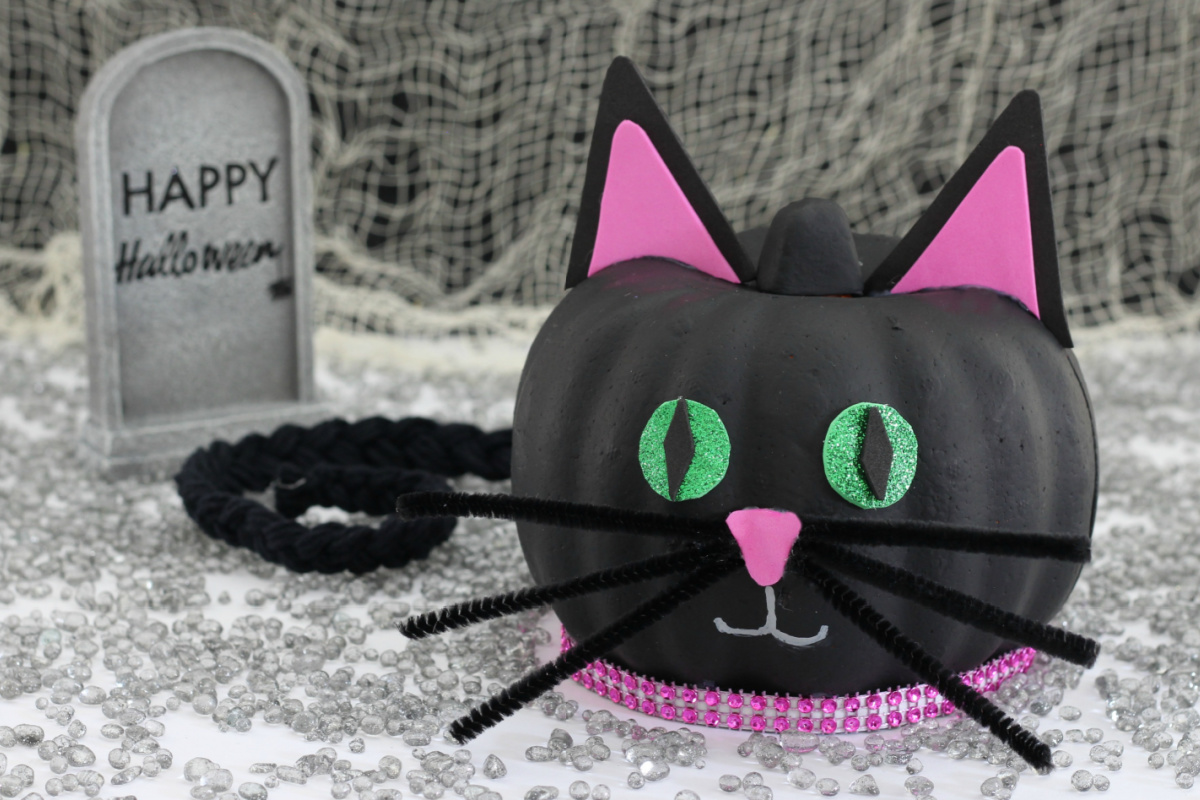
- Make the ears by drawing two triangles on black craft foam. Then draw two slightly smaller triangles on pink craft foam.
- Glue the pink triangles to the black ones.
- Using the pumpkin as a guide, cut a small curve in the bottom of the ear so that it will sit flush against the top of the pumpkin. Cut a little at a time until they fit just right.
- Glue the ears on. You'll want to use just a little on the bottom, and more along the bottom back of the ear so that the glue isn't visible from the front.
- Cut eyes out of sparkly green foam. You can use a craft hole punch or trace a coin to get a perfect circle. Then use some of the black foam scraps to make skinny diamonds and hot glue them to the middle of the eyes.
- Glue the eyes to the front of the pumpkin.
- Cut out a small pink triangle, rounding out the corners. Then take two pieces of chenille and cut each one into thirds (you will have 6 pieces total). Use hot glue to attach the nose and chenille whiskers, then paint a mouth with white paint.
- For the tail, gather 18 strands of yarn and tie them together at the top with a small piece of yarn. After separate the yarn into thirds and make a braid, tying the end with another piece of yarn.
- Attach it to the back of the cat with more hot glue.
- Use your sparkly ribbon to make a collar. Mine had a sticky back but since it wouldn't sit flush against the bottom of the cat, I didn't remove the liner. Instead, I used hot glue to attach the ribbon.
- Now your black cat is ready to display!


Notes
- You’ll probably want to paint two coats of the black, so plan to leave extra time for the paint to dry.
- If using this as a party craft, paint all the pumpkins black ahead of time. I also like to give each kid a plastic bag with all the supplies they need inside.
Did You Make This Project?
Share it with me on Instagram @funmoneymom and follow on Pinterest @funmoneymom for more!
Want more easy pumpkin painting ideas? Get all the tutorials here:
- Grinch Pumpkin
- Witch Pumpkin
- Minion Pumpkin
- Gnome Pumpkin
- Pikachu Pumpkin
- Mike Wazowski Pumpkin
- Sully Pumpkin
- Taylor Swift Pumpkin
- Shark Pumpkin
- Baby Yoda Pumpkin
- Vampire Pumpkin
- Harry Potter Pumpkin
- Golden Snitch Pumpkin
- Pumpkin Diorama
- Unicorn Pumpkin
- Jack Skellington Pumpkin
- Sally Skellington Pumpkin
- Hello Kitty Pumpkin
- Frankenstein Pumpkin
- Mummy Pumpkin
- Black Cat Pumpkin
- Emoji Pumpkins
- Bat Pumpkin
- Spider Pumpkin
- Melted Crayon Pumpkin
- Cinderella Inspired Pumpkin
- Teal Pumpkin
- Butterfly Pumpkin
- Bumblebee Pumpkin
- Metallic Polka Dot Pumpkin
- Caramel Apple Pumpkin
- Spiderweb Pumpkin
- Glitter Pumpkin
- Dollar Tree Pumpkin
- Minnie Mouse Pumpkin
- Mickey Mouse Pumpkin
- Spiderman Pumpkin
Let’s be friends!
Did you love this post? Make sure to comment below and let me know your thoughts! And don’t forget to follow on your favorite social network below!

About Lisa O’Driscoll
Lisa O’Driscoll is a lifestyle and parenting expert, cookbook author, and the creative force behind Fun Money Mom, a popular blog she’s run since 2014. She’s the author of the children’s cookbook Roll It, Slice It, Mash It, Dice It, designed to get kids excited about cooking. With multiple TV appearances under her belt, she loves sharing her expertise on family-friendly recipes, creative DIYs, and party planning and is always on a mission to inspire and entertain!


I love that you added a tail and a collar to this no cut pumpkin! We made cat pumpkins like this a few years back but putting a smaller pumpkin on a larger one and making ‘sitting kitties’- it was a blast and we got so many compliments! #client
Cats are my favorite animal so I enjoyed making this
I’m so glad! We love cats too so this craft was fun for us as well! 🙂
Have a Happy Halloween!
I’m going to make it today. Thank you!!!
I hope you had so much fun!