
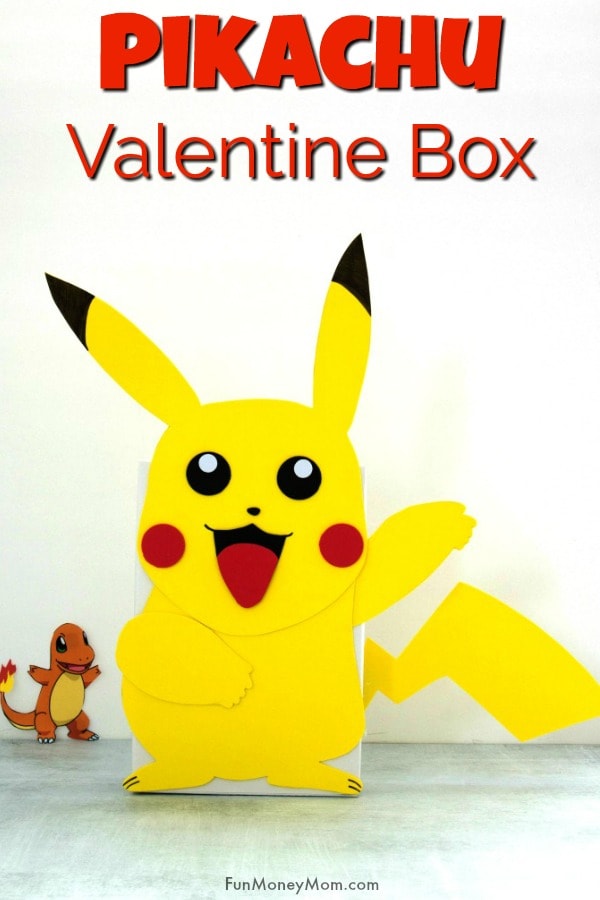
Pikachu Valentine Box (with free printable template)
This post may contain affiliate links. As an Amazon Associate, I earn from qualifying purchases.
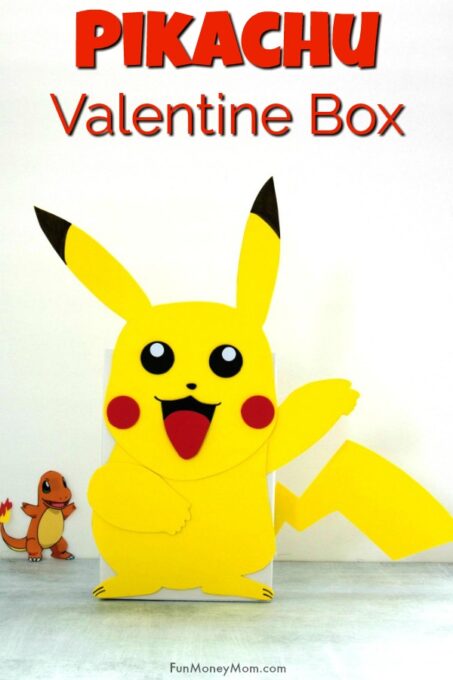
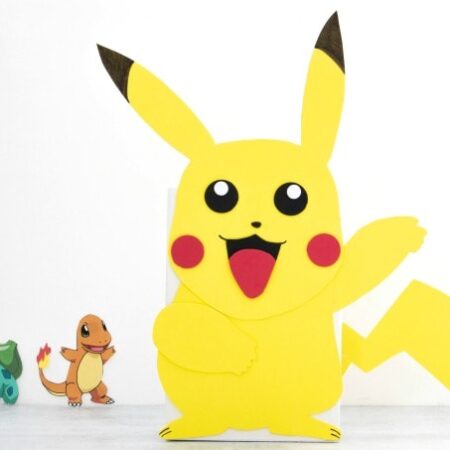
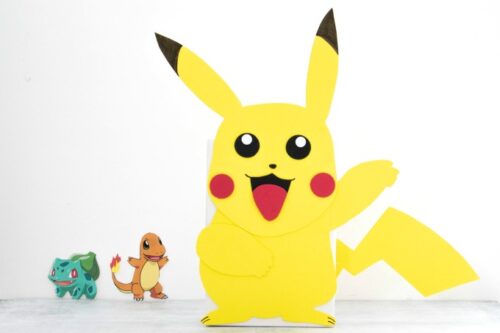
This Pikachu Valentine Box is easy and fun for kids of all ages! With just a few simple supplies, your child will have the perfect box for collecting all those classroom valentines!
Pikachu Valentine Box
Remember how much fun it was to make Valentine boxes as a kid? That’s the best part about being a mom…you get to relive all of those little traditions again, this time through your kids’ eyes.
When it came time to make a Valentine box this year, my girls knew exactly what they wanted. Since they love Pokémon so much, they came up with the inspiration for this Pikachu Valentine Box.
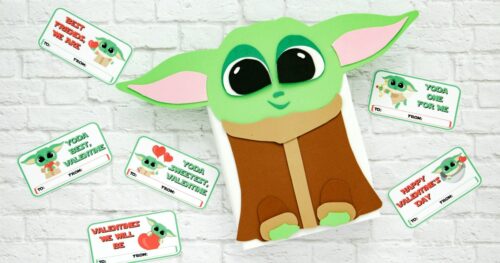
I mean, this little guy couldn’t get much cuter, right? He’s definitely giving our Baby Yoda valentine box a run for the money! The best part is that he’s so easy to make! Just print the free template, trace and you’re good to go.
See my full list of Valentine’s Day boxes at the end of this post.
What You’ll Need
- Pikachu template
- Cereal box
- White construction paper
- Yellow craft foam
- Red craft foam
- Black craft foam
- White craft foam
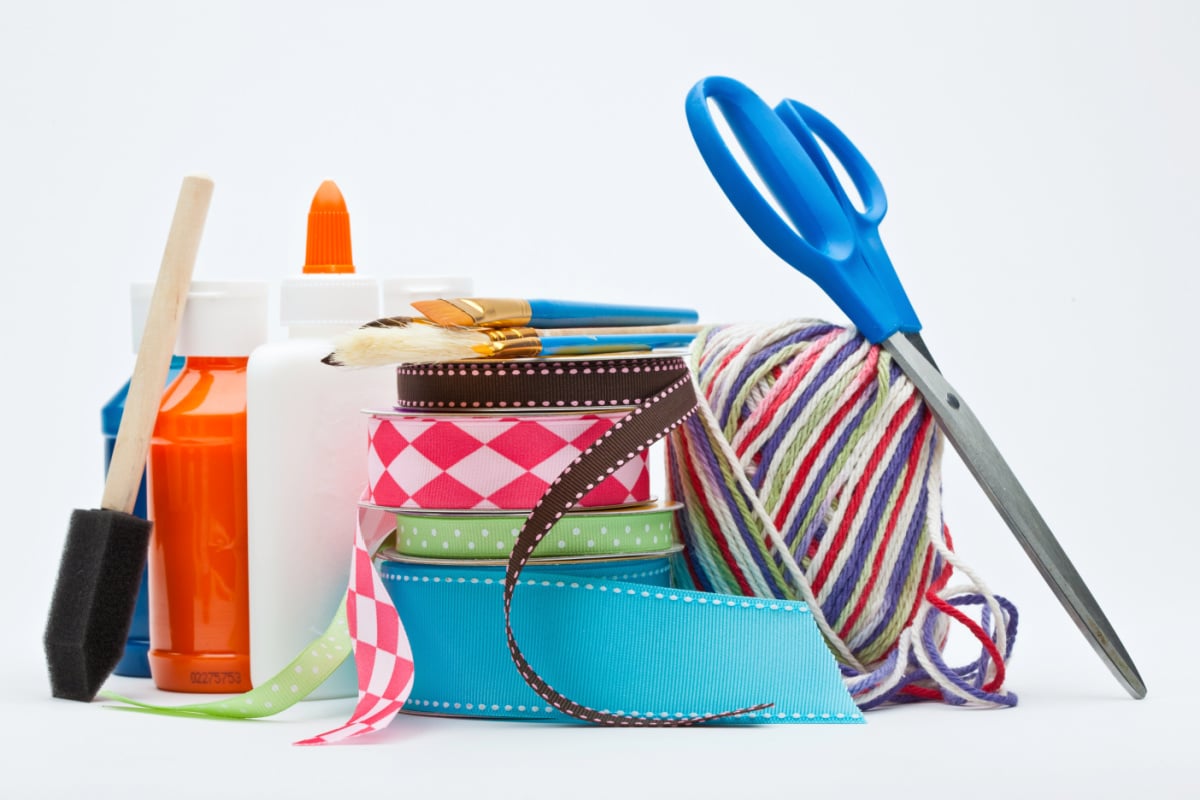
You’ll also need an X-acto knife, scissors, hot glue gun (or craft glue like Elmers) and hot glue sticks
Since I’ve made a lot of Valentine boxes over the years, I know tracking down supplies can be half the battle. So I created an Amazon storefront with everything you need for this Valentine box, all in one spot to save you time.
How To Download & Use Your Free Printable Template
- Enter your first name and email address in the form below.
- Check your inbox. Your template should arrive within minutes.
- Download and print.
- Cut out the pieces and use them to trace the shapes onto the craft foam. Now you’ve got everything you need to create this cute owl craft!
- Scroll down for the full step-by-step tutorial.
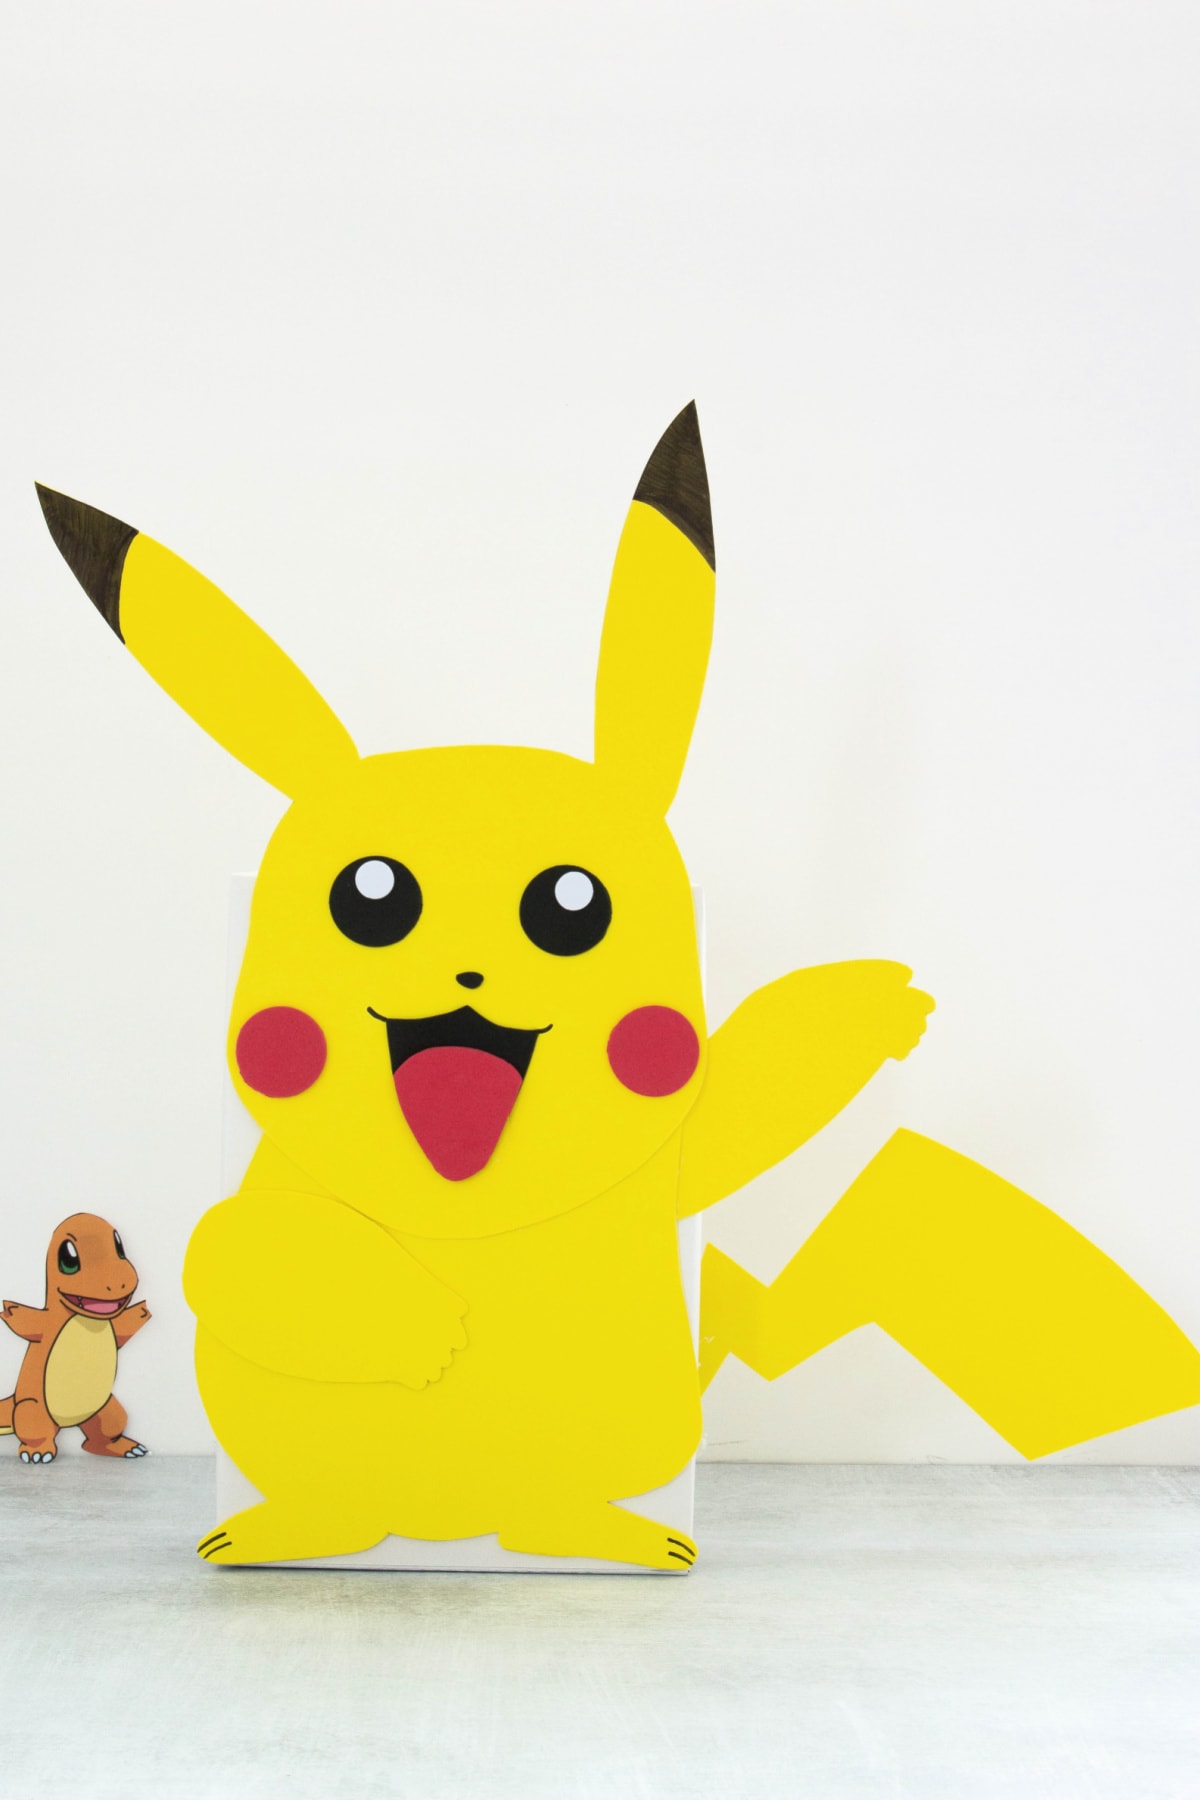
Pikachu Valentine Box
Materials
- Cereal box
- Templates for Pikachu Valentine Box
- White construction paper
- 3 pcs. 12×18 Yellow craft foam
- 1 each small red, black and white craft foam
Instructions
- Wrap a cereal box in white construction paper and use an X-acto knife or box cutter to cut a hole in the top.

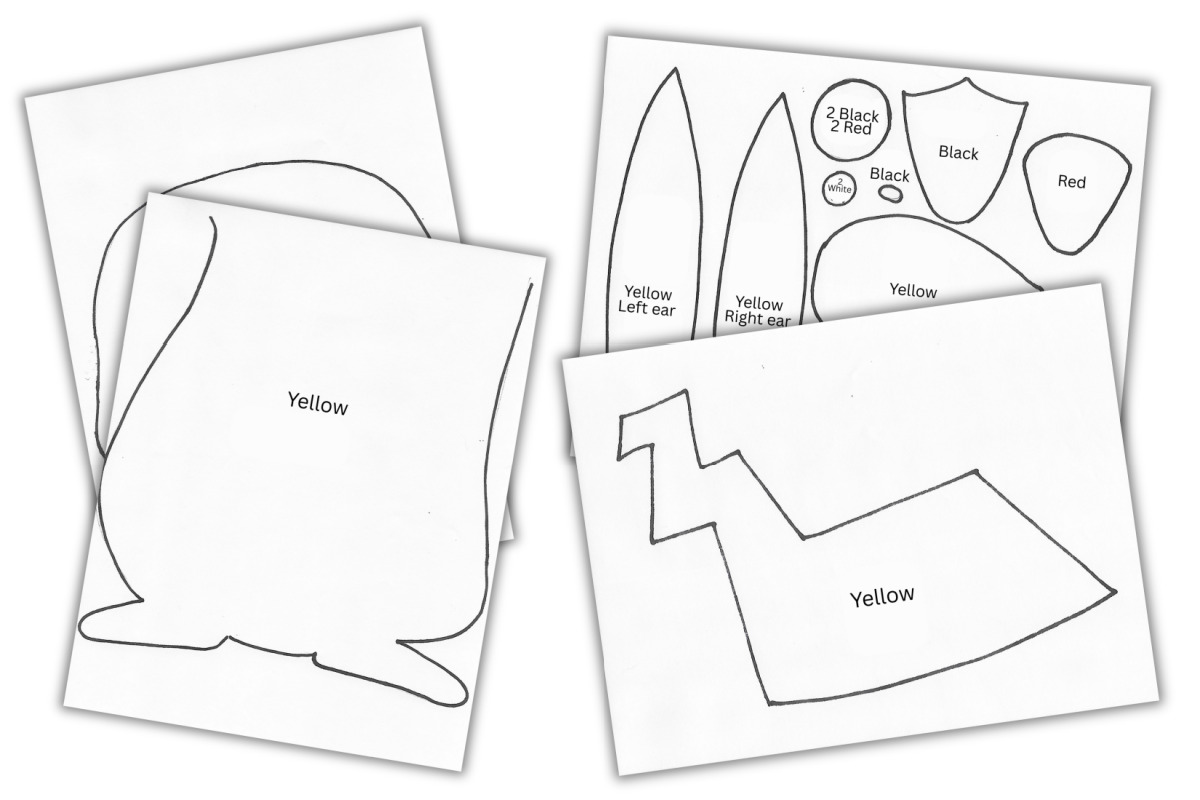
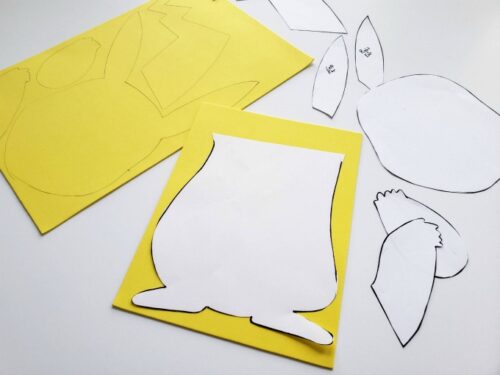
- Print three templates, the head, body and tail. Cut out each one and trace on yellow craft foam.
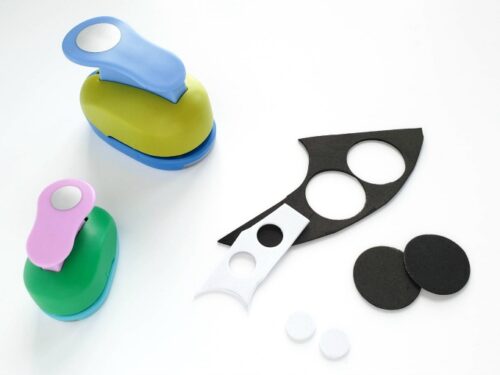
- Use craft hole punchers to make the circles for the eyes (these were 1" and 1/2"). If you don't have them, I've sometimes used coins instead (or you can just draw your own circles)
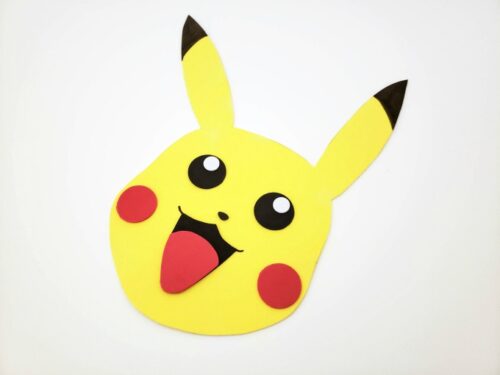
- Hot glue the pieces together to make the face, then use a black permanent marker to color the tops of the ears.
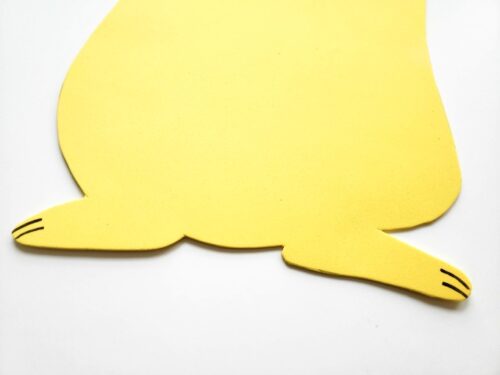
- Trace and cut out the body. Use the marker to draw the toes.
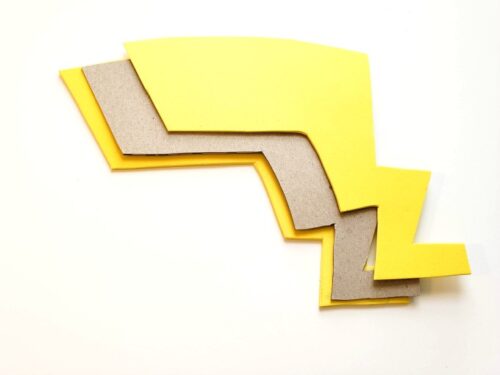
- The tail was a little tricky. At first I was just going to use a single piece of craft foam but it was too "floppy". I cut a second piece of yellow foam, then a slightly smaller piece of cardboard. I hot glued the yellow foam together with the cardboard in the middle. That did the trick!
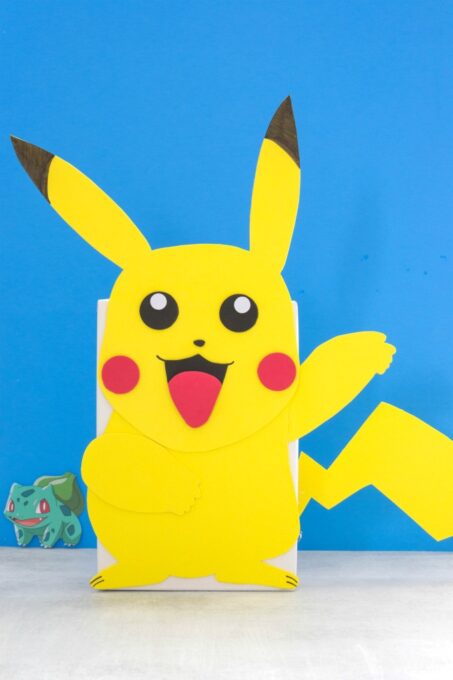
- Glue the body to the cardboard box, then the head. The head should lightly overlap the body. Finally, add the hands. That’s all there is to it. Your Pikachu valentine box is ready!


Notes
Did You Make This Project?
Share it with me on Instagram @funmoneymom and follow on Pinterest @funmoneymom for more!
The kids will love collecting their valentine cards in this cute Pikachu valentine box! If you really want to make it a Pokemon themed Valentine’s Day, you can order these cute Pokemon Valentines or give everyone a Pokemon tattoo!
More Fun Valentine Box Ideas:
- Shark Valentine Box
- Soccer Valentine Box
- Hedgehog Valentine Box
- Baby Yoda Valentine Box (with matching Valentine cards)
- Among Us Valentine Box
- Gnome Valentine Box
- Robot Valentine Box
- Spiderman Valentine Box
- Monster Book Of Monsters Valentine Box
- Harry Potter Valentine Box
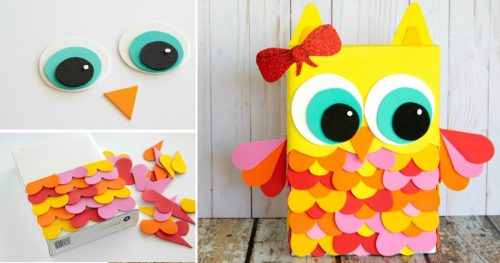
- Owl Valentine Box
- Panda Valentine Box
- LEGO Valentine Box
- Chewbacca Valentine Box
- Unicorn Valentine Box
- Dog Valentine Box
- Heart Shaped Valentine Box
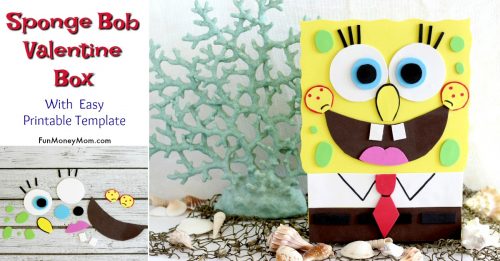
- SpongeBob Valentine Box
- Shopkins TV Valentine Box
- Donut Valentine Box
- Minion Valentine Box
- Cat Valentine Box
- Shopkins Calculator Valentine Box
If you liked this post, you may want to check these out too…

Monster Book Of Monsters Valentine Box
Let’s be friends!
Did you love this post? Make sure to comment below and let me know your thoughts! And don’t forget to follow on your favorite social network below!

About Lisa O’Driscoll
Lisa O’Driscoll is a lifestyle and parenting expert, cookbook author, and the creative force behind Fun Money Mom, a popular blog she’s run since 2014. She’s the author of the children’s cookbook Roll It, Slice It, Mash It, Dice It, designed to get kids excited about cooking. With multiple TV appearances under her belt, she loves sharing her expertise on family-friendly recipes, creative DIYs, and party planning and is always on a mission to inspire and entertain!


This is super cute. It seems that the links for head and body templates both go to the body. I can’t get the head to open up.
I’m so sorry about that! I’ve fixed the link and I hope you have fun making your valentine box 🙂
where do I find the templet for the pokemon valentine Pikachu box?
Hi Kristen,
If you look at the materials list, you’ll see where it says Pikachu template. Click on that and you’ll be able to print. Have fun!
Hi ! can you tell me what size circle punch(s) you used?
Sorry for the delay in answering. The large one is 1″ in diameter and the smaller one is 1/2″.
Thank you so much for posting this! My son’s teacher wanted the kids to make valentine’s boxes and my son loves Pokemon so this was a hit. I am not a crafty person and it took me less than an hour from start to finish. The only suggestion I’d make is instead of putting your color labels in the center of each template, put them outside of where you’d cut. I decided to use card stock instead of foam and printed each page instead of tracing then cutting and you can see the label colors where the paper is not directly glued to the box. Other than that, thank you, thank you, thank you!!!
This is a great suggestion! I will definitely do this in the future and will try to find the time to go back and redo the ones that are already posted. I’m so glad your son had fun with this!
So adorable!
Thank you so much! 😊
Thank you for helping mama’s and grandma’s do fun crafts with our littles!! Our Pikachu was not perfect, nor up to “professional crafting standards” 😂 When littles “help” perfection falls away to let fun take the lead. We appreciate you and the joy you helped bring to our Valentine crafting!! 💓
I’m so glad that you have fun with it! Comments like this totally make my day…thank you for sharing! 😊